


Likes
Comments
Share


@Bread_n_Buds
Follow
The Watermelon Candy F1 Hybrid is a real beast... look how beautiful it is, what a flower with a long shape, maturation and very fast growth despite all this quantity of hemp and flower. Super. THERE are mini brunches everywhere and I've had tons of them.
The maturation started very early, I had also noticed this on the F1 plants of RQS, very often these ultra fast flowering girls start to put out red pistils when you don't expect it but that's the type of rapid maturation of these plants.
I'll tell you again about doing the math. Problem: a Watermelon candi from seed to harvest takes about two months, how many cycles of watermelon candy can you make in a year which, I remind you, lasts 12 months?
And how many cycles can you do with the average autoflowering that lasts 3 months? And how many with photoperiodic ones that last even longer?
If it doesn't seem like much, learn to count.
Beautiful, beautiful, beautiful, big congratulations to Zammi.
https://www.zamnesia.io/en/10666-zamnesia-seeds-watermelon-candy-f1-automatic.html
Video Reel Coming soon on Sunday
Food by Plagron https://plagron.com/en
Light www.viparspectra.com/
Tent & Air www.secretjardin.com
Music of the week www.radionula.com
+++ 432 hz frequencies to keep in line my Girls to Gaia.
Site Description
ZAMNESIA SEEDS - WATERMELON CANDY F1 HYBRID AUTOMATIC: BUDS BURSTING WITH FLAVOR
If you've been looking for a flavorful strain with superb genetics that's effortless to cultivate, the hunt is over. Thanks to reliable F1 hybrid genetics, Watermelon Candy F1 Automatic showcases the highest degree of productivity and efficiency. This strain takes everything you know and love about the original, and packages it in a plant with even greater potential.
GROWING WATERMELON CANDY F1 HYBRID AUTOMATIC
Derived from Watermelon, Candy Kush, and ruderalis, Watermelon Candy F1 Automatic is a finely tuned medley of genetics. This cultivar is fast to flourish and reliable to grow, no matter where you choose to grow. Taking just 9–10 weeks from germination to harvest, she provides a uniform growing experience culminating in a huge haul of buds for her size.
Reaching heights of 65–80cm, Watermelon Candy F1 Automatic stays pretty grounded, making her perfect for smaller growing areas where space is a commodity. It also means you can fit more plants in if you have the room! Once ready to yield, growers will see a return of 400–450g/m² indoors and up to 100g/plant outdoors. Moreover, Watermelon Candy F1 Automatic is highly resistant to pests and disease, making it an ideal strain for newcomers and fans of low-maintenance cultivation.
AROMAS, FLAVORS, AND EFFECTS OF WATERMELON CANDY F1 HYBRID AUTOMATIC
If we haven't already sold you on the power of F1 hybrid genetics, the proof is in the pudding. Watermelon Candy F1 Automatic is teaming with terpenes and cannabinoids, making for a lively high coupled with huge flavors. Just one hit is all it takes to sample rich fruitiness mixed with sweet candies and a slight earthiness to back it up. And with an average THC content of 23%, the effects are euphoric at the start but settle into deep relaxation soon after. Whether you're chilling alone or with friends, Watermelon Candy F1 Automatic will see you right.
So seeds of all brands, in addition to these great F1 Hybrids and the entire Zamnesia line, fertilizers and everything related to the world of cannabis, you should buy them from the best online store in the sector
www.zamnesia.io

Likes
7
Share


@MediciGrade
Follow
11/15 - Day 43 - I've changed the light schedule on the timer from 20/4 to 18/6. I will be heading out of town for 10 days on December 25th and so I'll need to harvest and hang to dry by the 24th at the latest. I've read in a few forums that decreasing the lights on/lights off ratio can speed flower maturation on auto-flowers. The other growers also mentioned that the decrease in light also reduces yields, but on such a tight timeline I'd trade total yield for more fully ripened buds any day of the week. Would certainly be interested if anybody has experience/knowledge that contradicts what I've read. Plants stretched another 2 inches in the last 24 hours putting them 22 inches from the light. I still have room to raise my light another 2 inches, but if these girls stretch more than 6 more inches they'll be < 18 inches from the light which I'm assuming would cause light burn based on the research i've done on this 600W ViparSpectra reflector series. Here's hoping they don't stretch more than 6 inches from here.
11/17 Day 45 - Haircut day. Left a few fan leaves on the shorter/lower shoots, but took almost everything else. Tallest tops had stretched another 4 inches in the past 48 hours, and were 18 inches from the light. I raised the light the final 2 inches I had available, which places it back to 20 inches from the tallest bud sites. Hopefully the haircut I gave the plants slows down the stretch, but either way it looks like I'll have to do a lot of retraining before I head out of town tomorrow for 5 days.
11/18 Day 46 - Fed nutes. Cal mag + advanced nutrients (micro, grow, bloom), and MKP. 4 Litres of water per plant. A lot of runoff in the saucers, but I'm out of town for the next 5 days so I'm leaving it to be absorbed throughout the week.

Processing
Likes
23
Share


@SativaSteve88
Follow
Another week down few more to go can't wait!! First ever attempt of growing my own so really impatient to see the final results now and get to the finish line, that said all has went well upto now other than the size they reached haha, really started putting on weight now it seems and they smell lovely, excited to see the buds fatten and progress over these last few weeks up until harvest now, started 5 liberty haze also they are just coming upto 3 weeks now so check that diary out to, any comments info tips for the final stages appreciated


Likes
13
Share

@Dc43_
Follow
Last and final plant being harvested I’ll be renovating the room I’m growing in so the next run will be a month or 2 from now


Likes
5
Share


@DoxPuppy
Follow
I added my old light to the setup for more Watts, a total of ~230 Watt is soaking that lady in photon

Likes
8
Share


@emeraldlabs
Follow
She got her first feeding today. Will likely be only feeding with grow big, potentially 1 more, then switch over to tiger bloom. Everything seems to be going smoothly.
Video/photos taken 35 days after breaking soil.

Likes
14
Share


@TheDankofScotland
Follow
Ready to flip into flower in 3 days , this Friday just letting the terminator get into the plants system before the flip and letting the plants spring back after A defoliation before the transition into flower , planning on using canna A + B , terpinator , massive bloom and PK - 13/14 together


Processing
Likes
15
Share


@vibealive
Follow
Not too too much to report... Kind of on Auto Pilot really until the end... The broken top is FINE, and it's looking GREAT man!!
I'm sure we're going to get a solid yield... :)

Processing
Likes
13
Share


@Crazy_zx10r
Follow
About a day into week 3 . Growing very strong and fast. Transplanted into the 5gal bags at night . Over week 3 they exploded. They wanted the room .. the 5gal bags made that happen. Amazing results with just foxfarm ocean forest soil.
Likes
35
Share


@Veteransgrow710
Follow
It was pretty challenging feeding all my plants at 1x .i have been over feeding my last autos grows this is my 2nd photo grow and my best.their stretching not too bad and making little buds so far


Likes
13
Share


@NOLOGIK
Follow
Fantastic big glu!! Infinite glu!
27/4:
sample #B was already cut 4 days ago ... compared to the sample #B I'm still waiting 4/5 days from today .. to be able to cut everything ... they have a strong and many good smell!

Likes
59
Share


@ATLien415
Follow
🙏 Big thanks to Plagron and Zamnesia for putting on the Eternity Grow Cup 2025. This kind of platform means a lot to the community. The chance to push our grows, test out new techniques, and connect with other cultivators from all over has been inspiring. Appreciate the love and effort that went into making this event happen! Hope everyone enjoyed looking over my shoulder on this grow and best of luck to all participants!
REVIEW - Runtz (fem., photo.) from Zamnesia: ⬛⬛⬛⬛⬛⬛⬛⬛⬜⬜
The seeds from Zamnesia germinated rapidly, rooted strongly, went wild in veg, and produced an ample amount of high-quality medicinal flower. The diary speaks for itself on that front so this space will be more of a phenotype review. The plants were labelled A, B, and C from left to right respectively in photos. A and B were the 'clasicaly-appearing' sativa-esque leaves while C was the more 'indica-appearing' phenotype. Although A and B appear the same qualitatively, they did produce substantially different amounts of flower (despite their DLI being near max out for the entire tent footprint without supplementing CO2, so I do not think just being in the middle attributed to this). Past their different yields, A and B also have vastly different profiles. A is a classic gelato/ice cream cooler/Z terps, and my personal favorite of the plants (wish I had taken a clone of this one instead). B is the most on point for what I think of with Runtz, classic Z terps but with a slight tropical/rotten/sweetness to it. C had the misfortune of being ready to chop a little earlier than the other girls so her profile is mostly just spicey kush now. I did observe intersex flower sites but given the entire context of the diary and how the plants performed, I have to assume it was user error. No pollination observed in any of the flowers, as zero additional intersex sites occurred. The distinction between A, B and C is what I would expect from a typical F1 cannabis seed. I do not enjoy growing from seed much but these girls were manageable. Add to that the relative stability of the genetics for a Runtz recreation, and well, these are good quality beans for a great price. Not only is Zamnesia responsive and available, their confidence speaks volumes. How many vendors would have an in-house Runtz, knowing how much of a genetic-gravity-well it is in, and be confident enough to let ~200 randos grow it and show it?
REVIEW - Green Sensation from Plagron: ⬛⬛⬛⬛⬛⬛⬛⬛⬜⬜
I enjoyed using the green sensation, the NPK values on it make it versatile in application and a power-house in flower. I can't say I noticed anything better or dramatically improved, although comparing to Heavy 16 and asking for a marked improvement is big ask in my opinion. What I was able to do was seamlessly integrate the Green Sensation into my current routine. The additive stayed homogenous, was easily introduced into solutions with no adverse impact to the water contents or pH. Most importantly, the plants enjoyed the additive and it did accomplish the main goal of being able to wane off your primary line. In this respect, by using Green Sensation I was able to save resources by lowering my Heavy 16 inputs across the board approximately 50% and supplementing with Plagron's Green Sensation.


Likes
2
Share


@EtnoGrow
Follow
el segundo corte luego 15 dias o dos semanas, ya mas maduro punto mixto temprano, cogollos ambar y blancos nublados, predominantemente blancos . se ve con mejor pinta que el primer corte
Likes
26
Share


@eldruida_lamota
Follow
Que pasa familia, hemos vuelto para actualizar las skunk que ya tenemos cosechadas.
Que gran genética, y muy típica entre fumadores de hierba, un crecimiento más indico pero floración lenta bastante lenta, en teoría se supone que es Sativa, 17% thc en la tas con un tamaño medio pequeño pero flores mi compactas y dulces, un cultivo ni fácil ni difícil, sin más, bastante neutral para los cambios climáticos algo sensible con el aspecto alimentación.
La recomendaría en verdad, sobre todo para aquellos amantes del dulce.
Nos vemos en próximos proyectos fumetillas

Likes
2
Share


@Barzenegger
Follow
The journey continues, nothing much has changed. The Chem Beyond Diesel is taco-ing hard, probably due to the light being close, but since the NYC and BJ are the same height and are not taco-ing, this one might also just be a little more sensitive (?). The BJ and NYC are fox-tailing quite a bit, so the plants could also just be showing different reactions to the same stress?
Either way, there isn't much I can do at this point. The humidity is a bit high and I have defoliated some more to help bring it down. I might have to consider some other options, too.
I switched from Hesi Root Complex to Canna Rhizotonic now (because my bottle was empty and I wanted to try something new), and also added some D-Block to my reservoir to help prevent clogging.
The plants are supposed to be 8-9 weekers, but they look more like at least 11 right now.
I guess we will see.
Likes
21
Share


She's bushing out real good..... I'm going to pinch her again in a couple of days.... so she will be even bushier... yeah I see the brown spots...... I'm thinking nute burn.... she's growing just fine

Likes
1
Share

@Sunweed
Follow
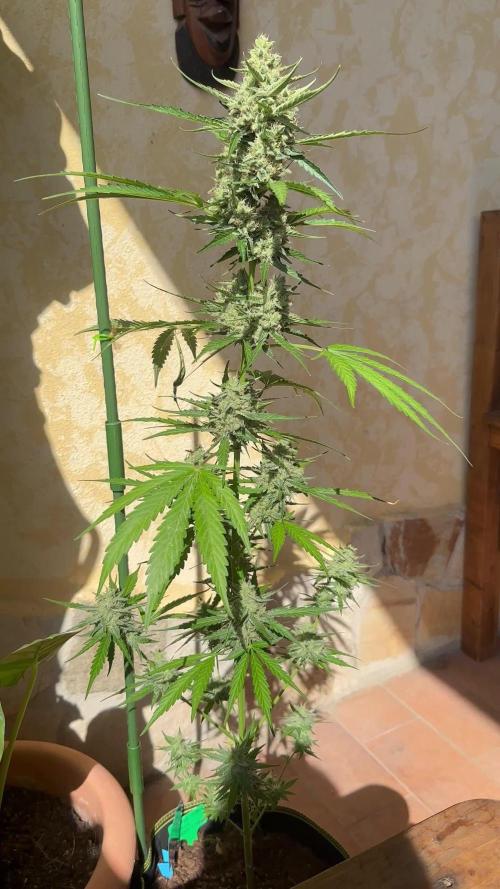
Ho avuto problemi con gli elicotteri in questa ultima settimana , stavo coltivando completamente outdoor senza serra esterna , ma ho notato attività di elicotteri (carabinieri) molto insistenti sopra il mio giardino , perciò anche se nelle foto appare senza serra , sono stato costretto a metterla in serra sempre outdoor , comunque mi avvicino al taglio che è preventivato tra circa una decina di giorni ovvero al 70esimo ; sto monitorando i tricomi con una lente da gioielliere 90x , ovviamente sto irrigando con sola acqua da una decina di giorni ormai , anche se come annunciato anche ad inizio thread in questa coltivazione i fertilizzanti sono stati usati il minimo indispensabile

Likes
18
Share

@Bncgrower
Follow
Week almost coming to an end, I decided to update a few days before as this week should be very busy... Everything is going very well so far, nothing to correct, looking forward to the next few weeks 💪💪💪
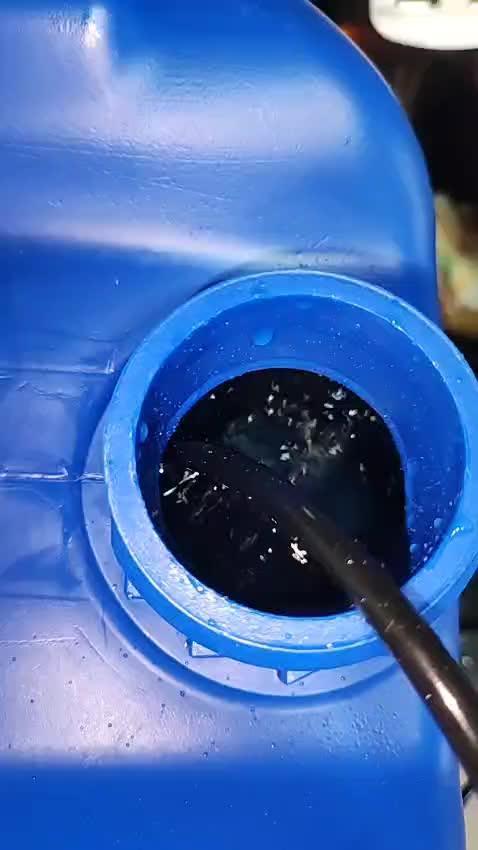
I decided to automate my irrigation, which was the only thing I still had to do manually, humidifier, dehumidifier, air conditioning were all automated and all that was left was watering. Using automotive equipment, I assembled a fuel pump, a cold start solenoid, a smart extension from China, some hoses, connectors and an aquarium air compressor to make bubbles every hour for 20 minutes, and finally the drippers, which are also low cost. 💲💲💲
I posted the video of the whole scheme working and also the oxygenator, I don't know if anyone doesn't want to invest in a high-cost one and also likes to do these things, that's a great idea... If you have any questions or want to do the same you can ask me in chat, it's very simple...
Good farming to everyone 🌱🌱🌱
