Check the winners The Grow Awards 2026 🏆 


Likes
Comments
Share
@PEAKYPLANTERS
Follow
ladies and gentlemen
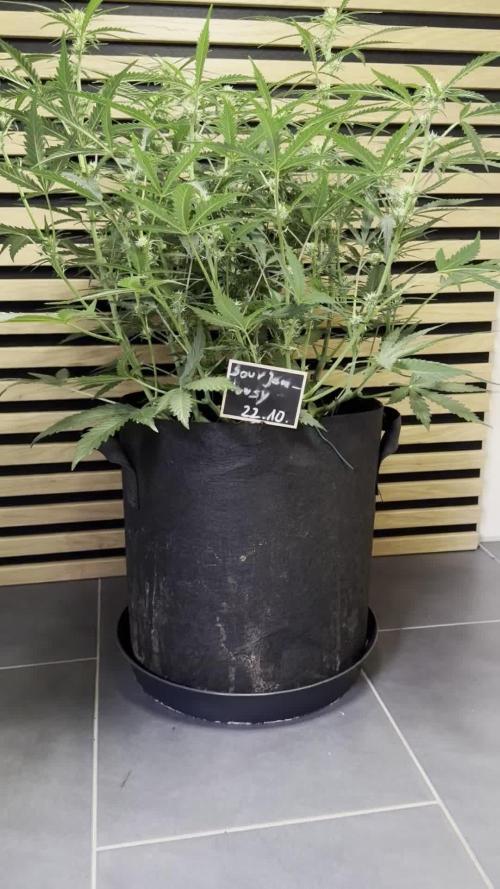
Welcome to peaky house gardens
We are pleased to announce that we have finished our first experience with growth made only from cuttings
Our intention was to have a lot of weed that was all THE SAME....AND I WOULD SAY THAT WE SUCCEEDED 🤙😉😋👩🏼🌾
Let us know if you liked it... we're waiting for your comments

Processing
Likes
5
Share
@ladyjane
Follow
8/12 - Dropped 3 seeds into RO water to germinate
8/13 - Placed seeds into moist paper towel and into plastic bag to germinate on heat mat.
8/15 - All three seeds sprouted. In the morning I prepared three 3-gallon pots with Roots Organics Original Soil and Nature's Living Soil Autoflower mix. I will be doing Super Soil method for this grow. I filled the bottom one third of the pot with regular soil, then added 1 lb of Nature's Living soil and mixed it in. Then filled the rest of the pot with the regular soil. I topped it with Mosquito Bits for added BTI for pest prevention. Finally, I wet the pots down with RO water and Organic Black Strap Molasses. After about 8 hours, I planted the three seeds and placed them in the 4x5 tent with a humidity dome to keep in moisture.
8/16 - Two of the three already have their true leaves. So, I have removed the humidity domes from those two.
8/17 - The last of the GSCs have sprouted her true leaves so I have removed her dome. I sprayed them lightly again today with RO water and molasses.

Likes
12
Share
@Jays_Not_Here_Man
Follow
Seedlings 🌱 are doing great! They are looking very healthy and happy.
Routine this week was was just checking the humidifier every morning, and spritzing with my spray bottle x2 daily (very small amounts) starting at the base of the plant, but also making sure to get the exterior edges to allow those roots to be searching for water.
Changed the light cycle to 18/6 around day 7, and also adjusted my BloomPlus BP 2500 to have 140 watts at the wall. Didn’t lower the light as the increased wattage seemed to slow down the stretch they initially had. Still using my small 250 watt heater behind my intake fan to draw some heat in and keep the tent nice and cozy, even during lights out (about 75-76 *F)
By day 14, I started to water with a measuring cup, still using my 1 ml of Sensi Cal/Mag plus. Watering only about 1/4 cup of water all around the pot, and will wait until the soil is dry’ish (the old finger poke) before I start to increase the watering amount gradually.
Sometime around day 21 is when I will begin to introduce some nutrients, I will be using the Advanced Nutrients- Grow, Micro and Bloom along with the Sensi Cal Mag plus. Happy Gardening 🇨🇦❤️🌱😎💨

Likes
17
Share
@Sergio_721
Follow
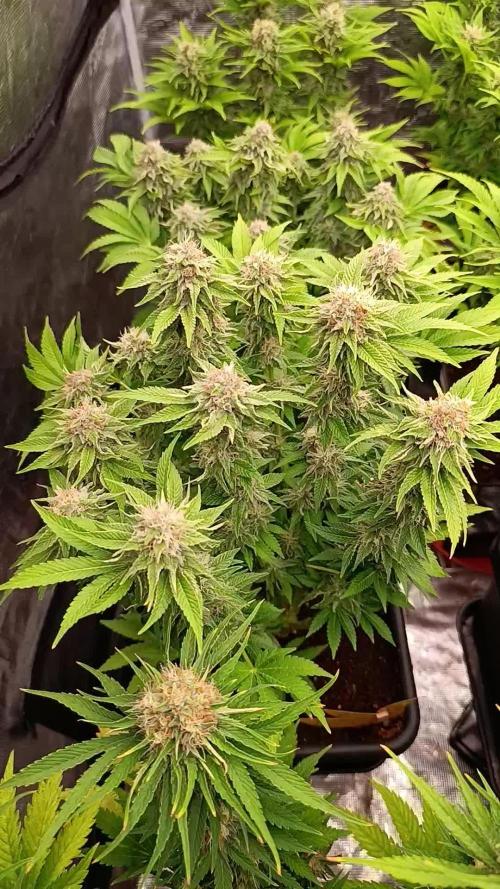
almost ready to cut 🤤🌱
Day 76
1-2 days and proceed with the harvest I am aspetrating that the soil dries up well. we'll see when they give us these little girls of fustbuds
Likes
5
Share
@Ensign420
Follow
Greetings fellow growers 🖖 and welcome to my first grow ever. This adventure actually started several months ago when I decided to stop buying flower from dispensaries and just grow my own bud. How hard can it be!?
This is actually my second seed of this strain. The first bean sadly died due to over watering (sorry girl, RIP). I was literally watering the cube to the point where water was dripping from the bottom, then heavily sprayed the humidity dome and tray with the vents completely closed. Everyday. Multiple times. I never let the dome or try dry out. So after about 8 days of not sprouting, there was a funky smell of rot. So that was that.
Later I learned that rockwool retains a lot of water and can easily drown seeds. So a wet/dry cycle is best for rockwool germination.
So even after hours of researching and digging through forums and tutorial videos, I was still under prepared for this journey. Did not consider how delicate the germination phase is. Oh well. Lesson learned. Reset and try again!
I hope everyone is safe and stoned during this corona crisis. Just like everyone else in the world, I want this pandemic to be over with. But in the meantime, let's grow some weed! 🖖
[START OF WEEK 01]
Day 01 - Monday - 08/03/20 - Total Days: 001
-----------------------------------
- [0830]: Light Schedule: 24Hrs/0
--- Soaked cube in 5.5 PH water for 10 min. Did not shake water out.
--- NO NUTES! Only PH'd down to control the PH levels.
--- Did not use the default hole (way too deep).
--- Flipped cube upside down and made a shallow hole for the seed (less than 0.25" deep).
--- Placed seed in and pinched hole close. No additional water added.
--- Sprayed the tray and dome with straight water (5.5 PH).
--- Vents are cracked opened a for ventilation (about 1/4 opened each).
--- Distance between the light and tray was 53"
--- AC was set to 80 °F
--- Exhaust fan was set to 86 °F
--- Room average temp was at 85 °F
--- Dome humidity was at 85-99% when sprayed.
--- Allowing to completely dry before respraying.
- [2200]: Dome and tray were completely dry! Sprayed only tray and dome with more water.
Day 02 - Tuesday - 08/04/20 - Total Days: 002
-----------------------------------
- [0845]: Sprayed dome and tray in the morning. Everything was dry.
--- Hoping for the best!
- [2130]: Everything was dry again, so sprayed dome and tray at night along with a light spray on the cube.
Day 03 - Wednesday - 08/05/20 - Total Days: 003
-----------------------------------
- [0830]: Everything was dry again. Resprayed dome and tray. Slightly sprayed cube.
- [2125]: Hooo damn!! She popped! Am little stub is visible! Resprayed dome and tray again.
--- Still going 24/0 for lights.
- [+0033]: Just checked up on her and I swear she grew a bit taller! Getting excited!
Day 04 - Thursday - 08/06/20 - Total Days: 004
-----------------------------------
- [0845]: Wow! Went from a little stub to fully sprouted overnight! Everything was pretty dry again so resprayed dome and tray.
- [2200]: Tap root is visible! Over 1" long too! Just resprayed dome and tray again.
-- Going to prep for hydroton transplant tomorrow!
Day 05 - Friday - 08/07/20 - Total Days: 005
-----------------------------------
- [0930]: She keeps growing!
-- Added a bit of CalMag to the spray bottle (8 drops to 650ml of distilled water). Resprayed dome and tray. Water was at a 5.4 PH with 141 PPM.
- [1045]: Prepped the bubble bucket with 4.5gal of water. Water is high enough to reach about 0.25" above the bottom of the net pot.
--- Added 3 drops of Superthrive
--- Added 3.5ml of CaliMagic
--- Added 2ml Hydroguard
--- Then PH'd down to 5.6
--- Solution Strengh: 120 PPM
--- Water chiller is set to 20 °C
- [1100]: Transplant time!
--- Filled the net basket 1/3 with hydroton. When placed in the bucket, air bubbles are not visible, but are slightly below the surface (slight digging will reveal the water/bubbles below).
--- Removed plastic on rockwool cube and placed in basket, then filled around and covered with hydroton. Making sure to block any light from passing through the net pot and into the nutrient solution.
--- Covered with a half-bottle dome sprayed with the CalMag water from earlier.
--- Hoping for the best!
- [1300]: Raised Bucket 5" higher. Now light distance is 48" to top of bucket.
- [1820]: Lowered tent exhaust temp to 76 °F
--- Lowered AC to 75 °F
--- Raised bucket even higher so light distance is 30" to top of bucket.
- [2300]: Looking good!
--- Sprayed dome and surrounding hydroton with more CalMag water.
--- Attached timer to light! So new 18 Hrs On/6 Hrs Off light schedule.
--- Lights On: [1600] (4pm)
--- Lights Off: [+1000] (10am the next day)
--- Decided to go with lights on during the evening/night and off during the later mornings/afternoon (the hottest part of the day) to see if temps can be controlled better.
--- Please survive girl!
Day 06 - Saturday - 08/08/20 - Total Days: 006
-----------------------------------
- [0800]: Everything was dry. Resprayed hydroton and dome.
- [2000]: Here first night cycle seemed to go well! Get'n taller!
--- Dry again. Removed the dome.
--- PH went up to 6.5 so PH'd down to 5.7
--- Ran the top feed drip ring for a bout a minute to wet the hydroton and rockwool with the nutient solution.
---Too scared to leave the top feed on 24hrs (I don't want over water her and cause dampening-off). Will let dry before re-watering.
- [2100]: After closer inspection, I think she's looking a bit yellow.
--- Decided to add a bit of grow nutes to the bubbler solution.
--- Added 2ml of Sensi Grow A
--- Added 2ml of Sensi Grow B
--- Solution strength after adding more nutes: 176 PPM
--- PH went up to 6
--- I hope that the extra chelating properties of the 'PH Perfect' solution is enough of a buffer for proper nutrient uptake.
Day 07 - Sunday - 08/09/20 - Total Days: 007
-----------------------------------
- [0800]: Water dropped a bit (mostly due to evaporation) so solution strength was at 190.
--- Checked PH again. Was still at 6, so PH'd down to 5.4
--- Ran the top feed for a minute to wet the hydroton a bit.
- [0915]: Since she's looking perky but still a bit yellow. So decided to up the nutrient concentration even more before lights out.
--- Added 2ml more of Sensi Grow A
--- Added 2ml more of Sensi Grow B
--- Solution strength after adding more nutes: 199 PPM
--- PH went up to 5.8
- [1700]: Checked nutrients.
--- PH: 5.9
--- Solution strength: 202 PPM
--- Added 4ml of Voodoo Juice
--- Added 4ml of B-52
--- PH after adding more nutes: 5.9
--- Solution strength after adding more nutes: 238 PPM
- [2130]: Decided to make a new foliar spray to address the continued yellowing.
--- Started with 500ml of distilled water.
--- Added 3 drops of CaliMagic
--- Added 3 drops of Sensi Grow A
--- Added 3 drops of Sensi Grow B
--- Added 3 drops of B-52
--- Added 1 drop of Superthrive
--- Solution strength: 164 PPM
--- PH was at 5.9 and did not adjust.
--- Gave her one spray.
--- Also sprayed the surrounding hydroton.
[END OF WEEK 01]


Likes
8
Share
@JeyGanesha
Follow
Bella la mia forbidden runtz..anche lei mi darà minimo un ettata di fiori deliziosi...100gr.di buona terapia ...💪😜🤞
Likes
62
Share
@Wicked_Stix
Follow
The ethos put on a lot of stretch this week. The viparspectra xs2000 is doing a great job. Running cool and keeping the plants happy. Everyone is popping pistils. Excited to see what kind of variety comes out of this gutter!

Likes
48
Share
@TheCannaProphet
Follow
~ WEDDING CHEESECAKE FAST FLOWER by FastBuds ~
Well fam, here we go again with another epic strain from FastBuds Fast Flowering stable. After having such tremendous success growing their Gorilla Cookies Fast Flower outdoors last year, I've decided to run another of their fast flowering strains outdoors this year... Wedding Cheesecake Fast Flower!
The best description of this awesome cultivar comes directly from my friends at FastBuds which is as follows:
"A delight for the mind and body: Wedding Cheesecake FF (Fast-Flowering) is a delicious strain that offers XXL yields in a 7-8 weeks flowering cycle. This terpene powerhouse produces loads and loads of mouth-watering vanilla-creamy-cookie-scented terps with hints of citrus and cinnamon. In addition to its delicious aromas, this variety grows very well in both indoor and outdoor setups, yielding up to 650 g/m2 without extra maintenance, making it the ideal strain for beginners as it allows you to maximize yields while minimizing work. This super-fast feminized photoperiod version offers upbeat and energetic yet deeply relaxing effects that are perfect for consumers looking for a heavily focused, motivating, and creative high. It’s the ideal strain for those needing that extra energy boost to start a busy day on the right foot.
Wedding Cheesecake FF boasts chunky, large-sized buds with a thick layer of silvery-white resin and bright orange hairs scattered all over: that just screams ‘quality’. The lime-green flowers sparkle with an array of hues ranging from dark to light green, to magenta and purple, and reek of a delicious aroma that’ll remind you of fresh store-bought cheesecake.
This is an XXL hybrid that grows extremely tall in height, reaching up to 3m with one huge main cola and multiple long side branches that can withstand enormous yields of up to 650 g/m2 with ease. Wedding Cheesecake FF is extremely resilient to the elements and can be grown in almost every climate as long as you’ve got the space and basics covered, making her an excellent choice for those looking for large-scale harvests with a quick turnaround time without much effort."
________________________________________________________________________________________________________________________________________________________________________________________________________________________________________________________________________________________________________________________
The Setup:
This is going to be an outdoor grow, but I have started the Wedding Cheesecake FF indoors as our weather is still too cold to put her outside (nighttime temp's dipping regularly into the 30's℉).
The plan is simple... let her grow inside under a 19/5 light schedule until the nighttime temperatures stay above the mid 40's℉, at which point she'll be moved outside and transplanted into the soil which I have already setup and inoculated with beneficial microbes, and then let the fun begin!🤪💚
________________________________________________________________________________________________________________________________________________________________________________________________________________________________________________________________________________________________________________________
Weekly Updates:
4/26- Week Five... here we go!
The Wedding Cheesecake FF from FastBuds has her 6th set of leaves now and is looking nice and healthy. She has good color and her growth is beginning to pick up.
4/28- All is well with the Wedding Cheesecake FF. Today I checked the moisture of the soil and decided to water via the garden hose with well water along with a good drink of fresh Compost Tea.
4/30- Rain showers today took care of my watering duties! Yesterday I sprayed her down with Neem Oil to see if it helps to mitigate whatever is beginning to chew on her leaves.
5/2- Another week gone by and this lady is beginning to look like she might end up being a standout!
Thank you for checking out my diary, your positive comments and support make it all worthwhile! 💚Growers Love!💚😎🙏


Likes
3
Share
@factoryofweed
Follow
Aquí PURPLE PUNCH esta empezando a brotar.
- Tenemos a 3/9 con un aspecto un poco anómalo, lo veremos próximamente.


Likes
32
Share
@Bossman
Follow
Looks like I'm going to be satisfied with the autos and the photos their coming along fine very nicely. I super cropped the one outside and that's turning out fantastic


Likes
3
Share
@Sundancers
Follow
Sie hat den letzten Frisörbesuch sehr gut überstanden. Heute stand Entlaubung auf dem Plan sowie Entfernung zu kleiner Blüten.
Ihre Sonnensegel sind extrem spitz und lang: Was für ein sative Monster! Diese Blattform gefällt uns sehr. 😍
Wir sind gespannt auf den Stretch der Blüten und hoffen das sie nicht zu instabil wird.
Sie hat ein sattes grün und zeigt keinerlei über- oder unterdüngende Eigenschaften.😎
Likes
5
Share
@420DeepGrow
Follow
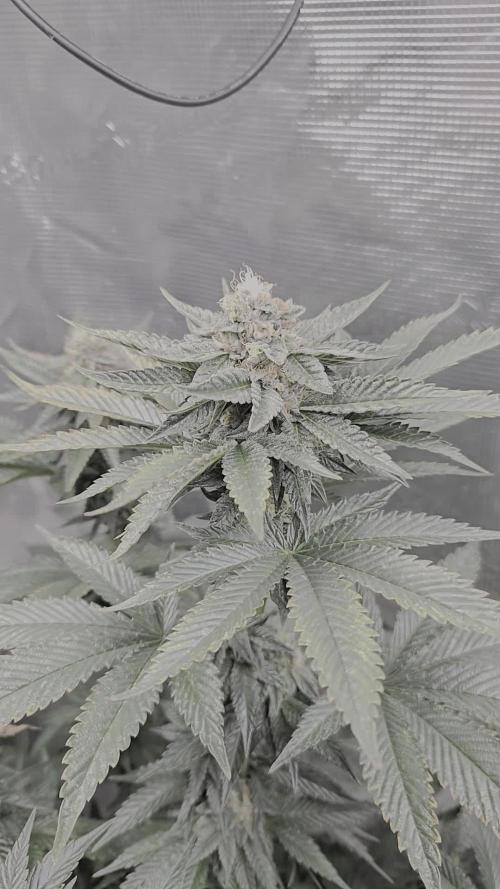
📆 Semana 7:
El cultivo avanza con claridad en el engorde final. Los cogollos continúan hinchando y compactando, con cálices apilándose con más presión y las puntas ganando densidad real.
La resina sigue intensificándose, cubriendo por completo flores y hojas cercanas, mientras los tricomas comienzan a evolucionar hacia tonos lechosos. La absorción se mantiene estable y el metabolismo sigue limpio, permitiendo que la planta concentre su energía en peso, potencia y maduración.
El aroma gana profundidad y presencia, señal de que la fase final del desarrollo floral ya está en marcha.
Seguimos creciendo fuerte 💪!

Likes
8
Share
@ProKush27
Follow
By the start of the week I’ve noticed magnesium deficiency on plant A and B, so I started adding Biobizz Calmag on Froglord’s kind recommendation.
Otherwise I started slow defoliation process and I’m currently removing around two leaves per day.
Plants definitely grew larger than expected but I’m not mad :D. They’re taking a bit longer, but it should be worth it. I’m expecting harvest on plants C and D soon.
Likes
9
Share
@TrichomeTheatre
Follow
This week I fed Tea ☕️ that consisted of my own worm castings from the bin I made a few months back, molasses for the microbes , and a chicken manure product from Coop Poop. I can already see the difference, unless that’s my mind playing tricks on me, but I like to think that it is working! I think my own castings are the real catalyst to new growth; both now as well as in the future! I did check the trichomes on the plants that seem to be entering senescence (final stage of life). They seem to be still somewhat clear, so I will wait at least another week to harvest. As far as everything else, it has been an easy, uneventful, grow! ☮️💚

Likes
6
Share
@GoldenWeedGrower
Follow
Legend
Timestamp: 📅
EC - pH: ⚗️
Temp - Hum: 🌡️
Water: 🌊
Food: 🍗
pH Correction: 💧
Actions: 💼
Thoughts: 🧠
Events: 🚀
Media: 🎬
D: DAY, G: GERMINATION, V: VEGETATIVE, B: BLOOMING, R: RIPENING, D: DRYING, C: CURING
______________
📅 D50/B13 - 04/06/24
⚗️ EC: 1.0 pH: 6.0
🌡️ T: 24°C H: 60%
🌊
🍗
💧
💼
🧠
🚀
🎬 1 TL video
______________
📅 D51/B14 - 05/06/24
⚗️ EC: 1.0 pH: 6.0
🌡️ T: 25°C H: 60%
🌊 15L
🍗 CalMag, Bloom A-B, Bud Candy, B-52, Big Bud
💧
💼
🧠
🚀
🎬 1 TL video
______________
📅 D52/B15 - 06/06/24
⚗️ EC: 1.0 pH: 6.0
🌡️ T: 25°C H: 60%
🌊
🍗
💧
💼
🧠
🚀
🎬 1 TL video
______________
📅 D53/B16 - 07/06/24
⚗️ EC: 1.0 pH: 6.1
🌡️ T: 25°C H: 80%
🌊 4L
🍗 CalMag, Bloom A-B, Bud Candy, B-52, Big Bud
💧 pH-
💼 Added pH- in order to keep the water on the lower side for a while
🧠
🚀
🎬 1 TL video
______________
📅 D54/B17 - 08/06/24
⚗️ EC: 1.0 pH: 6.1
🌡️ T: 25°C H: 80%
🌊
🍗
💧
💼
🧠
🚀
🎬 1 TL video
______________
📅 D55/B18 - 09/06/24
⚗️ EC: 1.0 pH: 6.1
🌡️ T: 25°C H: 70%
🌊15L
🍗 CalMag, Bloom A-B, Big Bud
💧
💼
🧠
🚀
🎬 1 TL video
______________
📅 D56/B19 - 10/06/24
⚗️ EC: 1.0 pH: 6.1
🌡️ T: 25°C H: 70%
🌊
🍗
💼
🧠
🚀
🎬 1 TL video

Likes
5
Share
@FlyHighhh
Follow
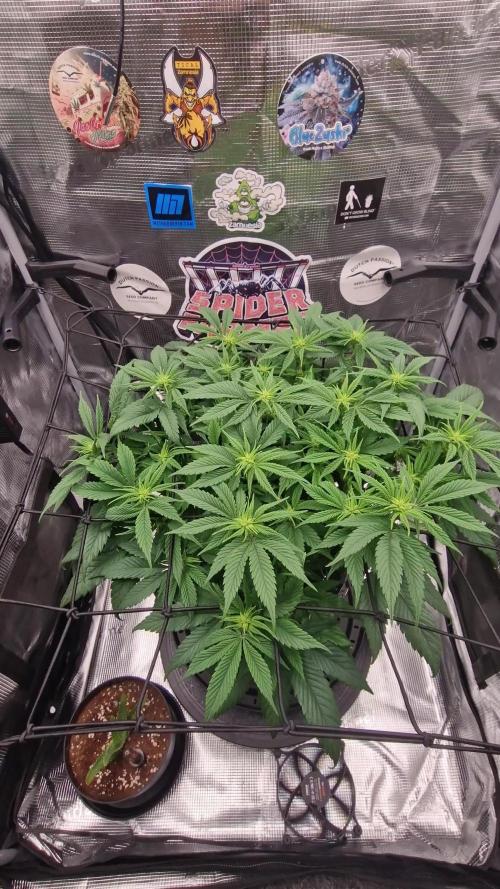
Begonnen met voeding ,licht opgevoerd naar 250 watt . Ik ging eerst voor 4 planten maar kan het niet over mijn hart verkrijgen om die back up stek te deleten dus heb ik hem er maar in een kleine pot ertussen gepropt en hoop ik dat het straks in de scrogg allemaal.een beetje in elkaar gaat overlopen . 🤔🤔😏