


Likes
Comments
Share


@jojopfoh
Follow
The stretch is finally over and now she is starting to stack. The bud formation is beautiful and there are so many bud sites. The colas are ging to be huge

Likes
21
Share

@Wilstang
Follow
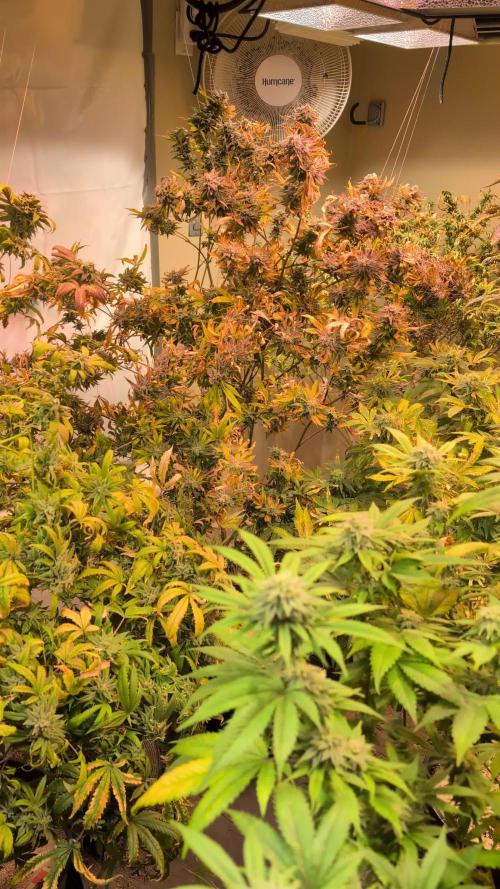
IPM
https://www.arbico-organics.com/product/mite-predator-phytoseiulus-persimilis-plus-sachets/mite-predators
https://www.arbico-organics.com/product/spidermite-destroyer-stethorus-punctillum-adults-larvae/pest-solver-guide-mites

Likes
1
Share


Likes
31
Share


@valiotoro
Follow
Beautiful buds super sticky✂️
Delicious smell something new to me!
Cant Wait the curing to taste this beauty

Likes
12
Share


@thonhash
Follow
En esta última semana de prefloracion, aprovechamos a hacer otra poda de bajos y defoliación (como podéis observar,si se ha llevado bien hsta ahora el cultivo,y hacer correctamente los cortes,y en su momento, se recuperará en apenas horas/día.
Seguimos regulando el led a un 75/85%(225/240w aprox) y entra en acción el terpesyn.
Volvemos a aplicar enzynabis

Likes
41
Share


@Kmikaz420
Follow
Bonjour a toutes et à tous . Cette semaine j ai eu des soucis avec 3 plantes qui évolue plus lentement (chose qui fais qu elle ne supporte pas autant de ppm que les autres 😞)
J ai donc hier commencer à arroser les 3 retardataires avec une solution moins forte (300ppm pour 2, 3 jours puis je passerai à 600ppm )
Normalement ça devrais le faire ,bon les photo sont prise avant la nuit donc les feuilles tombent encore plus ) je rajouterai des photo demain voir le changement , j ai également rajouter le co2 aujourd'hui (système airbombz) histoire de les aidé à reprendre un peut plus vite et au moment où toutes les plantes seront O.K je Les passerai en floraison .
HORREUR DE VOIR MES PLANTES COMME CA !!!@! ON VA CHANGER CELA TRES VITE..
Voilà 24h après les plantes on déjà meilleurs mine ;)
On se revoit très vite pour le taillage des branches avant la floraison.
20/04 bonjour. Comme toutes les plantes sont bien partie la j ai décider de faire la taille des branches inférieure un peut plus tôt histoire de passer en floraison lundi (à voir si les plantes auront récupéré d ici la ;)
Autrement l arrosage se fait PH= 5.8
PPM= 800 (pour toutes les plantes )
Voilà voilà c est à peut près tous pour le moment .
(D ici lundi je vais mettre quelque photo des racines qui sont juste immense et d une épaisseur jamais vue ça ;)

Likes
6
Share

@PapaTerps
Follow
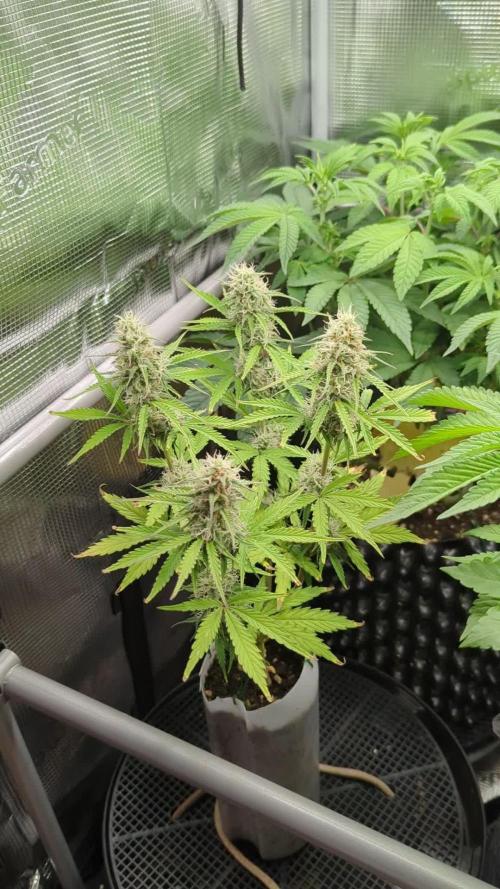
TB SkittleZ Auto - The Bulldog Seeds
Day 66
🚿 watered her three times this week, with 1l of RO tap water with defined nutrients mixed individually, in order and then pH'd to 6.5.
✂️ No work on her this week, as nothing was required 🙌🏻
🌸 She is focusing on bulking her bud and has doubled her flower volume since last week 💪🏻 She has finally started to release her aroma into the tent, very fruity and candy like - it's all going well so far!

Likes
52
Share


@SomeLikeItGrow
Follow
Hey folks! 33 days has been passed out, girls are showing bushy results with this LED COBs, i am a little bit surprised. Preparing to 12/12 and ScROG :) Cheers!

Processing
Likes
12
Share


@Silverback_Guerilla
Follow
1/14:
This morning, I did a foliar application of big bloom and fulvic acid, then about 5 hours later I watered them with about a half-gallon of rainwater each and added armor si, humic acid, endoboost myco/tricho, liquid molasses, and a bunch of cal-mag. Today, I also I wired up and mounted my new samsung sun board strips (660nm/730nm) and my Solacure FlowerPower UVB fixture.
I'm running the deep red/far red bud boosters a few hours per day right now, but will run them for the entire photoperiod once I start flowering them. I'll run the UVB for 4 * 15-minute sessions a day for the full flowering cycle, and if they don't protest too much I'll increase each session by 5 minutes and evaluate again. Some strains are more forgiving than others and I've got 5 different strains in this space...so really not sure much time I'll get away with exposing them to the deadly rays without damaging them too much...😈
1/15:
I received one of the rapid led/growmau far red initiator pucks today. With the placement of my UVB light, I'm realizing I'll need another far red puck to have even and intense far red coverage, so I'm ordering another with Prime delivery and waiting to start flowering until I receive it.
I sprayed them down really well with ph adjusted rainwater tonight to rinse off nutrient build-up from foliar applications.
1/16:
I'm really excited to try flowering under 14/10. I grew photos indoors on an off for 15 years before I semi-retired. If I added up all the additional flowering time I could have done through the years if LED technology existed, I'd have had an extra truckload of bud to smoke.
I did another application of Axiom Harpin a|b Proteins this evening, right before dark. I'm expecting a big growth burst this week, leading up to the flower stretch. I really need them to trigger under 14/10 within 4 or 5 days🙏
...if not, I'll switch to 13/11 and wait a few more days🙏😟..if still no pistils are poppin, I'll go to 12/12 and chalk it up as bad luck or varietal indifference to Pr and Pfr manipulation.
1/17:
I fed each of them about 3/4 gallon of full strength veg nutes. This will be the last. I'll go with half-strength veg and half-strength bloom for a week, then go with full strength bloom nutrients until I start flushing them in 6-8 weeks.
1/18:
I installed the second far-red flowering initiator today and got all my timers configured for flowering:
=========================================
timer#1 - power strip with qb's and red boosters
10:00am -12:00am
timer#2 - (dual/independent setting)
sideA- 3-way cube with uva bars
10am - 3pm
7pm - 11pm
sideB- flowerpower uvb
1pm - 1:15pm
4pm - 4:15pm
7pm - 7:15pm
11pm - 11:15pm
timer#3 - far red pucks
11:00pm - 12:15am
timer#4 - sub-canopy tube
10am - 1pm
3pm - 6pm
8pm - 11pm
========================================
I also did some testing on the timers and sealed myself into the closet to check for any light leaks. All good.👌
1/19:
Tonight is their first long night. It's ON!👍
1/20:
I watered them today with about a half gallon each. I'm seeing calcium and magnesium deficiences here and there, so added some boomerang and heavy cal-mag-Fe along with liquid molasses, humic acid, and endoboost myco. I also foliar fed with big bloom and fulvic acid.
That's it for week 4-

Likes
101
Share


@biggreens420
Follow
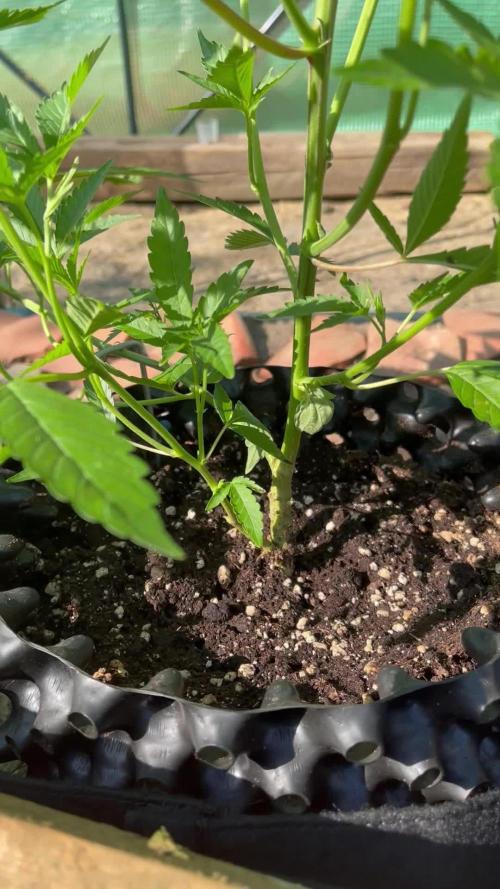
This girl is one chunky monkey glistening with all her frost shes packed on some weight and most hairs have turned orange still quite visible so will be feeding another week and then begin flush will get some better pics in week thanks for reading happy growing guys


Likes
Comments
Share


@wizard_of_bel_air
Follow
3rd week, transplanted to 1 gallon containers. Adjusting light to coincide with southern California sunrise time.
Likes
7
Share


@CanadianFillmore
Follow
Another week in the books. Plants are really starting to smell, light citrus.

Likes
20
Share


@Bread_n_Buds
Follow
Here we are again ready to start again, always under the sign of Zamnesia, we make our fantastic plants and we show you what we are capable of. We have 5 autoflowering strains and 5 photoperiodic ones and now we present them to you.
We are faced with a Classic of recent times: Runtz. It certainly does not have the age of Northern Lights but it is a truly magnificent plant and Zamnesia perhaps also has the best version. Truly super I have grown it in all sauces let's see this one. Gelato and Zkittlez are my all-time favorite mums perhaps.
To explain my germination method which is a combination of experiences acquired in the field and readings of the right advisors, I have chosen to divide it into phases so whoever wants can follow them and understand better step by step.
- Preparatory Phase ---- Check the average temperature in the room, humidity status to understand if it is the case to start or wait, I decided for the end of August because the temperatures start to drop towards the 22-25 degrees recommended for germination.
Then another thing more or less credible depending on the sensitivity is the control of the lunar phases. I believe in it a lot, it is a method that ancient farmers used to understand when it was best to plant depending on the attraction of the moon. To make my life easier I use a simple app that advises you on the right time to plant, harvest and put in the jar (depending on the lunar phases).
- Phase 1 --- Soaking in water. There are many authoritative friends who advise against this method due to the risk of drowning, but I have always been fine and I follow the rule if it opens in water the seed is almost certainly healthy and will come out of the ground 90% normally.
- Phase 2 --- Opening the seed in water. As soon as the seed opens and the root comes out a little, you have to be very very careful not to leave the seed in the water open for too long. This is why there is a risk of drowning. So as soon as the root comes out, it must be planted. Do not wait for it to stretch out a lot, you can wait a little longer in the absorbent paper, but not in water.
- Phase 3 --- In the meantime, while I soaked the seeds, I prepared my pots: I use small biodegradable pots (choose the ones with holes underneath for drainage). A few hours before working with the opened seeds, I moistened the soil with water adjusted to the right pH (5.8 - 6.2) and Plagron Power Roots. The small root is now open and we can make a little hole with a toothpick, widen it and insert the seed. Not too deep with the root facing downwards. From Serious Seeds we learned the dome technique: if you put a small dome of soil on the seed the water will settle on the sides avoiding overwatering problems.
- Phase 4 --- The plant emerges from the soil. So far I have not put the light, now I turn it on at minimum after half a day of soil to give direction to the seedlings. The first week the light will be gradually brought from 40% to 60% to go to 70% - 75% in the remaining weeks of veg. During the first week maximum, I keep the cycle of 24 hours to avoid stretching. Be careful not to exceed the first week at least with photoperiodic plants.
- Germination % --- In water 20/20 seeds have opened for good luck I'm waiting to talk when they come out of the ground but it seems that we are going towards an excellent percentage of germination..."Not too bad"...
- Soil and Food --- The soil used is entirely organic in every part and is the Plagron Promix that will be used with the 100% organic pack provided by Zamnesia complete with all the main fertilizers for your plant buy it at the link --
https://www.zamnesia.io/it/11457-plagron-easy-pack-natural.html
// Strain Description // Guys, we have really reached a turning point! Our breeders have recreated one of the most sought-after strains by Californians: the very powerful and exquisitely delicious Runtz. This cross between Gelato and Zkittlez is everything you could want from a cannabis strain: tasty, powerful, balanced, productive and fast flowering. Buy the seeds and try it yourself!
- Get a seed of this fantastic strain --- https://www.zamnesia.io/it/6000-zamnesia-seeds-runtz-femminizzato.html
- Soil and Fertilizers entirely organic --- https://plagron.com/en
- Growbox --- https://www.secretjardin.com/
- Music and sound --- I made my girls listen to 432hz frequencies and music from www.radionula.com
- Z --- You can find these seeds, much more from the world of cannabis, mushrooms and an incredible series of accessories and gadgets on the reference site not only mine but of many growers ---- https://www.zamnesia.io
Likes
2
Share

@Janerussel
Follow
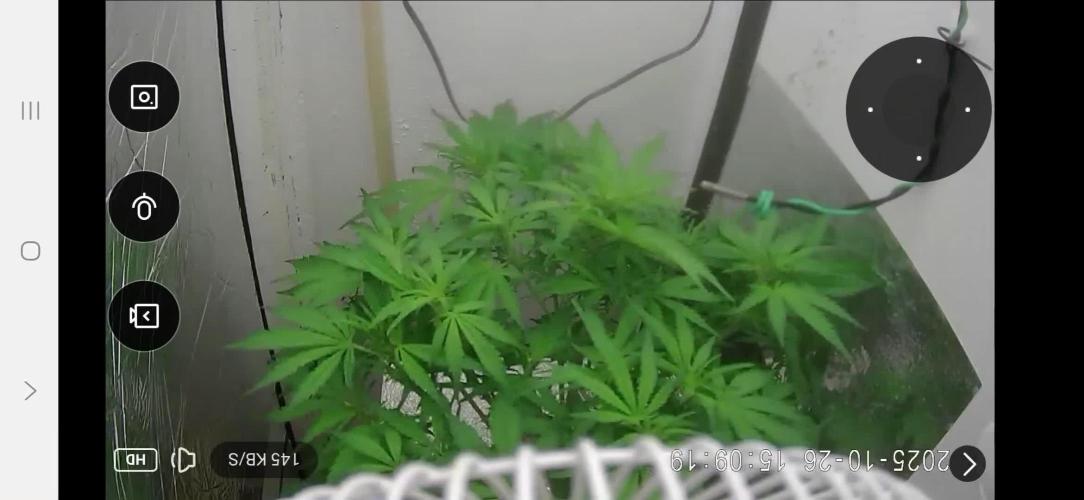
F week 3. It gets really bushy. I had to do a second defoliation. At this point everything seems to go well.
Likes
5
Share


@JohnnyBarrel
Follow
Week 15 - flo 6 weeks
Satisfying period: maturation time. No really problems, just a doubt about the final result in terms of quantity and buds size. Even if’s not a goal to produce big colas : I would have a bigger result with a little bit more work on the plants., like LST. The TS 1000 (150W) led was too low (for the room size) during the end of vegetative and preflowering period now it’s a 250W led).
Every plants are healthy , still green (just few classical yellow leaves on base), producing lot of pistils and resin. The indigo Berry Kush is really appetizing: Frosty and meaty. Criminal+ and Special Queen shows lot of dense little flowers everywhere and some correct main buds. The NYC turn orange and flowers become thicker.
Each plant develops a pronounced and singular aroma. I will have a choice of different flavors and tastes.
Watering around 1,5L every 3 days.
- rain water + cal/mag + bud XL + diamond sugar
- rain water + cal/mag + overdrive (NPK-1/5/4) + diamond sugar
Ventilation + carbon filter Ok for smell
Now it’s question of patience. I will start to flush next week.


Likes
92
Share


@DogDoctorOfficial
Follow
Week 9 - First Week of Flowering 🌸
The dark period has ended, and these ladies came back into the light fully energized and ready for action! It’s just the first week of flower, and they’re all praying, stretching, and absolutely thriving—filling up every inch of the tent. This grow space is officially packed from wall to wall, with each plant competing for its share of light and showing off some of the biggest, healthiest leaves I’ve seen yet! 🌱
A few strategic plucks here and there have kept airflow smooth and light penetration balanced. Those big leaves? They’re a sign of happy, healthy growth. Large leaves help the plant capture maximum light energy, essential during this stage, especially as they start focusing on developing those flowers. When plants grow huge, vibrant leaves like these, it means they’re well-nourished and content in their environment—a true testament to the well-balanced conditions we’ve got going in the tent!
Flowering Parameters 🌡️
Room Environment:
• Temperature: 26.7°C
• Humidity: 63.3%
• CO2: 960 ppm
• VPD: 1.29 kPa (prime zone for flowering health!)
Lighting:
• Light Intensity: 835 PPFD (ideal for boosting flower growth)
• Solution: pH 5.96, TDS 460 ppm, temp 21.1°C
• Medium: Moisture: 100%, TDS: 520 ppm, Temp: 21.6°C
Carbon Filter Installation & Smell Management 🌬️🌱
With the transition to flower, the scent profile is already starting to kick in—crazy for the first week, right? 🌸 To keep everything fresh and under wraps, I’ve set up a carbon filter system. Here’s how it’s working: I’ve connected the filter to my Aerofan, which pulls air directly from the tent. This air is cleaned by the filter and released into the main room, where it then passes through another filter before exiting my space. This dual-filter setup means no scent escapes into the wild, keeping things stealthy and the grow room a peaceful, scent-contained environment. Perfect for anyone concerned about keeping their home free from that telltale aroma! 🕶️🌬️
Enhanced Lighting with Emerson Effect 🌞
This week, I’ve introduced an extra 15 minutes of red light at the beginning and end of each light cycle. Why? Well, this red boost taps into the Emerson effect, enhancing photosynthesis efficiency, especially during the flowering stage. By stimulating a little extra wake-up and wind-down light, we’re mimicking the natural sunrise and sunset experience for these plants, which can help reduce flowering time. Not only does it encourage smoother transitions into day and night, but in theory, it’ll help these ladies finish a bit faster, while giving them a little nudge to build more substantial, quality flowers. 🌇
Nutrient Adjustments 🌱
Now that we’re in flower, I’ve swapped out the Start Booster for P-Boost and TopBooster to specifically support flowering needs. Here’s why:
• P-Boost brings in additional phosphorus, vital for energy transfer and cell division as the plant channels more resources into budding sites.
• TopBooster supports the flowering phase by improving flower quality and density, helping to build those big, aromatic buds we’re after.
These changes bring the nutrient mix in line with what’s most beneficial at this stage. All this precise dialing in is easy to manage thanks to the TrolMaster system. From pH to nutrient scheduling, the TrolMaster ecosystem and ThinkGrow LEDs have been the ultimate teammates in this grow journey, giving me real-time data, fine control, and peace of mind. 💯
(Not introducing UV light just yet, but stay tuned as that’s coming soon for an added boost!)
Looking Forward 🌟
Next week, we’ll be upping the reds, giving us an even greater chance of activating those flowering signals for a smoother, faster transition through the cycle. I’ll keep tweaking and fine-tuning every parameter to make sure these ladies get exactly what they need to thrive.
Big thanks to the TrolMaster system for keeping everything in balance and optimized, along with the supportive Grow Fam following this journey! Your enthusiasm, advice, and support are a huge part of this grow’s success. Keep following for more updates, and stay tuned for what’s next! 🌿✨
P.S. Deep Dive: TrolMaster’s MBS-S8 CO₂ Sensor & Smoke Detector 🚨
The MBS-S8 CO₂ Sensor from TrolMaster is a powerhouse for growers, especially when it comes to optimizing plant growth and efficiency in a controlled environment. This sensor continuously monitors CO₂ levels and integrates directly with the TrolMaster ecosystem, giving you real-time data on CO₂ concentration. Ideal levels of CO₂ can significantly boost growth and yield during certain stages, so understanding and managing CO₂ is key. With the MBS-S8, I can control CO₂ levels precisely, keeping them within the optimal range for photosynthesis. This sensor is a game-changer because it adjusts CO₂ delivery automatically, giving plants exactly what they need without any extra monitoring from me.
Meanwhile, TrolMaster’s Smoke Detector is an essential safety device, especially in spaces with electrical equipment, lights, and heat-generating components. This detector can be set up to alert me instantly via the TrolMaster app if any smoke is detected, allowing me to respond immediately to any potential issues. Fires and smoke are rare in controlled grow setups but having this safety measure provides peace of mind and lets me focus on the plants without constant worry. It’s an incredible tool for any grower prioritizing safety and proactive monitoring.
Discount Codes so you can save big on your next check out 💚💚💚
Kannabia - DOGDOCTOR 30% off
SeedsmanSeeds - DOGDOCTOR 10% off
CannaKan- DOGDOCTOR 15% off
terpyz.eu - DOCTOR 15% off
The Neutralizer - PORKIT5-DOG 15% off
As always thank you all for stopping by, for the love and for it all , this journey of mine wold just not be the same without you guys, the love and support is very much appreciated and i fell honored and so joyful with you all in my life 🙏
With true love comes happiness 💚🙏 Always believe in your self and always do things expecting nothing and with an open heart , be a giver and the universe will give back to you in ways you could not even imagine so 💚
Friendly reminder all you see here is pure research and for educational purposes only
Growers Love to you all 💚💚💚


Likes
60
Share


@julian100614
Follow
Los cogollos no dejan de engordar y endurecer 🔥
Estoy realmente sorprendido con los resultados que está dando esta pequeña gorilla.
Vamos a mantener los valores por una semana mas para ver si siguen en aumento pero ya nos estamos preparando para la recta final y hacerle su lavado de raices para una fumada perfecta.
El olor es potente y su resina abundante. Como dije antes, lo mas sorprendente es lo compacto que están los cogollos, son piedras.

Likes
9
Share

@FireAntTheGrower
Follow
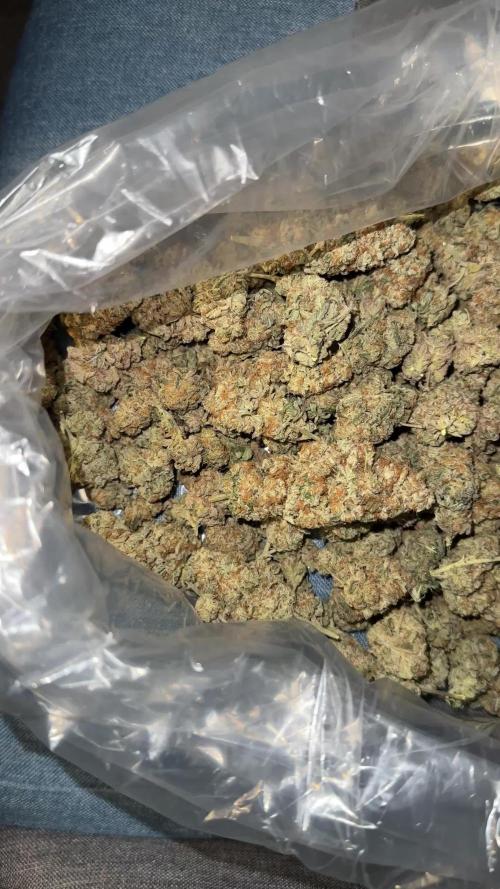
I definitely enjoyed and having cool cure definitely a game changer . Bout to test it out some more by leaving the buds or recent harvest inside the system. Thinking cutting down the time 4 weeks in veg and 8 to 9 weeks in flower to keep it coming and posted..
Likes
48
Share


@Mz876
Follow
Week 9 . Still not flowering I’m so confused because my lambs breath started at the same time and their buds are crazy for two weeks into flower but this baby ? Nada . Hopefully once she starts flowering she can live up to rhe name
