




Likes
47
Share


@MadeInGermany
Follow
Info:
Unfortunately, I had to find out that my account is used for fake pages in social media.
I am only active here on growdiaries.
I am not on facebook instagram twitter etc All accounts except this one are fake.
Have fun with the update.
Flowering day 23
since time change
to 12/12 h.
Hey everyone 😀.
It gets more beautiful from week to week :-).
The buds are starting to develop well.
They also get thirstier and thirstier. Another 1 g of GHSC Bio Bloom per liter of coconut was added.
Otherwise, the week was poured twice with 0.8 l each time and the tent was cleaned. Have fun with the update.
Stay healthy 🙏🏻
You can buy this Strain at :
https://www.exoticseed.eu/
Type:
Herz Og
☝️🏼
Genetics:
Larry OG X Kosher Kush
Indica 60 % / Sativa 40 %
👍
Vega lamp:
2 x Todogrow Led
Quantum Board 100 W
💡
Bloom Lamp :
2 x Todogrow Led
Cxb 3590 COB 3500 K 205W
💡💡☝️🏼
Soil :
Canna Coco Professional +
☝️🏼
Fertilizer:
Green House Powder Feeding
☝️🏼🌱
Water:
Osmosis water mixed with normal water (24 hours stale that the chlorine evaporates) to 0.2 EC. Add Cal / Mag to 0.4 Ec Ph with Organic Ph - to 5.5 - 5.8 .

Likes
13
Share


@sunshinegroww
Follow
Overall very easy to grow dont need much attention at all left her to grow natural so not sure if strong for training probably ,smells really sweet by far

Likes
2
Share


@Sksssk99
Follow
Week 3.
oh my days, the smell is incomprehensible, truly exceptional sweet and super tangy, I have never smelled anything so tangy

Processing
Likes
19
Share


@lukavega
Follow
This is more of an equipment gathering project-first grow so I want to keep it simple and budget friendly, I ordered autos for my first grow but Oregon Elite Seeds sent a free gorilla Girl from Sweet Seeds. Super psyched for my first grow!
Day1. Soaked seeds for 4 hours in bottled water, used paper towel method with 100% sprouts within 18 hours inside dark tent at 80 degrees (heater and air purifier) and 40% humidity. Hoping to plant directly into prepared soil (6.9 ph currently) in 24 hours.
Day 2. Planted Critical OG Kush and Blackberry Autos 1/4 directly into 8 gallon cloth pots (these are the wrong pots-they are wax lined but the pandemic made getting the aeration pots unavailable-I may have to transfer later). Very lightly watered. i prepared my soil mix and had it acclamated to the grow room. I opened the air vents at each end of the grow room and set heat to 78, placed a bowl of water for humidity and started oscillating fan for airflow. Planted Gorilla Girl in a tupperware dish till i can get something more suitable. I really need another light but shipping just isn't working out.
Day 4: 1 OG Critical was culled do to lack of progress. Gorilla Girl hs been repotted and looks fine. The Blackberry are much leggier than the others at this point. I'm watering just enough to get to the roots with bottled spring water.
Day5 : the girls just woke up-posted pics. 1 light and 6 plants is not ideal. I'm not sure if I should put the strain that is naturally shorter under the light directly or focus on the tall ones getting enough light to not stretch. Comments appreciated.
Day 6: Ligthts off after a 20 hour on cycle. I was concerned that my light insn't adequate spacially. I dropped it down to 15 inches above the seedling and got it tropical in the tent. I also used a 6500k 15 watt shop light for added light color and they enjoyed it, except for 1 had a bit of yellow. I will post photos when they wake up to see how they look after this light/heat/water boost for 20 hours. My Gorilla Girl is the only one that isn't above 2 inches. That one was planted deeper (1 inch instead of1/4th like the others. I did have some "seed helmets" so next time I will go a little over 1/4 inch deep. Qweeby's roots grew like a wad instead of down. I've had to readjust her placement twice because the roots act like they want to be on the surface. I'm excited to see them in 4 hours. I may cull one and start a different seed. The Blackberry Kush is stretchy which seems nice for a new grower like me. I am trying to limit the stretch so they match the Critical OG height but they are hearty toddlers.
Day 7: Added a 3000w LED off ebay. I didn't account for the rise in heat but it only got up to 84. Raised it from 18" to 20" and got more air flowing through. One plant has a little yellowing from the inside of the main leaves (inside to out) but it's barely there so I'm going to check PH meter and easy watering since yesterday I did water more then I have thus far-so it could be a little root lock from too much water.


Likes
6
Share

@Borberad
Follow
Blütewoche 6
Die volle Blüte
Noch gibt das Blümchen vollgas und die Blpten schwellen weiter. Da sich aber die Trichome schon milchig färben wird die Düngerdosis bereits reduziert. In ein bis 2 Wochen kann geerntet werden.
* Zustand der Pflanze: Gesunde Pflanze mit immer dicker werden Buds,
* Wichtige Ereignisse: Reduzierung des Dünger
* Düngung & Messwerte:
* Gießwasser: pH ca. 6,3. Leitwert 0.8 mS.
* Drain: Wir stellen sicher, dass der pH-Wert nicht unter 5,5 und nicht über 6,8 liegt und der Leitwert die +/- 500 S Abweichung einhält.
* Anpassungen: Aufgrund des Eigengewichtes der Buds mussten an Tag 88 (Blütetag43) Stützen eingebaut werden.

Likes
15
Share

@NoProbation4Weed
Follow
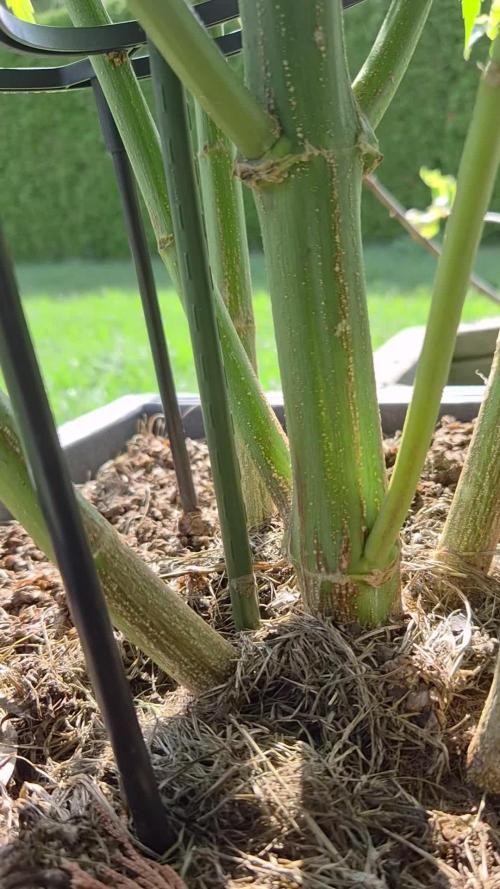
Both Slushberry Mintz plants are absolute eye-catchers. Indoors, they are developing gorgeous purple buds with an impressive bud structure. The terps are exceptionally strong and incredibly tasty. Rich grape-cake terps fill the air, while the buds continue to swell and become denser and firmer.
The outdoor Slushberry Mintz is finally entering the flowering stage as well, showing its first signs of bud development. Overall, the outdoor plant also looks very healthy and vigorous, and I have high expectations for it. Hopefully, we’ll continue to have a dry late summer and autumn.
Likes
5
Share


@Bigsmokes420
Follow
Another good week both strains are reacting well to the techniques I’m applying so far no problems and loving this grow.
Likes
93
Share


@MrJones
Follow
Mr-Jones Shockwave F2
🔹🔹🔹🔹🔹🔹WEEKLY GOALS🔹🔹🔹🔹🔹🔹
🌞Environment - 75/80℉ and 45/50% Humidity
💧 Feeding - Using "Super Coco" amended soil. compost teas, Dechlorinated H20 PH/6.5 Fish Fertilizer, Started feeding the plants because they are only in 1-gallon pots.
🍃Training / towards the end of the week will be Schwazzing the plants, along with cleaning out the bottoms,.
🕷️ IPM - Will be using Green Cleaner" 1 OZ per Gallon, and CannControl from Mammoth alternating between product each month for Integrated Pest Management.
💡Mars Hydro FC 4800 / 480W Led Grow Light - "Instagram: MarsHydro_Aliexpress"💡
🔹🔹🔹🔹🔹🔹🔹🔹🔹🔹🔹🔹🔹🔹🔹🔹🔹🔹
Rambling - These ladies are going great, maybe second-guessing myself but only using 1-gallon pots not sure the nutrients in the Super Coco will carry the plants, going to be Top Dressing with Roots Organics Bloom.
🔹🔹🔹🔹🔹🔹🔹🔹🔹🔹🔹🔹🔹🔹🔹🔹🔹🔹
▶️Sunday 11.29.20 / Top Dressed with Roots Organics Bloom, continuing to water with Dechlorinated H20 PH/6.5, going to be making a super tea after I finish Schwazzing the plants, normally I grow photos in 5 to 7-gallon pots. The New Mars Hydro light is kicking ass!
▶️Monday 11.30.20 / Normal feeding tonight, the ladies are just doing great!
▶️Tuesday 12.01.20 / Normal feeding tonight, the ladies are just doing great!
▶️Wednesday 12.02.20 / Conducted heavy defoliation, Schwazzing tonight, they look great, top dressed with roots organic uprising bloom, and decided to move along with light BioBiz nutrient regiment, growing these gals in 1-gallon pots, the soil nutrients will be depleted.
▶️Thursday 12.03.20 / The ladies have responded well to the defoliation and the started nutrient regiment. I set the 💡Mars Hydro FC 4800 / 480W Led Grow Light to 75% time to watch these ladies just blow up! Will be doing an IPM treatment Saturday morning before lights out.
▶️Friday 12.04.20 / Continuing feeding light BioBiz daily with Weekly top dressing of Roots Organics, the ladies are just thriving!
▶️Saturday 12.05.20 / Plants are doing great after the heavy defoliation, continuing to feed with Bio-Biz daily.
🔹🔹🔹🔹🔹🔹🔹🔹🔹🔹🔹🔹🔹🔹🔹🔹🔹🔹

Likes
6
Share


Likes
2
Share


@TheCalyxLaboratory
Follow
End of Run – Karels Herer Haze: The Final phase & Hash Project! 🌿✨
And last but not least, we turn our attention to the regular Karels Herer Haze (by SSSC)! We are cruising straight into the final week of this nice-to-have grow.
Originally, this run was planned purely as a pollen-collection project. However, since the two plants ended up performing amazingly well in the system, we’re putting them to prime use: the main portion will be processed into top-tier Dry Ice Hash, and a few selected buds will of course be put aside for a direct test smoke!
Current Parameters:
Lighting (PPFD): Dialed down to a cozy 600 PPFD for a smooth finish.
EC Level: Now sitting at a stable 1.2 and being gently tapered off.
Status: We’ve entered the home stretch, trichomes are cloudy-to-amber, and this project is wrapping up nicely.
A great bonus outcome for this run—let’s see what the dry ice hash yields at the end! On to the final round! 🚀?

Likes
38
Share


@Danger90946
Follow
Day 86 12/05/2021- Week 5 of flower almost done hopefully by the end of the month. Went out on a trip and GoPro never turn on for the last two days bummer but will upload time lapse videos daily. Today the lady got nutrients as well.
Day 89 12/08/2021- Today the lady got water, really hoping to see buds starting to fatten up.
Day 91 12/10/2021- So today the lady got a special treat, freshly collected rain water. She is just doing her thing and making those buds. I have also finally put the spider farmer SF-2000 at 100%. Also end of another flowering week, see you guys next week.
--------Have a good one friends and stay high--------

Likes
6
Share


@Dig_This69
Follow
Easy to grow. Fruity spicy very nice stone and made lots of edibles with this trimmings and have to watch out with dosing LOL.

Likes
155
Share


@deFharo
Follow
Bienvenidos cultivadores de marihuana clandestinos y también a los que tienen la fortuna de no serlo!🖐️👨🌾👍
Este es un relato semanal de técnicas, experiencias de cultivo y Bio preparados orgánicos caseros, los cuales llevo experimentando dos años en cultivos de marihuana interior.
Esta semana voy a escribir sobre: CARBÓN VEGETAL ACTIVADO CON MICROORGANISMOS DE MONTAÑA. esta es una práctica avanzada pues al menos se necesita tener el inóculo sólido de Microorganismos de Montaña (MMS), aunque al final intentaré dar otras opciones para aquellos que no tengan MMS. Puedes consultar en la semana 3 la manera de hacer Microorganismos de Montaña Sólidos (MMS): https://growdiaries.com/diaries/134104-grow-journal-by-defharo/week/725879
El carbón vegetal es un excelente componente para toda clase se mezclas de sustrato, tiene varias propiedades muy interesantes, ayuda a la estructuración del suelo y la creación de humus, es un regulador térmico en lugares fríos, favorece la expansión de las raíces y su estructura de microporos promueve la retención de humedad y nutrientes, se dice que en 1cm cúbico de carbón puede contener de 8 a 30 millones de Microorganismos. Y es precisamente la propiedad de retención de humedad y nutrientes, de la que se aprovecha esta práctica.
El carbón vegetal llamado "activado" que se usa en filtros de agua o aire, tiene mala fama entre los aficionados a las peceras, porque se dice que roba nutrientes, principalmente Nitrógeno, esto tiene una explicación y no es un problema para cultivo en macetas, el carbón seco tiende a absorber humedad y los nutrientes que se encuentra en el sustrato o en los riegos, porque es muy poroso, y de repente, tiene que saturar todos sus microporos, pero esto apenas va a tener incidencia en un cultivo.
En mi caso lo que hago es mezclar el carbón con los Microorganismos Sólidos y después lo humedezco con agua y melaza para activar la Microbiología del inóculo, dándole la energía necesaria, de esta manera tengo un carbón inoculado con Microorganismos de Montaña, y una vez en el sustrato, con humedad, estos MM, se propagarán. En este caso el carbón, de momento, no captura nutrientes porque está saturado, pero después de unos riegos, será la casa perfecta donde los Microorganismos y los nutrientes convivirán ofreciendo una fuente extra de nutrientes, para que las raíces se alimenten en periodos de escasez de alimento o humedad.
Supongo que quien tenga inóculos bacterianos comerciales, podría usar esta práctica para multiplicarlos.
INGREDIENTES BÁSICOS:
Agua pura: 500ml
Carbón vegetal, para usarlo en macetas conviene que los trozos de carbón no sean grandes. 750 gramos.
Melaza: 75g
Microorganismos de Montaña Sólidos (MMS): 225g
PROCEDIMIENTO:
Se mezcla el carbón y los Microorganismos sólidos.
Se disuelve la melaza en el agua.
Se humedece el carbón lentamente, mezclándolo bien, porque el carbón vegetal puede almacenar mucha humedad y necesita tiempo para saturarse.
Se guarda a oscuras durante un mes en un recipiente cerrado.
Hasta aquí la fórmula básica, yo hago algunos añadidos, como se puede ver en las fotos.
Añado 260g de Leonardita, que es un carbón vegetal con millones de años y en el proceso de convertirse en mineral, aunque todavía no lo es, es además, la mayor fuente de ácidos húmicos y comparte las propiedades del carbón.
Añado Microorganismos de Montaña Activados (MMA) de forma líquida para aumentar la inoculación de microbiología, también un lacto fermento de frutas que aporta muchas vitaminas, nutrientes y enzimas... en la última foto se ve el recipiente después de un mes.
Siguiendo el principio de saturación previa de los poros del carbón, para mezclas de sustratos, y sin tener acceso a microbiología, se podría, por ejemplo, saturar el carbón con alguna mezcla nitrogenada para el comienzo del cultivo, después el carbón seguirá cumpliendo sus funciones de estructuración de suelos, creación de humus y para retener humedad y nutrientes.
Hasta la próxima...
SALUDOS A TODOS LOS CULTIVADORES... 🖐️👨🌾
Likes
2
Share

@Phaleg
Follow
Howdy,
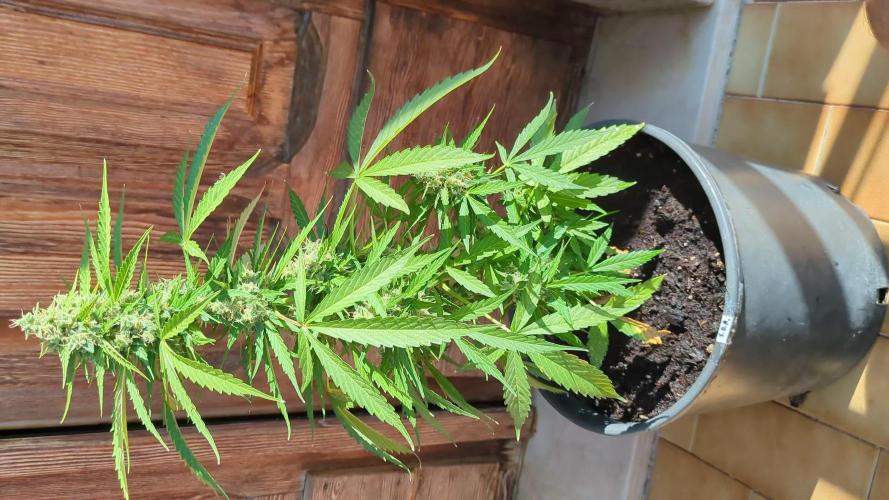
as requested by some fellow followers and growers, I took more media this time, to show the situation better. Photos have been taken in order to show the plant overall, the details of the cola and related tricomes and then there is a 4K video to better see it. I hope that you can like it ^^
Plant kept the same height: 50cm = 20 inches
Temperatures were warm, most of the week above +30° (86F), air was dry and sun was strong.
Plant got water early in the morning and in the evening after the sun.
Please provide a feedback about the maturation of the plant, this should be the 5th completed flowering week.
I am still struggling to understand why this year all the plants sucked so much in size, even comparing with other autos I grew
Last time that I grew a Sticky Orange Auto was my best asset, it came 78cm tall out of clay pot slightly larger than this year, producing 280g fresh and 58g net dry weight.
PS: Why there is no audio in my videos? They are taken with mobile and compressed with DivX converter into mkv pro.
The only big change that I did this year was to follow this advice from YouTube, they explained since auto-flowering plants have a very short living cycle, to avoid the trauma of transplantation, was better to put the cracked seed directly into the soil of the final growing pot.
So I did, because it sounded smart, but results still show a worsening compared to previous years.
Likes
7
Share


@XoticGROW666
Follow
( RUNTZ X F1DURB X GUSHERS )🍬🌈🍨🍧
PURP KICKIN INN END #WEEK4
CANT WAIT TILL THE BUDS SWELL UPP!!
SUPA INTENSE CANDY TERPS THIS ROUND
NOT BIG BUDS BUT SUPA HIGH IN BRIXX LEVEL WITH ALL THE ORGANIC CARBON INPUTS!! PPM 900/1200 1.2 max
(Face Off OG x Watermelon Zkittlez) X (Runtz x F1 Durb x Gushers) 🍉🍬🌈🍧🍨🍦
LIL PRUPLE TINT WIT MOUTH WATERING SUGARY TERPS KICK INN END #WEEK4 BY WEEK 7/8 SHE WILL BE PURPLE PURPLE WIT SUPER INTENSE CANDY MOUTH WATERING TERPS CANT WAIT TILL SEE THEM BUDS SWELL UPP!! PHENO A/B
NOT BIG BUDS BUT SUPA HIGH IN BRIXX LEVEL WITH ALL THE ORGANIC CARBON INPUTS!! PPM 900/1200 1.2 max

Likes
27
Share


@Rock_n_Roll_Randy
Follow
FINISHED THE 2ND WEEK OF FLOWER, THEY REALLY FILLED OUT NICE FROM THE MAJOR DEFOLIATION I DID 3 WEEKS IN A ROW
.SEEDS PUT INTO THE SOIL ON JUNE 22ND
SORRY TO EVERYONE WHO TRIES TALKING TO ME....I STILL CANT TALK TO ANYONE BECAUSE I TRIED CHANGING MY EMAIL ON HERE AND IT MESSED EVERYTHING UP. I CANT LIKE ANYTHING OR COMMENT ON ANYTHING. THE WORST IS I CANT JOIN CONTESTS
STRIVE NUTRIENTS IS THE BEST IVE EVER USED. A MUST TRY AND I BUY IT MYSELF. GOT A SAMPLE LAST YEAR AND ITS SO GOOD I BOUGHT MORE. ITS A 2 PART POWDER NUTRIENT THAT DISSOLVES IN MINUTES AND YOU MIX THE SAME STRENGTH OF THE 2 PART NUTRIENTS FROM WEEK 2 UNTIL THEY ARE FINISHED (BESIDES THE FLUSH), NO MORE BULLSHIT OF SWITCHING TO BLOOM FERTILIZER. THATS MY FAVORITE THING BESIDES THE RESULTS.
CHECK EM OUT AND BELIEVE EVERYTHING YOU READ BECAUSE ITS NO BULLSHIT, AWESOME FRIENDLY AND HONEST PEOPLE
Likes
2
Share


@eldruida_lamota
Follow
Venga familia que ya viene la cosecha de estas Pink Runtz de RoyalQueenSeeds , que ganas que tenia ya de darles machetazo.
No veas que pinta que tienen estas plantas.
Las flores aparte se ven bien resinosas, y con unos tonos muy llamativos.
a sido una genética con la que disfruté mucho cultivarla, es algo complicada cultivarla pero merece la pena si eres cultivador con experiencia no te será problema cosechar.
Hasta aquí es todo , espero que lo disfrutéis, buenos humos 💨💨.
Likes
11
Share


@Eddjack
Follow
Non so perché ma ha questo colorito sul giallo ...non so se è qualche carenza ma è tutto perfetto dal pH all'umidità ... comunque procede molto bene ! Aspettiamo e vediamo che succede