Processing
Likes
Comments
Share
This week i defoliated on day 18 because i have way too many top coming out and too many lowbuds that were getting no light from being covered by layers and layers of leaves. All strains but the og Martian have real tight internodal spacing.
Likes
38
Share
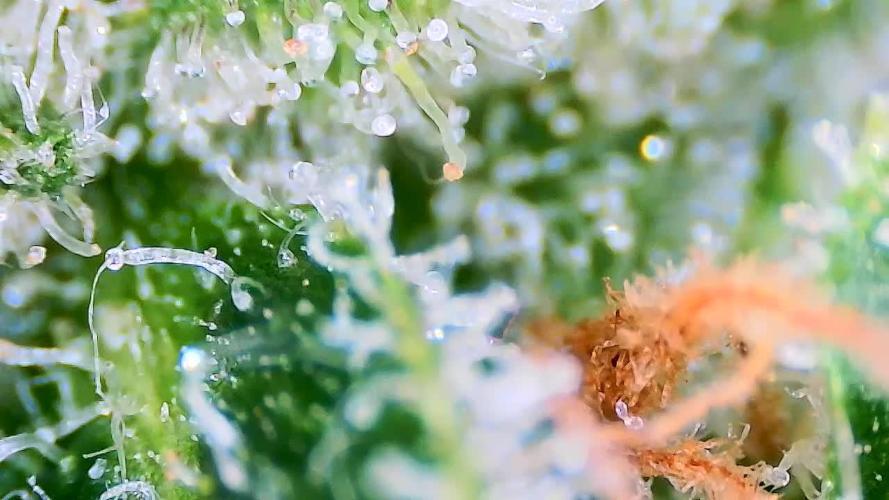
Utopia Haze is a rare heavily sativa dominant hybrid (90% sativa/10% indica) strain created through back crossing Brazilian Sativa strains. This tasty little bud took home 1st Place for Best Sativa in the 2008 High Times’ Cannabis Cup and for good reason – with its potent 18-22% average THC level and long lasting cerebral effects, Utopia Haze is one powerhouse smoke. The Utopia Haze high comes on soon after you finish your first toke, hitting you with a strong cerebral lift that infuses you with a sense of hazy relaxation. Type: Feminised/Photoperiod Cultivation: Indoor/Outdoor Flowering Time (days): 70-75 Indoor Yield (g): Up to 650 Feminised Outdoor Harvest Month: October Feminised Outdoor Harvest Month Week: 3rd-4th week Aroma: Citrus, Woody, Pungent, Mint Effect: Cerebral Lift, Hazy Relaxation, Sleepy Welcome Everyone to the Final Entry of my Utopia Haze Grow ! There is so much to discuss ! I have been extremely busy as of late trying to get this Harvest together, but i am happy to have it here for you now ! I Seriously under estimated the amount of time, help from others, and my own necessary skills to pull this off.. and i still kind of screwed it up lol ! But its worth noting i have never actually done this before and trying to document it during....was extremely hard. It is next to impossible to work an iPhone with rubber gloves on ! First I want to discuss everything step by step so before you jump straight into the comments on how the end product is so small in "quantity" Rest assured i am happy with its"quality"...and thats all that matters to me because Life is a journey not a destination! and i have learned so much from this grow that I couldn't be any happy even if i messed some things up :) But at the very least I hope you read through this entry in its entirety with an open mind and focus more on the process, rather than just the outcome! I ran out of Ice & i was only able to wash three times..(normally I've heard you should go sometimes 5-6 washes) Preparation is Key & things will be much better next round :) Photos 1-22 These are pretty self explanatory but for those of you just tuning in now.. this is what happens to a very happy plant when you don't have the necessary tools to monitor key components of growing cannabis.. Ph, as well as EC levels play a very key role in the outcome of your grow lol that being said I was just able to save this plant by purchasing both tools but that doesn't mean the plant didn't suffer because of the prior events.. This was a Huge reason behind me choosing to turn this harvest into what i would consider "Solventless Hash Rosin" from "Ice water extracted Bubble hash". Pictures 23 The idea here is the process of using "fresh Frozen Cannabis" this has been discussed many a time online on such sites as instagram and here on grow diaries as well.. I personally have Never tried the process so i decided to try it out and make a judgement for myself.. Video 24 The Cannabis has now been in the freezer for 72 hours making it very well frozen.. as you can tell i struggled getting it all into the 25u Screen Wash Bag. One thing of note i would do differently is i will de-stem my next batch as i also believe this played a part in the amount of plant matter that escaped through the sieves. Photo/Video's 25-28 The idea here is "ice water Seiving" & especially with the bags that I am using here that are only have screen material on the bottom portion of the bag it is very important to have spaces in-between the screens to allow the water to pass directly through the screens into the bottom bucket with the least amount of resistance.. because the hash is so extremely temperature dependant if it gets warm on the side of the bag.. it will stick there and not make it to the bottom to become use able product.. 29 You do not need to use as much Ice as i used here lol... the idea is to keep everything very cold..i certainly achieved that but at the sacrifice of using so much that i ended up grinding product and producing "contaminants" but in the end they are just plant matter that i would be smoking when i rolled up my joint either way so.. I'm not super disappointed.. But it should be noted that what you want to achieve here is a Layering effect where you have the wash bag between two small layers of ice while the "water current" washes the Trichomes away allowing them to be separated by the screens setup below :) Before Starting the machine you should allow some time (i.e.;10-12minutes pre soak to allow the product to become saturated) before the first cycle. By video 32 I have just ran out of ice lol.. Video 33-34 Here I have a tip for you.. to separate the screens that you sieve through.. cut 5 gallon buckets to stretch them across nice and tight.. it'll make scooping your Bubble that much easier ! i learned this from the many "Frenchy" videos I have watched :) Picture 35 Here in lays the problem for most people.. drying your hash without loosing vast amounts of "Terpenes" whilst also stay ever vigilant against mold ! Thanks to all those videos I've watched on youtube.. id like to think this was one of my most successful parts of this process.. Things to Note; Terpenes start to seriously evaporate at temperatures 68F or 20C you need to stay as cold as possible whilst bringing the Relative Humidity in the space down into the 40-30% to stay away from that nasty mold ! I used my cold storage room in the basement.. with a dehumidifier running to keep the space at 45% RH & staying at a constant 15c. All while spreading the hash as thin as possible across parchment paper, on top of the white screens with a fan moving air across both sides of the paper. Pictures 36-38 These are some macros i took in the middle of my drying session I fell in love with the colour. Yes i know the black spots are plant material but they will get caught when i bag the hash & squish the oil out. Thing to Note; at this stage it is important to ensure you 'micro plane" the hash down as fine as you can whilst staying weary of the temperature... any "chunks" will hold pockets of moisture.. that lead to potential problems..ie; mold ... Picture/Video 39-41 Successfully planed bubble hash ready to be bagged and Squished ! Picture 42 Ive decided to follow Pedro.. from Pedros Grow Room and double bag to be on the safe side so i don't have any blow outs. So thats One 25u bag inside one 160u bag ! :) Pictures 43 This is almost 3 grams of the bubble hash from above, already melting in the bag.. this is where i ran into trouble again lol things started getting to warm in the house and i was only able to get one of the three squish's i did on video :( things started getting sticky. Picture 44 This is basically just a photo of the equipment I'm using; 3x5 LowTemp Cage in the frame I built myself, with a 20Ton bottle jack. Something to note here is this is an older Lowtemp model with only a single heating zone which is which i have it closed here heating Both sides of the press :) As well as the importance of having adequate pressure on your plates.. my rig is very overkill for the size of hash bags..lol Video 45 Here is the lovely press video.. its didn't quite work the way i wanted either lol my directional folding wasn't quite tight enough for a big "drip" :) &the Press was set to 65°c Photo's 46-50 are pretty self explanatory :) I had a blow out.. but still managed to pull an 80% return from the hash once squished...& yes it tasted amazing :) Was it worth it in the end... that could be debated.. for some..i understand..its not your thing, but for those of us that are interested in making our own concentrates.. free from Solvents... I wouldn't make it any other way :) If even ONE of you reading this diary finds it helpful to reference for ANYTHING.....even if its "what not to do" ill consider it a success ! Thanks again for tagging along on this garden adventure.. its been one heck of a journey ! Much Love from B.C. Canada, Until Next time, Cariboo
Likes
7
Share
@Meksi2790
Follow
still recovering from the nitrogen def will flip into flower next week still feeding ph 6.5 and 800-900ppm
Likes
8
Share
@Pifferson
Follow
This week was fun, had nutrient lockout on the one plant some signs on others. Decided to flush from the top with two plants which is a terrible idea with autopots; the minerals build up in the soil and all I did was wash them down. The plant that was looking the worse had some lower branches die after this so I cut them out. Reached out to autopot and they were a huge help, flushed from the Rez and then brought my nutrients way down. I only just got an ec meter but I was at 3200 ppm when I started the flush and 150 by the time I added nutrients back in. The two plants that I flushed from the top aren’t in great shape but they’re still alive, only 2 more weeks to go so hopefully this didn’t have too much of an impact on quality!
Likes
4
Share
Likes
4
Share
@Franci5
Follow
The plants have finally exploded in growth, the LST is working great for them and they also have giant leaves and stems, I'm excited for these weeks of constant training
Likes
24
Share
@Grnhead
Follow
Update 2/4 (day 25): * Turned the lights back up to 100%. The top of the canopy is getting 50K Lux and they seem to be enjoying it. * Very small signs of flowering in the two smaller plants. Nothing yet from Pineapple Express #1, which was surprising since it's older. * Trimming bigger fan leaves to leave a clear top and bottom to the canopy. * Trying to train the colas to an even distribution and without getting too close to the sides. I am going all in on fewer-but-larger colas to try to boost the harvest. I hope I don't learn a hard lesson by not letting side branching to occur but want to give it a shot.
Likes
11
Share
So I didn't give her the ideal growth conditions to shine but I am very pleased with how she looks and smells. I did grow two of these cake bomb seeds the other being in a 3 gal fabric pot which turned out to be a beautiful male that i did not keep for lack of space purposes. I kept this plant however in a 2 gal clay pot during its entire 6 month life cycle that included roughly almost 4 months of veg followed by 70 days flowering time majority of her life was being cramped in a 3x3 with 6 other plants back when i only had 3 tents. And I wanted to cut her down a few days sooner but my drying tent was behind schedule. A few of my plants were effected by spider mights due to a clone that i had brought home and did not properly Quarantine. I was however very fortunate and lucky to eradicate the problem once and for all 5 weeks after noticing. With weekly ipm treatments of Organisheild (killed mights before flipping to flower with foliar sprays in-between to wash away any contaminates. so now that we have that out the way. But cake mlbomb actually fought the infestation off within 2-3 weeks This plant is very easy to train and responds extremely well without hesitation. Seeing as how thick the colas were for her small stature i would recommend a Scrog style training.Usually seeing tops turned up within a few hours. Stacking is very solid and tight all the way through. No visible stem structure on most tops even lower buds are round dense balls. I did not do any cold flush on this plants night temps did drop to 66-67°f on few occasions and she has a very visible and vibrant purple tone to her buds and leaves a very beautiful hue of royal purple a deep forrest green bud (taking more visual notes when final cure has finished) around day 18 of flower I was noticing trichome resin surfacing and by day 27 tops were full of white pistols and and frost covered definitely indicating the power punch she would soon deliver. Scents that began to develop were of cream and pound cake like aroma which than later developed into a jelly flavored gummy bear when trimmed before being cut to dry. More updates posted after curing has been complete
Processing
Likes
6
Share
@MulzinMo
Follow
4/20 Still having trouble getting seeds to grow! 4 out of 6 seeds from the initial pop have died, so I've popped one more Chemdogging and one more Sour Diesel. Placed the popped seeds directly in the pot they'll stay in for the whole grow per suggestions. Built a 30"x36" trellis out of 3/4" PVC pipe, will install a double trellis netting on it once I set up the Blumat watering system. Also added in a smart power strip that now has built-in timers I can control from my phone. Organized all my extra grow equipment and cleaned up the room! The little pots in the photos are some random seeds I'm starting off in here to give to some friends to grow outdoors. 4/25 - sour diesel popped up today! 5/2 Still no luck getting the Chemdogging to sprout, currently waiting on C-dog and a Blackberry auto to sprout in my other two pots. Set up some random plants from seeds I found in a bag of Black Lime and Cookies, put them in a separate room to flower so I can find out if they're female.
Likes
10
Share
Cepa difícil de cultivar, hay que estar pendientes de ellas cada día.lástima algunas tienden a salir flor macho, no obstante la calidad está muy bien , pegan de miedo. Red hot cookies x cookies gelato Híbrido (50% indica / 50% sativa). Producción Interior: 450/500 g/m2 . Floración Interior: 8/9 semanas z Thc: 25%/28% . Cbd: bajo . Sabor: afrutado y dulce. Altura interior: 90cms- 140cms . -Origen genético de red hot cookies: Tropicanna Cookies (Girl Scout Cookies x Tangie. -Origen genético de cookies gelato: Girl Scout Cookie X Gelato 33 Posibilidad de conseguir flor roja, porcentaje desconocido. Disponible , tirar chat o Dm instagram.
Processing
Likes
30
Share
2018-04-10 Day 1 I gave the girls water and nutrients yesterday so nothing to drink today. Turned them 90 degrees today, to give my girls as much lightexposure as possible. The flowers get bigger and bigger for each day, Overall the ladies look really good, the colors are very nice, they look healthy. Sour Ripper nr 1 is 79cm Sour Ripper nr 2 is 77cm Added some new videos of the girls, check them out 👌 -------------------------------------------------------------------------------------------------- Strain information After much effort Ripper seeds can introduce one of the most appreciated varieties by genetic collectors. They have worked to get one of the few lines of Sour Diesel feminized version preserving the main qualities of a good Sour D: flavor and potency. Sour Ripper has a sativa structure with a wide distance between branches, little foliage and a more compact and desirable bud than the Original Sour Diesel we work. It's flowering period is 65-70 days. The most "undergrown" taste of the United States available for your collection. Vegetative: 1 to 2 weeks Genotype: 60% Sativa / 40% Índica Indoor flowering: 65/70 days. Outdoor flowering: Mid October Yield: Medium / High Effect: Powerful. --------------------------------------------------------------------------------------------------
Likes
9
Share
Likes
18
Share
@Diips
Follow
day 15 shes a bit more ahead than plant nr 1. looking good! day 18 shes also stretching a lot! shes actually the tallest at this moment xD
Likes
2
Share
Still don't know if it's a MALE or female? But I'm excited for my next year grow outside. The climate i live in I didn't think a weed would thrive outside but this one is. Praying it's a female so i can see how flowering stage handles the out doors. Our summer are mild and it gets chilly at night but it seem to be ok with the climate so next year I am going to plant at least 3 outside and see what happens
Processing
Likes
Comments
Share
Flicked to flower 21th June under two 600watts LEDs in bloom humidity 47to53 temperature 20c to 25c will update with pictures on 26th June
Likes
43
Share
@Organic_G
Follow
Blütewoche 5 kam zum Ende / Tag 34 Das Volumen der Blüten hält sich in Grenzen, kann auch mit dem UVB zusammen hängen, aber die Qualität der Blüten ist 11/10, super leckerer Duft, steinharte Knospen und was auffällig ist, das Terpenprofil variiert sehr stark, die oberen Blüten die schon fast maximal reif sind haben eher ein leicht abbauendes Terpenen Profil, von dem Gassy Duft der wie ein Permanent Marker riecht sind die Blüten mit der höchsten UV Exposition als auch Licht Exposition bekommen einen stärkeren Wood Chip Geruch, die darunter liegenden Blüten haben noch den Permanent Marker Geruch… interessant vom selben Pheno Typen verschiedene Terpenenprofile zu erhalten…
Likes
8
Share
Les branches de Purple shine sont assez épaisse même un peu trop, le LST est vraiment galère à faire pour l'instant je vais encore attendre un peu qu'elle se développe plus et j'envisage peu être de supercropped les 4 branches principal une fois plus développé afin de former la base(a voir les prochain jours 🤔) Le 1/05 rempotage de Purple Shine, elle a bien colonisé son air pot 1l passage en 4L géotextile dans un supersoil composé de (lombricompost,guano verre, sang et corne de boeuf sèché, phosphate naturel, zéolite, sel Epsom+ mycorhizines) et terreau covercrop Le 3/5 début du LST , pose de clip lst pour former les 4 branches principal, petit accident lors de la pose des clips un apex c'est bien cassé et ne tien que sur 1mm. Je fait une tentative pour essayer de le sauver mais je doute de résultat 😥. Le 4/5 perte de l'apex accidenté 😮‍💨😥 ce matin la branche avait les feuilles flétrie et la tige recroqueviller, fini pour elle le sauvetage a été un échec😥. Le 5/5 on se relève de cette déception et envisage quelques changements dans le programme pour que cette connerie deviennent profitable😉. Nouvelle taille des apex, on passe à 6 pousse maintenant je laisse un temps de repos à purple shine avant une nouvelle taille je prévoyais 8 apex et au final j'en aurai 12😉🔥. PS: même s'il t'arrive une couille, baisse pas les bras et relève toi, arrange toi pour que cette galère te soit profitable😉🔥
Likes
49
Share
@yan420
Follow
FERMAKOR BARREL MIX – BASE IN USE (Testing on the Fantasy Feast girl we pulled out of another diary https://growdiaries.com/diaries/274722-grow-journal-by-yan402 ) (FERMAKOR BASE SYSTEM KOH VERSION diary https://growdiaries.com/diaries/278391-grow-journal-by-yan402) (Urea & Micros on the way — first week running without them) 🍶💧🍶💧🍶💧🍶💧🍶 💧 30 L Barrel – Current Working Mix 🍶💧🍶💧🍶💧🍶💧🍶 Step 1 – Calcium Nitrate (Part A) 7 L warm water (~35–40 °C) → added 45 g Calcinit, stirred until fully clear. That’s the calcium + nitrogen backbone for the feed. Step 2 – FERMAKOR PK Base (Part B) 15 L water in the main barrel → added 30 ml FERMAKOR PK Concentrate, mixed well. This forms the main P + K part of the formula. Step 3 – Combine Solutions Slowly poured the Calcinit mix into the barrel while stirring — no reaction, still crystal clear. That confirms the mix is stable and precipitation-free. 🌿 Step 4 – FPJ / FFJ Batch Added 30 ml homemade FPJ (fish + veg batch) ≈ 1 ml/L. Color shifted to a light-amber tone — looks alive and active. 🍋 Step 5 – Citric Acid Balance Added 1 tsp citric acid after everything was blended to fine-tune pH and help chelate micros later on. 📦 Step 6 – Top Up & Check Filled to the 30 L mark with plain water → pH tested with drops, showing yellow-green — roughly 5.8 – 6.0 range. Nice clean look, stable smell, no residue. 💧 Current Base Ingredients (Active Mix) Warm Water ≈ 22 L total Calcinit 45 g → N + Ca foundation FERMAKOR PK Base 30 ml → P + K support Citric Acid 1 tsp → Chelation + pH balance FPJ / Fish Emulsion 30 ml → Organic enzyme booster Result: clean amber mix, mild and balanced. I’ll let this version run for a week before adding anything. 👀👀👀👀👀👀 Observations and changes 👀👀👀👀👀👀 27.10.25 VW27 noticed some min burnt tips so I decreased Calcium Nitrate 45 to → 40g, decided to add two more elements micros and Epsom salts just to make sure they got everything, Fetrilon Combi 1 (Micros): 0.5 g, Epsom salts: 8 g 28.10.25 VW27 she seems devoid of any deficiencies, seems ready for the flip to 12/12 02.11.25 VW27 girl is looking good so I decided to stop making daily videos and do a standard once a week update. 09.11.25 aVW28 7 days since flip,stretch in full swing, first pistils showing, leaf color deep and healthy. Slight tip burn early week → gone after pH stabilized. Feed stayed clear, no residue, roots clean and sweet-smelling, did what I hope is a last cleanup and pruning🎥 10.11.25 VW29 added Phosphoric acid pH down to the schedule for flowering stage. 14.11.25 FW1 FERMAKOR PK Micros 40 → 50 ml 23.11.25 FW2 got some burnt tips, observe and act accordingly in case it worsens, diluted by 25% for this week. 05.12.25 FW3 about 2 weeks ago Calcium Nitrate 35 g → 25 g, FERMAKOR PK Micros 50 ml → 60 ml 🌱💦🌱💦🌱💦🌱💦🌱💦🌱 🌿Day to day tasks & actions 🌿 🌱💦🌱💦🌱💦🌱💦🌱💦🌱 30.11.25 FW2 – Fed 5l of #1 → 2l runoff 01.12.25 FW3 – Fed 5l of #1 → 2l runoff 02.12.25 FW3 – Fed 5l of #1 → 2l runoff 03.12.25 FW3 – Fed 5l of #1 → 2l runoff 04.12.25 FW3 – Fed 5l of #1 → 2l runoff 05.12.25 FW3 – Fed 5l of #1 → 2l runoff 06.12.25 FW3 – Fed 5l of #1 → 2l runoff 07.12.25 FW3 – Fed 5l of #1 → 2l runoff 💧💦💧💦💧💦💧💦 🌱 Nutrients in 30 L #1 Veg – FERMAKOR 💧💦💧💦💧💦💧💦 Calcium Nitrate (Calcinit / Nitcal): 45 → 40 g → 35 g → 25 g = 1.50 g/L → 1.33 g/L → 1.17 g/L → 0.83 g/L = 207 ppm N / 253 ppm Ca → 184 / 225 → 161 / 197 → 115 / 141 PK Concentrate (FERMAKOR Base): 30 → 40 ml → 50 ml → 60 ml = 1.00 → 1.33 ml/L → 1.67 ml/L → 2.00 ml/L → balanced 1:1 P:K + light micros (from extract) Home-made FFJ/FPJ (Fish + Veg): 30 ml = 1.00 ml/L Epsom Salt (MgSO₄·7H₂O): 8 g = 0.27 g/L → ~26 ppm Mg + ~35 ppm S Fetrilon Combi 1 (Micros): 0.5 g = 0.017 g/L → Fe 0.7 ppm · Mn 0.7 ppm · Zn 0.3 ppm · Cu 0.3 ppm · B 0.1 ppm · Mo 0.02 ppm Phosphoric Acid (pH down) + Citric Acid (chelation): as needed → First set pH with phosphoric acid, then add a little citric only if you want extra chelation Target pH: 5.8 – 6.0 (drop test yellow-green) 📦 TOTAL: Liquids: 60 → 70 → 80 → 90 ml per 30 L = 2.00 → 2.33 → 2.67 → 3.00 ml/L Solids (CaNO₃ + Epsom + Fetrilon): 53.5 → 48.5 → 43.5 → 33.5 g per 30 L = 1.78 → 1.62 → 1.45 → 1.12 g/L 💧💦💧💦💧💦💧💦 YouTube Link: https://youtube.com/-m8h?si=A7x4Zlr2kj-_ga31