Likes
Comments
Share


@shwable
Follow
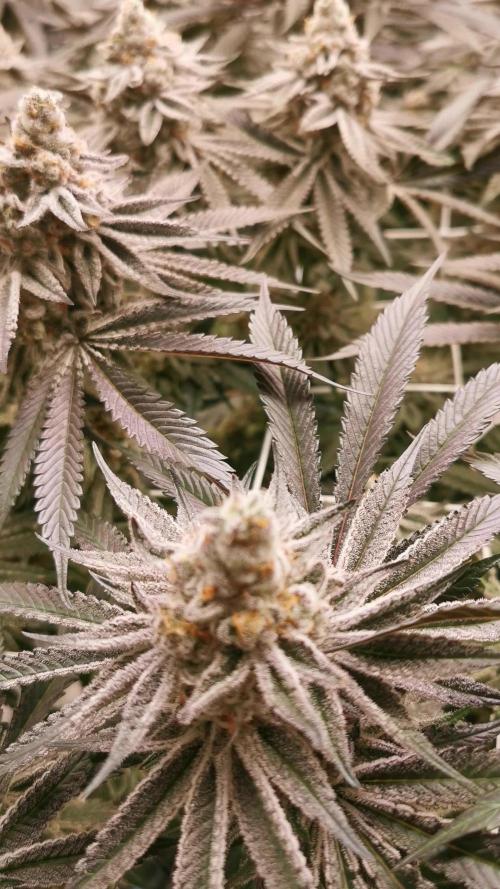
Everything looking fine so far.
I gave them a little amount liquid grow enzymes with distilled water on 19.04. what seemed to boost the growth.
If You have any tipps or recommendations feel free to let me know.


Likes
35
Share


@farahweed
Follow
#Day 123
#Week 6 flowering 💐
Oh my God, it's the 6th week of flowering
The smell of children is crazy.
This week I used advance hydroponics overdrive supplement at the rate of 2 mg/liter because it is really high quality.
Thank you for your comment🙏🙏🌷🌷


Likes
15
Share


@Bread_n_Buds
Follow
Our Tangerine Dream by Zamnesia is one of the photoperiod plants that is holding up best to main lining, the branches are stretching and growing very very well.
** Remember that we are growing a plant worked with the techniques indicated and another left to grow without pruning to preserve its speed; in the previous/next diary you will find the other plant of the same variety.
We are in a 100% organic configuration, the soil is recycled Promix + 1/3 fresh soil + 10% Perlite + RQS Mycorrhizae Mix (4 g in the mix, 1 g under the small fiber pot).
We switched to the advanced flowering program a couple of days ago but last week we still did not give any green sensation. We fertilize with: // 1 ml/l Sugar Royal - 3 ml/l Alga Bloom - 1 ml/l Power Buds - 1ml/l Green Sensation
All nutrients are available from Zamnesia: https://www.zamnesia.io/it/531-growshop/476-fertilizers
We always have the excellent mycorrhiza from RQS running through the soil. https://www.zamnesia.io/5778-mix-micorrhiza-easy-roots.html
Taste this strain a little bit, it's a cross of legendary strains ---- // https://www.zamnesia.io/en/10966-zamnesia-seeds-tangerine-dream.html
Short Description Zamnesia // When legendary genetics are crossed, something exceptional can only be born. Tangerine Dream is the result of crossing classic strains. With citrus and sweet aromas and flavors, vigorous growth and euphoric and stimulating effects, Tangerine Dream by Zamnesia Seeds has it all. But don't take our word for it: order your seeds now and discover it for yourself.
You can find the whole world of growing at Zamnesia and much more take a tour of the site and you will find "all the best that nature has to offer" in various shapes and colors.
The whole world of growing and more is at Zamnesia: just take a look at the site and you will find "all the best that nature has to offer" in various shapes and colors.
The new strains are fantastic and the old ones are no exception...
-- // www.zamnesia.com

Likes
9
Share





Likes
19
Share

@broccoleee
Follow
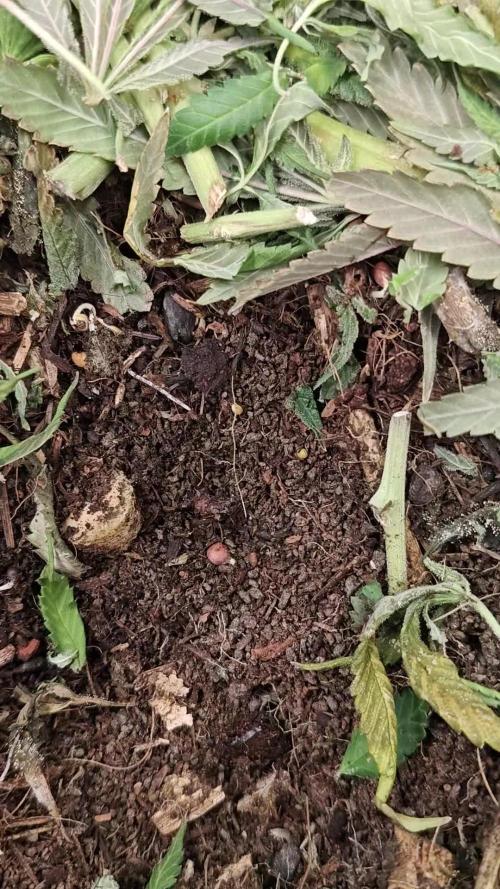
- wurden vorgestern eingesetzt
- schaut jetzt alles noch ein wenig karg aus aber man kann auch schon langsam das Cover Crop wachsen sehen
- Temperatur ist bei ca. 25°C, VPD ist auf 0,9- 1,0 ca und Licht ist erstmal auf 230 - 250 PPFD eingestellt
Zum Beet:
- Ca. 120 Liter Beet
- Schwarzerde von Sonnenerde im 4. Run(nach 1. Run 7-10 L frische Erde aufgefüllt), unten grober Bims zur Drainage und feiner Bims im Substrat als Wasser-/Nährstoffspeicher, Regenwürmer, Asseln, Springschwänze bzw allgemein Nützlinge, Bokashi, IMO
- Bisher wurde auch alles was von Pflanzen im Beet abgeschnitten wurde, einfach wieder hinzugefügt um Nährstoffe zu recyclen, mal schauen wie lange es anständig funktioniert ohne Reamending
- Almicanna Cover Crop Mix + Mulch/Pflanzenreste vom letzten Run
Processing
Likes
32
Share


@maddog767
Follow
week 4 just trying to get them going , i put them in bigger pots the change the soil to,,,,,royale mix plogron..,hopefully they have the hight i want them at in week 6 if not,i myte go 1 or 2 more weeks witch will come up to 7 or 8 weeks veg...i learn others weekly grow an now i found my main problem witch was heat with the t5 8tube, so now am using ,,,,,600w marswell LED with a 250w cfl,,,,,so road to week 5 let see if i can get some more healthy grow,,,,,,,FEEL FREE TO ASK ANS GIVE COMMENT ON GROW....😉👊💪😎👊👌👉

Likes
11
Share

@Bread_n_Buds
Follow
This week I present the HARVEST of GODFATHER OG Autoflowering #1. The second plant is another monster, and I'll introduce it to you shortly.
The plant has a slender appearance, due, as mentioned, to a longer-than-average transition period between vegetative growth and flowering. It almost seemed like it wouldn't flower, but then, perhaps due to genetics or the addition of Power Buds to stimulate initial growth, the plant produced beautiful flowers, nice height, and a good overall result.
This plant's flower is a bit airy, but not bad at all.
Pot and Soil - This plant was grown in a 20-liter airpot with Plagron BiloLight Mix organic soil.
Lighting - A Zamnesia Phytonaut 480W LED lamp, used from mid-flowering onward, allowed fruiting. We achieved a PPFD (photosynthetically active photon flux density) between 800 and 1200 μmol/m²/s, with cycles of 24, 23, 20, and finally 18 hours.
Z https://www.zamnesia.io/it/14526-lampada-led-per-coltivazione-phytonaut-480.html (National link in case Google doesn't work)
Growing system: Zamnesia Ecosystem, fan, extractor, and grow box, all made by Zamnesia.
Trichhomes: We let the plant mature longer than usual to bring out its indica characteristics; this time, there are numerous amber trichomes and beautiful red-tipped trichomes.
Feeding: Grown with Plagron Official, a 100% organic base fertilizer, and all recommended additives.
Visit www.plagron.com for grow cycle calculations, product selection, and general information.
All nutrients are available on the Zamnesia website. Also check out the live substrate and the fantastic new Zammi product line.
You can find this excellent strain here:
https://www.zamnesia.io/en/11102-blueberry-crumble-auto-zamnesia-seeds-feminized.html
(Google it if the link doesn't work; it's a national link)
You can find this excellent strain here:
https://www.zamnesia.io/it/14330-godfather-og-auto-zamnesia-seeds-femminizzata.html
(Google it if the link doesn't work; it's a national link)
Terpene // Caryophyllene, Myrcene, Limonene
Parents // Alpha OG x XXX OG x Ruderalis
Genetics // 60% Indica / 40% Sativa
THC // 26%
CBD // 0-1%
Climate // Mediterranean
Resistance // Mold Resistant
Taste // Aroma // Sweet, Fruity, Spicy Pine Diesel
Effect // Relaxing, long-lasting, body high, calming
Zamnesia Description - Godfather OG Automatic by Zamnesia Seeds is the autoflowering version of one of the most potent OG strains on the market. With 26% THC, a rich terpene profile, and a full flowering cycle of 9-10 weeks, this indica-dominant hybrid is ideal for growers seeking fast, aromatic, and intense results without compromise.
Godfather OG Auto is the result of a cross between Alpha OG, XXX OG, and Ruderalis. This blend retains the potency of the original OG while incorporating the speed and autoflowering potential of Ruderalis. The 60/40 indica-sativa balance ensures fast and reliable yields.
Every hit delivers the classic OG bouquet: sweet fruity notes, fresh pine, wood, and a subtle diesel aftertaste. The smoke is dense, aromatic, and satisfying, perfect for lovers of bold, complex flavors.
Compact and discreet, Godfather OG Automatic is perfect for small spaces, balconies, or grow tents. Indoors, it can reach a height of 100 cm with yields of up to 450 g/m², while outdoors, it reaches 120 cm with a potential yield of 150 g/plant. All this in just 9-10 weeks from seed to harvest, with feminized seeds for maximum reliability.
"The best that nature has to offer"
www.zamnesia.com
Likes
21
Share


@BudsBanditUK
Follow
Now being flushed and ready to be chopped in a few days. Plant smells amazing and has put on loads of weight. This will be a very interesting one to smoke.


Likes
Comments
Share

@Simba732
Follow
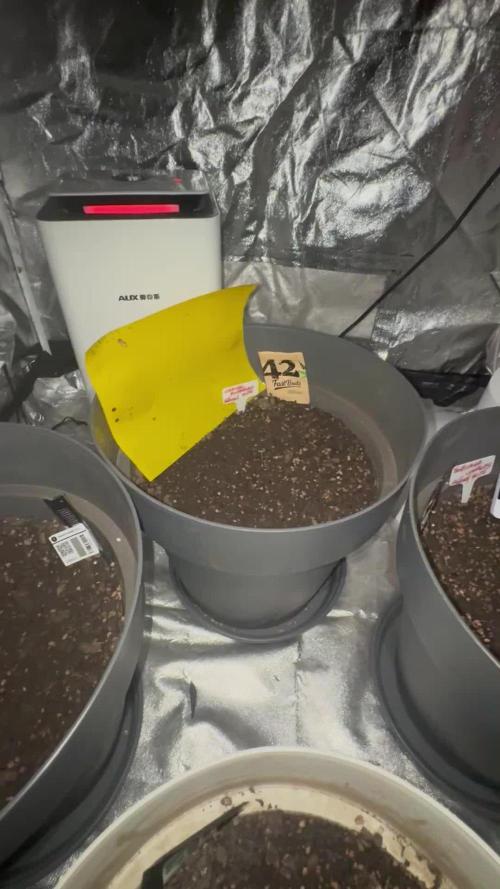
🔹Welcome to my Original Blueberry Auto grow diary from Fastbuds.
🔹She’s one of the strains featured in this season’s lineup.
Germinated using the glass-of-water method for 3 days, starting August 10, 2025.
🔹Placed into soil on August 13th.
🔹She sprouted with slightly munched / chopped cotyledons… uhmm 🤨
🔹I’m hoping there aren’t any mites or pests lurking in the mix or tent that could harm our seedling.
🔹Happy growing 💚

Likes
13
Share


@Megaprezoni
Follow
So this is my first grow ever.
I planted directly in substrate and watered with nutrients directly.
I water every 2-3 days. I have watered 3 times till now day 8.
Are my seedlings healthy? is my grow normal?
I water until the coco is completely wet, as soon as it starts to runoff i stop. Should i always let runoff water more?
Thank you.
Likes
7
Share


@LittleBigTrees
Follow
Only giving them water so far.
The mimosa cuttings are taking being cloned really well.
Likes
12
Share


@GeekSayWhat
Follow
Started documenting this plant a little late, apologies. Everything is going great though... started LST just after week 2 and she has a nice flat canopy. I can see 8 or 9 flowering points all nice and even.
Likes
48
Share


@Theia
Follow
I am very happy with the Chiquita Bananas in the end. Clones were total seed factories but I think we may have a go at making some hash with those as the foot long buggers are caked in crystal.. 62g and 63g .
Plant 1 is just a monster for me 365g wet. Long dense buds thick dank smell of tropical sweets. Not as much seed as I thought there would be so glad I was convinced to push her a bit more.
Plant 2 is smaller but has taken a pure turn in the last week.i don't think she was stressed at Al. I did switch to just water for last 10 days but apart from that I dunno. I don't think she has any thing with pure in her genetics but either way she looks beautiful. 169g wet from her.
Everything is drying for the next 10 days when I shall report back.
Happy grows.🌿🌱👊
Stay safe.😷

Likes
4
Share


@805homegrown
Follow
Everything is still going good for this week just giving 6.2 PH Tap water with a bubbler for 24 hours before I fill my Reservoir.
July 2 when my lights came back on at 5pm I decided to Defoliate these two girls and add a ScrOG net for some extra support and some tucking for the leaves.
July 6th last day of week 8
I took the other two plants in the back out of the tent today so I can flip these to 12 on 12 off.

Likes
27
Share


@cheetah844
Follow
She's staying shorter, that's her genetics -good old NL. Very excited for the strain, the flower that I currently have is my favorite smelling strain ever. I hope this phenotype smells like that. It's one of those strains that you keep smelling over and over again, it just keeps luring me back with that beautiful smell.

Likes
2
Share