




Likes
112
Share

@Kushycat
Follow
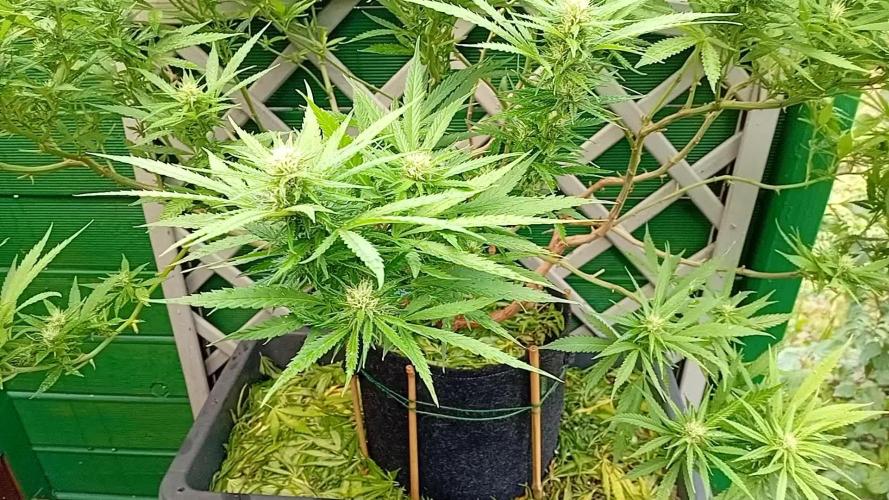
Edward Scissorhands was in the garden and let the scraps fly. Way to go, Edward! He did a great job—leaving plenty of space between the shrubs and neatly placing the clippings on the ground to encourage beneficial microorganisms in the soil.
It looks as if the entire planter, with the pot on top, is one single root ball. I’m curious to see what it’ll look like when it’s fully grown.
Here’s hoping for a golden October! 🌿🍂

Likes
33
Share


@Ksouth1
Follow
This was a simple grow. She uses more cal-mag than anything I have grown before. Likes small doses of nutrients and reacts well to training. Will update when she is dried and ready to jar!



Likes
18
Share


@Luca90
Follow
Week four was definitely the week when the plants started to really grow bigger, I started some LST at my way cause even if I check thousands of videos I end it up doing what I thought was better for my plants, I perhaps was a bit late so it wasn’t stretching as I thought it would have, maybe I shouldn’t have wait this long, but again first time learning a lots.. I let the plant grow with LST only in week 4 in week 5 I introduced a scrog I made myself cause I thought that I couldn’t keep doing lst because I started too late
Likes
12
Share


@Alice_in_Wonderland
Follow
Day 15 - The new week meant a change of water, nutrients and an adjustment of lights.
Chong is looking like a short, but sturdy little seedling with broad fan leaves and big roots. Max is 10cm vs. Chong at 7cm and her leaves are perky and the stem is thick. They both look good for their own individual reasons. Looking at the roots specifically, Chong seems to be facing similar problems as Cheech in the Cookies Gelato grow - the aeration in the bucket appears to have “dead zones” because of the colour the roots and the manner in which they are sticking together. I’ve adjusted the air stone to be more central in the bucket and cleaned the air tubes because the nutrients stick on the tubes.
Other than that, I’ve controlled the PH back down to 6.0 after the addition of the nutrients using the Milwaukee PH controller and decided not to adjust the height of the lights because there was only about 2cm growth this week.
Also added the first wire to give Chong a bit of a better bend in her stem, gently starting off the process of LST.
Day 20 and the ladies are getting closer to topping. Both are showing clear third nodes with the fourth node opening up. I am sure we will be topping during this next week of veg.
Likes
3
Share


@ThitPinGyi94
Follow
The plant's buds are showing more pistils, and the aroma has become quite fragrant, a creamy scent. Trichomes are now visible on the leaves. There hasn't been any significant increase in fertilizer this week; I've only doubled the amount of fermented banana peel liquid. I also did some foliar feeding with a light spray of fermented banana peel liquid. The daytime temperatures are very hot, and the humidity is low. I've noticed a few whiteflies, but the plant's strength is good, so it's not a major issue. Airflow is also good, being outdoors. The UV index has been between 7 and 8 this week.
Likes
6
Share

@Dottgreenthumb
Follow
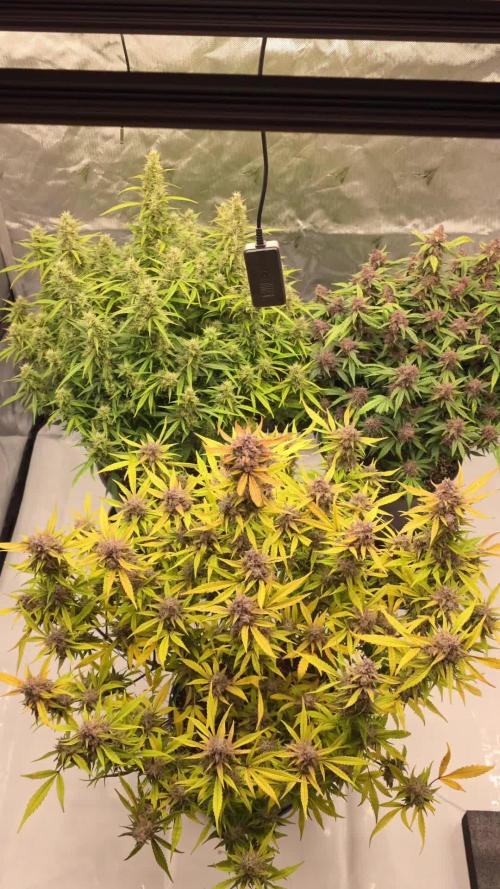
95 giorni la papaya cookies è quasi pronta al taglio run off 0.4 ec
Lo strain banana purple puch rf3 Inizia oggi il flush
La gelato ancora un altra settimana di fertilizzazione
Likes
5
Share

@Patres
Follow
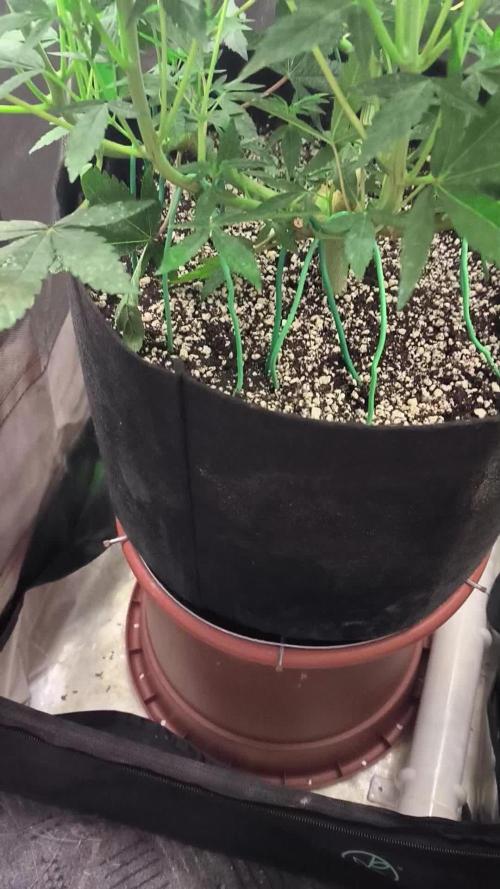
K.onec 2. týdne květení. Holka se stále vytahuje, ale není to žádný extrém, snad to bude akorát. Plán na snižování vlhkosti mi moc nevyšel páč poslední týden pršelo, tak sem aspoň zvýšila teplotu. Vpd teď držím kolem 1,2-1,4kpa. Někdy příští týden přijde na řadu defoliace

Likes
7
Share

@eldruida_lamota
Follow
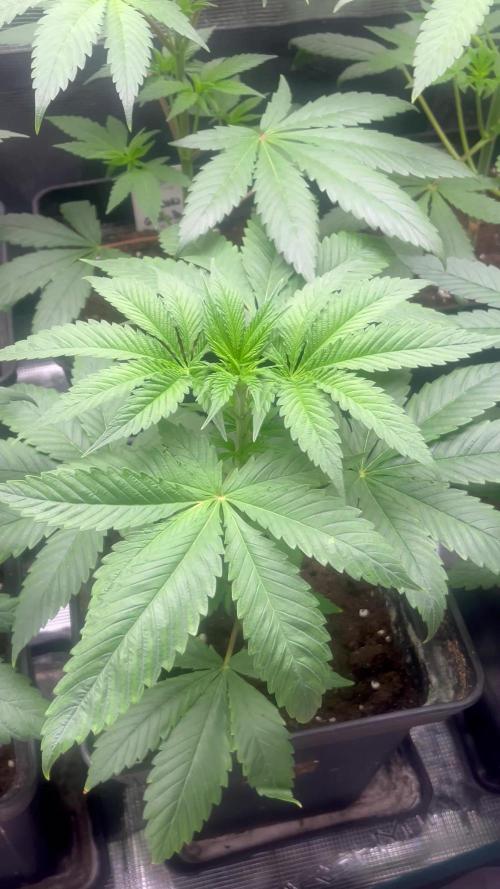
Que pasa familia, vamos con la quinta y última semana de crecimiento de estas Green Gelato feminizadas de RoyalQueenSeeds.
Vamos al lío ,se trasplantaron en macetas de 7 litros definitivamente.
El ph se controla en 6.0 , la temperatura la tenemos entre 24/20 grados y la humedad ronda el 50%.
El ciclo de crecimiento puse 16h de luz, el foco está al 50% de potencia.
De momento van creciendo a buen ritmo y tienen un buen color, estaban muy bien enraizadas al realizarle el trasplante se notaba la abundancia radicular, también aplique tetra 9 de manera foliar.
Agradecer Agrobeta por el envío del kit gold series en cuestión, unos maestros 🙏
- os dejo por aquí un CÓDIGO: Eldruida
Descuento para la tienda de MARS HYDRO.
https://www.mars-hydro.com
Hasta aquí todo, Buenos humos 💨💨💨
Likes
9
Share


@LooseLipsSinkShips
Follow
Producing more resin now colas are starting to fill in
Typical jack herer fuel smell coming from them
Buds look quite light green at this stage
EC 1.5
Coming up to the half way mark on a 10 week strain
flowered early at 19 days of light after germination
Normally plants flowered that have received fewer than 30 days veg tend to look a little bit behind schedule until week 6 to 7 when they catch up
So far the SH pheno & the Fire OG are maturing at a standard rate at 35 days of flower they look like 28 to 30 days worth of flower development
I expect this to catch up by day 45
at day 45 they should look like a standard 45 days of flowering development
The slow phenotype has only been allowed a little bit of space this one looks like a 12week + plant
I will only allow it 10 weeks it's too small to be worth waiting for her to finish
Day 37 Removed some leaves at the middle of the canopy to help with light penetration
Day 39 resin production and colas filling in has increased significantly over last few days starting to smell like pine along with the fuel no citrus smell

Likes
5
Share


@Bread_n_Buds
Follow
Our King Louis Automatic are truly those plants with a great desire to grow, the one in main lining is perfect.
Remember that we are growing 1 Plant worked with the techniques and one left to grow without cutting techniques to preserve its speed.
In this diary we find the plant that is growing normally, nice and straight just with a little cleaning and LST at the bottom only on the branches and not on the main stem. The plant had a moment of over at the end of the vegetative phase when it was time to move into flowering it had a manifestation of rusty spots on the sunbathing leaves but now at the beginning of flowering everything seems fixed. In my opinion it is a lack of K but yes
The comparison is the salt of the experience so the plant in the other diary will be worked very differently go and see it to compare them.
We have started the Plagron fertilization program, we are in 100% organic configuration, the soil is recycled Promix + 1/3 fresh soil + 10% Perlite + RQS Mycorrhiza Mix (4 g in the mix, 1 g under the small fiber pot).
We are administering // 1 ml/l Power Roots - 1 ml/l Pure Zym - 1 ml/l Sugar Royal - 3 ml/l Alga Grow
We have sprayed Vita Race Foliare 3 ml/l.
https://plagron.com/en
The doubts about the compatibility between Pure Zym and mycorrhizae have been dispelled, they can get along according to Plagron experts. If someone tells you that enzymes eat mycorrhizae, which in principle may seem possible, explain to them that it is not true.
https://www.royalqueenseeds.it/growing/452-easy-roots-mix-di-micorrhize.html
Love this strain perfect for main lining! ---- https://www.zamnesia.io/it/11238-zamnesia-seeds-king-louis-automatic.html
Brief description of Zamnesia // Say hello to true royalty with King Louis Auto, an autoflowering version of the original King Louis. Bred from OG Kush, LA Confidential and a premium ruderalis cutting, King Louis Auto delivers premium bud fit for a king just a few weeks after germination. As if that wasn't enough, her small size and vigor make her great for almost any grow environment. Incredibly efficient
King Louis Auto has inherited the best traits of her photoperiod cousin, all wrapped up in a fast and easy-to-grow seed. With good soil and adequate watering, King Louis Auto seeds will quickly grow into robust and vigorous plants. Once fully mature, these plants will not exceed 80cm indoors, meaning they can easily fit into even the smallest of grow spaces. Likewise, outdoor plants will only reach 100cm, making this strain ideal for guerrilla grows or other environments where discretion is key. And if that wasn't enough, King Louis Auto only takes 9–10 weeks from germination to harvest, after which she'll reward you with yields of up to 300g/m² indoors and 150g/plant outdoors. With its pungent terpenes and high THC levels, King Louis Auto offers a fragrant and relaxing experience. When you open your jars of buds, you'll immediately notice intense scents of pine, damp earth and fragrant wood. After inhaling her equally complex smoke or vapor, you'll be hit with a deep, relaxing body stone that's perfect for those moments of well-earned rest and relaxation. With 24% THC, King Louis Auto hits hard and takes effect within minutes, working every muscle in your body to relax. Perfect for evenings, weekends or any time you want to unwind. Buy your seeds now and experience the king of sweet strains.
You can find the entire world of growing on Zamnesia and more, just take a look at the site and you will find "all the best that nature has to offer" in various shapes and colors.
The new strains are fantastic and the old ones are no exception...
--- // www.zamnesia.com

Likes
7
Share


@ChitownCannaChica
Follow
I have to water this plant a ton! Hard to get the water to seep in.
Going to be a tough one!
Probably will start with low dose nutrients soon

Likes
1
Share

@Drtomb
Follow
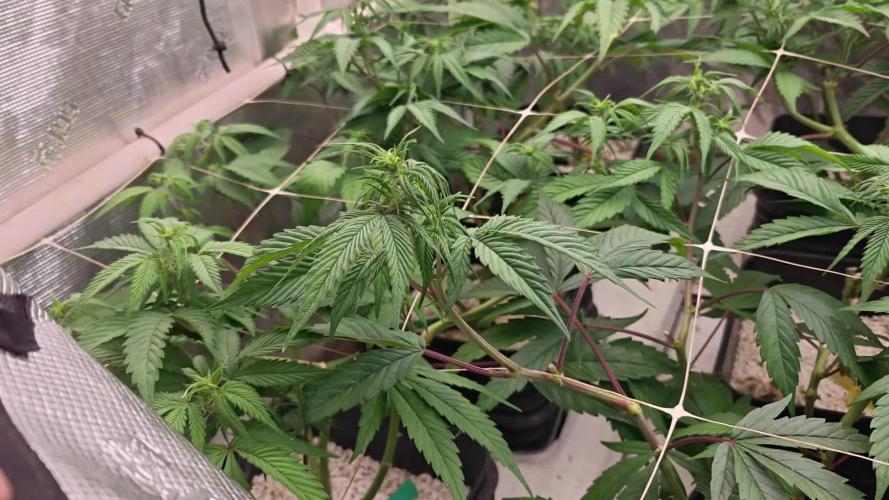
Just flip these plants about 3 or 4 days ago. Had some bud trainers on the branches to get them down a little bit lower is this plant tends to stretch. We should see some nice Frosty buds in a few weeks . Stay tuned and tune in

Likes
470
Share


@PurpleWorship
Follow
Day 8 : Still watering a small amount everyday, before lights turn off. No nutrients, only my lentils juice, to help roots production.
She show no deformation, leaves have a perfect shape. That's something i was used to with auto ^^ She is a bit too tall in my opinion, but she's not stretching anymore. Good.
Still planning to add dirt on the top, to simple solve this. She Spend day outside, the weather is still perfect.
Likes
2
Share

@GREENPHOENIX6262
Follow
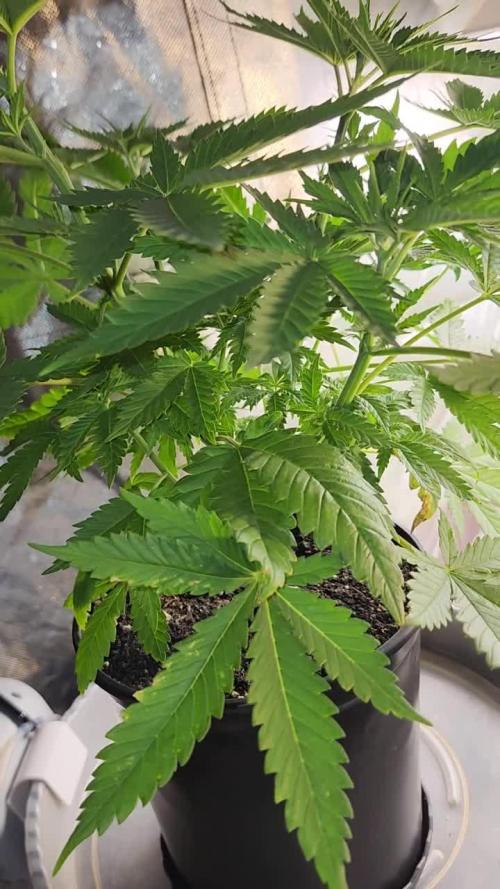
02/23 - Week 3 Veg - Did some light defoliation on her inverted leaves mainly in the middle of the plant - She has definitely blown out some, will have to apply some LST on upper canopy sometime this week - Nute/Clean water feeds have become more frequent alternating once every 2 days.
Likes
37
Share

@Bread_n_Buds
Follow
Disclaimer: This is the second plant go back a week to see a purple wonder full of fantastic trichomes that you can't miss.
Let's be clear this Slurricane is a masterpiece of genetics, this time in a "normal" green color but still full of yield and with very high quality buds. It seems once again to be in California with Snoop making Bluntz of Slurricane.
Technique used // In this case we only cleaned the plant at the bottom and let it grow free and happy to preserve the main cola.
Better with the techniques or normally? This time we have two very different phenotypes, a plant with medium internodal distance. This time I prefer the purple plant worked with the techniques is breathtaking.
Flower quality // From one to 10 stars 10. The plant has an abundant resin it really seems to see the best Californian flowers. I'm not kidding. They are combative flowers, they will probably go to some competition, so we washed the buds. If you don't know how to do it, there is a great article on Zamnesia.
Read the article in your language // https://www.zamnesia.io/it/guida-growing-cannabis/333-lavaggio-delle-ceme
Fertilizzanti// I am quite satisfied with how I managed to clean the plant, I did two big flushes of 50 liters and let it run and then just watered for a few days. It discolored a little but it was time to harvest, I gave 52 hours of darkness.
For the reasons mentioned above and for a great taste I prefer organic. All Plagron fertilizers and additives in the green/100% organic version have fully satisfied me. Choose the soil based on your style and calculate the sheet on the website www.plagron.com -
Brother, if you are a stubborn "I don't put anything in it" type, use additives, listen every now and then... and then come and tell me.
Fertilizers, on the other hand, are available in convenient all-inclusive packages on the Zamnesia website.
This strain is truly exceptionally Californian; usually plants bred by Europeans don't look that Californian, not this one.
--- https://www.zamnesia.com/11177-zamnesia-seeds-slurricane.html
Zamnesia Description // Slurricane is a premium US strain, created by In House Genetics and now available to all growers thanks to the breeding processes implemented by Zamnesia. Born from the fusion of Purple Punch and Do-Si-Dos, Slurricane is 60% indica and is incredibly vigorous. Whether indoors, outdoors or in a greenhouse, this strain is capable of producing large quantities of dense and aromatic buds. Add Slurricane to your assortment and enjoy growing one of the most beloved hybrids in the United States.
Slurricane seeds quickly produce very robust specimens with an extraordinarily solid structure. Vegetative plants develop a massive stem, with large fan leaves and a tight internodal spacing. Thanks to their resistance and thick foliage, they are ideal for training techniques.
Opening a jar full of Slurricane buds will make your mouth water: this strain produces dense, fragrant and resinous buds that will win over even the most demanding cannabis enthusiasts! After curing, the flowers retain a marbled texture, with sparkling trichomes covering the inside and outside. The aromas are sweet and spicy, with clear notes of berries. With 28% THC, Slurricane produces a vigorous effect. Consuming it in the evening hours will make you feel pleasantly numb on a physical level and enveloping vibrations, useful for promoting sleep.
Music and Frequencies // For about 4/6 hours a day my plants listen to 432 Hz frequencies created specifically for their well-being and, sometimes, a little black music to give them those vibrations that only music can give. www.radionula.com
All the best that mother nature has to offer is on ---- www.zamnesia.com
Likes
4
Share


@GeminiCQC
Follow
I'm expecting at least another week on the hubba bubba as it's getting nice and thick, and I haven't noticed any new pistols form in a few days. The ABxRKO is still trucking, and it makes me excited for the next drop that tree1four did. It smells heavy on the burger side, but not super meaty. It has a slightly sweet gassy meaty smell to it.

Likes
1
Share

@rommyu
Follow
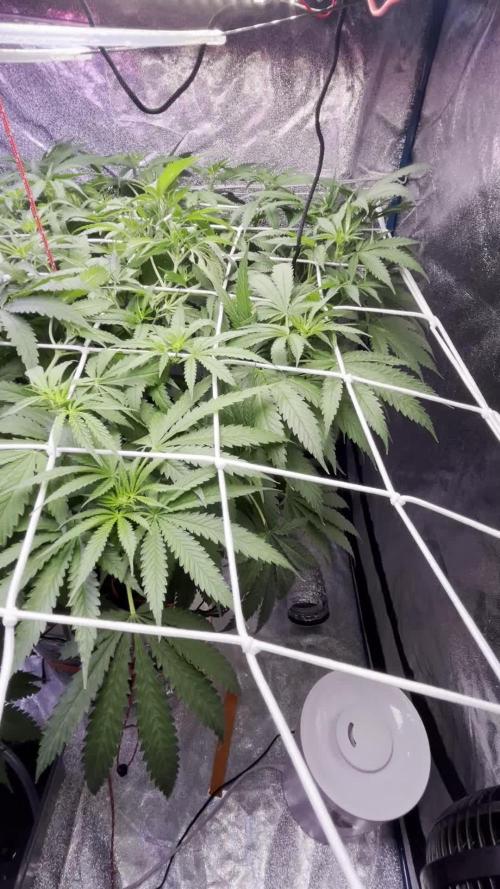
Lots of issues at the moment, issues with not knowing if I have a deficiency or if the plant is progressing along. Yellowing leaves - should I let them falls off? should i remove them to prevent their getting infected and infecting others?.
Outside temp is around 30-32 degrees making my ice pack on the pot side solution insufficient to keeping the temperature stable. Lots of tucking and the canopy is reaching 1m2 and the roots are so massive they fill the bucket completely (15L).
They smell fresh and It feels alive, the smell the energy coming off the microbes, beneficial bacteria and mycorrhizza, like smelling a flowing river teeming with life.
I didnt train the stems properly (i wanted more horizontality).. Which is causing the issues I have now. But in the old tent (which was 2x2 feet 60cmx60cm) they would touched the wall and created other issues, I hadnt decided yet where i wanted to put it next (120x240cm or 60x120cm).
Im learning alot about electrical conductivity (ec) and also about how my plant responds to concentration of fertilizers and helpers as suggested by the manufacturers recipe.
I have branches in the front that are not growing to the ideal height, im just tucking and tucking the others hoping they catch up.
also the light ppfd is up to 1000. and the distance is about 250cm.
Im hoping to get at least 350grams of dry bud, and if im lucky maybe even 500!.
I plan to do the same exact grow again, with the same breed (not a clone unfortunately). Hopefully I can increase the yield as well as any factors i deem needing improvement (less electricity, optimal percentage of fertilizer, less fluctuation in vpd).
in short: lots to learn! but not enough buffer!

Likes
13
Share


@WeedFlin
Follow
Se me funde la lámpara en pleno horario de luz 😅 Bueno, ha durado bastantes años. Con el humidificador y la nueva deberían acabar a full la floración.
La he tenido unas 15 horas con una bombilla hasta que me llegara la lámpara nueva. Parece que ya no habrá mas inconvenientes hasta el final. Lets Go!

Likes
16
Share


@Ensign420
Follow
Introduction - Week 14|07 Summary -
Ensign's log, stardate 9437.65,
Great week of growing! Wow what a good week!
Growth in the main tent has all around been incredible!
Submitted my first submission to the Global Grow Cup! Filmed a video of the solo cup container (marked with the ticket/order number) that will be used for the competition. Also had to fill and prove the solo cup holds 2 cups of soil. Now I need to root a clone (for the first time), transplant her into this cup, and submit my 2nd entry before the 30th of this month.
As far as my first attempt at cloning, have already begun the rooting process! Managed to take cuttings from 3 out of the 6 phenos in the main tent (the first cutting was also my first time topping). Soaked the cuttings for two days before planting them into Coco Coins. So far everything has gone surprisingly well! The clones are now rooting under the propagation dome with the vents fully closed. Will check for roots soon!
At the end of the week, growth was just raging! Was planning on flipping to flower in a week, but decided to begin the first week of flower next week! Thus this is the last week of veg. Plan to flip to 12/12 next Monday!
Onwards to next week!
[START OF WEEK 14|07]
==========================================================
Garlic Budder #1 - WEEK 14|07 - Full Veg Wk5
Garlic Budder #2 - WEEK 14|07 - Full Veg Wk2
Garlic Budder #3 - WEEK 07 - Full Veg Wk5
Garlic Budder #4 - WEEK 06 - Full Veg Wk4
06/03/24 → 06/09/24
This Week's Estimated Goals
----------------------------------------------------------------------------------------------
DLI: ~26 mol/m²/d
PPFD: ~400 μmol/m²/s
VPD: ~1.0 kPa
This Week's Meter Readings & Averages [Lights On: 16:00 - 10:00]
----------------------------------------------------------------------------------------------
DLI: 24.56 mol/m²/d
PPFD: 379 μmol/m²/s
VPD: 0.91 kPa
Soil %: [32.7, 37.6, 37.9, 34.1]
==========================================================
Day 01 - Monday - 06/03/24 - Total Days: 098
-----------------------------------
Daily Averages [~23:00]
- Temps: 80.7°F [27.1°C]
- Humidity: 74.4%
- VPD: 0.90 kPa
- Soil %: [31, 34, 39, 35]
-----------------------------------
- [09:57]: Quick morning check!
--- #1 is looking a bit droopy, but almost lights off (at 10:00) so not concerned.
--- Nice! Mainly wanted to check on #4 and she is looking great! She’s perked back up and looking good!
- [23:08]: Evening check.
--- Wow! It’s a jungle in here!
--- #1 has gotten too big? Nah!? Keep on growing girl!
--- #2 is growing and definitely getting bigger! Growth just looking really weird.
--- #3 has continued to get larger and is looking quite uniform in growth!
--- #4 is growing and looking perky again!
--- Even the original #1 and #2 phenos (in the back) are looking good!
--- Wow! #4 is really getting close to the light.
- [23:14]: Checked down both fill tubes.
--- Both reservoirs were completely dry!
- [23:27]: Checked the Ecowitt soil moisture sensor data:
--- 30% - [CH01 EB1 - Garlic Budder #1]
--- 34% - [CH02 EB2 - Garlic Budder #2]
--- 39% - [CH03 GFP - Garlic Budder #3]
--- 32% - [CH04 FPT - Garlic Budder #4]
- [23:32]: Poured 4 cups of distilled water down EB1’s fill tube.
--- Poured 2 cups of distilled water down EB2’s fill tube.
- [23:38]: Checked the humidifiers.
--- Refilled the 4X4’s humidifier with distilled water.
--- Tomorrow, plan to defoliate and start cloning for the first time!
--- Going to take multiple cuttings from both #1 and #4 for sure, but still deciding on the rest.
--- Getting hyped!
Day 02 - Tuesday - 06/04/24 - Total Days: 099
-----------------------------------
Daily Averages [~23:00]
- Temps: 81.4°F [27.4°C]
- Humidity: 74.3%
- VPD: 0.93 kPa
- Soil %: [29, 35, 38, 32]
-----------------------------------
- [11:59]: Time to film the first entry for the Global Grow Cup!
--- Going to be using BuildASoil 3.0 potting soil.
--- Filming the video using a stand and my phone.
--- This video is mainly to establish the container that the plant will be grown in. Also to prove that the container is a 16oz container and that it can hold 2 cups of soil.
--- The ticket (order) number also had to be written on the cup.
- [12:36]: Done!
--- The video had to be done in one continuous shot with no edits (my original submission does not have the logo).
--- There was also a photo that needed to be shot which shows the cup filled with 2 cups of soil (just like the video, the original image submission did not have the logo).
--- I think I did everything correctly, but also sent an email for verification of submission and validation.
--- Getting hyped!
--- [*smokes a bowl]
--- Going to defoliate today along with for the first-time, going to take cuttings for clones!
--- After a bit of online research, decided to split the cloning process into two days.
--- Today going to take cuttings and will soak them in a solution of aloe for 24hrs. Afterwards will change the water out and use straight distilled water.
--- Then in a couple days, plan to transplant into coco plugs (Coco Coins) for rooting.
--- For optimal results, also be using a rooting hormone (Clonex).
--- Well.. Here goes nothing!
- [17:01]: Evening check.
--- Wow! #1 is looking huge! Her main top is stretching above the lower canopy which is continuing to bush out.
--- #2 is growing along. Growth is gnarly and a bit droopy, but she’s getting taller!
--- #3 is looking great! Still a bit small, but she is continuing to get larger.
--- #4 looks like she needs a watering.
--- Both plants in the back are also looking surprisingly great as well!
- [17:05]: Checked down both fill tubes.
--- Both reservoirs were completely dry!
--- As far as today's defoliation, going to leave #2 and #3 alone and will focus my defoliation and cloning on the rest of the plants.
--- This will be my first attempt at cloning, also going to try topping for the first time today.
--- No pressure Ensign. What can possibly go wrong right?
- [17:27]: Time to start the cloning and defoliation process!
--- Filled a measuring cup with 3 cups of distilled water.
------ Added 3/4tsp of Horticultural Aloe
------ Added 1 more cup of distilled water
--- Mixed the solution and poured an even amount into three separate solo cups.
--- Made sure to mark two of the cups (#1 and #4). The unmarked one will be for any other clones from amongst the 6 phenos (if any at all).
- [17:43]: Time to top and defoliate #1!
--- Using a pair of brand new trimmers (AC Infinity),
--- Gently cut the main stalk to even out the canopy.
--- Then trimmed and cleaned most of the nodes leaving the top node or two.
--- Also trimmed the leaf fingers a bit before placing the top cutting into the cup of aloe solution.
--- Now for the rest of the cuttings!
--- [~45 minutes later]
- [18:32]: Managed to finish defoliating and cutting the rest of the clones.
--- Took two more lower cuttings from #1 (3 clones total).
--- Took 3 lower cuttings from #4
--- While defoliating, decided to try and clone the original #2 pheno as well. Took 4 small cuttings.
--- Similar to the top cutting, trimmed and cleaned each lower node for each cutting before placing them into the cups.
--- Before finishing up the 2nd cutting, I noticed the first cutting (the top cut that was also trimmed) was drooping.
--- So I did not trim and the leaf fingers for the other cuttings.
--- In total there were 10 cuttings taken for potential clones.
--- My main focus was to take cuttings and to clean up all the lower growth from both #1 and #4.
--- Defoliated and cleaned up the back original phenos as well (also trimmed back the cover crop).
- [18:35]: Temporarily placed the cuttings onto the floor of the 4x4 tent.
--- Took the trimmings (about 3 cups) and spread them onto the top mulch of #1 and #2.
--- Time to set the environmental controls for the 3x3 veg tent.
- [18:43]: Within the AC Infinity App,
--- For the Veg Tent [3x3] controller,
--- Adjusted the 'Vegetative [18/6]' Schedule for the grow light.
------ Set the Mode to ‘On Mode’
------ Set the START/END times to 04:00PM/10:00AM
------ Set the MAX to 1
--- The IonBoard S33 is now utilizing around 60.8W (at intensity 1 out of 10).
--- Adjusted the 'Vegetative [18/6]' Schedule for the exhaust fan.
------ Increased the Humidity’s HIGH trigger value from 81% to 87%
--- Adjusted the 'Vegetative [18/6]' Schedule for the humidifier.
------ Decreased the VPD target value from 1.5kPa to 0.8kPa
- [18:52]: Moved the cuttings into the 3x3 veg tent.
--- It begins! I think.
--- Going to let these cutting drink some aloe for a day before switching to straight distilled water.
--- Hmm. Could be the white floor of the 3x3 veg tent, but have noticed the S33 has a whiter spectrum whereas the FC-6500 seems to be warmer in color.
--- Anyways,
- [18:58]: Poured 4 cups of distilled water down EB1’s fill tube.
--- Poured 2 cups of distilled water down EB2’s fill tube.
- [19:06]: Filled a pump sprayer with 5 cups of distilled water.
--- Focused mainly on the straw mulch of #4.
--- But also misted the straw mulch for the rest of the plants a bit.
- [19:12]: Checked the humidifiers.
--- Refilled the humidifiers with distilled water.
- [19:44]: Going to be using Clonex rooting gel before planting the cuttings into Coco Coins (pre-soaked with microbes and aloe). But before that begins, going to transfer the Clonex gel into a squeeze bottle.
--- Gently peeled back the seal on the original Clonex bottle. Just enough make a tiny opening,
--- Then slowly and carefully poured the gel into an empty squeeze bottle.
--- Also removed the sticker from the original bottle and placed it onto the new one.
- [19:54]: Perfect!
--- Instead of applying the gel to the cutting, going to be applying the gel to the Coco Coin.
--- This squeeze bottle will make applying the gel a lot easier.
--- Will take PPFD readings tomorrow.
--- Also will change out the aloe solution to distilled water.
--- I really hope I didn’t screw things up before they could even begin.
--- Don’t die on me ladies!
--- Please.
Day 03 - Wednesday - 06/05/24 - Total Days: 100
-----------------------------------
Daily Averages [~23:00]
- Temps: 81.9°F [27.7°C]
- Humidity: 75.5%
- VPD: 0.90 kPa
- Soil %: [29, 36, 38, 36]
-----------------------------------
- [09:40]: Quick morning check!
--- #1 is looking a bit droopy, but looking okay. Topping is a high stress technique so going to take some time to recover. Don’t plan on flipping the main 4x4 tent to flower for a good week or so which should be enough time.
--- #4 looks great! The defoliation seems to have no effect on growth. Nice!
- [09:41]: Also quickly checked on the 3x3 veg tent,
--- Nice! The cuttings are looking great!
--- No yellowing and they all seemed to have turned up towards the light.
--- So far so good!
- [22:53]: Evening check.
--- #1 is continuing to dominate this grow! She has spread wide and looking incredible!
--- #2 is looking gnarly, but getting there.
--- #3 is getting larger! But still a runt. By far, her leaves are the darkest of the bunch, but she is still growing!
--- #4 looks happy and growing along beautifully! Wow!
- [22:55]: Checked down both fill tubes.
--- Both reservoirs were completely dry!
- [22:59]: Poured 5 cups of distilled water down EB1’s fill tube.
--- Poured 2 cups of distilled water down EB2’s fill tube.
- [23:05]: Checked on the 3x3 veg tent.
--- Ooo yea! The cuttings are still green! Nice!
- [23:07]: Took PPFD readings.
--- The cuttings were around 121 μmol/m²/s which gives a DLI of 7.84 mol/m²/d
--- Nice! These levels are on the lower range for seedlings (~100-300), perfect! I think.
- [23:14]: Swapped the aloe water out to straight distilled water.
--- Going to let these cuttings soak for one more day before planting.
--- Please don’t die girls!
- [23:15]: Checked the humidifiers.
--- Refilled the humidifiers with distilled water.
--- Ooo yea!
--- Tomorrow is the big rooting day!
Day 04 - Thursday - 06/06/24 - Total Days: 101
-----------------------------------
Daily Averages [~23:00]
- Temps: 81.9°F [27.7°C]
- Humidity: 75.2%
- VPD: 0.91 kPa
- Soil %: [32, 38, 38, 34]
-----------------------------------
- [16:20]: Evening check.
--- #1 is a bit droopy, but growth is looking green and healthy.
--- #2 is looking bigger! She’s also looking sort of droopy.
--- #3 is growing along nicely! Looking good girl!
--- #4 is looking great! A bit droopy but plan to water today.
- [16:23]: Checked down both fill tubes.
--- EB1's reservoir still has some water.
--- EB2's reservoir was completely dry!
- [16:23]: Checked the Ecowitt soil moisture sensor data:
--- 28% - [CH01 EB1 - Garlic Budder #1]
--- 36% - [CH02 EB2 - Garlic Budder #2]
--- 37% - [CH03 GFP - Garlic Budder #3]
--- 30% - [CH04 FPT - Garlic Budder #4]
- [16:30]: Using a pump sprayer,
--- Misted the straw mulch of #4 with 6 cups of distilled water.
--- Focused mainly on the straw mulch.
--- Also misted the straw mulch of #3 (in the grassroots fabric pot) a bit.
- [16:43]: Poured 5 cups of distilled water down EB1’s fill tube.
--- Poured 3 cups of distilled water down EB2’s fill tube.
- [16:52]: Checked the Ecowitt soil moisture sensor data:
--- 56% - [CH01 EB1 - Garlic Budder #1]
--- 44% - [CH02 EB2 - Garlic Budder #2]
--- 40% - [CH03 GFP - Garlic Budder #3]
--- 45% - [CH04 FPT - Garlic Budder #4]
- [17:01]: Took general PPFD readings.
--- #1 was around 379 μmol/m²/s which gives a DLI of 24.56 mol/m²/d
--- #2 was around 333 μmol/m²/s which gives a DLI of 21.58 mol/m²/d
--- #3 was around 293 μmol/m²/s which gives a DLI of 18.99 mol/m²/d
--- #4 was around 378 μmol/m²/s which gives a DLI of 24.49 mol/m²/d
- [17:09]: Took the weekly height and light distance measurements.
--- #1 was about 21" tall.
--- #2 was about 13.5" tall.
--- #3 was about 9.5" tall.
--- #4 was about 19.25" tall.
--- Hmm..
- [17:19]: Adjusted the right oscillating fan a bit.
--- Re-angled the CloudRay S6 oscillating fan upwards. Been noticing that the air has been hitting the tops of the plants so easing off a bit (#1 is still getting hit, but she’s huge so not too worried).
- [17:23]: Back to the measurements!
--- #1 was about 9.5" away from the grow light.
--- #2 was about 17" away from the grow light.
--- #3 was about 17.5" away from the grow light.
--- #4 was about 11.5" away from the grow light.
- [17:46]: Checked on the 3x3 veg tent.
--- Cuttings are still green! They do look a bit droopy but no signs of yellowing.
--- Okay!
- [17:55]: Time to begin the rooting process!
--- For my first attempt at rooting, going to be using Coco Coins pre-soaked in saponins, microbes and aloe.
--- To further help with rooting, going to also be using Clonex rooting gel.
--- Filled a measuring cup with 4 cups of distilled water.
------ Added half of 1/64tsp of Quillaja Saponaria Extract [60]
------ Added 1/16tsp of Horticultural Aloe
------ Added 1/8tsp of Mycrobe Complete
--- Mixed the solution thoroughly.
--- Time for the Coco Coins!
--- 10 cuttings means 10 Coco Coins.
- [18:09]: Dropped 10 Coco Coins into the measuring cup.
--- The coins immediately started to expand.
--- A bit too much.. Oops!
--- Poured the solution and Coco Coins into a pitcher.
--- Added 2 cups of distilled water to the solution (now at 6 cups).
--- Great! The coins are pretty much fully expanded, but going to wait a bit longer to fully saturate each coin.
--- [~20-30 minutes later]
- [18:42]: Great!
--- Took the seedling and flood tray from the AC Infinity propagation dome and placed all 10 Coco Coins into the slots.
--- Gave each Coco Coin a quick shake to remove excess solution. The coins were not dripping with solution but still pretty saturated.
--- Arranged them into 3 groups with the cuttings in mind.
--- Also tried to keep the pre-made holes intact.
--- Time to inoculate the Coco Coins!
- [18:54]: Using a squeeze bottle,
--- While keeping the nozzle from making contact with the coco, gently filled each pre-made hole with Clonex rooting gel. Just enough gel to fully cover the hole of each coco coin.
- [19:00]: Time to plant the cuttings!
--- Gave each cup a misting of distilled water. Focused on wetting the top growth with water.
--- Okay!
--- To avoid mixing cuttings up.
- [19:01]: Starting with the original #2 pheno cup,
--- For each cutting,
--- Using a pair of clean trimmers, made a final 45° cut about 1/2" from a bottom node.
--- Then stripped away and scared the protective membrane below the node before planting.
--- Made sure the node was about 1/2" below the surface of the coco.
--- To help with planting, while inserting each cutting, gave the Coco Coin a gentle squeeze to loosen the coco. This also helped to ensure the coco and gel was in good contact with the cutting.
--- Once the cutting was planted into the Coco Coin, made sure to place back in the same spot (made sure to keep the cuttings in their groupings).
--- Once a cup was complete, made sure to keep the label with the group.
--- Re-misted the top growth as needed to keep it wet.
--- Also wiped the trimmers with isopropyl alcohol in between cuttings (plan to use 10% bleach solution for next time).
--- Repeated this process until all 10 cuttings were cut, planted, and in the tray.
--- The coco coins fit perfectly into the tray and don’t reach the bottom. Nice!
--- The bottom air gap is important.
--- Poured a bit of distilled water through one of the empty slots into the bottom of the tray. Just enough to fill the bottom of the tray, but not enough to reach any of the Coco Coins (~1/4cup).
- [19:35]: Placed the propagation tray with cuttings into the 3x3 veg tent.
--- Placed the first layer of the propagation dome on before giving the sides a misting of distilled water.
--- Also sprayed the top of the propagation dome before covering the cuttings.
--- Vents are all fully closed.
- [19:40]: Placed the bar lights onto the top of the dome before configuring the controller.
------ Set the START/END times to 04:00PM/10:00AM
------ Set the bar light’s intensity to 2 (out of 10).
--- Also made sure the propagation light controller’s time was in sync with the Controller 69 Pro.
- [19:47]: Took PPFD readings.
--- The cuttings were around 136 μmol/m²/s which gives a DLI of 8.81 mol/m²/d
--- The PPFD levels are similar to the floor.
--- Perfect!
--- Going leave the IonBoard S33 on during this rooting process.
--- Will check back tomorrow to cycle the air under the dome.
- [19:56]: Checked the humidifiers.
--- Refilled the humidifiers with distilled water.
- [20:17]: Quick night check!
--- Ooo yea! Growth is raging and looking perky!
--- Mainly checked on #1 and #4 which were looking incredible!
--- Keep on growing ladies!
Day 05 - Friday - 06/07/24 - Total Days: 102
-----------------------------------
Daily Averages [~23:00]
- Temps: 82.7°F [28.2°C]
- Humidity: 76.2%
- VPD: 0.89 kPa
- Soil %: [37, 40, 38, 35]
-----------------------------------
- [10:03]: Decided to increase the ambient temp in the 3x3 veg tent.
--- Within the AC Infinity App,
--- For the Veg Tent [3x3] controller,
--- Adjusted the 'Vegetative [18/6]' Schedule for the heater.
------ Increased the Temp target value from 78°F to 82°F
--- Hopefully this will help to keep the veg tent at a more consistent temp.
- [22:26]: Evening check.
--- Ooo yea! The garden is looking incredible!
--- #1 is looking perky and just bushing out! Wow!
--- #2 is getting big! Growth is weird and leaf fingers are huge! Just going to let her grow.
--- #4 is looking happy and growing along like a champ! Nodes are starting branch out and she is turning into a bush!
- [10:28]: Checked down both fill tubes.
--- Both reservoirs were completely dry!
- [22:33]: Poured 5 cups of distilled water down EB1’s fill tube.
--- Poured 3 cups of distilled water down EB2’s fill tube.
- [22:40]: Checked on the propagation dome (inside the 3x3).
--- Ah yea! Looking great ladies!
--- Lifted the top of the dome to let some fresh air in for a bit.
--- Wow!
--- Leaves still look nice and green!
--- So far everything looks great!
--- Just going to continue on!
- [22:53]: Checked the humidifiers.
--- Refilled the humidifiers with distilled water.
- [11:01]: Decided to adjust the humidifier for the 3x3.
--- Within the AC Infinity App,
--- For the Veg Tent [3x3] controller,
--- Adjusted the 'Vegetative [18/6]' Schedule for the humidifier.
------ Increased the VPD target value from 0.8kPa to 1.5kPa
--- The higher VPD level will essentially turn the humidifier off.
--- I won’t be needing the humidifier for a good week so might as well save the water.
Day 06 - Saturday - 06/08/24 - Total Days: 103
-----------------------------------
Daily Averages [~23:00]
- Temps: 81.6°F [27.6°C]
- Humidity: 74.9%
- VPD: 0.91 kPa
- Soil %: [35, 40, 37, 31]
-----------------------------------
- [07:40]: Quick morning check!
--- #1 and #4 are looking perky and happy!
--- Also checked on the propagation dome,
--- All cutting still look green! Hyped!
- [20:02]: Evening check.
--- Wow the garden is raging with growth!
--- #1 has blown up! She has clearly recovered and growth is ramping up again!
--- #2 is stretching upwards!
--- #3 is now the smallest of the 4, but still getting larger!
--- #4 is looking incredible! Wow! Growth looks perky and happy!
- [20:05]: Checked down both fill tubes.
--- Both reservoirs were completely dry!
- [20:10]: Poured 6 cups of distilled water down EB1’s fill tube.
--- Poured 2 cups of distilled water down EB2’s fill tube.
- [20:16]: Checked the Ecowitt soil moisture sensor data:
--- 35% - [CH01 EB1 - Garlic Budder #1]
--- 40% - [CH02 EB2 - Garlic Budder #2]
--- 36% - [CH03 GFP - Garlic Budder #3]
--- 27% - [CH04 FPT - Garlic Budder #4]
- [20:19]: Using a pump sprayer,
--- Misted the straw mulch of #4 with 5 cups of distilled water.
--- Focused mainly on the straw mulch.
--- Also misted the mulch of #3 a bit (in the fabric pot).
- [20:27]: Checked propagation dome (in the 3x3),
--- To cycle the air under the dome, lifted the top off for a bit.
--- Ooo yea! Everything is still green and looking great!
--- Keep on rooting ladies!
--- Oops!
- [21:45]: Checked the humidifiers.
--- Refilled the humidifiers with distilled water.
Day 07 - Sunday - 06/09/24 - Total Days: 104
-----------------------------------
Daily Averages [~23:00]
- Temps: 81.5°F [27.5°C]
- Humidity: 74.8%
- VPD: 0.91 kPa
- Soil %: [36, 40, 37, 36]
-----------------------------------
- [08:18]: Quick morning check!
--- Nice! The main tent is looking great! #1 and #4 are both raging with growth!
--- Checked on the propagation dome (inside the 3x3) and the clones are still looking green!
--- Wow! Everything is going almost too well! Just keep on growing!
- [19:08]: Evening check.
--- Garden is just exploding with growth! Seems everyone has fully recovered from the defoliation and topping!
--- Wow #1 is bushed out and looking incredible!
--- #2 is growing really starting to get large! Growth still is funky, but stoked none-the-less.
--- #3 is starting to fill in the pot! Getting larger!
--- Wow! #4 is getting taller and looks healthy and green!
- [19:12]: Checked down both fill tubes.
--- Both reservoirs were completely dry!
--- Wow the canopy is really starting to get taller and closer to the light. May need to raise it up soon.
--- Absolutely surprised how low the light levels have been throughout this entire cycle. Barely moved the light and have not increased the intensity past 2 (out of 10). Less is really more.
--- Anyways!
- [19:18]: Checked the Ecowitt soil moisture sensor data:
--- 36% - [CH01 EB1 - Garlic Budder #1]
--- 41% - [CH02 EB2 - Garlic Budder #2]
--- 37% - [CH03 GFP - Garlic Budder #3]
--- 34% - [CH04 FPT - Garlic Budder #4]
- [19:19]: Poured 6 cups of distilled water down EB1’s fill tube.
--- Poured 3 cups of distilled water down EB2’s fill tube.
- [19:24]: Checked propagation dome (in the 3x3),
--- To refresh the air, lifted the top off for a bit.
--- Sweet! Still green! Wow!
--- Using a spray bottle, misted the top growth with distilled water.
- [20:35]: Checked the humidifiers.
--- Refilled the humidifiers with distilled water.
--- Wow what a week!
--- Growth has been just insane in the 4x4 tent! All plants have fully recovered and have just exploded with growth.
--- I think it’s time to flip to flower!
--- Also, I’m absolutely baffled about how well the cloning process has been going.
--- So far no issues!
--- Not complaining, but just surprised. Keep on growing ladies!
--- If all goes well, should have fully rooted clones soon ready for transplanting (into solo cups of course).
--- Absolutely hyped for next week!
--- Maximum warp Ensign, Engage!
[END OF WEEK 14|07]
