Processing
Likes
Comments
Share
@
Follow
Likes
11
Share
@Hawkbo
Follow
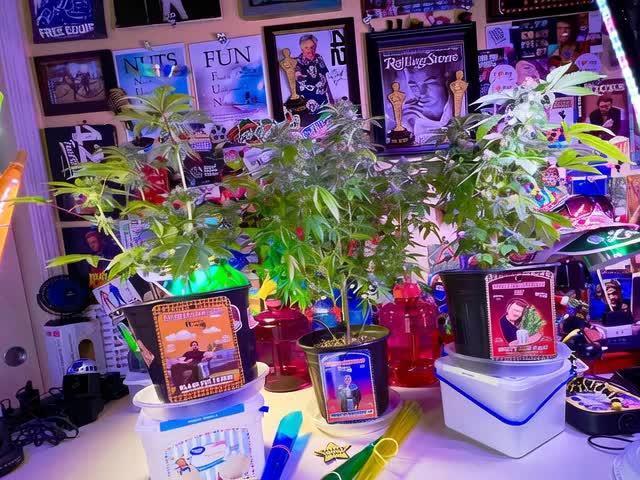
Sorry for the delay was in a wedding this weekend came home and been trimmin like a dog the past few days and didnt have time to do the update but I'll do another one before tuesday to get back on track. As of Friday sept 6 its day 46. In the video the plants from back left to right are .. Gelato-> Cream Cookies -> Gelato Middle row from left to right are Lemon A.K 1 -> 6 Shooter-> Lemon A.K Front is Tester 5 -> Lemon A.K -> Tester 26
Likes
29
Share
Still battling humidity although I think I have finally came up with a solution that allows my co2 too flourish as well. I connected my outlet carbon fan to my humidity control and changed my settings to the green ban of my vpd chart. I’ll keep you guys in the loop on that.
Likes
9
Share
COMING SOON!! The tent and everything is all clean and sanitized 👍. Had some issues but now im Almost ready FOR EVERYTHING MARS HYDRO VISIT: www.mars-hydro.com www.marshydroled.ca PROMO CODE: rocknroll VISIT THE ALIEXPRESS STORE: @marshydro_aliexpress Instagram: @marshydropenny https://youtube.com/channel/UChU5ZWwNi-DvnO3oWVU3ceA Thanks for taking the time to read and check out my diary🤜🤛 TS3000 FEATURES: WIDEBAND SUNLIGHT FULL SPECTRUM LED GROW, Infinite close to natural sun light, suit for all plants whole stages indoor growing, rapid plant response from seed to flower, achieve maximum quality and quantity, much better than traditional HPS grow systems. HIGH REFLECTIVE & NOISE FREE-Fanless LIGHT BOARDS design will make your growing life easy and quiet, quickly heat dispersing material aluminum reducing light lost to aisles and walls, increase the light intensity up to 20%, allowing your plants receive more energy and without burning your plants for maximum headroom. HIGH EFFICIENCY ENERGY SAVING PLANT LIGHT, high-power NEW LED grow, Compares to traditional 3000 watt HPS lamp and other brand led grow light while only 450 watts true output with 1016 LEDs, more scientifically and energy-efficient! Perfect for 5' x 5' veg stage, 4' x 4' bloom stage, higher intensity in a MARS HYDRO grow tent, reflective area, or by crossing over using multiple TS3000. BOOM YIELD LARGE GROW LIGHT, NEWEST SMD LED technology provide highest PAR/LUMEN output(1095.6umol/), makes you get 30% higher yield compare OLD led lights, can get max yield at 2.5g/watt, less pay but get more yield, bring a amazing grow trip to any home grower as it beams huge amounts of light energy to plants below. COMMERCIAL LED GROW LIGHT, Updated easy dimming & daisy chain function, main light controlled, especially come with two waterproof and dimmable Mean Well Drivers, auto sensing power supply works on both 120VAC and 240VAC and 277VAC, suit for Large Rooms and Commercial Setups. Low Energy-Consuming LED Grow Light: Consuming 300w and also mounted with 1016 chips, TS3000 has the ability to replace a 450w HPS light while reducing 40% power intake. High Efficiency LED Grow Light: With overall light output PPF 343umol/S as well as amazing PPE 2.3 umol/j, it's 50% even more photon efficient and can assure a 30% more return than the old HPS/MH lights. Patent Highly-Reflective Hood Shape: The reflector design on TS3000 is patented, which can effectively gather the light dispersed in all directions to enhance its light intensity as well as assist plants in absorbing more light. Full Spectrum Plants Favorite Spectra: By the unique mix of spectra that makes most light in the 400-700nm waveband, incredibly conducive to plant photosynthesis. Adequate IR(730-740nm) is additionally consisted of in the range to generate larger buds. Dimming And Daisy Chain Feature Available: Upon an independent dimming button on the external driver, backing 0-100% settings adaptation and up to 30 LEDs daisy-chained in a group, it supplies different light levels for various plant stages meanwhile saving energy. Safety Certifications And Service Warranty: CE, ETL, RoHS, UKCA security certifications accepted, 50,000 hours durability, 5-year service warranty, and local after-sales repair 5x5 GROW TENT: LOCK ALL LIGHT INSIDE MARS HYDRO Indoor Grow Tent interior is made of diamond mylar which is highly reflective. (Other brand's mylar and reflective rate is as low as 50%, won't provide efficient light. )MARS HYDRO 1680D canvas, being double stitched, it is tear proof and has perfect light locking. Mars Hydro's grow tent keeps 100% lighting beams inside and helps your plant absorb more lights. EXTRA-THICK --No light leaks or rips at all DURABILITY GROW TENT Stable metal corner adapters and poles are the trustful supporters of the tent, standing sturdy, neither rusting nor paint-falling, quick easy tool-free installation. Mars Hydro's heavy-duty metal zippers, with double layer black lining, are the best on the market which create a light-proof seal EASY OBSERVATION FOR YOUR PLANTS. Special observation windows are made by double layers of cloth. Observe the growing conditions of your plants without opening the tent and avoid disturbing plants. The observation window also serves to dissipate heat and ventilate air AUTOMATIC 6 INCH EXHAUST FAN KIT W/ CONTROLLER: Mars Hydro 6'' Inline Fan uses a mixed-flow design to maintain peak performance in a high static pressure environment. GROW TENT FAN: MARS HYDRO inline fans are designed to ventilate hydroponic grow rooms, transfer heating/cooling, cool AV closets, and exhaust odors. EFFECTIVE VENTILATION: Variable speed controller for easy fan speed adjustment. Optimal ventilation for your planting. LOW NOISE LEVEL: Durable plastic fan housing and blades for extremely low noise(32dB-A); create a truly quiet growth environment. EASY INSTALLATION: Removable duct ends with locking tabs for quick removal and easy maintenance and a cord length of 4.9 feet for hassle-free setup. This grows tent fan with a controller for easy fan speed adjustment. BASIC PARAMETERS: Ventilation exhaust fan size: 6” | Dimensions: 315mm*225mm*210mm. | Weight: 2.7. | Airflow: 402CFM | Noise: 32dB-A | Bearings: Dual Ball. 
Likes
7
Share
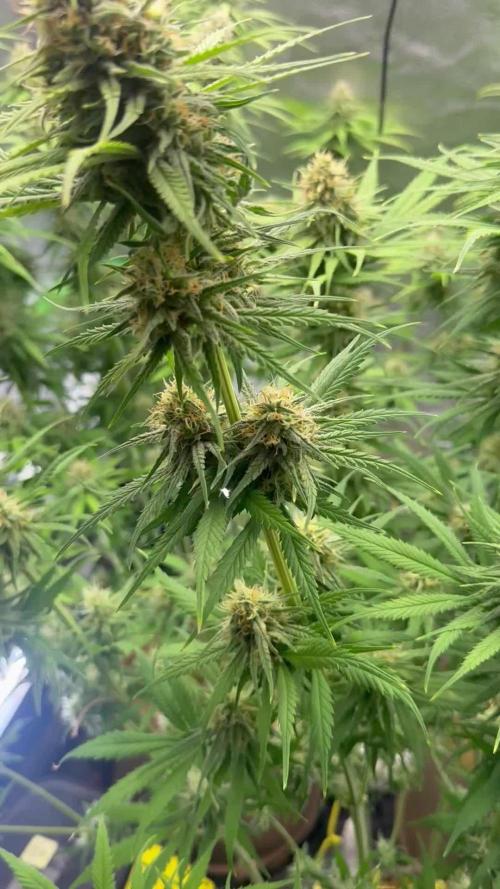
Things are moving along great.The buds are developing and smelling absolutely amazing.Cherry cola won’t be a big producer but wow is her scent potent.The Lemon cherry cookies having the biggest buds so far and will finish first but still needs some time.Ive increased light intensity to 80 percent which kinda fried the fan leaves but no longer needed at this point.
Likes
6
Share
Hallo zusammen 🤙. Sie wächst sehr schön und macht keine Probleme.
Likes
14
Share
Summertime has said in temperatures are in the 90° range this will make the tent harder to cool and I definitely need to get a bigger humidifier. Soon all the outdoor will be out of the chance describing it will go in and we will structure and get ready for flower
Likes
86
Share
@CANNASIM
Follow
------GENERAL COMMENT------ Girls are moving forward without troubles, i'm pleased not having to deal with issues. I'm breaking down the feeding schedule like: Sensi Base + Bigbud*(or pk booster) + Recharge > VeloKelp+Natures Candy+Bigbud*. So there is constant feed, every other day mixed in 1.5l water. Once a week i give Cal Mag 2ml /l. Not touching the girls with any HST or stress since I switched to flower. Is the first time i'm running recharge from the beginning to the end, have to say that is solid. ------GG.AK47 COMMENT------ What a pleasure to see that many colas and a vibrant girl giving fruits! 😎👊 I'm very curious to see the results in this one, solid strain! Aroma is gasy and diesel like.
Likes
97
Share
~_~_~_~_~_~_~_~_~_~_~_~_~_~_~_~_~_~_~_~_~_~_~_~_~_~_~_~_~_~_~_~_~_~_~_~_~_~_~_~_~_~_~_~_~_~_~_~_~_~_~_~_~_~_~_~_~_~_~_~_~_~_~_~_~_~_~_~_~_~_~_~_~_~_~_~_~_~_~_~_~_~_~_ ❤️💡🌱😽💨 Everyone was up-potted 2 days ago and showing a little new growth since then. They're all very healthy looking, one has some slight yellowing which should disappear soon with our change but all plants are extremely small for their size.. we've been letting these dry out completely between watering so I'm convinced there's a genetic component to this. We've had a few other strains start extra slow for us in the past and one in particular that started slow and then took off like wildfire around week 5 so I'm not too concerned ..they're each using 3gal square (plastic) pots willed with fresh Promix-HP..they're getting a little bit of Big Bloom with smaller amounts of Grow Big with every other watering now and this has corrected the odd hue we noticed around wk3.. The Mars SP-3000 is about 2.5 away, it sounds far but despite the distance, node spacing is always really tight in that tent all through veg We're hoping for some explosive growth this week now that everyone is officially settled, we're still on the fence as to how we'll train these but odds are we'll do our typical 4 way LST after topping and keep under their skirts bare.. ..there no telling how long we'll veg these as size is always our determining factor but when the time comes, we plan to flower in this tent as well.. not too much else to report, its been an effortless week.. thanks as always for dropping by and happy harvests everyone!! 👊😺 ~_~_~_~_~_~_~_~_~_~_~_~_~_~_~_~_~_~_~_~_~_~_~_~_~_~_~_~_~_~_~_~_~_~_~_~_~_~_~_~_~_~_~_~_~_~_~_~_~_~_~_~_~_~_~_~_~_~_~_~_~_~_~_~_~_~_~_~_~_~_~_~_~_~_~_~_~_~_~_~ 8/17 We've gotten some fast growth in the last few days.. we figured they were just late to the party.. we topped all plants at the 3rd node yesterday and we'll eventually pull each plant 4 ways..apparently the "weird hue" is genetic, they all have a unique purple undertones..neat strain for sure.. we dropped the SP-3000 a few inches and they're praying to it almost around the clock..we're debating on building a 4x2 PVC scrog table for these girls if we find the time.. thanks for dropping by Growmies! Much love!❤️ ⚡Mars Hydro/SP-3000⚡ Specifications ⚙️: Diodes: Samsung LM301B / Osram 660nm (960 total!) Driver: Meanwell 300watt 🔌 (300W±5% @AC120V-277V) PPF: 824umol/S ☢️ PPE: 2.8 µmol/j 〰️〰️ Lifespan: 50k+ hrs ⌛ Weight: 10.1 lbs (4.6kg) Veg Coverage: 3 x 5 ft 🌱 Flowering Coverage: 2 x 4 ft 🌼 -The SP-3000 uses an aluminum heatsink (no fan) and the driver can be placed outside the tent 🌡️⬇️ -IP65 waterproof ratings, tolerant to high humidity grow environments 💦 .. -Up to 15 can be daisy-chained together and all controlled from a single light! 💡~💡~💡~💡~💡 ~_~_~_~_~_~_~_~_~_~_~_~_~_~_~_~_~_~_~_~_~_~_~_~_~_~_~_~_~_~_~_~_~_~_~_~_~_~_~_~_~_~_~_~_~_~_~_~_~_~_~_~_~_~_~_~_~_~_~_~_~_~_~_~_~_~_~_~_~_~_~_~_~_~_~_~_~_~_~_~_~_~_~_
Likes
9
Share
@Darth_Cha
Follow
6/11 - My seeds finally came in the mail and I got to soak them this morning. With the start of the soaking I also took the time to mix my Fox Farms Happy Frog Potting Soil along with my nutrients. I wanted to make sure my ratios are a little balanced but slightly heavier on the all purpose fertilizer to start out. In my first feeding I might go a little heavier on the Bud & Bloom than with the All Purpose depending on when I think they need to be fed and how close they are to flowering. Perlite was added to the soil to make sure there was good drainage and I will be using 5 gallon fabric pots. I’m planning to do some LST along with possibly topping/FIMing the plants just to see what comes of it, so I’m excited for that. This is my very first grow and I’m not much of a gardener (yet) so any and all input and advice would be very much welcome thanks 🌱🌱🌿 PS - Sorry for the angle the video the next ones will be correct. 6/14 - All three seeds popped over the two days the spent in the paper towels! Finally putting them in the soil feels good. Going to keep the soil above the seeds moist with a handheld sprayer using distilled water every few hours until the light shut off for the night. I forgot to take pictures of the seeds before planting them. From here I’m hoping to get at least one of them to pop through the ground in the next couple of days. Of course, I’m still looking for tips and input. 🌱 6/16 - All three seeds have made it through the soil so that is more step forward. The critical purple has a shell still on one of its leaves so I’m hoping it pops off on its own in a day or so otherwise I may try to gently tap it off. Currently, the grow lights are about 24 inches away from the seedlings. I think I might keep them at this distance until I notice stretching or leaves curling.
Processing
Likes
7
Share
Frosty, thick buds! This is the last feeding for pheno 1 and 2 Added overdrive and stopped big bud The smell is kinda fruity Very sticky Pheno 3 is behind in bud development but very bushy composites m compared to 1 and 2
Likes
50
Share
Eternity Grow Cup - Week 9 Veg Update We are stepping into Week 9 of vegetation, and things are getting exciting! The plants are thriving—compact, bushy, and growing beautifully. This week, we introduced a SCROG (Screen of Green) net, an essential tool for maximizing yield and optimizing plant structure. Let’s dive deep into the why and how of scrogging: Why Install a SCROG Net Now? Maximizes Light Exposure: The net allows even light distribution across all branches, ensuring every bud site gets the optimal amount of light. Controls Plant Height: By guiding the branches through the net, we keep the canopy even and prevent excessive vertical growth. Enhances Airflow & Reduces Mold Risks: Spreading the plant out increases air circulation, reducing humidity pockets and minimizing risks of mold and pests. Increases Yield: More bud sites exposed to light mean higher-quality flowers and greater overall production. For now, we’re still not using the under-canopy lights, though they will come into play soon. The ICL 300 is positioned strategically, and we will likely move them around as needed later. For now, the focus is on structuring the plants and ensuring they fill out the available space properly. Optimizing Airflow - The Vortex Effect Air circulation is crucial for plant health, and this week, we’ve optimized airflow by positioning the fans to create a vortex effect: Fan Positioning: Each fan is placed at the tent corners, pointing in different directions, ensuring dynamic airflow instead of direct wind hitting the plants. Benefits of a Vortex System: Reduces hot spots and evenly distributes CO₂. Strengthens stems by creating a natural resistance. Prevents stagnant air, reducing mold and pest risks. The extraction system is powered by an AeroFan, connected to the AeroFan Smart Remote FRC1, currently running at 60% speed. This setup efficiently manages humidity and temperature while maintaining optimal air exchange. Current Environmental Conditions & Feeding For now, we’re maintaining the same water schedule and nutrient regimen. The environmental conditions remain stable: Temperature: Holding steady at ideal growth levels. Relative Humidity: Balanced to encourage healthy transpiration. PPFD (Photosynthetic Photon Flux Density): Kept at optimal levels to support vigorous vegetative growth. CO₂ Levels: Elevated but within safe limits, promoting faster growth. The plants are filling the space beautifully, but we know that the flip to flower is approaching soon! The next phase will depend on how fast they continue to spread, and adjustments will be made accordingly. Closing Thoughts & What’s Next? This week was all about structural optimization—ensuring proper airflow, training the plants with the SCROG net, and keeping everything in balance before the transition to flower. The upcoming weeks will be crucial, as we fine-tune the environment, possibly introduce the under-canopy lighting, and prepare for the flowering stage. A huge thank you to our sponsors Aptus Holland, TrolMaster, CannaKan, Grove Bags, Ziggi Papers, and of course, Zamnesia, Plagron, and Grow Diaries for making the Eternity Cup possible. And to our incredible community—followers, supporters, and even the critics—we appreciate every single one of you! Stay tuned for next week’s update, and don’t forget to follow along on YouTube and Instagram for exclusive content and behind-the-scenes looks! See you soon, and happy growing! Let’s keep pushing forward, and best of luck to all the competitors—we’re all growing something incredible together. Until next time! Genetics - Runtz https://www.zamnesia.com/6000-zamnesia-seeds-runtz-feminized.html Nutrients - Plagron https://plagron.com/en/hobby - Aptus Holland https://aptus-holland.com/ Controls - Trol Master https://www.trolmaster.eu/ LED - https://www.futureofgrow.com/en LED - https://www.thinkgrowled.com Soil - https://www.promixgardening.com/en Germination - Cannakan https://cannakan.com/?srsltid=AfmBOopXr-inLXajXu3QFgKXCXXos4F1oEvScjMKIB5MR5dk8-GJ-F49 DOGDOCTOR 15% off Smoking Papers - https://ziggioriginal.com/ Terpene saver - https://grovebags.com/ As always thank you all for stopping by, for the love and for it all , this journey of mine wold just not be the same without you guys, the love and support is very much appreciloved and i fell honored with you all in my life With true love comes happiness Always believe in your self and always do things expecting nothing and with an open heart , be a giver and the universe will give back to you in ways you could not even imagine so As always, this is shared for educational purposes, aiming to spread understanding and appreciation for this plant. The journey with nature is one of discovery, creativity, and respect. Let’s celebrate it responsibly and continue to learn and grow together! Growers Love To you All 💚 #EternityGrowCup #RuntzHunt #GrowersLove #CannabisCommunity #AptusHolland #ProMixSoil #TrolMaster #Zamnesia #Plagron #ZiggiPapers #Grovebags
Likes
29
Share
@Libanese
Follow
I switched the timer on 12/12, i will do not defoliation for 2-3 days and after i will do it, no too massive but i want have as much light i can in the second bloom week. Half week: I modified the layout of grow room, I putted the vertical net behind the tube to earn more space for plants. End week: I did the first of the last 3 defoliation . The plants has a lot of shoots, it hard to arrive to cut the 3 plants on the back, i decided to cut only the leaves and try to have more shoots possible
Likes
4
Share
Likes
29
Share
@Edenganj
Follow
Some significant yellowing a day apart from feeding. Did I give it a nutrition burn by changing the ratios of nutes? I probably should’ve done a flush before feeding.
Likes
21
Share
@Hydronaut
Follow
Hoping that this week will not be a tennis match with my PH and my nutrient solution. Last week I saw my solution drop a full point in a matter of hours - consistently. I also ditched the PH up/down dosers crutch two grows ago, and I am not missing it as the intel is far better without them. IMO PH dosers do not give you real-time feeding feel from your plant - yet they adjust your PH to the "Perfect" level. Less is more in this craft, and in more ways than not. There is a balance between technology, automation, efficiency and most importantly - humans. If we removed the human element out of a grow, the product will be inferior, right? - trichome check showed mostly cloudy, with a few random amber if one looks hard enough. She’s ripening nice and reservoir running fairly normal for late flower. Wonder if that zero water filters-gone-bad caused my major PH crashes. Fed her KookBloom dry only this week and now in a 2 day flush. Should be about 10% amber.
Processing
Likes
6
Share
All in all every strain is doing great! Blueberry is the closes to finishing followed by chemdawg and lastly the Somango I just flipped little over a week ago so still have a little while to go with her! Blueberry has a pungent and fresh berries/citrus aroma going on while the chemdawg has the infamous og odor no doubt og is related to it haha. Thanks for checking it out! XD ..sorry for the delayed update
Likes
47
Share
The ol lucky 13 is hanging in there. Doing her thing. She is smaller than the FBTO1 but looking healthy. She is starting to show signs of transitioning to flower. Hope to see a little stretch on her over the next week. I have been plucking some leaves from the top to get light to as many buds as possible. Also cleaned up a few lower branches that were never going to make it to the top. Going to keep plucking a few here and there as she stretches. I totally neglected their water running it 2 weeks without checking it, but I kept an eye on the leaves and there were no issues. I gave them a flush and fresh nutrients today. Started them on a little maxibloom. Will probably start some liquid Koolbloom next week. She is under a galaxyhydro 140 watt but there is 1000 watts total led running in the room so she is getting some extra light from those. Nutrients per gallon .5 tsp maxigro .25 tsp maxibloom .5 tsp calimagic Ph to 6.0
Likes
175
Share
Day 15 Today I switched the lights from the Seedling program to the Growth program. I measured around 640 PPFD at the canopy level so a bit high for early veg but I will leave it where it is now and keep an eye out for light stress, and raise the lights if I have to. I also added a second USB fan for increased circulation. USB fans are great when the plants are small and you don't want the stronger winds that the regular clip fan generates. I also started the clip fan but directed it towards the lights to help keep them a bit cooler. I adjusted the extractor fan from 60 secs Off/30 secs On to 30 secs Off/30 secs On in order to remove more hot air. This will have to be tweaked further and I'll monitor my temps to figure out a suitable setting. It becomes a balance between temp and humidity. I really wish I had a system where I could set a target VPD and then the system would automatically adjust temps and humidity to follow that target. Not practical in my small setup though but maybe one day... Temps are always an issue in my setup as I have two powerful lights inside one small tent without AC. I have set the light cycle so that the lights are on during the night but off during the day to help to balance the temp a bit. I'm also considering getting some extension cables and put the LED drivers outside the tent to see if that helps to bring down the temps a bit further. Later in the grow I will use CO2 so that will help a bit against higher temps. Finally, I watered the plants as they were getting a bit dry. The left plant got 1 liter and the right plant 1.5 liters as the sensor reported that that pot was a bit drier. I reckon it has to do with the plant being larger (almost double the size of the other plant!) I should also really get my ass in gear and hook up the Blumat system so I don't need to worry about hand watering. Day 16 Nothing to report really except some additional growth, both vertical and horizontal. Day 17 Watering time again. Gave them 6.2 pH water this time and once again more to the right plant as it drinks more. I guess around 1.3 liters for the left plant and 2 liters for the right one. I tried putting in my small USB humidifier into the tent but I soon realized that it can't share the USB power that the fans are running on so will have to get another USB power cable in there. Didn't expect that small humidifier to use that much power. Oh well, that's a job for another day. Day 18 The girls are thirsty it seems as I had to water again today according to the Blumat sensors (I really, really need to install my Blumat system as soon as possible but should get the last bits that I need in a day or two). I gave them 2.5 liters of water (pH 6.7) and once again a bit more to the right plant. I also was able to squeeze in my tiny humidifier into the tent even though the tomatoes are still in there. Turns out that all I had to do was to switch the USB power adapter from the old Samsung one that I used to a more powerful iPad charger. Now it works just fine to run the fan and the humidifier on the same power. The reason why I'm using a small USB humidifier instead of a proper one is simply due to the lack of space in my small tent. This (very basic) humidifier is the smallest one I could find yet have a decent size tank so I don't need to fill it up all the time. Day 19 The cover crop EXPLODED since yesterday so the first thing I had to do today was to cut that back a bit. I also started brewing some compost tea (AACT). I mixed together worm castings, rock dust, biochar, lime, bentonite, neem meal, kelp meal, and molasses and will leave it brewing for 24 hours and then feed it to the plants tomorrow. Would have liked to add alfalfa meal as well but haven't been able to find any. I usually put my seed starter warming mat under and taped to the brewing bucket to increase the tea temperature and microbial activity. The plants are doing their thing, a little bit taller and a little bit wider. I will probably top the right plant next week but not sure about the left one as it is smaller so might need another week. Day 20 The compost tea was ready today after 24 hours of brewing. I fed each girl with around 3 liters of tea (pH 6.8) and as I wasn't planning any foliar feeding this time around I kept the tea unfiltered. So that everything that went into making the tea ended up as a top dressing. I guess I don't have to water for a couple of days after this. Not much change is plant size but the leaves are filling out. Day 21 Today was completely uneventful so not much to report except that I probably will top the right plant tomorrow as it is up to 5 nodes.