Likes
Comments
Share
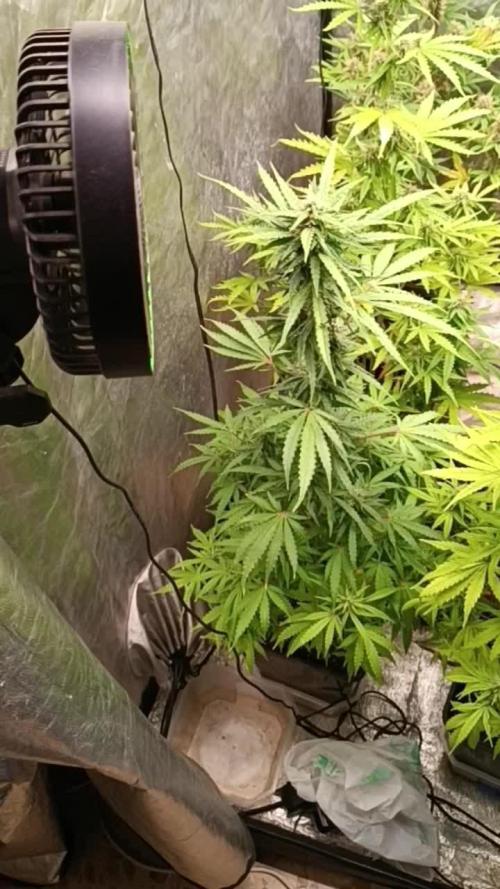
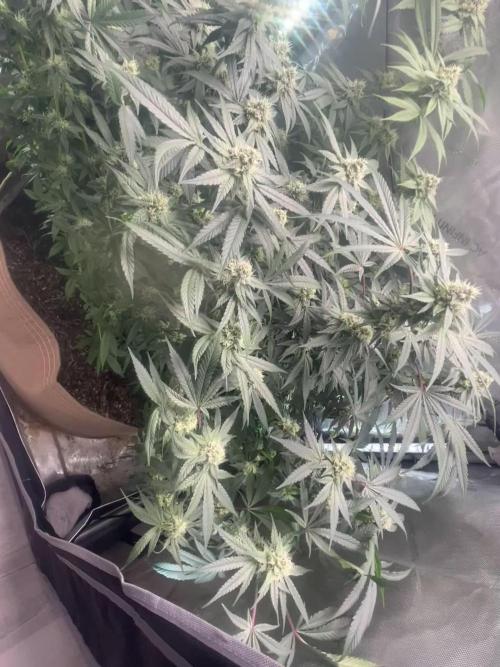
Nice big plant, lots of dense buds. It smells a little bit citrus, but not strong smell.
Likes
3
Share
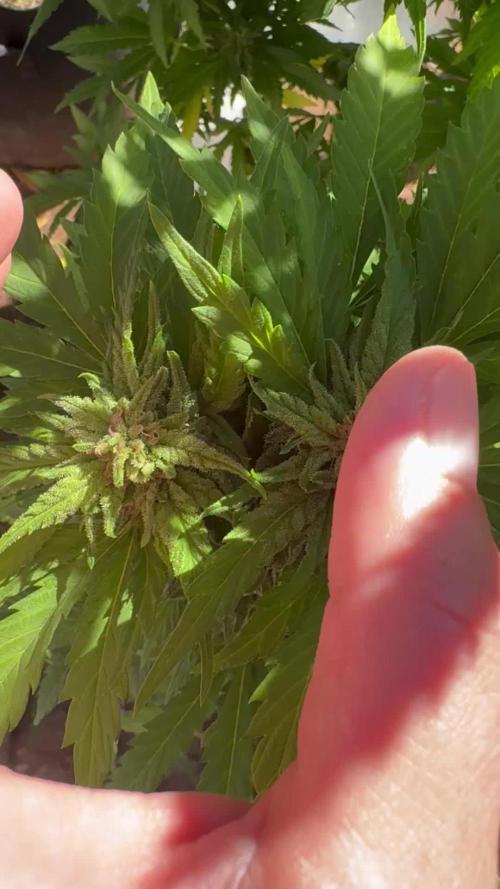
Anotheer amaazing Black cherry punch pheno, beautiful colas, they looks just like rockets, so fat dense and sticky colas man. So in love with this black cherry punch, same sweet aroma, very fruity and sweet just like her sisters. I'm very happy with how this strain has performed in my garden. All my plants are 100%organic grown. She's been grown with florganics FLO Living soil, guanokalong organic dry amendments and Silicium flash by biotabs which contains bug shit and helps to keep a good microbial activity in your soil, it also contains silica, Flo living soil is full of life too man, I'm getting top clean aromas, very clean medicine for myself. It's such a pleasure to work with what I love the most. My cannabis 🤞💚😋🍪 peace everybody!!
Likes
42
Share
@Grey_Wolf
Follow
Barneys Farm Pineapple Chunk update 5th Jan 2020 11th week of veg over and done with. Ive done quite a bit since the last update as far as this girl is concerned 1st of all i erected a greenhouse that covers all of my Photo period plants. and secondly I transplanted the Pineapple chunk out of the pot she was in and put her straight into the ground so I'm expecting and hoping that she will explode once the stretch starts in about 5 weeks or so. The soil I moved her into is really nice and fertile as it was used to grow winter vegetables and Broad beans. The growing of legumes can benefit the soil by bringing nitrogen to the surface to be made available to anything else growwing in the same soil. I gave the area I transplanted her into a good dose of Azospirillum and Mycorrhizal innoculants after she went into the ground. Thankyou for checking out my update see you next week 👍
Likes
2
Share
@Jokey4
Follow
This plant is my first real plant because the first one had a genetic mutation coming from the seed because I gave it exactly the same conditions as this one and therefore I will consider this plant as my first plant. I am very proud of myself to have obtained such a yield (188g wet) with very few problems during the culture of this Steacky Beast Automatic from Zamnesia. This plant resisted very well to a nitrogen deficiency due to a too high ph because of my ph metter which was out of order but also to a small burn to the nutrient. I started rinsing on day 54 (it lasted 2 weeks and a half). I couldn't put you pictures of the trichomes but they were perfect for the harvest and the pistils were also matching so here is why I waited until day 73 The heads are hung in the culture box with brown soft ties (I removed everything except the extractor and the filter), the box is plunged in the dark so it's perfect for drying Thank you for your interest in my growing diary! See you soon, Jokey4
Likes
27
Share
1/20/2023- So much to do pre grow and over the next 16 days, absolute first order of business is that I have to take down my current Grow---TIMBER-- Then I have a list of things I have to get done in order to be ready to start this grow 1 Feb. With that said T - 2 days until start 48 hour Flush T - 2 days until Start 48 hours of Light T - 4 days until TIMBER!!! Items that need to be done before 1 Feb 2023 1. I need to clean the tent out 2. I need to clean the equipment- Proper Sanitization between grows in Hydro is a must!!! 3. I need to get the hole in the ceiling above my tent repaired- For my last grow I had a deep sink installed in my grow room, to make Hydroponics a little bit easier and have a water source in the same room. The seals on the pipes they were installing broke and leaked through the ceiling causing some damage all the way across my grow room, I was already weeks into my grow and couldn't risk them working above my tent and it would have been very awkward positon for them to be working in as well, so have to get this done quickly between chop and germination. 4. I have to install my new light- I was using a Vivosun 4000 and for this grow I am switching up to a Spider-farmer SF 7000. 1/20/23- For this upcoming grow I am working with M/F photo seeds so I ordered 4 Sex determination kits. I recieved my my 4 Sex determination testing kits from Rimrock Analytics today. I will be using these to test my plants at week 2 of Veg so that when/if I take clones I know I am taking them off females. As well as I don't want to accidently pollinate my tent during this grow I am looking for big beautiful buds not seeded buds. :-) 1/24/2023- Harvest of current grow- Started at 2:00pm and finshed wet trim and firt batch into the freeze dryer. 1/25/2023- Next batch into the freeze dryer and cleaning all my equipment for this Grow. T-1 Day until the workers are supposed to be here to fix the hole in the Grow Room. T-3 days until I instll my new Gorilla Grow Tent and my New Light Spider Farmer SE-7000 for this grow. T-7 Days until Start of Germination 1/26/2023- Harvest is done ran through the Freeze dryer and dry tim completed. 1/27/2023- Grow Room repairs completed. Hole is gone Letting the paint dry before I install the new tent. T-2 days until Install the New Gorilla Grow tent and the new Light T-3 days until I put the hydro equipment in the new tent T-5 days until Germination 1/29/2023- Day 0- Final Pre Germination activities Germination Start T-3 days The paint on the ceiling was dry and it was time to finish prepping for Germination. I got the following items knocked off my list. New 4X4 Gorilla Grow Tent is up and ready New Spider Farmer SE-7000 Light is installed- Thanks Moony Grows for the suggestion and for the Code that got me some money off and free shipping (Moonygrows)!! I turned the lights all the way up to max and set the timer to 18/6 0600-0000. I will keep an eye on the temperature and humidity without my plants and see how hot it gets with the new light. I put my Hydro system back together and put in 40 gallons of water into it, time to monitor for leaks the next few days. I Setup my cloning machine for Germination Days 3-11 1/30/2023 let me break down the situation, ROOM in the TENT.. Enough said.. No really I tried putting my exhaust system up in the new tent with my new light, The light is so big corner to corner that it really didn't give me enough room for the lights be be raised, with the exahust hanging the buckets my plants are Starting in are 2 and 1/2 feet off the ground, great for plenty of room for roots but not so great for upwards space for the plant to grow. In a 6' 11 tent with the exauhst in side and hanging that only gave me a little over 4 feet of grow room to play with. My last grow if you saw my diary, anyone could tell I was struggling to keep the buds off the lights. No good, Since space was such an issue I was running my carbon filter inside on the ground but It really needed to be up sucking the heat out not shooting the cool out. With that setup I was sucking air through the filter and pushing it out the tent at a bottom exhaust hole cold out. Wasn't doing me any good for my heat. I was hitting temps of up to 85 degrees. I bought a portable AC unit and have been running it in the grow room to try and keep temps below 85 and I have had to lower the power on my lights during grow also not ideal.. With that said a friend of mine MoonyGrows (Check out his diary) took the time to look at my issue send me a picture of my grow tent setup with detailed instructions on how to suck the air out from the top but putting my filter and fan on top of my tent so no room issue and I am sucking the air out from the top where the heat is instead of pushing the air out from the bottom where the cool is... THANK YOU MoonyGrows For taking the time to help me get this straightened out.. Now I have room and I have the exhausts working right and now my temps with everything at 100% are topping out at 80 this dropped the temp by 5 + degrees at 100% max. T-2 days until Start of Germination Prepped my seed tray with humidity dome Prepped my Rapid Rooter plugs. I Used RO water, and I added a few drops of Hydrogen peroxide to Oxygenate the water. I then PH balanced between 5.7-6.0 the same that they will be getting in the Cloning Machine and when they get to thier final grow pod. I perfere the 5.8x range and I hit 5.84 for these rapid rooters. If you want to see a complete video on the process HowWeedGrow has an amzing video that shows step by step how to do it and explains it better than I ever could including how to plant the seeds. Which I will cover when I get to that step on Wed. https://www.howweedgrow.com/how-germinate-weed-seeds-cannabis-rapid-rooters/ 1/31/2023 T-1 day until Germination Start All set and ready have my Rapid Rooter plugs ready to go have my seeds out.. Have my seed tray warming up tonight. Tomorrow morning right into the Rapid Rooter then strait into the tray. I will spray the dome to start the humidity in there. 2/1/2023 Germination Day!! Let the games begin! 0600am Put the seeds into the Root Riots. And then put the seeded Root Riots into their first home the Seed tray. I have them under the light 24/7. Sprayed the dome 7:30pm Sprayed the Dome to keep humidity going on the dome. 2/2/2023 Day 1 of Germination Sprayed the Dome in the morning Sprayed the Dome in the evening 2/3/2023 Day 2 of Germination Roots are starting to come out the bottom of the root riot plugs and the heads are slowly popping out of Number 4 just below the surface. Afternoon- Number 4 has popped up Evening- Number 3 has popped up as well. Happy Dance!! 2/4/2023 Day 3 - Germination Surprise Surprise Surprise- all 4 have now poked their heads up.. Happy day!! 100% Germination succeeded. Now major milestone to track is how many are female and how many are male. I will take look at the roots this afternoon/evening and see if they have enough root to go into the cloning machine for the next 7 days before they go into their Hydro Pods. Day 3 - Germination - Evening.. Roots looked good and they were tall enough to make it into the cloning machine. Now that they are all in the cloning machine I have switched the lighting to veg state 18 on 6 off. 2/5/2023 Day 4 - Germination - Morning All the Ladies (fingers crossed) looking great stretching nicely and look nice and green, Photo synthesis underway.... UPDATE!! After a very interesting POD cast on FSTS by Dr. Bruce Bugsbee from Utah University, I have shifted my lighting to 24 hours on through seedling and then I am going to shift to 20 hours on the rest of Veg. 2/6/2023 Day 5 - Germination While Checking on my conditions inside the new tent last night, I found that the Humidity was down to 39 Percent. I added an AquaOasis Cool Mist Humidifier, the reason I selected this humidifier is that I needed one that could be turned on and off utilizing my Inkbird Humidity Controller IHC200 that I have my Pro Breeze Dehumidifier currently running with. Root structures are starting to get there about 1/4 of an inch. 2/7/2023 Day 6 - Germination Everything seems on track more roots poking out of each today. They are each getting a little taller as well. Checked in the evening and number 3 was drooping the Root riot plug on the bottome was dry and the roots were not in the water yet. I raised the water just enough that the longest root that was sticking out is now hitting the water. 2/8/2023 Day 7 - Germination Everything looked good while checking in on them this morning number 3 is now full up and no droop again. 2/9/2023 Day 8 - Germination T-2 days until Plant into Forever Pods and we start week 1 of Veg .. :-) Surprising thing to me is that number 1 and 2 were later in popping then 3 and 4 but the roots are growing longer in 1 and 2. 2/10/2023 Day 9 - Germination Number 1 and Number 2 are definitely ready for transplant today.. Based on how they were yesterday and where they are today I am hoping by tomorrow 3 and 4 are ready. Today they look to me where 1 and 2 did yesterday.. I really hope 3 and 4 catch up by tomorrow since.. T-1 day until transplant to new/ final home for grow. Need the roots long enough to have some clay down in the basket to keep the root riot out of the water and only roots in the water.. 2/11/2023 Day 10 - Germination Today they got placed in thier forever Home, 7 days from Sprout and 7 days until Week 1 Start. PPM- 180 this is water out of the Tap Temp Water: 70.7 Temp Tent: 77 Humidity: 40% I have a humidifier going 24/7 to try and bring this up.. I also have Humidity Domes on each plant. 2/12/2023 Day 11 - Germination Sprayed the domes, all are looking good.. Nothing much to do at this phase but Keep monitoring the PH level in the system and making sure they have a comfortable home. T-6 days until Week 1 start 2/13/2023 Day 12 - Germination Sprayed the domes, They were looking a little yellow today so I moved the light down to assist. Nothing much to do at this phase but Keep monitoring the PH level in the system and making sure they have a comfortable home. T-5 days until Week 1 start 2/14/2023 Day 13 - Germination Sprayed the domes, They were looking a little Florissant yellow today, with what looks like slight burn on the tips, I talked with a fellow grower and we agreed that It was probably that I was drowning them, Yes you can drown you plants even in Hydro, but only early on.. :-) It usually happens with the water being too high, which soaks not only the roots but the medium (root Riot plug in this case). I lowered the water from touching the bottom of the pot to about 1" away. This will probably take 3-4 days to resolve. I will continue my daily monitoring. T-4 days until Week 1 start 2/15/2023 Day 14 - Germination Sprayed the domes, continue my daily monitoring they look a little darker green instead of lime green now that I lowered the water levels in the system, so I think that I might have resolved the issue but it will take a few days for recovery to happen. T-3 days until Week 1 start 2/16/2023 Day 15 - Germination I looked in on them this morning, 3 and 4 look like they are doing well and recovering nicely. Number 1 not so much it has brown spots on the leaves, this very well can still be a side effect of the overwatering but I decide to go ahead and add Nutes earlier than I was planning just incase. I was going to wait until Saturday but I think intervention is necessary now especially after drowning them early on. I added 1/2 what I am planning on adding for week 1 start. I also think I am going to adjust my chart to add 1/2 2 days after plant from now on. I don't think it would hurt it to have some Nutes to pull from. .25ml/Gal Calmag = 12.5ml 1ml/gal GH FloraMicro= 50ml 1ml/gal GH FloraGro = 50ml 1ml/gal GH FloraBloom = 50ml T-2 days until Week 1 start = I will drain the system and start it over on Saturday with Week 1 Nutes. 2/17/2023 Day 16- Germination I didn't even want to post today after looking in on them this morning, 3 of the 4 are now showing signs of dronwing.. Brown spots on the leaves, the water levels were still too high.. I drained about another inch out of the tanks.. Will see how quick they recover.. I start week 1 tomorrow and will have to ensure my water levels are at least 1" away from the basket on this round.
Processing
Likes
4
Share
Dropped the seeds in water in the afternoon, the day before yesterday. I just put them in the pots about an hour ago. I am growing 4 in a 4X4. All the seeds were split and showing just a bit of the root. I mixed about a teaspoon of Azos with the soil just where the seeds are, in the center of the pots. I mixed it into a depth of about 3 inches. I am misting with PH (6.4) adjusted water. Will grab some pics when the girls come up. It should just be a couple of days. Update for the week. It's early morning on the 9th, 5 days since planting. All 4 of these Fastberrys were up within 48 hours of going into the ground. They popped within 12 hours of each other. They have now been up for 2 days and are looking good. Still misting with just PH (6.4) adjusted water. I will mist for a couple more days and then start real watering. The first watering will include Mykos WP to help with root growth. So far off to a good start!
Likes
25
Share
@m0use
Follow
Easy going week. nothing much to report. The EC pen I got is acting weird already. sometimes I'll put it in the feeding liquid and it will display 400ppm something. Then if I move it about or drip it in and out it will jump up to 700ppm something. I doing it over and over till I get a base line and go from that. this weeks EC was aorund 680ppm but the video does not show the other dips I did. PH still kicking aorund 5.9. I find it more annoying to adjust just the waters PH for these plants on the balcony where everything else is "as is" Will try this again indoors in a peat and perlite medium void of any other additives when It can have more of my undivided attention. maybe on the other seeds I got from FB via a friend in the mail. Side note uploading videos into the diaries is great and all, but takes to long to resize and process, can't hit save till its all done... no idea what its doing in the backend. stupid rule on contest must have videos every week,
Likes
8
Share
Hey guys! New week, here we are! As always, every Sunday is cleaning day. Took everything again from the tent, washed the saucers. Was also time to cut down some leaves as it was starting to look very bushy and hard for the light to get through it. During that time, came across with some bugs under the foliage, which isn't a great sign for sure. Not to mention the fruit flies that moved in and are making my life a little chaos. Reducing now the RH a bit, and watering now on every 72h instead of 48h to keep the grow as dry as possible. Increasing the ventilator speed was another attempt, it so much air circulating should be hard for them to make a living inside. Just put now more of those fly traps and will add a couple glasses of cider vinegar here and there, as it attracts most of the flying things with success. Note that some plants are yellowing/fading away and that's never a good sign This is the one with the most visible symptoms, And keep scratching my head around it. Thought for few weeks it was Nitrogen deficiency, but after increasing it and the CalMag values, the problem persists, so I'm inclined for something bug related. Besides that, temps are still very stable, RH was changed, now to 40% tops, and the light went a little lower to get it closer to the plants - always with the light burn effect in mind. 40cm is the line between the tops and the lamp. Flowering is looking good, buds are forming well and seems that's gonna be a good ending if I can keep the bugs under control. No smell yet, the Amnesia takes over in that field, giving her a few more days/weeks until we can start feeling her scent :D That's all folks, have a great week
Likes
164
Share
At the start of week 8 she is still doing amazing and looking very healty and lush green the little nuggets are fatning up nicely and smelling very tasty cant put my finger on it what the smell is but its like a certain brand of bubblegum very sweet Day 51 drinking 33cl a day that’s a lot for such a little thing but she takes it in 3 times feeding her at 6 in the morning 5 in the afternoon and 11 at night like a little baby that needs her bottle in time Some of the outer leaves are colouring a little but hey she is half way her flowercycle so i expected her to start showing Some kind of signs that fall is starting to kick in Day 53 split her stem on top of her flux knob to increasse thc and budproduction to the fullest potential and binded a soft bendie arround it so she does not split further then neccesary🙏🙏 To all contestants the end dates is moved to 31 december due to Some unexpected and unnormal wheather factors with Some of the contestants Some of them have to unfortunatly start over so to give every one a fair chance final date is 31 DECEMBER!!! Or 14weeks as maximum growcycle Everybody gets that?!🙄🤣🤣 Not many people know about this trick, but I’m sharing it with you today. Have you ever heard of splitting the stem of your plant? No? Well, did you know this will force your plants to create heavier and denser buds? And it also increases THC production up to 20%! The purpose of stem splitting is to disturb the flow of nutrients and water right at the base of the stem. This will cause the plant to start producing more trichomes which means heavier and denser buds with higher THC levels. Make sure to read my article How to split the stem to increase THC levels after I tell you how to do this in 3 easy steps. How to split the stem in 3 easy steps: Step 1 Tie the stem with a rope or cable tie right at the base. Tie a second rope or cable tie a couple inches above that. Step 2 Take a very sharp knife and cut from the top tie to the bottom tie. There should be one vertical cut that is a few inches in length. Step 3 The knife should remain inside until you have a pencil or chopsticks to replace it with. This is to keep both sides of the marijuana plant from touching each other. Splitting the stem causes stress on the plant and forces it to create more trichomes. Trichomes serve as protectors of the marijuana plants. Specifically against pests, diseases, low temperatures and wind. Because of this protective feature, more trichomes are produced during times of stress. Take advantage of this special feature and read this article about splitting the stem and many more secret tricks to grow huge buds and increase your yield
Likes
55
Share
@nonick123
Follow
Día 57 (10/03) Riego con 400 ml H2O EC 0,45 Día 58 (11/03) Los cogollos no paran de engordar y ponerse duros como rocas 😍💥 Riego con 500 ml H2O EC 0,45 Día 59 (12/03) Se muestra llena de tricomas! Espectacular! Riego con 500 ml H2O EC 0,45 Día 60 (13/03) Riego con 500 ml H2O EC 0,45 Inicio un experimento a ver cuantos días aguantan sin regar habiendo regado dos días seguidos con 500 ml, ya que voy a estar 3 días fuera la semana próxima.... Día 61 (14/03) No riego Día 62 (15/03) A las 48 horas las macetas empiezan a estar ligeras, aunque no secas, pero NO van a aguantar 3 días sin riego Riego con 350 ml H2O EC 0,45 Día 63 (16/03) Aplicación de 0,5 Litros de PK Booster Compost Tea de nuestros increíbles amigos de BIOTABS 🚀 Khalifa Genetics - https://khalifagenetics.com/product/lemon-blanco-v3/ @khalifa.genetics 💦 BioTabs 15% DISCOUNT code "GDBT420" biotabs.nl/en/shop/ @biotabs_official 🌱Substrate PRO-MIX HP BACILLUS + MYCORRHIZAE @promixmitch @promixgrowers_unfiltered 💡2 x Mars Hydro FC1500 EVO Led Grow Light (2024 NEW FC 1500-EVO Samsung LM301H 150W LED) - https://marshydro.eu/products/fc1500-evo-led-grow-lights/ - https://www.amazon.de/dp/B0CSSGN5D8?ref=myi_title_dp
Likes
14
Share
@Kakui
Follow
15 Noviembre: -Hoy se instaló el sistema de riego "Drip to Waste" que me permitirá hacer riego de precisión, con protocolo "Crop Steering". -Se instalaron sensores de humedad de suelo, para saber cuándo y cuánto regar, el sistema manda datos de humedad de suelo, temperatura y humedad ambiente, etc vía internet a mi celular. -Mañana se comienza con el primer riego de precisión. 17 Noviembre: Segundo día de riego automático, 3.0EC y 5.9pH, las plantas crecen a buen ritmo, las raíces ya están saliendo por los orificios de drenaje a 2 días de transplantadas. 20 Noviembre: Se realizó una pequeña defoliacion de las hojas tipo abanico muy grandes.
Likes
6
Share
Likes
55
Share
@BodyByVio
Follow
Had to put another layer of netting for support.
Likes
127
Share
@SwissKush
Follow
Week 9 of flowering, Day 92 = the smell is incredible a. the buds are smelling very sweet, and still growing very large b. we are in the home stretch c. the trichomes are very milky d. the DWC is half full of 1620ppm nutrients at 6.5PH, I am cutting it in half with Mineral Water to finish the maturing process e. stigmas are changing color very rapidly, and the smell is incredibly strong Day 93 - WOW! The smell is becoming very intense a. we do not have a carbon filter on this box as it is out in our barn, but holy cow when we walk about 5 meters from the barn we can smell it strong b. added 4L of mineral water to the DWC to cut the Ripen down c. the buds are maturing fast! this will be harvested around day 100/101/102 d. for this week we are moving light to 11/13 Day 94 - resin explosions everywhere a. the light switch always makes more resin appear, and causes white stigmas to turn pink/orange b. she has slowed down her drinking a bit c. tomorrow the DWC will be pumped out, and 10L of water with FloraKleen will be added for 2 days Day 95 - trichomes look wonderful! a. 100x microscope shows really nice trichome development, majority milky white, with some amber, a few clear which should go white/amber in the next few days, and while drying. b. installed FloraKleen at 3ml/L with 10L of mineral water, will keep FloraKleen in for 2 days, then remove c. the pistils are all turning red/orange and brown Day 96 - growing well a. the buds continue to fully mature, the pistils are changing rapidly, and there are very few clear trichomes anywhere I look b. she is drinking less and less, her life is coming to an end I see, i constantly remove dead curled up leaves from her Day 97 - maturing, and smelling awesome a. i uploaded a video of the buds b. the trichomes are all milky white, and a probably 5-10% amber, they are SO greasy! Just like Girl Scout Cookies! c. installed a dehumidifier into the tent, it works well Day 98 - she is in the harvest window a. what a great plant to grow, 95% pistils are orange/red/brown and trichomes are 90% milky, 5% amber and a few clears here and there b. I am removing some leaves today to open her up a bit c. I think we will go another week, I will be in Geneva, so hopefully she will eat her leaves!
Likes
5
Share
@VeeDro203
Follow
Purps!!!! Lowered lights to increase terp production
Likes
31
Share
@Dunk_Junk
Follow
Nice growth this week. Making roots. Making leaves. She will shoot up in a couple of weeks.
Likes
Comments
Share
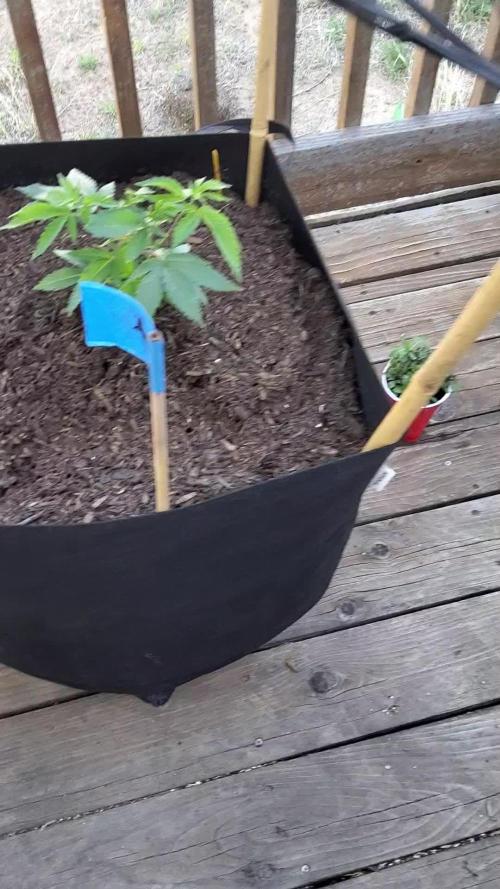
Transplanted to their final homes, 5 gallon fabric pots. Plant's height is 8cm - 13cm. Temp: 22°c - 29°c Hum: 30% - 45% Water ~ 1L each PH: 6.7 On day 16, I transplanted to 5 gallon fabric pots. I amended the Biobizz light mix soil with: *Per 5 Gallon Pot* EcoThrive Grow - 27g EcoThrive Bloom - 3g Ratio = 90/10 Now they're all drinking 1L a day. L.S.T: I topped the two American Beauties once each on Day 20 at the 5th node to allow the Cherry pies to catch up. 😁 Very pleased!