


Likes
Comments
Share


@BOMbolenath
Follow
Very nice strain, classic smell like citrous and mango. Compact plant with lot of dense buds.


Likes
18
Share


@VI_Cannabis
Follow
July 5 - The girls are still doing awesome. temps are between 21-26. Humidity is 40-50. Still feeding every 24-36 hours with 3L per plant.
July 6 - They are doing good. Showing lots of flower sites now. Unfortunately I did not get any pictures today.
July 7 - Tons of progress since last week. I don't see any signs of any problems, and still no pests! The smell is getting A lot stronger as it starts to flower more
July 8 - Still doing there thing, no problems, temps and humidity is fine. Have been feeding every 24 hours now as they seem to be really thirsty
July 9 - Super happy with how they are doing. No issues yet. Smell is heavier, and tons of bud sites showing up. Only issue is they are growing pretty uneven.
July 10 - Time to get a even canopy! First time doing some HST. I also did some defoliation. One of the stems split open a bit but it seems to be doing just fine. I did he HST and defoliation in the morning, i then took pictures of 12 hours later and everything seems just fine!
July 11 - Everything seems to be a lot more even and the broken stem doesn't seem to affect the growth.


Likes
9
Share


@stone2345
Follow
Buds are starting to thicken up and get nice healthy looking trichomes. Plant #2 was under a light that did not have the full spectrum setting on. I didn't realize that and now see that it's development is lagging plant #1. We'll see how this affects harvest, but I'm hoping that the timing will still work out.

Likes
12
Share


@NorthernChemist
Follow
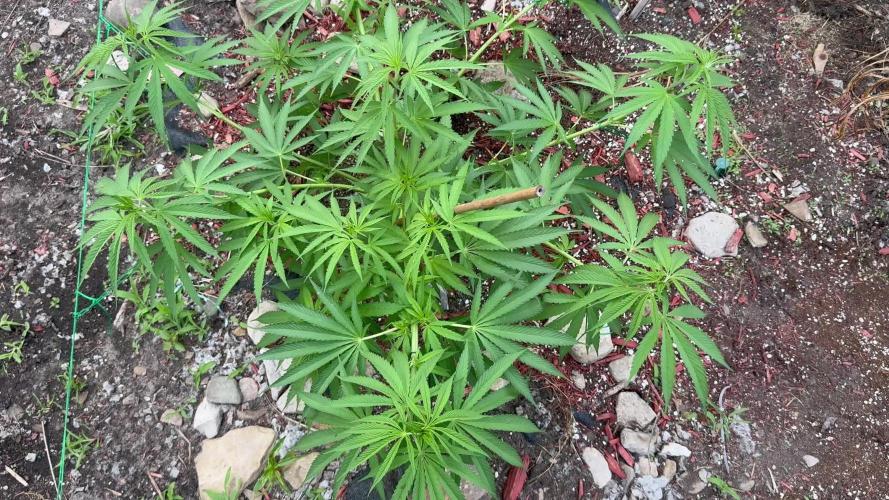
June 11: First week exposed to the full elements. Plants took a beating from the wind but othwise look strong and healthy albeit a bit small. No rain this past week, but soil moisture at 10cm is decent. Preflowers are showing already.
Likes
15
Share


@SamDo
Follow
Hello, fin de semaine 4 de croissance. Le plantes semblent être en bonne santé. Elles ont bien grandies depuis la semaine dernière. Sur les 8, 3 sont vraiment beaucoup plus vigoureuses.
Je les ai passées en floraison aujourd’hui, j’ai donc effectué une défoliation pour enlever toutes grandes feuilles. Et j’ai aussi fait un LST.
Je les aient changées de box, je suis passé sur une box de 1.20x1.20x2 avec une lampe de 600w LED de chez OpticLed. J’espère avoir de bon résultats.
N’hésitez pas à me donner votre avis sur l’avancement de la culture.
A la semaine prochaine.
Happy grow... 😎

Likes
220
Share


@CRiSPrGrow
Follow
Week 0 : Sixshooter
Hawkbo says Six Shooter is one of the top Fast Buds Strains, so i'm like "yeah man might as well run me some of these, i do like my weed top of the shelf!" so here it is with the six shooter , bought these direct during one of Fast bud's promotions, 3+2 x2 for the price of one, so yeah that' s a good deal ! germinating 5 let's see how many i end up keeping, depends on the rest of the seeds too ! overnight in a glass of water with a few drops of my kelp extract , protect it from the light , the next day looks like some already cracked, putting it in the RQS propagator, dont use your fingers to manipulated activated seeds , cover with some dirt, cover the propagator with a blanket to protect it from light and keep the temperature up. Let's see ! within a day three had cracked the surface, one was all squiggly from being put upside down but within a day it has straightened out, the two last ones took 3 more days to crack the surface, i'm saving them and keeping them closeby in case i need to replace any of the planted seeds. Six shooter have been great genetrics so far, i transplanted three of them on day 4. see you next week for more updates !
Likes
6
Share


@XanHalen
Follow
Nov 29:
They seem to be accelerating in veg growth but I see a small portion of the leaf on the smaller plant either grew in mutated or somthing cut it, I haven’t seen a single bug in the box so I don’t think it’s that but you never know, and the bigger plant has some issues near the base of its stem, I noticed it before I did the LST and now I’m wondering if I should have addressed that issue before starting the LST. Let me know what you guys think!
Dec 2:
Walked into the room and noticed a faint smell, wasn’t any smell last night when I started the LST on the slower girl. Further inspection showed some white pistols on the bigger girl, I believe she is the culprit for the smell as the other seems about a week behind. They are both now LST‘d and leaf tucked. Enjoy the pics and vid’s!
Dec 6:
I have tied down some of the longer chutes on the bigger plant (will see in week 5 update) to create more airflow and light penetration as I didn’t even realize how bushy the stem and node sections had gotten. I have also cut the chutes coming off the first true leaf. I don’t think I will make any cuts to the smaller one as it’s already a slower growing pheno. Going on a trip starting the end of week secede to late week 8, so I have a automatic feeder coming from Amazon, and I will continue using it through flower to reduce open tent time.

Likes
2
Share


@ReggaeShark_420
Follow
Im very happy with this girl. 26.8 for a plant got a bit hurt and struggled, the bud is sou beautifull.
Likes
8
Share

@Chubbs
Follow
What good everyone, these ladies are progressing beautifully. Thinking another week or two on these and they'll be pretty much ready to harvest. All in all Happy Growing
Likes
38
Share

@Natrona
Follow
Divine Seeds 2025 Auto Contest AK-47XL Auto
👉Sponsored Grow👈
W9 F5
I wish I could share this week’s weather with you. It was sunny and comfortable in the 70-80s with 50% humidity. This means that whatever the temperature is, the air feels like it, not 10-15 degrees hotter.
My AK-47XL is short under 3 feet and has good node spacing so there is space for air flow. The buds forming don’t have many hairs yet but the trichomes forming on the sugar leaves are visible. Looking at the bud structure, the leaves are tight throughout. This may be a concern for bud rot if the rain and humidity return. I’ll keep a close watch, but so far, she is easy to grow and resistant to fungus and pests.
Thank you all for your continued support and encouragement. Your likes and comments motivate me to keep sharing my journey. Let’s continue to learn to grow together!
Stay green, growers love 💚🌿,
💫Natrona💫

Likes
8
Share


@R1pp3r
Follow
Tan solo esperando la flora ajajsjsjs no puedo estar más conforme con la estructura que alcanzó, sin duda hasta ahora es una de las mejores cepas que eh probado

Likes
22
Share


@ILoVeThiSpLaNt
Follow
Day 73
Qualche giorno e raccolgo queste Crystal Candy XL e la Sweet Cheese rimasta nana (è la terza volta che faccio questo strain e ho sempre avuto piante mutanti).
In quanto a odori le Crystal solito odore di caramelle gelatinose/gomma da masticare (fragola e meloni)mentre la Sweet Cheese sa di formaggio e pompelmo
Tra un mese aggiornerò con le ultime foto 🖐️💪

Likes
3
Share

@Grow_for_Happiness
Follow
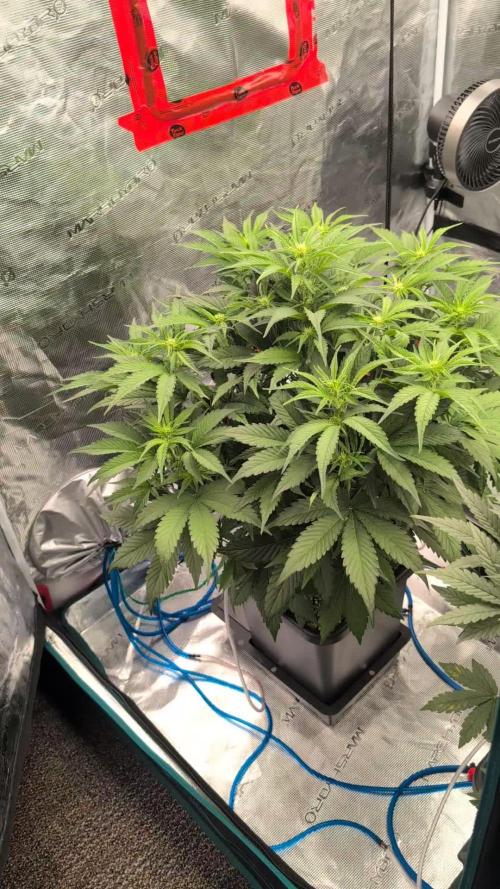
Exciting week, this girl has gone into flower! Was seeing the start of some pistils at beginning of week and by end of week they are fully into flower. Just over an inch of growth a day, and were just hitting stretch. Nice busy even plant, with zero training or defoliation to date. Love how blueberry crosses are almost always naturally bushy plants. Trying out Plagrons Power Buds, claims more bud sites, see how she. Goes! Plants seem happy with the mix so far, so good! Lights at 30" hitting 580-600 umol/s

Likes
Comments
Share


@MonctonGrows
Follow
This strain has never disappointed. Always a beautiful fade and amazing smell.
Likes
7
Share


@Fat_Olsh_Farms
Follow
Day 29. Taking very well to training.
Day 33. Growing at a nice pace. Taking well to anything I throw at her.


Likes
4
Share

@Borberad
Follow
Umstellung an Tag 44. Nach einer 20h Nacht wird in die Blütephase gewechselt.


