Likes
Comments
Share
@TechDCo
Follow
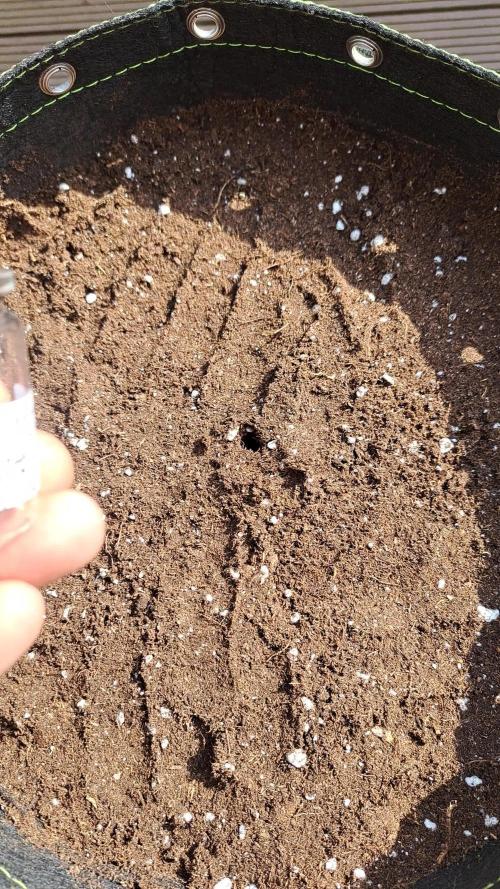
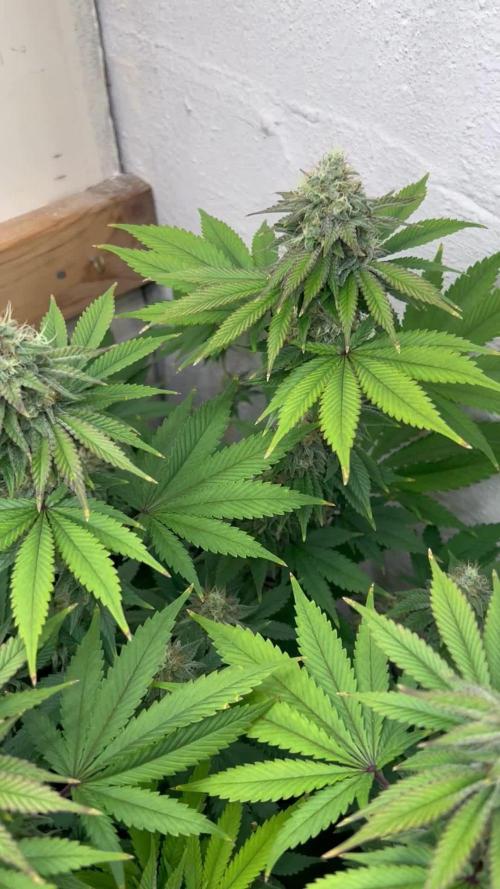
Date: 07/04/2024 Illumination Activated! Anticipating your contemplative response 🤔, it is evident that a larger vessel is imperative for her growth trajectory, considering her current confines within a 19L container. The imminent requirement calls for a spacious 60L receptacle, especially for accommodating the root expansion of this 100% sativa cultivar, akin to cultivating three distinct plants. Rest assured, I am diligently addressing this necessity. My cognitive acuity now far surpasses any previous state, a veritable testament to heightened clarity and focus. Maybe more common sense than my pervious brain dulled 😑 Mid-day: The Train of Disframe I am perplexed by the presumptions some individuals harbor about their own identities, a realm from which I am keen to distance myself. I exemplify the valor to be met with disdain. I abstain from soliciting your allegiance or appreciation towards my creations. Subsequent to the fruition of these cultivation endeavors, their merit shall resonate independently. Should you be inclined to express admiration and allegiance, it brings me joy; conversely, indifference does not perturb me. My aspiration transcends superficial accolades; I envision forthcoming cultivators beholding my endeavors with awe akin to stargazing. "I have the courage to be disliked I'm beyond it" - End of Story 08/04/2024 I find myself amidst the transition to the flowering phase of cultivation, a process I previously jestingly referenced. In humbled reflection, I seek divine forgiveness for my momentary lapse in candor. In pursuing optimal nourishment for my botanical charge, I have meticulously curated a regimen involving the gradual escalation of Sensi Bloom feed to a maximum dosage of 4ml per liter, attuned to the specific needs of the plant. Embracing the role of a discerning steward, akin to a 'Plant Whisperer,' I am dedicated to orchestrating a harmonious symphony of growth and vitality within this verdant realm. 4inch Extractor Fan installed. "The Recurrence Vid" In the compelling narrative title, the strain Forgotten Haze Cakes, classified as a pure Sativa, luxuriates in ample space for vertical expansion during the inaugural fortnight of transitioning phases, courtesy of the employed cultivation methodology. By delicately leaving the initial set of lower big fan leaves, it'll anticipate discourage within the plant from branching and proliferation. In the vibrant realm of my sativa tent, where the verdant sentinels of growth flourish under the radiant canopy of light, a unique challenge presents itself – the absence of a means to monitor humidity levels. Despite this limitation, my steadfast dedication to the well-being of my botanical charges remains unwavering. As the sativa strains bask in the nurturing embrace of their environment, enveloped in a tapestry of vibrant hues and resplendent foliage, I adapt my stewardship with a blend of intuition and experience. //////////////////////////////////////////////////////////////////////////////////// ⏸️ ▶️ "HUMIDITY" + "HUMILITY" = MILITARY! - This saga; can NOT , continue in the Military realm of Sativa" In the captivating narrative of cultivation, where the seeds of growth are sown with care and nourished with intention, a poignant reflection emerges – the distinction between "humidity" and "humility" reverberates with profound resonance. Within the intricate tapestry of botanical stewardship, the ethos of humility stands as a guiding principle, shaping the ethos of caretaking and nurturing. However, as the whimsical wordplay unfolds, the realm of the military - a stark and regimented domain - starkly contrasts with the delicate intricacies of the sativa realm. The sativa tent, with its vibrant tapestry of growth and vitality, thrives in a sanctuary where the essence of humility permeates the air, fostering a symbiotic relationship between caretaker and plant. Yet, the rigid confines of the military realm, with its structured hierarchy and discipline, stand in stark juxtaposition to the organic fluidity of the sativa's journey towards botanical magnificence. In this divergence of paths, the saga grapples with a fundamental incongruity, a dissonance that renders the blending of military precision with the ethereal essence of sativa cultivation an untenable pursuit. As such, the narrative must veer away from the militaristic paradigm, embracing instead a narrative that celebrates the organic harmony and symbiosis that defines the cultivation journey within the sativa realm. With reverence for the intrinsic beauty of growth and a deep-seated appreciation for the interconnectedness of all living beings, the saga pivots towards a narrative that honors the essence of humility, nurturing, and respect that underpin the art of cultivation. Through this recalibration of focus, the sativa tent emerges as a sanctuary of growth and renewal, where the ethos of humility reigns supreme, guiding the journey towards botanical excellence with grace and wisdom. In this realm where empirical data gives way to intuitive guidance, I rely on a finely tuned sensibility cultivated through years of tending to these green companions. Attuned to the subtle cues and nuances of their growth patterns, I navigate this uncharted territory with a blend of caution and ingenuity. While the absence of direct humidity readings may pose a challenge, my keen observation and intimate connection with the plants allow me to discern their needs with a heightened sense of awareness. As the delicate ballet of growth unfolds within the confines of the sativa tent, I embrace this unique opportunity to deepen my symbiotic relationship with Forgotten Haze Cakes. I will adapt my Military training skills with attentive care and a deep-seated understanding of their botanical language, I strive to create an environment that nurtures their flourishing without the aid of conventional metrics. This journey of cultivation, guided by intuition and nurtured by experience, embodies a union of art and science that transcends the boundaries of empirical data, fostering a connection that transcends the limitations of instrumentation. Feed Schedule ATM: 3.5.5ml/L = 66.6 Currently drinking 6L/24hrs 09/04/2024 Effective immediately; all photos taken during the flowering stage must only feature the plant with the lights on. Exceptions may be made in the case of serious incidents or issues that require documentation with the lights off or during mid-day. This protocol aims to ensure consistent monitoring and assessment of the plants' growth and health during this crucial stage. Thank you for your cooperation and adherence to this new guideline. ///////////////////////////////////////////////////////////// - "The Singularity Expansion" - The Singularity Expansion in the realm of my botanical cultivation practices embodies a concept of unification and harmonization. Through meticulous research and thoughtful contemplation, I have elucidated a methodology that leverages singularity as a guiding principle. At the outset, the elements of my grow technique may appear disparate and disconnected, akin to a fragmented mosaic. However, as the cultivation journey unfolds, each component seamlessly converges towards a singular, coherent endpoint, transcending the initial chaos to manifest a harmonious and bountiful fruition. Singularity serves as the transformative force that orchestrates the convergence of diverse elements within my cultivation process, culminating in a cohesive and synchronized outcome that epitomizes unity and balance. 10/04/2024 ...... as the lights illuminated the verdant expanse of my botanical domain, I meticulously undertook the task of adjusting the colas. Engaged in a strategic battle of balance and precision, I ensured that the lush growth on both the left and right sides of the scrog remained impeccably level......currently still in PROGRESS of this battle! - "In navigating the realm of visual representation within my botanical narrative, a distinct dichotomy emerges between the untreated authenticity of unedited photographs, characterized by a vibrant green hue and crisp clarity, and the studio-enhanced counterparts which exhibit a washed-out white palette. Delving deeper into this juxtaposition, I find myself strategically oscillating between these two visual paradigms, recognizing the nuanced interplay between natural realism and heightened studio effects on my S23 Ultra device" - https://youtube.com/shorts/RngRlQwy4Hk WATCH OUT the Kangaroos About! Never mind that Double-O,7, I'm Double-7,0. 707. Amidst the luminous glow, as I embarked on another day of nurturing my botanical companions, a significant milestone unfolded within the realm of my cultivation journey. The arrival of pre-flowers signaled a crucial juncture, prompting a pre-warning to elevate the nutrient feed to meet the escalating demands of this transformative phase. With precision and care, I made meticulous adjustments to the scrog, ensuring the optimal positioning for these burgeoning blooms. The act of "fluffing her" symbolized a tender gesture of support, further enhancing the growth trajectory of my botanical charges. "The Recurrence Vid 2 -Pre Flowers" Upon a recent realization, it has come to light that she does not solely possess the traits of a 100% sativa strain. In a moment of introspection, the humorous realization surfaced that this misconception had taken root in my mind. Nonetheless, she retains her endearing moniker as "Forgotten Haze Cakes," a creation by the revered breeders TerpyZ X Kalyseeds. Acknowledging my humanity, I accept the occasional errors in judgment that may arise, understanding that such missteps are a common thread woven into the fabric of human experience, even among the most seasoned individuals. These moments of revelation serve as poignant reminders of our inherent fallibility, etching themselves into our memories as enduring lessons in growth and refinement. Additionally, it has been unveiled that "Forgotten Haze Cakes" is, in fact, a hybrid of Amnesia Haze "Hy-pro cut" and Vanilla White. This may explain a little depth to the botanical identity of this intriguing lanky plant, enriching the narrative of her genetic lineage. Anticipation brews within me as I eagerly await the unfolding of her growth journey, with fingers crossed in hope of witnessing her blossom into her full potential. Here is a sneak peek photo of her, a visual encapsulation of the promise and potential that lies ahead. The flowering stage presents a plethora of nuances and intricacies to marvel at and contemplate. 12/04/2024 Lights On: Budsites Adjusted Scrog slightly. Pre-Flowers On 13/04/2024, a gentle defoliation was carried out to clear away leaves that were obscuring younger bud sites. Additionally, the nutrient regimen was adjusted to incorporate Sensi Bloom at a concentration of 3.6.6 ml/l, with planned incremental adjustments up to 4ml/l as the flowers begin their enchanting journey towards full bloom. 1 hour after the lights were turned on, it was noted that the extractor fan may have been inadvertently disturbed during the defoliation process. This is evident from the slight drooping of the , likely influenced by both temperature fluctuations and the defoliation itself. Remember to always double-check the outlets after each session to ensure smooth operations. Few hours later.... Cropmaster installed/extra 4inch extractor fan attached! 14/04/2024 Undertook defoliation procedures and implemented certain modifications. In the previous evening, Cropmaster experienced LED malfunctions. Consequently, I have resorted to utilizing the Budmasters God 9 once again God.4 Mid-day: installed 60watt side light!
Likes
17
Share
@cultivars
Follow
AUGUST 10 to 16, 2024 Specimen continues to grow vigorously, gaining another 12cm (4.75") in height. Pistils now being pushed out in many locations. Plant receives 14:26 of daylight as sunrise is 06:49 and sunset is 21:15. Fungus gnat presence has multiplied, so effort put to dry out medium and layers of Diatomaceous Earth applied on two occasions. Watered in with Bacillus Thuringiensis Israelensis (delivered via Mosquito Dunks soaked in rainwater for 24 hours) in effort to combat and destroy larvae. Based on development to date, not expecting to harvest specimen until the week of October 14, 2024. Day 106 - Applied 2.0L of Full Spectrum Soil Drench (Flowering Formula), pH'd to 6.7; Solution prepared with rainwater treated with Bacillus Thuringiensis Israelensis; 500mL bottom watered with plain rainwater. Sprayed soil surface thoroughly with approximately 1L of Soil Pest Defense Drench. Day 107 - Applied layer of Diatomaceous Earth to combat Fungus Gnats Day 108 - n/a Day 109 - n/a Day 110 - 1.5L bottom water with plain rainwater in the morning, another 1L bottom water in the late afternoon. Day 111 - Applied layer of Diatomaceous Earth to combat Fungus Gnats Day 112 - n/a
Likes
8
Share
@draco38
Follow
Settimane 10 di fioritura iniziata e hanno un profumo buonissimo e forte, a fine di questa settimana vedrò se raccogliere o aspettare un’altra settimana poiché i fiori in basso non sono ancora abbastanza maturi. Questa è la mia prima esperienza e so di aver commesso errori ma le piante hanno comunque resistito. Avrei bisogno di qualche consiglio per capire se dopo questa settimana devo raccogliere oppure no. Ciao a tutti
Likes
48
Share
@McBubatz
Follow
14. Woche, P1 fällt morgen, die ist soweit gut denke ich (ca. 20% aufwärts Bernstein Trichome). P2 braucht leider noch ca. 1 woche länger. 93. Tag ist für P1 das Ende, sie wurde heute vorgetrimmt und zum trocknen aufgehängt. Ergebnisse gibt es wenn die P2 auch geerntet wird, denke nächste Woche um die Zeit. Aber eins kann ich euch versichern, is mit Abstand die schwerste die ich ist jetzt hatte😊🍀🍀. Gebt euch auch mal wie viele Trichome die gute produziert hat, Duft is noch sehr pflanzlich, Blüten sind ziemlich fest gewesen hoffe das es nach dem trocknen noch so ist. Alles in allem super Run. Hoffentlich is die gute bei den Top 10 das wäre ein träumchen, wobei ich es wirklich jedem gönne zu gewinnen und bei soviel starker Konkurrenz geht ich wahrscheinlich unter. ABER was ein geiler Contest trotzdem, hier ein dickes fettes Dankeschön an Zamnesia und Plagron für die Möglichkeit hier überhaupt mitmachen zu dürfen 🙏💙💜 98. Tag , werd die gute am Samstag/Sonntag je nachdem wie ich Zeit finde, umlegen und zum trocknen aufhängen.
Likes
4
Share
@Ensign420
Follow
|»» LOG DISCLAIMER: Not intended as a grow guide. Grow log entries are usually posted 3 weeks later and are for my learning reference. ««| Introduction - Week 26 Summary - Ensign's log, stardate 17608.3, Wow what a week! Drying is always pretty simple and been checking daily. Buds are drying nicely and terps are smelling pretty dank!! Most of the week has been in the veg tent with tissue culture! Mixed another batch of establishment media and took proper explant cuttings. Also super-cropped the mothers to even out the canopy. Ahh yea! Getting hyped for trim day next week! Next week will also be the last week for this grow log, but am already planning out the next cycle. Anyways! Onwards to next week! [START OF WEEK 26] ========================================================== ---------- [ 4x4 MAIN TENT ] ---------- Heady OG BX1 #1 [Round4 ~Wk19] - WEEK 26 - Dry Wk1 ----------- [ 3x3 VEG TENT ] ------------ TKO - WEEK 09 - Full Veg Gorilla Goat #1 - WEEK 05 - Full Veg Heady OG BX1 - WEEK 09 - Full Veg Garlic Budder OG#1 - WEEK 05 - Full Veg 10/13/25 → 10/19/25 This Week's Estimated Goals ---------------------------------------------------------------------------------------------- DLI: ~0 mol/m²/d PPFD: ~0 μmol/m²/s VPD: ~1.5 kPa This Week's Meter Readings & Averages ---------------------------------------------------------------------------------------------- Light On/Off: 00:00 - 00:00 | Wattage: ~000.0W [LV00] Distance From Canopy: ~00” DLI: ~0.00 mol/m²/d PPFD: ~0 μmol/m²/s VPD: ~1.17 kPa Soil %: [47.4, 34.1, 35.0, 55.7, 43.7, 43.6, 44.0, 43.3] ========================================================== Day 01 - Monday - 10/13/25 - Total Days: 183 ----------------------------------- Daily Averages ~[+01:00] - Temps: 78.8°F [26.0°C] - Humidity: 64.4% - VPD: 1.19 kPa - Soil %: [49, 34, 35, 57, 44, 44, 44, 42] ----------------------------------- - [22:05]: Night check on the 4x4 tent. --- Ca-Caw!! Looking great! --- Heady OG BX1 #1 is drying along and no signs of mold. Also airflow and RH is stable and within the 60-70% range. --- Getting stoked! Trim day is 9 days away! - [22:09]: Checked the Ecowitt soil moisture sensor data: ------------------ [ 4x4 MAIN TENT ] --------------- ------ 48% - [CH01 FT » G30 - Heady OG BX1 #1] ------ 35% - [CH02 FB » G30 - Heady OG BX1 #1] ------ 35% - [CH03 BT » G20 - TKO] ------ 56% - [CH04 BB » G20 - TKO] ------------------ [ 3x3 VEG TENT ] ---------------- ------ 46% - [CH05 BL » GR7 - TKO] ------ 40% - [CH06 BR » GR7 - Gorilla Goat #1] ------ 40% - [CH07 FL » GR7 - Heady OG BX1 #1] ------ 40% - [CH08 FR » GR7 - Garlic Budder OG#1] --------- Veg: 38% - 45% | Flower: 45% - 55% --------- General: 30% [Dry] «| 45 - 60% [Moist] |» 70% [Wet] - [22:18]: Checked the 3x3 veg tent. --- Looking healthy in the veg garden! --- All of the vegging mothers are looking great and the canopy is starting to even out. --- Also clones look healthy and no need to water yet. --- The stems, err, I mean, explants, don’t show any signs of contamination. --- Staying positive, glad the growth media is sterile and the overall procedure was successful. --- Anyways! Plan to create more establishment media and cut proper explants soon! - [22:21]: Checked the humidifiers. --- Tanks are still full and no leaks found. Day 02 - Tuesday - 10/14/25 - Total Days: 184 ----------------------------------- Daily Averages ~[+01:00] - Temps: 76.9°F [24.9°C] - Humidity: 64.8% - VPD: 1.11 kPa - Soil %: [46, 34, 35, 56, 43, 43, 44, 43] ----------------------------------- - [21:44]: Night check on the 4x4 tent. --- Looking good in the dry tent! --- Heady OG is drying along and humidity levels look great! --- Nothing to do but maintain and wait to trim in 8 days! - [21:55]: Checked the Ecowitt soil moisture sensor data: ------------------ [ 4x4 MAIN TENT ] --------------- ------ 45% - [CH01 FT » G30 - Heady OG BX1 #1] ------ 34% - [CH02 FB » G30 - Heady OG BX1 #1] ------ 35% - [CH03 BT » G20 - TKO] ------ 56% - [CH04 BB » G20 - TKO] ------------------ [ 3x3 VEG TENT ] ---------------- ------ 41% - [CH05 BL » GR7 - TKO] ------ 40% - [CH06 BR » GR7 - Gorilla Goat #1] ------ 47% - [CH07 FL » GR7 - Heady OG BX1 #1] ------ 46% - [CH08 FR » GR7 - Garlic Budder OG#1] --------- Veg: 38% - 45% | Flower: 45% - 55% --------- General: 30% [Dry] «| 45 - 60% [Moist] |» 70% [Wet] - [21:59]: Checked the 3x3 veg tent. --- Looking healthy and growth is raging! --- All mothers are looking beautiful! --- Clones are getting taller and looking healthy! --- Gorilla Goat #2 needs watering. Let’s go Ensign! - [22:03]: Here is the starting initial watering range: ------ Gorilla Goat #2 » 255.4g → 300.3g and was last watered 4 days ago. --------- General Solo Range: [Dry] «| [Initial Cup Weight] + ~55-100g |» [Wet] --- Took the starting weight before watering, ------ Gorilla Goat #2 » 230.8g --- While on a scale, --- Gently misted her straw mulch with RO water. --- Tried to keep the top growth dry. --- Misted 5-10 sprays. Waited a few seconds, then misted again. --- Made sure to reference the watering weights. --- Repeated this process until the cup weighted at least 300g. --- There was no runoff. - [22:23]: Took the saturated weight after watering, ------ Gorilla Goat #2 » 345.7g --- Marked the watering date on the side of the cup. Also marked the saturated weight on the back. --- Placed her back into the tent. --- Decided to train and super-crop both clones. --- Bent the taller branches to lower the canopy. - [22:38]: Checked the humidifiers. --- Tanks are still full and no leaks found. --- Onwards Ensign! Day 03 - Wednesday - 10/15/25 - Total Days: 185 ----------------------------------- Daily Averages ~[+01:00] - Temps: 75.6°F [24.2°C] - Humidity: 63.8% - VPD: 1.09 kPa - Soil %: [48, 34, 35, 56, 44, 43, 44, 42] ----------------------------------- - [+01:33]: Quick night check on the 4x4 tent. --- Looking great in the dry tent! --- Also starting to smell dank! --- 7 more days until the big trim! - [+01:37]: Checked the 3x3 veg tent. --- Veg garden is healthy and growth is green! --- Both the Heady OG BX1 #1 and TKO mothers will need another topping soon. --- Clones in the propagation tray also look great and no need to water. --- The explant media is still looking sterile with no signs of contamination. --- Easy night in the garden. Nice! - [+01:40]: Checked the humidifiers. --- Tanks are still full and no leaks found. --- Okay! Tomorrow plan to dive back into tissue culture and prep more growth media. --- Onwards Ensign! Day 04 - Thursday - 10/16/25 - Total Days: 186 ----------------------------------- Daily Averages ~[+01:00] - Temps: 74.6°F [23.7°C] - Humidity: 62.2% - VPD: 1.11 kPa - Soil %: [46, 34, 35, 56, 43, 44, 44, 45] ----------------------------------- - [11:41]: Alright! Back to tissue culture and time to start another batch of establishment media! --- Took the plant growth regulators out of cold-storage (my fridge). ------ [ » SMOKES A BOWL « ] --- While the products warmed up, gathered the necessary supplies and setup my workstations. --- Currently, focusing on: ------ PHASE 01 » ESTABLISHMENT --------- » DAY 01 » MEDIA - PART 01 - Mixing the growth media --------- » DAY 01 » MEDIA - PART 02 - Sterilization of media and tools [via autoclaving] --- Going to use the same establishment formula, but doubling the yield. --- Also using RO water instead of distilled water. --- Here's the establishment media formula: --- [» VER.0001 |» INITIAL TROPICAL PLANTS FORMULA |» 0.5L (500mL) RO WATER «] ------ MS [Muashige & Skoog] --------- » 2.22g ------ Sucrose [Cane Sugar] --------- » 15g ------ BAP [6-Benzlaminopurine | Cytokinin] --------- » 0.5mg » 0.5mL » 500μL ------ IBA [Indole-3-Butyric Acid | Auxin] --------- » 0.05mg » 0.05mL » 50μL ------ AGAR [Jelling Agent] --------- » 3.5g ------ PH [Potential Hydrogen] --------- » 5.7 --- [» 1mg/mL CONCENTRATION ratio | 1mg = 1mL | 1mL = 1000μL «] - [12:59]: Time to prep the growth media! --- Made sure to turn OFF the lung-room's oscillating fan. --- Filled a measuring cup with 400mL of RO water. --- Dropped a clean magnetic mixing bar into the measuring cup. - [13:05]: Placed the measuring cup on the magnetic stirrer. --- Turned the unit ON and have the unit on LOW. - [13:11]: Using a precision scale (sensitive to 0.01g) along with a micro-pipette (1000μL capacity along with tips) and disposable (100mL) weigh boats, ------ Added 2.22g of MS [Muashige & Skoog] ------ Added 15g of Sucrose [Cane Sugar] ------ Added 500μL of BAP [6-Benzlaminopurine | Cytokinin] ------ Added 50μL of IBA [Indole-3-Butyric Acid | Auxin] ------ Added 3.5g of AGAR [Jelling Agent] ------ Then filled the measuring cup to the 500mL line before covering the top with plastic wrap. --- Alright! - [13:46]: Let the media mix on the magnetic stirrer for a bit. --- Have the unit set to LOW with a steady vortex. ------ [ » ~20 MINUTES LATER « ] - [14:09]: Okay! Time to pH the establishment media! --- Gently removed the bottom cap of the AC Infinity PH Meter PRO [AC-PHM7]. Placed the cap in the storage case for later. Covered the top with plastic wrap (KCL solution still inside the cap). --- Swirled the probe in a cup of RO water to rinse off the storage solution. --- Shook the excess water out and wiped the unit with a clean paper towel making sure all mineral buildup was removed (kept away from the very tip of the probe). --- Temporarily placed the meter back into the cup of RO water. --- Removed the plastic wrap of the establishment media. - [14:13]: Using the AC Infinity PH Meter PRO [AC-PHM7], --- Took the establishment media's initial pH reading. --- The pH was at 5.14 --- Using the micro pipette, ------ Added pH Up solution. --- Made sure to let the media solution mix for a bit before checking for pH readings. - [14:21]: Adjusted the media's pH until it stabilized to 5.58 --- For this batch, tried to go for a range of 5.4 to 5.8 pH. --- Also glad that I did not need to add PH down. - [14:43]: Poured the pH'd establishment media into separate polypropylene containers. --- Made sure to re-mix the media solution between container fillings. --- Ended up splitting the media solution into 12 containers. ------ 8x » 125mL Polypropylene Bottles [with screw cap lids] ------ 4x » 236mL (0.5pt) Glass Mason Jars [with polypropylene jamming lids] --- Have the lids of all vessels loosely on and set each aside for later autoclaving. --- Also filled 12 empty polypropylene bottles with RO water and placed the lids on loosely (4 bottles are re-used). - [14:58]: Prepped the tools for sterilization. --- Took a new 5.25in x 10in sterilization pouch and added the following tools: ------ 3x stainless steel forceps ------ 3x stainless steel scissors --- Before placing into the pouch, wiped each tool with a paper towel sprayed with 70% isopropyl alcohol. --- Sealed the bag and marked the date. --- Time to autoclave everything in the pressure cooker! --- Filled a Presto 23qt-Pressure Cooker with 12 cups of RO water. - [15:06]: Added a few aluminum foil balls to the bottom of the pressure cooker. --- Placed the first rack on top of the foil. --- Made sure the rack was level and stable resting above the water. --- Gently placed the containers of media into the pressure cooker and onto the first rack. Lids are still loose. --- Made sure to give space for each container and kept them away from the sides of the pressure cooker. --- Placed a second pressure cooker rack on top of the containers of media. --- Placed the containers of RO water onto the second rack. Lids are still loose. --- Placed the third rack on top of the containers of water. - [15:16]: Lastly, placed the sterilization bag of tools on top of the third rack. --- Took the pressure cooker lid and made sure the release vent was clear of debris before placing it on. --- Sealed and secured the lid. --- Pressure vessel has been sealed! --- Alright! Time to sterilize! --- While keeping the vessel level and straight up, moved the sealed pressure cooker to the kitchen for heating. - [15:23]: Placed the pressure cooker onto a butane-gas stove. --- Turned the stove ON and set it to HIGH. ------ [ » ~20 MINUTES LATER « ] --- Once steam was venting out of the release vent, --- Placed the metal rocker onto the vent. --- Shortly afterwards, the pressure top-lock sprung up to indicate the vessel was under pressure. --- Then the pressure gauge started to rise. ------ [ » ~10 MINUTES LATER « ] --- At 15psi, the metal rocker started to rock! - [15:56]: Turned down the stove down to LOW. --- Set a timer for 15 minutes and began monitoring the pressure gauge. --- Maintained the 15psi by making minor adjustments to the stove. ------ [ » ~15 MINUTES LATER « ] - [16:12]: Turned the stove completely OFF and waited until the pressure cooker's top-lock dropped down which indicated that pressure levels were safe to open. ------ [ » ~40 MINUTES LATER « ] --- Once the pressure cooker was at safe levels (0psi) and the top-lock was down, - [16:48]: Moved the pressure cooker into the lung room. --- The pressure cooker was still quite hot so was careful to keep the vessel straight up and level during transport. --- Used towels for insulation. --- Rested the hot pressure cooker onto a stack of 5-gallon buckets covered with layers of towels and folded paper bags. --- Gently opened the pressure cooker and set the lid aside. - [16:57]: While wearing nylon gloves, sprayed my hands with 70% isopropyl alcohol. --- Gently removed the bag of sterile tools placed it onto a Pyrex dish. --- Removed the top rack and set it aside. --- Then one container at a time, --- Gently tightened and secured the lids of each bottle of sterile water before placing onto the Pyrex dish. --- Removed the middle rack and set it aside. --- Then one container at a time, --- Gently tightened and secured the lids of each bottle and jar of sterile media before placing onto the Pyrex dish. --- Throughout the entire process, kept the gloves on and sprayed my hands regularly with 70% isopropyl alcohol. --- Decided to store all the bottles in the Pyrex dish. - [17:16]: Have the dish resting on a shelf in the lung room. The jars of media are set right next to the Pyrex dish on a towel. --- To prevent dust, covered everything with towels. --- Done for now and will check on the growth media tomorrow. --- If all goes well, should be taking new explant cuttings in a couple days! - [17:39]: Night check on the 3x3 veg tent. --- Looking beautiful and healthy in the veg garden! --- All moms are getting bushy and getting pretty close to the grow light. --- Since I plan to take explant cuttings soon, not going to top or train quite yet. --- Clones also looking healthy and seem unaffected by the super-cropping. Nice! - [17:57]: Checked the Ecowitt soil moisture sensor data: ------------------ [ 4x4 MAIN TENT ] --------------- ------ 45% - [CH01 FT » G30 - Heady OG BX1 #1] ------ 34% - [CH02 FB » G30 - Heady OG BX1 #1] ------ 35% - [CH03 BT » G20 - TKO] ------ 55% - [CH04 BB » G20 - TKO] ------------------ [ 3x3 VEG TENT ] ---------------- ------ 43% - [CH05 BL » GR7 - TKO] ------ 45% - [CH06 BR » GR7 - Gorilla Goat #1] ------ 42% - [CH07 FL » GR7 - Heady OG BX1 #1] ------ 44% - [CH08 FR » GR7 - Garlic Budder OG#1] --------- Veg: 38% - 45% | Flower: 45% - 55% --------- General: 30% [Dry] «| 45 - 60% [Moist] |» 70% [Wet] - [17:59]: Checked the 4x4 main tent. --- Ca-Caw!! I got Headies! --- Wow! Heady OG BX1 #1 is drying along beautifully and she is smelling dank! --- Also no signs of mold and RH levels look stable! --- 6 more days until the big trim! - [18:11]: Checked the humidifiers. --- Tanks are still full and no leaks found. --- Wow what a day! --- Still gots more to do! --- Let’s go! Let’s grow! --- Onwards Ensign! Day 05 - Friday - 10/17/25 - Total Days: 187 ----------------------------------- Daily Averages ~[+01:00] - Temps: 76.0°F [24.4°C] - Humidity: 62.0% - VPD: 1.16 kPa - Soil %: [48, 34, 35, 55, 44, 44, 44, 42] ----------------------------------- - [22:57]: Night check on the 4x4 tent. --- Ca-Caw! Headies is smelling dank! --- RH levels are getting a bit dry, but are okay. --- Wow buds are frosty with trichomes! --- With 5 days until trim day, getting stoked! - [23:04]: Checked the Ecowitt soil moisture sensor data: ------------------ [ 4x4 MAIN TENT ] --------------- ------ 47% - [CH01 FT » G30 - Heady OG BX1 #1] ------ 34% - [CH02 FB » G30 - Heady OG BX1 #1] ------ 35% - [CH03 BT » G20 - TKO] ------ 55% - [CH04 BB » G20 - TKO] ------------------ [ 3x3 VEG TENT ] ---------------- ------ 46% - [CH05 BL » GR7 - TKO] ------ 40% - [CH06 BR » GR7 - Gorilla Goat #1] ------ 45% - [CH07 FL » GR7 - Heady OG BX1 #1] ------ 50% - [CH08 FR » GR7 - Garlic Budder OG#1] --------- Veg: 38% - 45% | Flower: 45% - 55% --------- General: 30% [Dry] «| 45 - 60% [Moist] |» 70% [Wet] - [23:11]: Checked the 3x3 veg tent. --- Looking healthy in the veg garden! --- Mothers are getting bushy and tall! --- Super-cropped and trained the taller branches down to lower the canopy. --- Plan to take tissue culture cuttings tomorrow so glad there are plenty of tops to choose. Still deciding on which mother to preserve next. --- Clones in the propagation tray look healthy! --- The original Garlic Budder #2 clone needs watering. - [23:26]: Here is the starting initial watering range: ------ Garlic Budder OG#2 » 256.4g → 300.2g --------- General Solo Range: [Dry] «| [Initial Cup Weight] + ~55-100g |» [Wet] --- Took the starting weight before watering, ------ Garlic Budder OG#2 » 258.9g --- While on a scale, --- Gently misted her straw mulch with RO water. --- Tried to keep the top growth dry. --- Misted 5-10 sprays. Waited a few seconds, then misted again. --- Made sure to reference the watering weights. --- Repeated this process until the cup weighted at least 300g. --- There was no runoff. - [23:40]: Took the saturated weight after watering, ------ Garlic Budder OG#2 » [000.0]g --- Marked the watering date on the side of the cup. Also marked the saturated weight on the back. --- Placed her back into the tent. - [23:45]: Checked the humidifiers. --- Tanks are still full and no leaks found. Day 06 - Saturday - 10/18/25 - Total Days: 188 ----------------------------------- Daily Averages ~[+01:00] - Temps: 76.8°F [24.9°C] - Humidity: 60.3% - VPD: 1.25 kPa - Soil %: [47, 34, 35, 55, 44, 44, 44, 47] ----------------------------------- - [15:19]: Decided to decrease the VPD level a bit. --- Within the AC Infinity App, --- Changed the schedule name from 'Flower [12/12]' to 'Drying [0/24].' Oops. --- For the Main Tent [4x4] controller, --- Adjusted the 'Drying [0/24]' Schedule for the exhaust fan. ------ Decreased the VPD LOW trigger value from 1.5kPa to 1.4kPa --- Adjusted the 'Drying [0/24]' Schedule for the humidifier. ------ Decreased the VPD target value from 1.5kPa to 1.4kPa --- This should increase the relative humidity a bit and will maintain a 60-65% range - [16:59]: Evening check on the 3x3 veg tent. --- Wow the veg garden is raging with healthy growth! --- Even with the lower veg temps, growth has been perky and bushy! --- The TKO mother has been looking a bit on the purple-side, but I plan to increase the temps back after trim day. - [17:23]: Okay! Time to continue the tissue culture journey! --- Checked on the sterilized media, water, and tools. --- Ooo yea! The growth media in the glass jars have solidified nicely! --- The media in the bottles also look great! Found only one that did not gel properly. --- Hmm. The sterile water bottles are not looking sterile. Unlike the first batch (using distilled water), each RO bottle had tiny white particles floating in the water. --- I think this was due to the water source. The RO water used was from the plant reservoir. For the next sterilization, will try using water straight from the tap. Will discard the entire batch and try again later. - [17:34]: Anyways! Time to cut and sterilize another batch of explant cuttings. --- Using the similar protocols as last time, but with a few changes. --- Instead of distilled, using reverse-osmosis (RO) water. --- Also simplifying the workflow and will not be using the sterile water. --- Only taking cuttings from one cultivar. --- Today, attempting to preserve Heady OG BX1 #1 --- Unlike the last attempt, going to be cutting apical nodes and will leave all leaf growth on. --- Last attempt was more for monsteras and not cannabis. - [17:35]: Made sure the lung room's oscillating fan was OFF during the entire process. --- Put on a fresh pair of nitrile gloves. --- Okay! Let's grow Ensign! - [17:47]: Filled a glass beaker with 180mL of RO water. --- Using a micro-pipette, ------ Added 20mL of Clorox bleach --- Mixed the solution. - [17:52]: Poured the bleach solution into a glass mason jar. ------ Added 1 drop of Dawn dish soap. --- Dropped a magnetic mixing rod into the jar before setting it onto the magnetic stirrer. --- Turned the unit ON and set it to a low setting. --- Placed a polypropylene lid loosely on. - [18:02]: Rinsed and filled the glass beaker with 70% isopropyl alcohol. --- Filled another glass beaker with RO water before adding a drop of Dawn dish soap. Mixed the solution. --- Okay! Time to take the cuttings! --- Using a clean pair of trimmers, - [18:09]: Gently cut two clone cuttings from the Heady OG BX1 #1 mother. --- Stripped each cutting down to 2-inch apical nodes making sure to leave about 0.5 inch of stem growth for planting. ------ Prepared a total of 2 nodal cuttings. --- Dropped the nodal cuttings into the cup of soapy water. --- Swirled the cuttings in the soapy water for a bit. --- Opened the jar containing the 10% bleach solution. --- Using clean tweezers, --- Took each cutting out of the RO water and carefully submerged it into the beaker of 70% isopropyl alcohol for about 30 seconds. --- Then transferred the cutting from the isopropyl alcohol straight into the jar of bleach solution. --- Once both cuttings were in the jar, sealed the top with the polypropylene lid. - [18:23]: Flipped and set the entire bleach jar upside down onto the magnetic stirrer. --- Started using the magnetic stirrer. --- But the cuttings were getting hit by the bar so ended up turning the unit OFF. --- Instead, made sure to swirled the bottle every few minutes to agitate the cuttings. --- For a proper sterilization, the cuttings should be agitated in the hypochlorite (bleach) solution for at least 20 minutes. --- While waiting for the explants to sterilize, prepped the still air box. - [18:39]: Unfolded and placed a Safloga still-air box onto my desk. --- Thoroughly misted the inside of the air box with 70% isopropyl alcohol making sure to coat the entire chamber. --- Then isopropyl misted and placed the following items inside of the still air box, ------ x1 » Jar of Establishment Media ------ x1 » Bottle of Establishment Media ------ x1 » Glass-Bead Sterilizer ------ x1 » Roll of Plastic Wrap [pre-cut] ------ x1 » Sterilization Bag Containing: --------- x3 » Stainless Steel Forceps --------- x3 » Stainless Steel Scissors --- Made sure to fully coat the outside of the tool bag and each of the containers with 70% alcohol. --- The bag had a torn corner (Oops), so made sure to spray the inside with a few mists of isopropyl alcohol. --- For the glass-bead sterilizer, ------ Wiped the entire unit with isopropyl alcohol. ------ Before filling the unit with the included beads, misted the heating chamber with a spray of isopropyl alcohol. ------ Misted the glass beads again with a spray of isopropyl alcohol. --- Set the cleaned glass-bead sterilizer into the still air box. - [19:02]: Still air box fully prepped for explants! --- Okay! Explant nodal sterilization complete! --- While still wearing gloves, --- Misted the outside of the explant jar with 70% isopropyl alcohol before placing it into the still-air box. --- Turned the glass-bead sterilizer ON. --- Made sure to re-seal the chamber. - [19:05]: Okay! Finally time to start the tissue culture transplant! --- Let's go Ensign! --- Sprayed my gloved hands with 70% isopropyl alcohol (also put on a pair of cloth arm sleeves), --- Placed my hands through the arm holes and into the still air box to begin the process. --- Started by laying out my initial workspace: ------ » Far Left Quadrant » Jar of Sterile Establishment Media ------ » Far Center » Bottle of Sterile Establishment Media ------ » Far Right Quadrant » Glass-Bead Sterilizer ------ » Mid Center » Bleach Jar with Explant Cuttings [Main Workspace] ------ » Near Left Quadrant » Empty [Trash Area] ------ » Near Right Quadrant » Bag of Sterile Tools & Roll of Plastic Wrap --- Opened the bag of tools and placed the forceps and scissors into the pre-heated glass-bead sterilizer. --- Set the bag in the trash area (near left quadrant). --- Loosened the lids of both containers of sterile media but did not remove the lids. The lids were resting on top and could easily be lifted. --- Also took lid off of the bleach jar and gently set it on the table. --- Took the jar of sterile media and set it in the center of my workspace (to the right of the bleach jar). --- Using my left hand, took a set of scissors from the glass-bead sterilizer and gently cut the bottom of the first cutting. --- Once the bottom cut was made, placed the scissors back into the glass-bead sterilizer. --- Using my left hand, lifted the lid off of the jar of sterile media and inserted the trimmed end of the cutting straight into the growth media (using my right hand). --- Covered the jar with the lid and placed the forceps back into the glass-bead sterilizer. --- Tighten the lid of the jar and set it aside. ------ [ » REPEATED THE ABOVE PROCESS FOR THE BOTTLE OF GROWTH MEDIA « ] --- Once the last cutting was transferred from the bleach jar into the sterile media, --- Turned the glass-bead sterilizer OFF. --- Cleaned up my workplace and placed the scrap stem tips and bleach jar out of the way (near left quadrant). - [19:28]: Wrapped the lid of each explant container with plastic wrap before setting it in the center of the workspace. --- Explant transplant completed! - [19:59]: Using a label printer (Brother DT410), made a set of labels for each container: ------ Heady OG BX1 #1 | 04.24.25 | Photo | Reg ------ Formula: v0001 | ExBatch: 0002 | Lot: 01 | Pod: 01 ------ Establishment Media | Sealed On: 10/18/25 --- Opened the still air box. --- Then one container at a time, took an explant out and wrapped the lid with a label. --- Set the labeled containers onto the propagation tray (in the 3x3 veg tent). - [20:07]: Done! ------ The explants are around 37 μmol/m²/s which gives a DLI of 2.40 mol/m²/d under an 18/6 light cycle. --- Will check daily for contamination. --- Ca-Caw!! Ahh yea! --- Heady OG BX1 is now officially my first true attempt at cannabis tissue culture! --- Using this new workflow, I may try reusing the TKO media. Do plan to take new cuttings soon. May even try using the liquid media. --- Shout out to microclone and Bill Graham! His 'Tissueponics' video contains tips and tricks of the trade that have straight up changed the way I think of DIY cannabis tissue culture. --- Plan to further refine my process and will continue to refine the workflow with each attempt. - [20:15]: Checked the Ecowitt soil moisture sensor data: ------------------ [ 4x4 MAIN TENT ] --------------- ------ 54% - [CH01 FT » G30 - Heady OG BX1 #1] ------ 34% - [CH02 FB » G30 - Heady OG BX1 #1] ------ 35% - [CH03 BT » G20 - TKO] ------ 55% - [CH04 BB » G20 - TKO] ------------------ [ 3x3 VEG TENT ] ---------------- ------ 43% - [CH05 BL » GR7 - TKO] ------ 48% - [CH06 BR » GR7 - Gorilla Goat #1] ------ 42% - [CH07 FL » GR7 - Heady OG BX1 #1] ------ 45% - [CH08 FR » GR7 - Garlic Budder OG#1] --------- Veg: 38% - 45% | Flower: 45% - 55% --------- General: 30% [Dry] «| 45 - 60% [Moist] |» 70% [Wet] - [20:56]: Checked the 4x4 tent. --- Ca-Caw! Looking great my ladies! --- Humidity levels are still a bit on the dry side, but still okay. - [21:08]: Checked the humidifiers. --- Tanks are still full and no leaks found. --- Wow what a day! --- Oh yea, 4-more days until trim day!! Ca-Caw! Let’s go! Day 07 - Sunday - 10/19/25 - Total Days: 189 ----------------------------------- Daily Averages ~[+01:00] - Temps: 76.7°F [24.8°C] - Humidity: 59.4% - VPD: 1.27 kPa - Soil %: [48, 35, 35, 55, 44, 43, 44, 42] ----------------------------------- - [07:08]: Quick morning checked on the 3x3 veg tent. --- The veg garden is healthy and perky! --- All moms and clones are healthy and raging with growth! --- Both Heady OG BX1 #1 explants also look alive and green! - [19:26]: Night check on the 4x4 tent. --- Ca-Caw! We got MENDO DOPE in the trunk! --- Wow terps are getting loud and buds are drying along nicely! --- Looking frosty and coated in trichomes! --- Three more days until trim day!! - [19:33]: Checked the Ecowitt soil moisture sensor data: ------------------ [ 4x4 MAIN TENT ] --------------- ------ 46% - [CH01 FT » G30 - Heady OG BX1 #1] ------ 35% - [CH02 FB » G30 - Heady OG BX1 #1] ------ 35% - [CH03 BT » G20 - TKO] ------ 54% - [CH04 BB » G20 - TKO] ------------------ [ 3x3 VEG TENT ] ---------------- ------ 40% - [CH05 BL » GR7 - TKO] ------ 43% - [CH06 BR » GR7 - Gorilla Goat #1] ------ 47% - [CH07 FL » GR7 - Heady OG BX1 #1] ------ 41% - [CH08 FR » GR7 - Garlic Budder OG#1] --------- Veg: 38% - 45% | Flower: 45% - 55% --------- General: 30% [Dry] «| 45 - 60% [Moist] |» 70% [Wet] - [19:35]: Checked the 3x3 veg tent. --- Vegging along beautifully in the garden! --- Mothers are getting taller and probably could train, but will wait until tomorrow. --- Clones and explants also look healthy and green! --- Gorilla Goat #2 needs watering! - [19:44]: Here is the starting initial watering range: ------ Gorilla Goat #2 » 255.4g → 300.3g and was last watered 5 days ago. --------- General Solo Range: [Dry] «| [Initial Cup Weight] + ~55-100g |» [Wet] --- Took the starting weight before watering, ------ Gorilla Goat #2 » 244.9g --- While on a scale, --- Gently misted her straw mulch with RO water. --- Tried to keep the top growth dry. --- Misted 5-10 sprays. Waited a few seconds, then misted again. --- Made sure to reference the watering weights. --- Repeated this process until the cup weighted at least 300g. --- There was no runoff. - [20:04]: Took the saturated weight after watering, ------ Gorilla Goat #2 » 345.6g --- Marked the watering date on the side of the cup. Also marked the saturated weight on the back. --- Placed her back into the tent. - [21:41]: With a few days before the big trim, decided to sample a few buds! --- Cut and trimmed branch for sampling and wow she’s got terps! --- Buds are dense and have a gassy diesel funk! Ca-Caw!! Wow! --- Without even curing, pretty sure she’s the one! --- Plan to grow out another cycle (in clone of the same pheno), but I think I found my female for my first breeding project! - [22:01]: Checked the humidifiers. --- Tanks are still full and no leaks found. --- Ahh yea! Three more days until the big trim! --- Also next week will be the last for this log. --- But already stoked for the next! --- Planning on popping more seeds and continuing the pheno hunt for another female! --- Since I lost TKO this harvest cycle, plan to grow a clone cutting of the same pheno (#2). --- As for seeds, popping more regulars and going to attempt to grow some of Mr. Grow-It’s Chillout OG! --- Got a pack of F3s and am stoked to give them a try! --- Also going to sprout some beans of Dead Ops OG from Zaza Genetics! --- Chillout OG, Dead Ops OG, and another round of TKO! Let’s go! Let’s grow! --- Hunters of the dank! Ca-Caw! --- Anyways! --- Onwards to next week! [END OF WEEK 26]
Likes
9
Share
They are stretching like crazy. Peach Crescendo is not getting much taller. Not a bad run. Haven't really ran into any major problems.
Likes
10
Share
June 7: Lemon Cream Kush is looking good a day or two after being topped. June 9: going good. Video is a tip to moisten plant leaves a couple times a day when growing in dry air. It makes up for the low humidity. June 10: wildfire smoke has reappeared but not as bad as 2023 (here at least (so far)). She is not stretching out like my other plants but still growing. June 13: oops, i broke a main stem while trying to do LST. Patched with floral tape. it didnt fully break so the tape might work.
Likes
30
Share
BIG BIG apologies to Heather from fast buds & to Growdiaries & anyone who follows. The past few months have been a massive struggle, not just with temperatures & growing weed but on a personal level. My wife has been very poorly & with covid and everything going on, it's put a massive strain on us all!! I've tries to maintain an active presence on Instagram but that's about all I've physically had time for. I've put this update together today, so far into the grow now it almost seems pointless. I lost my original Mimosa due to high temps & high RH. Moving into the attic at that time of year was a mistake. It has cost me a small fortune to keep things alive. I've had to purchase an air con unit, more fans & just more of everything to be honest. My purple punch is almost ready to harvest, any time within the next couple of days, followed shortly by Bruce Banner & Kosher cake. I wont be winning any awards for this Diary & I feel bad as I was supposed to be show casing what 420 Fast buds has to offer & I've failed...miserably. I hope you can make sense of all the pictures I've included....just a mass photo frenzy over the past few weeks. Thanks to everyone & all your comments. Wishing you all the best. One Love ❤️
Processing
Likes
Comments
Share
So basically for some reason I wasn't able to add my next week which caused me to start this "duplicate first grow diary". Then I decided trying to split my diary into four separate ones to better catalogue my grow, and I'm just having a lot of issues getting everything straight. SO! I decided to continue posting full scope pictures of the whole setup, all four plant sets included. Will try to update more on everything tomorrow!
Likes
70
Share
All feeds with nutes use either a whole ratio or combination of "Veg Mix" and "Bloom Mix"concentrates DILUTED in water until a total ppm of add in is reached using a (Total Dissolved Solids)TDS Meter measured in PPM (parts per million). The "Veg Mix" concentrate will eventually be added in smaller ratios and "Bloom Mix" concentrate what will eventually replace the "Veg Mix" concentrate entirely with the ppm and ratios listed when I feed. Veg mix recipe is on week 3. Bloom Mix recipe is on week 5. Day 28 Just a quick update for this morning since I had to move the ties a little. LST, I now have them above the 3rd node branches. Stats are normal and the growth tips are turning upward now. Stats 73F/ 63% RH /IL Vent at 33% - Lights also same as before 345ppfd highest, 330 center, and 315 at lowest. No need for adjustment. She seems to be taking the training well. Day 29 Water day - checked last night and decided it was time again - Water by weight again so no runoff to measure at about 4 cups. (4 days since last feed by weight) 13lbs even par is 15lbs 4oz so I prepared 2lbs 4oz of water. Tested my meter and discovered it needed calibration (the temp is off and cant be calibrated - so I used a trusty meat thermometer. started with 4ppm and added 300ppm of epsom and vegmix ph balanced to 6.34 at 69.8F - then splashed with H2O2. Poured around roots and splashed the stem base - sprayed some on the leaves and use the whole amount. Had to adjust lights now to be brighter so I brought them down to 18.5" and ppfd is now 375highest 360 center and 345 at lowest. VPD is normal at 1.0 with 73F /63% RH /33% IL Vent - fans are pointed to directly now as the leaves are starting to get rough feeling - so I moved them a bit to blow less directly Training is doing good nice upward turn on the training (making small LST movements with the ties other than than... just letting it make new branches. Day 30 Checked PH and got 5.0 on my meter(+1.25 tested differential = 6.25) Stats normal too - 73F /64% RH /33% IL Vent - Lights at 385highest 370 center and 355 at lowest Removed cross ties since they are no longer needed to hold the fan leaves- training still looking nice as the new nodes are formed with 2nd node leaves growing already. Day 31 Identified an issue this morning - went back through my pictures, identified the start, looked at the day before, and noted my changes that I took notes on at that time. Went to google to diagnose a few possible hypothesis and am now testing with a treatment. (suggestions from more experienced growers welcome) This morning the issue was brown spots on the older fan leaves. Mostly just the left fan leaf. Seems to have started 2 days ago (day 29) when I changed the lights and fed her. When I fed her, I left water droplets on the leaves instead of drying them off after a short time (I had been drying them with a tissue after a wet pic. The fans were also adjusted after the lights were dropped closer as well. Hypothesis: I think the water was magnifying the light and caused light stress at the those spots. I dont think the wind of the fan had much to do with it other than they helped dry the leaves faster as noted by the water being completely gone by the time I took pictures later that night for measurements. Test: Raised my lights to a max of 350ppfd (from 385 highest reading this morning) Had to adjust fans again since they rest on my lights. Will observe looking for improvement over the next few days. ... another possibility was given to me by Guru @Roberts (thank you) as it possibly being a ph issue locking out calcium. So I thought I might test ph and then try diluted cal/mag in a spray if my soil is too low (also looked at pics and seen VERY close similarities in my pics and those) and so on that advice, I tested/calibrated my soil meter (it FINALLY calibrated for me!)I found my soil was avg of 3 readings at 5.153 (5.08,5.09,and 5.29) NOT GOOD - potentially locking out most all nutes. I weighed out about 2 cups of purified water with and added about half ml of CalMag, ph balanced the water to 6.5 at 69.7F (my research shows Calcium lockout starting at 6.3 or lower) and splashed with H2O2 - I poured most around the base and sprayed the leaves too. I made sure to use the whole solution by pouring the last of the solution in the spray bottle over the stem and stem base. EOD follow-up Found a possible calcium blockade in my ph and on my leaves (of which are now starting to curl so I placed my fans on oscillate to ensure they aren't doing more damage) --- fully documented now. otherwise measurements are now documented too. -- second node is starting to pull away from the last top so I will be looking to top again (3rd of possibly 4 total) and then HST and bind in a new spot Day 32 Doing a morning and evening check her now while I see this issue resolved. So far no sign of improvement since last night - might have gotten worse in comparison (will check pics side by side today) but I think because it's a immobile micronutrient so it should take time to stop then reverse. So in the mean time I am doing a slurry test as a 2nd test for my soil before I treat it. I took soil from 3 different spots and made sure I got some from about 4 inches deep in each spot (ensured calibrations were still good with buffer tests) 1st test is a PH meter tested directly in the soil. After using the 2 cups of 6.3 yesterday I got 3 readings today = 5.47, 5.32, and 5.5 to avg 5.43 - (yesterday's readings prior to treatment were 5.08, 5.09, and 5.29 to avg 5.153) - still far below the normal 6 to 7 for soil and the requirement of 6.3 and above for calcium to enter roots. suggesting again lockout. So while I am checking the plant conditions I also looked at the new nodes - 2nd node is starting to pull away from the first, but not quite enough to top yet - thinking I will be able to top tomorrow evening - should be able to correct the ph tonight, so I can see if there's results in that by then as well. I also set the fans to oscillate last night, so here's a video for that now. Measurements, ppfd, and vpd will be in tonight's check-up Day 32 So I started this evening by testing the run off with 2 meters, 5.7 and 5.67 - prepared 1 gallon of 7.5 ph water and splashed with H2O2 (checked with both meters) Before flushing, I documented the leaves again - still curled and look very dry but they still have some flexibility with them - they dont seem to getting any worse so the spray may have gotten enough to the leaves most affected. The new nodes and growth tips seem to be okay but not growing as fast as they were. That would still mean that the soil needs treatment before the roots begin to die off and I end up with stunted growth overall. SO I flushed the whole gallon and noted the runoff from the sides and bottom. I then tested the soil directly with 3 readings 5.95, 5.8, and 5.73 for avg 5.826 and tested the runoff water with 2 separate meters for 5.91 and 5.85 Not sure if I should feed dunk in 7.5 still or just use that number on the next feed in like 3 or 4 days. will discuss Other than that ppfd highest is 360, 350 at center, and 330 at lowest. VPD was 1.0 with temp at 74F /63% RH /33% IL Vent Growth tips could be ready to top again tomorrow night, but I would like the get the ph taken care of first. Day 33 Started the day by noticing the lower branches seem to stop turning and the next level branches seemed to have finally turned but nearly as fast as the first. (Noticed them having a start yesterday) Newer branches dont have any signs of issues. So the plan today is to make Bloom Juice for later. Feed Dunk with 100% Veg Juice at a ph of 7.3 test runoff and ppm. Top the 4 nodes and remove the lower leaves. Calcium issue or not, that was always the plan with main-linning the plant. However, because of the health issues, I dont think I am going to go past these 8 colas - rather instead I will simply stop here and do some HST to set them how I want them to grow and let her recover and finish her veg for about two or three weeks. Dunk had 300ppm of Epsom, Veg juice, in a little over 3 gallons of purified water. I had 7.4 ph and splashed with h2o2. I pushed the entire plant into the water and soaked for a few seconds. Drained by hanging the pot up for about 10 minutes and the stream started dripping instead. Checked the runoff with 2 meters 6.01 and 5.93 with 2580ppm. Then I topped all four nodes and removed the fan leaves from under my mainline. I used LST to finger press the new branches apart into the direction I plan to move them to get the nodes powering up. Next I will wait for a day to do HST on those new branches. Tonight I will simply let her rest. VPD still at 1.0 - 73F /63% RH /33% IL Vent - Lights are at 365 highest, 355 center, and 335 lowest. No need to measure for growth now as I dont plan to top anymore Day 34 Early entry to day for HST the morning after topping. So I started off the morning checking stats and health. PH levels are still low. 3 soil meter tests 5.41, 5.41, and 5.44 for an avg of 5.42 - kinda at a loss here but can only monitor now. VPD and lights are mostly the same - 74F /63% RH / 33% IL Vent - VPD not relevant today as the settings are the same and I am using HST to change the plant position. leaves are noted for future reference - all four lower fan leaves have signs of calcium deficiency but not progressing nearly as fast as the first two did, so I think my attempts via higher ph water and feed may have helped. (I know the microbes in the soil are supposed to help get past ph issues , but mine seem to not be heathy) HST used a cuticle rod from my wife's nail case and a paint stick to press the rod against the branches and smash the inside of the elbows I want to bend. LST I then cut 4 strips of garden wire at the same length, hooked the ends like candy canes and aligned them about 1/2 inch above the new node and into the soil. From the side they look level but have the leaves now facing sideways. They will turn in a day or two.
Likes
6
Share
Vamos familia, actualizamos la novena semana de floración de estas Runtz Punch de Herbies. La temperatura que estuvo entre los 22-24 grados y humedad dentro de los rangos correctos. Este armario se contaminó las últimas semanas de trips, tengo que parar un poco para desinfectar todo bien. Las flores acaban madurando bien y se llenaron de tricomas, por el momento todo correcto, os dejé también alguna novedad y un cambio en la sala, agradecer al equipo de Mars hydro por el nuevo TSW2000. (los últimos 5 años cultive solo con los leds de esta marca). Os comento que ya les doy machete estos días. - os dejo por aquí un CÓDIGO: Eldruida Descuento para la tienda de MARS HYDRO. https://www.mars-hydro.com Hasta aquí todo, Buenos humos 💨💨💨
Likes
93
Share
Welcome to the Zamnesia Spring Cup 🏆. Day 62 since time change to 12 / 12h The last week before the harvest has come 🎊. Hey everyone 🤗. The time has come. The last days and hours have struck for this great lady 😃. In the coming days she will move to the darkroom and spend another 48 hours there in complete darkness 😋. Of course, there will be an update before the big update after fermentation 👌. In the last update there is again a detailed description of the individual strain. I'm really looking forward to finally being able to try the strain 😄. It looks beautiful and smells extremely tasty 😍. I wish you all a lot of fun with the last update before the harvest, stay healthy 🙏🏻, and let it grow 🌱🍀 You can buy this Strain and Nutrients at : www.Zamnesia.com Typ: Sour Diesel (Zamnesia) Zamnesia Spring Cup 🏆🏆🏆 Type: Runtz ☝️🏼 Genetics: Zkittlez x Gelato 👍 Vega lamp: 2 x Todogrow Led Quantum Board 100 W 💡 Bloom Lamp : 2 x Todogrow Led Cxb 3590 COB 3500 K 205 W 💡💡☝️🏼 Soil : Canna Bio ☝️🏼 Nutrients : Monster Bud Mix ☝️🏼🌱 Water: Osmosis water mixed with normal water (24 hours stale that the chlorine evaporates) to 0.2 EC. Add Cal / Mag to 0.4 Ec Ph with Organic Ph - to 6.0 - 6.3 💦💧
Likes
5
Share
La pandemia kush es la más avanzada y se le empezará a regar solo con agua al igual q la Trimosa x mimosa_1 La Trimosa x mimosa tiene un problema con absorción de agua, pero ya está siendo solucionado
Likes
12
Share
26/09 Today, at the beginning of the second week of color, I nevertheless decided to remove a few unnecessary and interfering stakes. I also removed small shoots and some leaves that greatly interfered with the penetration of light to the shoots. I connected the problem with an overabundance of N with the fact that I have both AD components mixed. It turns out the formula 4 3 8, I think to remove a little Grow 1-0-4 component and then you will get an excellent compote for these bushes, I will also change the irrigation scheme, I will give 400 ml per day, instead of 800 in two days with formula 3-3-4 Even today I mixed a new compote with formula 3 3 4 , and added AD Grow just 1ml/1L and decided to add a little 5ml less AD Micro and AD Bloom . Let's see how things go . And I also took better photos, rate in the comments guys!! 30/09 Hi all! Continue. monitor the condition of the lowrider, it seems that the burnt edges of the sheets have begun to pass, periodically I just water it with water, and I made a little less content of the Grow element. The babies are developing extremely cool, I think that so far I am moving in the right direction I water 10% of the pot, they have 7 liters each
Likes
5
Share
This week they did more stretching as you can see the one on the left is into and above the light! I can't believe this but I'll role with it! I slowly defoliate just a little here and there between watering and filling the humidifiers. They really like to eat! Also, something to note that is they love the humidity as well as the warmth. I had to clean the outside of their grow bags this week. To my surprise the roots are starting to come out the bag! I can't believe it but this is awesome! Now they'll die due to contact with the air, and in return get bigger to take in even more nutrients! As predicted they fell off because their little pieces are on the floor. Well I fed and watered them daily. Like normal whenever I fed them either nutrients or soil amendments I made sure to water the plants with plain pH balanced H2O the next day in order to flush them. Then I would do any soil amendments if needed. After that plain pH balanced H20 and then you could do another fertilizer nutrient for them. After that pH balanced H20 and then you return to the soil amendments if needed.
Likes
6
Share
@IamCy
Follow
She's starting to fatten up nicely! Terps still off the meter,and the roots are ridiculous. Definitely one of the best plants I've ever grown.
Likes
13
Share
@Pennuts
Follow
The drying process lasted 14 days and I'm in the 2nd week of curing, I've already tried some buds and neither the smell nor the taste are great, the taste and smell of both phenotypes is lemon.