


Likes
Comments
Share


@Camarao_Desperto
Follow
Sup everybody, I thought a lot and if got learn the time is now!
I have 4 babys so I decided that two of them will be for my practice, one I won’t change a thing, and the last one I’m obligated to transplant (didn’t have pot :@).
I follow the advice of putting more soil into my pots and that’s was great!
I topped one as you can see, put some cinnamon powder to help heal (don’t have much sure, but read that somewhere).
The other I did some LST, honestly this is kinda harder to me than topping because you must be very careful and kinda follow your instincts to bend the plant.
The other one as said I didn’t changed a thing (gotta have at least one guaranteed hahahaha)
The last and minor one I didn’t have pot so need to transplant very soon.
That’s it, hope you like and honestly I’m satisfied until now, I thought I would screw it all just in the first week. That’s it, my newbie advice: go for it, just don’t go blind!

Likes
Comments
Share

@420abbybox
Follow
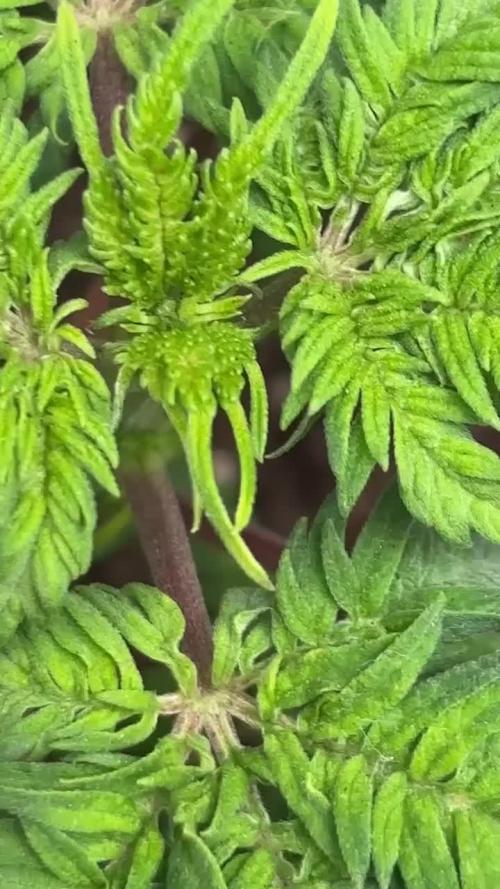
On week 7 of the vegetative stage the plant is stretching more & the root system seems to be expanding in the 14L pot nicely along with some side branches coming from the lower nodes and on the 8th-10th set of leaves

Processing
Likes
7
Share


@x_grower
Follow
Last week, first of flowering, was outstanding, I could water the girls regulary and the work paid off they stretched a lot and are looking super healthy. The girl right below the upper fan is suffering a bit with the shadows and is notoriously shorter than her sisters, I will need to rethink the air circulation for the next grow. Another concern of mine is their height, hoping they dont stretch anymore as the lights are already at maximum possible height inside tent and there is only 20cm gap between it and the plants.

Likes
22
Share


@emmett
Follow
On cruise control, getting into flush weeks in the bubble buckets. always water in the 30 gallon living soil? worm bin. I dig a small hole in a corner toss in kitchen scraps cover and water.
Likes
7
Share


@ChitownCannaChica
Follow
The tops are no different that a photo.
Easy to grow
Decent yield
Terps are decent with floral citrus tones
Smokes smooth
I will have to try and grow again

Likes
Comments
Share

@RooftopFarmer
Follow
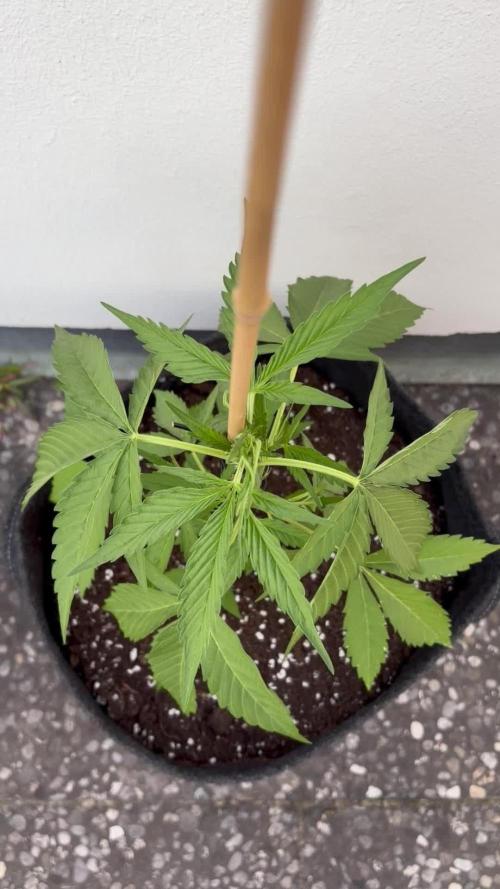
Banana Guava – Week 5 (Fast Buds Outdoor 2026)
Excellent weather continues, so Banana Guava is receiving maximum sunshine and consistent feeding. She’s thriving outdoors under these ideal conditions.
This week I got better sticks for support and secured her nicely. She’s now well over 15 cm tall with a gorgeous, deep green color and strong-looking leaves.
Likes
11
Share

@MistaOC
Follow
Biotabs Interview
1. Tell us a bit about yourself: who are you, where are you from, and what do you do outside of growing?
I’m 40 years old and based in the western part of Germany, living a grounded life as a family man. My main profession is in sales within the automotive spare parts industry, operating in a large-scale B2B wholesale environment across Germany.
We work with around 7,500 active business clients, and my role is less about day-to-day orders and more about the bigger picture. I’m the first point of contact for business-related matters — handling contracts, partnerships, and acting as the face of our department. It’s a role that requires structure, reliability, and a strong sense for communication.
Outside of that, I’ve always been someone who works with his hands. I take on a wide range of manual projects — from tiling and drywall construction to more specialized work like sealing fire protection openings. I enjoy creating things, improving spaces, and paying attention to the small details that make the difference.
That mindset follows one simple rule: all or nothing. If I do something, I do it properly. This attitude has shaped me for over 40 years — and it naturally carries over into my grows and the way I document them. I put a lot of care into every step, from the grow itself to how I present it in my diaries.
If I had to describe my life in a few pillars, it would be four: my family, my main job, my hands-on side work, and growing. And growing isn’t just a hobby for me — it’s a real passion that ties everything together. 🌱
2. How did you get into growing? Tell us about your very first steps.
My first contact with cannabis goes way back to when I was around 14. Back then, there was no WhatsApp or social media — if you wanted to meet people, you’d call them or maybe send a (pretty expensive) text, and then everyone would just hang out in the same spot. For us, that place was simply “the street.”
I was one of the younger guys in the group, hanging around with a few older ones, maybe 17 or 18. One of them used to disappear into a nearby field every now and then — everyone knew what he was doing, even if it wasn’t really talked about. At that age, I was curious, but also a bit hesitant.
At the same time, I was heavily into football, and most of my circle came from there. One day, during some kind of event at the sports ground, I ended up trying it for the first time with some of the older guys. It wasn’t the smoothest experience, especially mixed with alcohol, but it stayed with me.
After that, things developed naturally. Our small circle grew, especially through school, and we became what you’d probably call a typical smoker group. The real turning point, though, was when one of the guys — who had just moved to our area — showed me his hidden grow in the attic. It was a super basic setup with fluorescent tubes, no real climate control, no deep knowledge — but he was growing his own plants.
That moment stuck with me. It sparked something. Even back then, I knew I wanted to do it myself one day.
That chance came years later. When I was around 22, I moved into my first apartment with my girlfriend — who is now my wife. For the first time, I had my own space, and that’s when I started my first real grow. I converted an IKEA cabinet in a spare room into a small grow space, just big enough for two indica plants. Nothing fancy, but it was mine.
I got my seeds from the Netherlands back then, and I kept growing for about two to three years. My setup evolved over time — back then it was all HPS lamps and fluorescent tubes, long before LED became what it is today. I still have my old Homebox tent from that time, and it’s funny — it still looks almost brand new.
At some point, life changed and we moved into a place where growing just wasn’t possible anymore. So I had to stop, even though the passion never really left.
Then came 2024 and the partial legalization in Germany. For me, that was the moment everything came back. It’s still far from perfect, but for growers like us, it opened the door again to follow this passion a bit more freely — and that’s when I picked it back up.
3. What role does cannabis play in your life – personally and as a grower?
Cannabis has fascinated me from the very first moment — whether it was the smell, the experience, or just the whole vibe around it. For me, it was never really about medicine in the beginning. It was more like a way to unwind, almost like a switch that brings you into a different, more relaxed state.
What always stood out to me was the feeling — that deep physical relaxation and the sense of connection. It was never something negative in my life. In fact, I’ve always preferred it over alcohol, both back then and still today. It just fits me better.
Depending on the situation, it can even sharpen my focus. Of course, it can also do the opposite if you overdo it — but used the right way, it helps me slow down, reset, and find that “end of the day” feeling.
Over time, though, my perspective has evolved. As you get older, your body starts reminding you that you’re not 20 anymore. I recently had a shoulder tendon injury, and that was the first time I really experienced the medical side of cannabis in a noticeable way. It helped reduce the pain and even improved my mobility — something I hadn’t really thought about before.
But as a grower, cannabis means something even deeper to me.
Growing is a true passion. It’s not just about consuming — it’s about the entire process from start to finish. Watching a plant develop, learning from each cycle, improving step by step — that’s what really drives me.
It’s not about being better than anyone else. It’s about becoming better than I was before. That mindset carries over into other areas of my life as well — always refining, always learning.
At the same time, growing teaches discipline. You can’t just let things run and expect great results. Timing, care, consistency — all of that matters. If you don’t put in the effort at the right moments, the outcome won’t be what you’re aiming for.
That’s why I don’t see it as something lazy or passive at all. For me, it’s the opposite. Growing brings structure, focus, and a certain calmness into my life. It grounds me — and that’s what makes it so valuable to me. 🌱
4. What growing method do you prefer and why?
I’ve always preferred indoor growing over outdoor. It comes back to my mindset — all or nothing. In my opinion, especially here in Germany, outdoor simply doesn’t give me the level of quality I’m aiming for. Indoor gives me full control, and that’s exactly what I want.
At the same time, I’m someone who constantly experiments. Even if I know it might cost me yield, quality, or cause stress to the plants — I still do it. That’s how I improve. I need to see things with my own eyes and learn from my own experience to really understand what works best for me.
I’ve always grown in soil. Over time, my setup has evolved a lot. I started with simple plastic pots, switched to fabric pots after legalization, and now I’ve come full circle back to plastic pots — mainly because I moved into an AutoPot system, which fits my current approach better.
My goal today is to keep everything as efficient and stable as possible. I run an automated watering system connected to a 50-liter tank, which is filled through an RO system that I can control via app. The water runs through a calcium filter to help stabilize the pH. I’m not chasing perfect numbers anymore — as long as it’s stable and within a good range, that’s what matters more.
In general, I prefer working with organic nutrients. For me, it’s important to know that the final product is as clean and natural as possible. I’ve gone through all the typical struggles before — adjusting pH, dealing with deficiencies, spending hours mixing water — and over time I’ve simplified my system more and more.
That’s also where Biotabs fits perfectly into my setup. It’s a very natural match — simple, organic, and reliable. It allows me to focus more on the plants themselves instead of constantly adjusting inputs.
My standard setup is pretty consistent: a 1.2 × 1.2 m tent, around 480W LED, AC ventilation with a carbon filter, and usually five plants. I top every plant at minimum, veg for about five weeks, and often run a SCROG net to maximize the canopy.
But even here, I keep testing things. For example, I’m currently experimenting with and without a SCROG to see how it affects yield — because in the end, I’m not only chasing quality, but also efficiency.
That’s really my approach in a nutshell: build a solid system, keep it simple, but never stop refining it. 🌱
5. Which strain is closest to your heart and what fascinates you about it?
That’s a tough one — I don’t think there’s just one single answer.
In general, I’ve always been a fan of fruity, citrus-forward strains. Every now and then I also enjoy something more gassy, but if I had to go with what naturally comes to mind, it’s actually the very first strain I ever grew.
Back in 2012, during my first grow, I ran Super Skunk from Vision Seeds — and to this day, that one stands out. Funny enough, that first grow was probably my best one in terms of how it felt at the time. Everything was new, exciting, and that final product just hit different. Grown under a simple 400W setup, nothing compared to what we have today — but it was, without a doubt, the best weed I had smoked up to that point.
It’s not just about the strain itself — it’s about the moment, the experience, and what it represented.
At the same time, there’s another one I have to mention: Amnesia Haze (Core Cut). That strain is pure nostalgia for me. It was everywhere when I was younger — that classic haze we all knew. Growing it myself today brings back a lot of memories. It’s like a throwback to those early days, but now with the knowledge and control to really do it justice.
So if I had to sum it up: one strain represents where it all started for me, and the other connects me to the roots of the scene I grew up in.
6. What has been your biggest learning moment as a grower – a mistake or a success that helped you grow?
One of the biggest lessons I’ve learned as a grower is that routine can become your biggest enemy.
When you grow consistently over time, you start to build confidence — and that’s a good thing. But at some point, that confidence can turn into complacency. You think you’ve seen it all, you start skipping small steps, and you tell yourself, “it’ll be fine.”
That’s exactly where problems begin.
Looking back at my earlier grows, especially before my longer break, my setup simply wasn’t good enough. I was growing under the roof with temperatures easily hitting 30°C, humidity was all over the place, and the environment just wasn’t dialed in. On top of that, I started letting things slide because I thought I had it under control.
That combination was my wake-up call.
Since getting back into growing after legalization, I’ve taken a completely different approach. I take it seriously now — not just as a hobby, but as something I want to master. And I also recognize that being able to grow under good conditions is a privilege. There are a lot of factors that need to align — your environment, your living situation, responsibility, especially with family — it’s not something you can take for granted.
What really keeps me hooked is that growing never gets boring. I’ve had many hobbies in my life, but this is the only one that never lost its appeal. Even the “dirty work” — cleaning the tent, dialing everything in — it’s all part of the process.
Of course, I’ve made every mistake you can imagine. Overfeeding, underfeeding, overwatering, underwatering — pests like aphids and thrips, and currently my biggest challenge: powdery mildew.
That has been my toughest opponent so far. Even with controlled humidity, it can still show up, and it forces you to really understand your environment and your plants. The difference now is: I know how to deal with it. It’s under control, and that’s what growth is about — not avoiding problems, but learning how to handle them.
Every mistake teaches you something. And over time, you build the confidence that no matter what shows up, you’ll find a way to fix it.
7. What does your typical grow routine look like – how much time do you invest and what do you enjoy most?
My routine is pretty structured — I like to keep things consistent, but still leave room for adjustments when needed.
It all starts with popping seeds. I usually germinate around five to six and then select the strongest five to continue with. They begin in small 0.2L pots under a humidity dome, using Canna Professional soil enriched with Biotabs Startrex according to the feeding schedule.
After about two and a half weeks, I transplant them into 15L AutoPot containers. At that point, I water them in manually — first with about one liter of RO water, followed by another liter mixed with nutrients according to the schedule.
After that, I give them a few days to settle before watering again — usually around five to six days later, again with RO water. This approach has worked well for me to avoid overwatering and to let the roots establish properly in the new medium.
Even though the AutoPot system is already set up, I don’t activate it immediately. During the vegetative phase, I prefer hand-watering to encourage strong root development and avoid overwatering early on. Once I’m close to flowering, I switch the system on — basically just opening a valve, and everything runs automatically from there.
From that point on, the workload drops significantly. I don’t really have to worry about watering anymore. Nutrients are kept simple as well — every couple of weeks I add a small top feed, and that’s basically it. Compared to how complicated things used to be, it almost feels like it runs by itself.
That allows me to focus on what really matters: the plants.
I still check on them regularly, usually every evening when I’m home. Not because I have to, but because I want to. Instead of mixing water or adjusting pH, I can actually observe — the leaves, the structure, the bud development. That’s where the real connection happens.
That’s also when I decide what to do next — defoliation, LST, sometimes HST, or working with a SCROG net. It’s not always a fixed plan, more a combination of experience and feeling in the moment.
Environmental control has also become a key part of my routine. I start with around 70% humidity during germination, then gradually bring it down — around 65% in early veg, and closer to 55% after transplant. Keeping things stable has made a huge difference for me.
After roughly five weeks of veg, I flip to flower. From there, it’s about maintaining the system and letting the plants finish strong. Flowering usually runs around 8–10 weeks, depending on the strain.
And then it all starts over again.
What I enjoy most is exactly that balance — having a system that runs smoothly in the background, while I can fully focus on the plants themselves and the craft of growing. 🌱
8. What advice would you give beginners who are just stepping into the world of growing?
If I had to give one piece of advice, it would be this:
The rule is…there is no rule.
That’s my mindset, and it’s something I truly believe in. Of course, there are guidelines, best practices, and a lot of information out there — but in the end, every grow is different, every environment is different, and every plant reacts in its own way.
So instead of trying to follow everything blindly, sit down, observe, and learn from the plant.
Growing is a process. You won’t get everything right from day one — and that’s completely normal. Mistakes are part of it. In fact, they’re one of the most important ways to learn.
Today, it’s easier than ever to get into growing. There’s endless information online, tutorials, perfect pictures, and step-by-step guides. But that can also be misleading. You see these flawless results and think that’s the standard — but what you don’t see is the experience behind it.
When I started, it was completely different. There were forums, very limited pictures, and you had to figure out a lot on your own. That forced you to really pay attention and understand what was happening in front of you.
And that’s still the most important skill today.
Look closely at your plants. They will tell you what they need — through their leaves, their structure, their growth. Once you start understanding that, everything else becomes much easier.
So don’t chase perfection. Learn, adapt, and enjoy the process.
And most importantly — enjoy the grower’s life. 🌱
9. How did you first hear about Biotabs and what made you want to try it?
I’ve actually known about Biotabs for a long time.
Back when I first started growing, I was running a fully mineral setup — using products like Canna Vega and Flores. At that time, the market wasn’t nearly as saturated as it is today, but brands like Hesi and Biotabs were already around. I remember seeing Biotabs on the shelves back then, but I never really made the switch. I just stuck to what I knew.
My first real contact with Biotabs came much later, when I started diving deeper into soil biology — things like mycorrhiza and trichoderma. I became more interested in how the soil itself works and how to build a healthy microbial environment.
That’s when I came across Bactrex.
Funny enough, looking back now, I was using it completely wrong. I treated it like a different product and just added it straight into the planting hole, thinking that’s how it’s supposed to be used. Whether that was beneficial or not… I guess only the plants know.
But that was my entry point into the Biotabs world.
From there, I started learning more, testing different approaches, and understanding how the system actually works. Over time, I moved further and further away from mineral feeding and more towards a biological approach.
And the more I experimented, the clearer it became to me: the combination of organic growing with a simplified system is exactly what I was looking for.
10. How has Biotabs influenced your grow and what do you appreciate most about the product?
Biotabs has made my grow simpler, more stable, and overall more controlled.
Before, I spent a lot of time adjusting things — mixing nutrients, checking pH, reacting to problems. With Biotabs, that complexity is reduced to a minimum. The system is straightforward: prepare the soil, add the tabs, water it in properly — and from there, it’s mostly just water.
And the surprising part is: it works. Really well.
For me, it fits perfectly into my current setup and mindset. I’ve built a system that is as efficient and automated as possible, and Biotabs complements that in the best way. It allows me to focus on the plants themselves instead of constantly managing inputs.
That’s what I appreciate the most — the balance between simplicity and performance. You don’t have to chase numbers or overcomplicate things to get great results.
At this point, it feels like a natural fit — almost like a symbiosis between my way of growing and the product itself. And once you find something that works reliably on that level, there’s really no reason to change it.
For anyone who wants to grow organically and take their setup to the next level, it’s definitely worth exploring. 🌱.
Likes
8
Share
@Thedibber
Follow
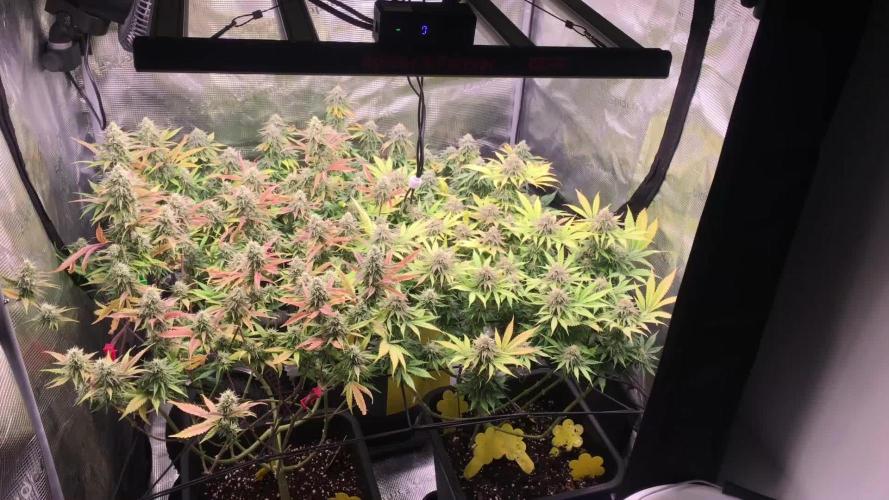
Bottom left I forgot I mixed with coco as I didnt have enough livingsoil left to fill the pot. Showing some signs of fading but giving it a dose of biobizz tonight and 50g 2 8 10 amendment to each. Watering 2L each every 2days still. Weekly microben feed at 5ml per L
25/10/25 - Added 55g of 2 8 10 amendment to each pot and mixed then watered 2L 5ml per L microben Ph6.8
27/10/25 - Watered 2.5L each Ph6.8
Likes
3
Share


@CaptonianMoneymaker
Follow
Some plants are still flipping over to flower myb 2 weeks behind the dist Bloomer


Likes
24
Share

@CampaCavallo
Follow
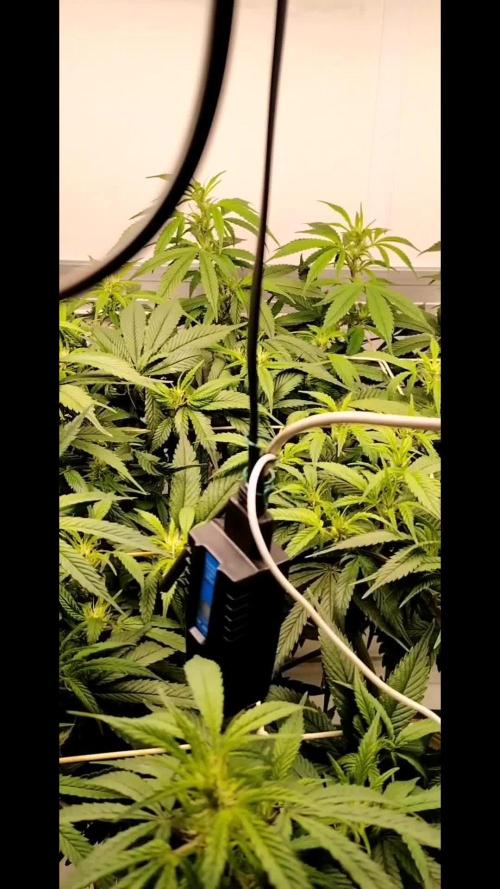
4ª Settimana di Fioritura 💐💐💐💐
👁️: ma che bello veder crescere la nostra sticky broccoli 💧🥦 😍!
Il training sotto la rete è quasi terminato ed ora la ragazza si può dedicare a far crescere i suoi fiorellini innevati 💖
⛽: in aggiunta al nostro succo di base di Advanced nutrients ph perfect , abbiamo iniziato a darle l'oro verde! GREEN SENSATION, questo è il tuo momento👍🏻 vaiii! 💜💚Grazie PLAGRON 💚💜
🎵: un ringraziamento speciale a M2O, Roberto Molinaro

Likes
93
Share


@MrJones
Follow
Mr-Jones Shockwave F2
🔹🔹🔹🔹🔹🔹WEEKLY GOALS🔹🔹🔹🔹🔹🔹
🌞Environment - 75/80℉ and 45/50% Humidity
💧 Feeding - Using "Super Coco" amended soil. compost teas, Dechlorinated H20 PH/6.5 Fish Fertilizer, Started feeding the plants because they are only in 1-gallon pots.
🍃Training / towards the end of the week will be Schwazzing the plants, along with cleaning out the bottoms,.
🕷️ IPM - Will be using Green Cleaner" 1 OZ per Gallon, and CannControl from Mammoth alternating between product each month for Integrated Pest Management.
💡Mars Hydro FC 4800 / 480W Led Grow Light - "Instagram: MarsHydro_Aliexpress"💡
🔹🔹🔹🔹🔹🔹🔹🔹🔹🔹🔹🔹🔹🔹🔹🔹🔹🔹
Rambling - These ladies are going great, maybe second-guessing myself but only using 1-gallon pots not sure the nutrients in the Super Coco will carry the plants, going to be Top Dressing with Roots Organics Bloom.
🔹🔹🔹🔹🔹🔹🔹🔹🔹🔹🔹🔹🔹🔹🔹🔹🔹🔹
▶️Sunday 11.29.20 / Top Dressed with Roots Organics Bloom, continuing to water with Dechlorinated H20 PH/6.5, going to be making a super tea after I finish Schwazzing the plants, normally I grow photos in 5 to 7-gallon pots. The New Mars Hydro light is kicking ass!
▶️Monday 11.30.20 / Normal feeding tonight, the ladies are just doing great!
▶️Tuesday 12.01.20 / Normal feeding tonight, the ladies are just doing great!
▶️Wednesday 12.02.20 / Conducted heavy defoliation, Schwazzing tonight, they look great, top dressed with roots organic uprising bloom, and decided to move along with light BioBiz nutrient regiment, growing these gals in 1-gallon pots, the soil nutrients will be depleted.
▶️Thursday 12.03.20 / The ladies have responded well to the defoliation and the started nutrient regiment. I set the 💡Mars Hydro FC 4800 / 480W Led Grow Light to 75% time to watch these ladies just blow up! Will be doing an IPM treatment Saturday morning before lights out.
▶️Friday 12.04.20 / Continuing feeding light BioBiz daily with Weekly top dressing of Roots Organics, the ladies are just thriving!
▶️Saturday 12.05.20 / Plants are doing great after the heavy defoliation, continuing to feed with Bio-Biz daily.
🔹🔹🔹🔹🔹🔹🔹🔹🔹🔹🔹🔹🔹🔹🔹🔹🔹🔹

Likes
6
Share


@Kloud9gardenz
Follow
Space is limited and I'm struggling with the time to keep up with these plants since things are back to normal on my parts of town. Just gonna keep about eye on em at keep defoliating. Plants were flipper after a month veg.

Likes
3
Share

@Organic_G
Follow
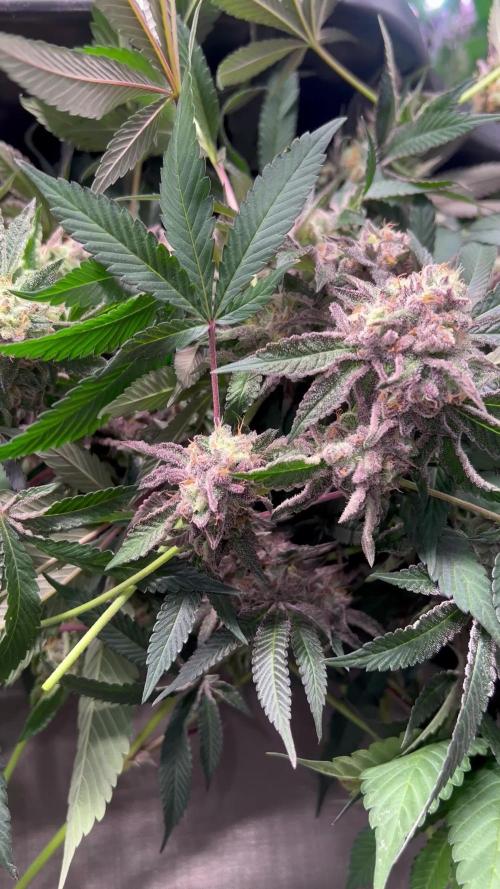
Interessant zu beobachten wie die Lila Pigemtierung innerhalb einiger Tage die Pflanze färbt, das UVB macht auf jedenfall seine Arbeit, sehr schön und verdichtet nochmal ordentlich die unter liegenden Blüten… 2/4 wurden geerntet, denken in 7 Tagen kommt die nächste Ernte

Likes
4
Share


@Growedbypepper
Follow
Esta semana he tenido un poco de problemas con la planta debido al cambio de clima para la floración de mi planta cambio a un lugar selo exterior el clima está algo frío y con poco sol pero igual se ha desarrollado muy bien esta semana 🙏🙏🙏🙏
Likes
10
Share


@MindFlowers68
Follow
Drying ended after 12 days. Trimming took around 1 1/2 hours and was really easy. No real small or larfy buds to speak of. I'm surprised how well it did considering how high the humidity was in flower it is a very resilient plant. Smoked pretty well off the bat, but needs just a little time to smoke the best. After curing for a month is super smooth and makes fore a very nice dubes. its almost gone! My friend loved it.


Likes
23
Share


@simps
Follow
Shoog from BulletProof genetics this little plant is growing fast strong happy with the girl who’s gonna be a big plan I can tell both Plants are growing pretty well s Shoog one It’s growing faster than shoog 2 put both plants are doing pretty wellShoog one is really taking off
One of my favorite plants this year so far just like haw fast it grows and how strong and healthy this plants are I have high hopes for theses phenos trying to find some amazing strains to work with on my breeding projects bulletproof genetics has some amazing genetics if you get a chance go check them out on Instagram or bulletproofgenetics.com
Likes
21
Share


@Chronicbastard
Follow
These gzs are just now starting stretching,not so much with the blue.im pretty good at growing monsters.its just been years and it was outdoors.im pretty excited.barney farms seems to have stroung genetics
Processing
Likes
2
Share


Likes
2
Share


@Ezcashinc
Follow
Can really see the plant getting potent according to what I have read, I really don’t know exactly when to harvest, maybe can get some tips from you guys out there.