


Likes
Comments
Share


@AutoCrazy
Follow
Week 3 of Flower
This little lady sure is taking her time flipping to flower. Her tent mates are well into it but she is taking her time lol. Oh well she is still healthy and I can see now that she is stretching out a bit and finally bursting into flowering. She will likely take longer then the 8-9 weeks that the breeders say given her slow start to flower. But I’m ok with that. She’s healthy so things are looking up.
5.9 pH
500 ppm
65 water temp
72 tent temp
39 RH %

Likes
3
Share


@Cultiv8or
Follow
I think there’s been some sort of salt build up / nutrient lock. The lower leaves have been turning a lighter green and some even yellow on SL plants. Most stems are red. Seems like it’s a pH problem. I flushed them with 4-5 litres of water to reduce the nutrient concentration in the roots.
Going to introduce molasses in next feeding! Organic Unsulphered
And also stop the Micro (nitrogen)


Likes
15
Share


@38PLAN
Follow
Non metterò la germinazione me la sono scordata e non metterò nemmeno tante foto,a fine ciclo vi dimostrerò come far uscire 6 autofiorenti da almeno 200g l'una
Ho 2 hps da 600w e 6 vasi/buste da 40 litri
20/4 di luce più luce naturale che entra dalla finestra,la terra é stata fatta da me perche mi ero rotto il cazzo di quella con i moscerini
30% terriccio/ 30% fibra di cocco/ 20% lapillo vulcanico/ 10% humus di lombrico/ 10% perlite e torba bionda

Likes
5
Share


@littlefoot
Follow
Added the trills ned back, gets to bushy lol end up with a lot of defol, see if I can stretch her out. Getting pretty healthy, if I can get this grounding undercontrol should become a nice plant
Likes
3
Share

@hinterhofgrower
Follow
.
📹: Video on YouTube @hinterhofgrower please like & subscribe
🌱: Day 1 after 111h
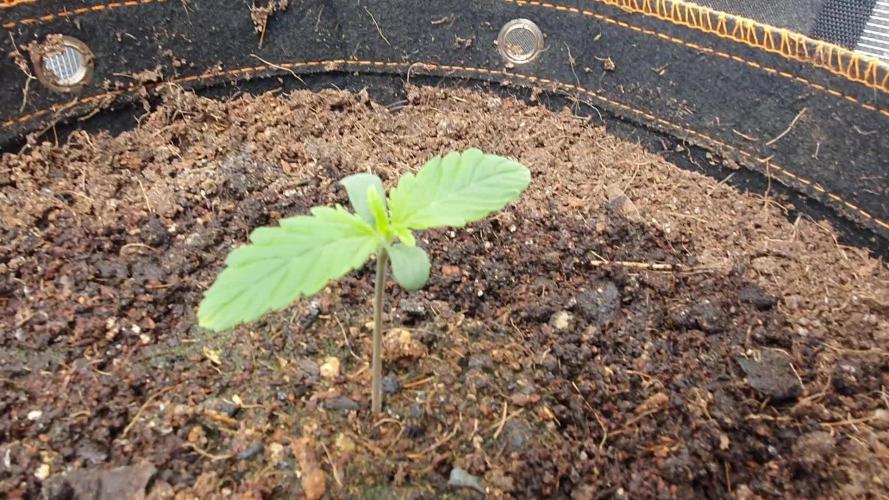
💧: 250ml day 4, 500ml day 6
💡: Dli 10 mol/m²/day
🤔:
Likes
32
Share


@Bud_Spencer
Follow
Hi Grower!!
Day 89 Complete
( 59 Days Flower)
Maybe I was too early to flush, but otherwise it looks really mega! I still think 5-7 days
Grown under Viparspectra P4000
CHECK YOUR DISCOUNT WITH THIS LINK
‐----------------------COPY&PASTE--‐-‐----------------
https://viparspectra.eu/?ref=budspencer
Or with my Coupon Code:
Budspencer420


Likes
8
Share


@AUTOBUDDHA
Follow
Smooth sailing on this batch deep into flower! Were sitting at 85 days today and they are looking fantastic! Steady feeding flora bloom and flora micro. Also giving them 5ml/gal of advanced big bud. These ladies are FROSTY! Cannot wait till these ladies wrap it up!
This auto critical is sitting an easy 35 plus days from harvest. This original auto from fastbuds will take around 120 days from seed to harvest, but she's gonna be a monster!
Likes
38
Share


@Cariboo_OG
Follow
Utopia Haze is a rare heavily sativa dominant hybrid (90% sativa/10% indica) strain created through back crossing Brazilian Sativa strains. This tasty little bud took home 1st Place for Best Sativa in the 2008 High Times’ Cannabis Cup and for good reason – with its potent 18-22% average THC level and long lasting cerebral effects, Utopia Haze is one powerhouse smoke. The Utopia Haze high comes on soon after you finish your first toke, hitting you with a strong cerebral lift that infuses you with a sense of hazy relaxation.
Type: Feminised/Photoperiod
Cultivation: Indoor/Outdoor
Flowering Time (days): 70-75
Indoor Yield (g): Up to 650
Feminised Outdoor Harvest Month: October
Feminised Outdoor Harvest Month Week: 3rd-4th week
Aroma: Citrus, Woody, Pungent, Mint
Effect: Cerebral Lift, Hazy Relaxation, Sleepy
Welcome Everyone to the Final Entry of my Utopia Haze Grow !
There is so much to discuss ! I have been extremely busy as of late trying to get this Harvest together, but i am happy to have it here for you now !
I Seriously under estimated the amount of time, help from others, and my own necessary skills to pull this off.. and i still kind of screwed it up lol !
But its worth noting i have never actually done this before and trying to document it during....was extremely hard.
It is next to impossible to work an iPhone with rubber gloves on !
First I want to discuss everything step by step so before you jump straight into the comments on how the end product is so small in "quantity"
Rest assured i am happy with its"quality"...and thats all that matters to me because Life is a journey not a destination! and i have learned so much from this grow that I couldn't be any happy even if i messed some things up :)
But at the very least I hope you read through this entry in its entirety with an open mind and focus more on the process, rather than just the outcome!
I ran out of Ice & i was only able to wash three times..(normally I've heard you should go sometimes 5-6 washes)
Preparation is Key & things will be much better next round :)
Photos 1-22
These are pretty self explanatory but for those of you just tuning in now.. this is what happens to a very happy plant when you don't have the necessary tools to monitor key components of growing cannabis.. Ph, as well as EC levels play a very key role in the outcome of your grow lol that being said I was just able to save this plant by purchasing both tools but that doesn't mean the plant didn't suffer because of the prior events.. This was a Huge reason behind me choosing to turn this harvest into what i would consider
"Solventless Hash Rosin" from "Ice water extracted Bubble hash".
Pictures 23
The idea here is the process of using "fresh Frozen Cannabis" this has been discussed many a time online on such sites as instagram and here on grow diaries as well.. I personally have Never tried the process so i decided to try it out and make a judgement for myself..
Video 24
The Cannabis has now been in the freezer for 72 hours making it very well frozen.. as you can tell i struggled getting it all into the 25u Screen Wash Bag. One thing of note i would do differently is i will de-stem my next batch as i also believe this played a part in the amount of plant matter that escaped through the sieves.
Photo/Video's 25-28
The idea here is "ice water Seiving" & especially with the bags that I am using here that are only have screen material on the bottom portion of the bag it is very important to have spaces in-between the screens to allow the water to pass directly through the screens into the bottom bucket with the least amount of resistance.. because the hash is so extremely temperature dependant if it gets warm on the side of the bag.. it will stick there and not make it to the bottom to become use able product..
29
You do not need to use as much Ice as i used here lol... the idea is to keep everything very cold..i certainly achieved that but at the sacrifice of using so much that i ended up grinding product and producing "contaminants" but in the end they are just plant matter that i would be smoking when i rolled up my joint either way so.. I'm not super disappointed..
But it should be noted that what you want to achieve here is a Layering effect where you have the wash bag between two small layers of ice while the "water current" washes the Trichomes away allowing them to be separated by the screens setup below :)
Before Starting the machine you should allow some time (i.e.;10-12minutes pre soak to allow the product to become saturated) before the first cycle.
By video 32 I have just ran out of ice lol..
Video 33-34
Here I have a tip for you.. to separate the screens that you sieve through.. cut 5 gallon buckets to stretch them across nice and tight.. it'll make scooping your Bubble that much easier ! i learned this from the many "Frenchy" videos I have watched :)
Picture 35
Here in lays the problem for most people.. drying your hash without loosing vast amounts of "Terpenes" whilst also stay ever vigilant against mold !
Thanks to all those videos I've watched on youtube.. id like to think this was one of my most successful parts of this process..
Things to Note; Terpenes start to seriously evaporate at temperatures 68F or 20C
you need to stay as cold as possible whilst bringing the Relative Humidity in the space down into the 40-30% to stay away from that nasty mold !
I used my cold storage room in the basement.. with a dehumidifier running to keep the space at 45% RH & staying at a constant 15c.
All while spreading the hash as thin as possible across parchment paper, on top of the white screens with a fan moving air across both sides of the paper.
Pictures 36-38
These are some macros i took in the middle of my drying session I fell in love with the colour.
Yes i know the black spots are plant material but they will get caught when i bag the hash & squish the oil out.
Thing to Note; at this stage it is important to ensure you 'micro plane" the hash down as fine as you can whilst staying weary of the temperature... any "chunks" will hold pockets of moisture.. that lead to potential problems..ie; mold ...
Picture/Video 39-41
Successfully planed bubble hash ready to be bagged and Squished !
Picture 42
Ive decided to follow Pedro.. from Pedros Grow Room and double bag to be on the safe side so i don't have any blow outs.
So thats One 25u bag inside one 160u bag ! :)
Pictures 43
This is almost 3 grams of the bubble hash from above, already melting in the bag.. this is where i ran into trouble again lol things started getting to warm in the house and i was only able to get one of the three squish's i did on video :( things started getting sticky.
Picture 44
This is basically just a photo of the equipment I'm using; 3x5 LowTemp Cage in the frame I built myself, with a 20Ton bottle jack.
Something to note here is this is an older Lowtemp model with only a single heating zone which is which i have it closed here heating Both sides of the press :)
As well as the importance of having adequate pressure on your plates.. my rig is very overkill for the size of hash bags..lol
Video 45
Here is the lovely press video.. its didn't quite work the way i wanted either lol my directional folding wasn't quite tight enough for a big "drip" :)
&the Press was set to 65°c
Photo's 46-50 are pretty self explanatory :) I had a blow out.. but still managed to pull an 80% return from the hash once squished...& yes it tasted amazing :)
Was it worth it in the end... that could be debated.. for some..i understand..its not your thing, but for those of us that are interested in making our own concentrates.. free from Solvents...
I wouldn't make it any other way :)
If even ONE of you reading this diary finds it helpful to reference for ANYTHING.....even if its "what not to do" ill consider it a success !
Thanks again for tagging along on this garden adventure.. its been one heck of a journey !
Much Love from B.C. Canada,
Until Next time,
Cariboo
Processing
Likes
31
Share


@buddha61
Follow
6/17 - Watered today. 5 days since last watering. Made sure to add water slowly to the cups, as the medium I'm using is a coco/peat based medium, and I realize that peat becomes hydrophobic when it dries out, and the top was close to that. By watering pretty slow, it allows more of it to be absorbed vs just running through. Both Chinook Haze plants have 3 nodes already, and are starting their 4th.
6/18 - I watered yesterday, then life hit, and the plants were without lights for just over 24 hours. Looks like the newer area started to yellow a bit, which I assume will green again within a day or two now that the lights are back on.
6/19 - Plants are looking good to me. There seems to be a lot less vein swelling, so it appears the chance of overwatering that looked like it was coming on a week ago is subsiding. Got to let them grow some more before I start to chop them up in an attempt to mainline.
6/21 - Plants will be watered tomorrow. Other than that, it is just slowly moving along, and I am considering going to 1g pots soon. I believe I am going to try to go from solo cup to 1g to 5g this time, and I think that by doing so, I might not need to fertilize at all during veg at least. I figure if I can get 3-4 weeks out of the solo cup, then similar out of a 1g, by the time I get to 5g, I will be close to 8-12 weeks, and close to flipping time. I have dimmed the lights a bit, and raised them close to 33" above the 2 Chinook Haze plants in hope to induce a little stretch between nodes, but they still seem to be growing fairly compact.
6/22 - Watered the plants today. Could have probably waited another day, but I figure 5 days between watering was enough, and the cups did feel pretty light.

Likes
19
Share


@spacecream
Follow
Not a lot happening, just filling out rectangles in the scrog net. Need smaller rectangles, these are 15cm...
Likes
8
Share


@AERO_Grower
Follow
6° Semana- Aeroponía - Están muy bellas las raíces, están 100% sanas. Se realiza poda apical al quinto nodo,una pequeña defoliación y luego se aplica LST a las más grandes, muy contento con el crecimiento actual.
---------------------------------------------------------------------------------------------------------------------------------------------------------------------------------------------------------------------
6th Week- Aeroponics - The roots are very beautiful, they are 100% healthy. The fifth node is topped, and a little defoliation and then LST is applied to the largest ones, very happy with the current growth.





Likes
21
Share


@3lementa1
Follow
These guys aren't growing as fast as the White Widow. I topped the one in the DWC. I'm going to wait a bit for the others. Other than that they look pretty good!
Likes
76
Share


@Canna96
Follow
This week went pretty well, but I am struggling with a heat wave here in my region. She is finally starting to smell like sweet grapes, and a few of the top leaves have a couple light burn spots on them because they are constantly pointing straight up and the tips are pretty close the lights. She is at 52" tall right now, and in her 5th week of flower. I think she should be ready to harvest in about 5 weeks. I have no idea what this little lady is going to put out, but I have a feeling it is going to be huge if she keeps bulking up for a couple more weeks like she did this past week. I also had to add another dehumidifier outside and one inside the tent. So now between the 3 dehumidifiers I have running non-stop, I am able to maintain 45% RH inside the tent. I have never seen a single plant put out this much humidity. Also waiting for this heat wave to end on Wednesday, I am struggling to keep my tent at 75 degrees F. This little lady is turning out to be a little piglet, she eats and drinks everything I throw at her and then wants more..... I hope everyone had a great weekend, stay safe and Blaze On!!!
Likes
31
Share


@Chubbs
Follow
PurplePunchOG Auto
Week 4
What up Grow Fam. Weekly update on these 3 little ladies. I did a defoliation and topped the bigger one in the back but over all seems to be going smoothly. I'll start introducing nutes General Hydroponics 3 part flora series with some calmag this week and see how they handle it. All in all been a great week. Happy Growing

Likes
10
Share


@HelenBlunt
Follow
What a beautiful strain! This pheno came to me from a 3 pack and has got some strong OG Kush resemblence: long and weak branches, light green leaves in flower, thick buds with little leaves and a strong smell of lemon, earth and cleaner. Skunky flavours from critical mass are not noticable. Very nice palette indeed.
A pretty straight forward grow: I already knew the cultivar and was able to give her just about what she needed at each point of the grow. The end result is a plentiful harverst of very aesthetically and psychoactively pleasing cannabis buds.

Likes
111
Share


@Salokin
Follow
Hello Growmies,
The first week of flowering has wrapped up, and I'm pleased to report that she's stretched evenly through the ScrOG. I've been doing some light defoliation where leaves were overshadowing other shoots.
She's showing a clear preference for a pH below 6. Anytime it creeps above that, the plant begins to experience nutrient lockout. I'm keeping a close eye on this and will adjust the pH as necessary.
Her root system is expanding robustly, gearing up for increased growth above ground. To support this, I've upped the dosage of Orca along with the boost accelerator.
Here's a bonus for you all: enter the code ZAMMIGD2023 at checkout in Zamnesia's online store for a 20% discount.
Thanks for stopping by, and stay tuned for more updates next week!
