


Likes
Comments
Share


@Hashy
Follow
Week 6
Light cycle=12/12
Light Power=150w
Extractor controller settings
High temp= 25c
Low temp= c
Temp step=0c
High Rh= 56%
Low Rh= %
Rh step=0%
Speed max=8
Speed min=2
Smart controller settings (during lights on).
Lights on=10.01-21.59
Radiator on= below 21.5c
Radiator off= above 22.5c
Dehumidifier on= not in use
Dehumidifier off= not in use
Smart controller settings (during lights off).
Lights off=22.00-10.00
Radiator on= below 18c
Radiator off= above 19c
Dehumidifier on= not in use
Dehumidifier off= not in use
VPD aim=0.6-1.4
DLI aim=35-40
EC aim=1.9
PH aim=6.2
Tue 30/1/24
#4 (Day 36)(Day 2 flower)
📋
Wed 31/1/24
#4 (Day 37)(Day 3 flower)
📋 H=52cm D=40cm DLI=26.5
🚿 foliar sprayed (Sumo Boost 2ml/L).
Thur 1/2/24
💧💧💧💧💧💧💧💧💧💧💧💧💧💧💧💧
Method= automatic
Feed=water
Neutralise=0.1ml/L
Roots=0.2ml/L
Easy Ph down=0.ml/L
Ec=0.2 PH=6.6/6.6
Time start=12.00pm
Finish time=13.45pm
(11×5 minute runs with 5 minute gaps)
Total flow rate=181ml/min
Flow rate per plant=45ml/min.
Total volume made=14L
Total volume left=4L
Total volume used=10L
Volume per plant=2.5L (Est)
Runoff.
Total runoff=1L
Ec=2.0 PH=6.1/6.2
💧💧💧💧💧💧💧💧💧💧💧💧💧💧💧💧
#4 (Day 38)(Day 4 flower)
📋 H=54cm D=38cm DLI=29.5
Lifted light and increasd power to 196w.
H=54cm D=45cm DLI=31.5
Extractor controller settings
High temp= 25c
Low temp= c
Temp step=0c
High Rh= 56%
Low Rh= %
Rh step=0%
Speed max=10
Speed min=2
Fri 2/2/24
#4 (Day 39)(Day 5 flower)
📋 raised camera, nearly touching the roof.
Sat 3/2/24
#4 (Day 40)(Day 6 flower)
📋 Defoliate a lot of lower leaves.
Sun 4/2/24
💧💧💧💧💧💧💧💧💧💧💧💧💧💧💧💧
Method= automatic
Feed=bloom nutes.
Neutralise=0.1ml/L
Silicon=1.0ml/L
Calmag=1.0ml/L
Terra Bloom=4.0ml/L
Sumo Boost=1.0ml/L
Roots=0.2ml/L
Easy Ph down=0.115ml/L
Ec=1.9 PH=6.1/6.5
Time start=12.00pm
Finish time=13.45pm
(11×5 minute runs with 5 minute gaps)
Total flow rate=190ml/min
Flow rate per plant=47ml/min.
Total volume made=13L
Total volume left=2.5L
Total volume used=10.5L
Volume per plant=2.62L (Est)
Runoff.
Total runoff=1.75L
Ec=2.4PH=5.9/6.2
💧💧💧💧💧💧💧💧💧💧💧💧💧💧💧💧
#4 (Day 41)(Day 7 flower)
📋 HST 1 cola.
Mon 5/2/24
#4 (Day 42)(Day 8 flower)
📋 H=69cm D=30cm DLI=46.0
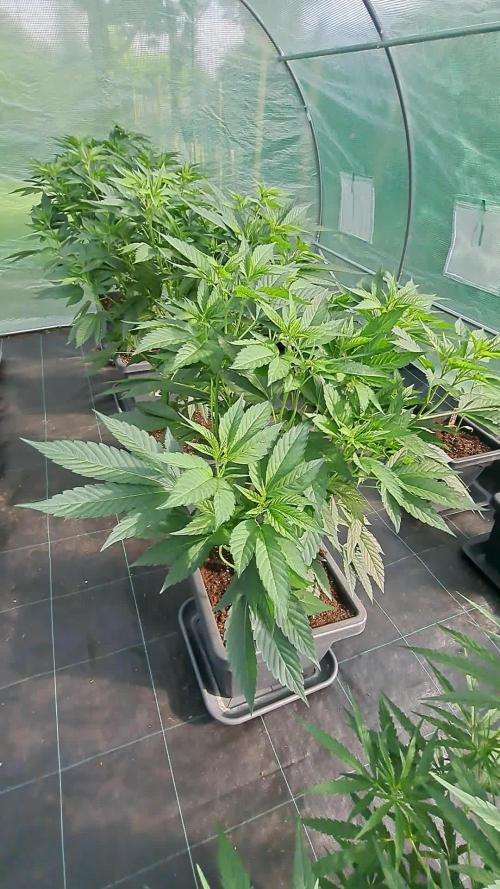
She has started flowering now. She has grown 20cm during this week, fairly confident I have a good grip on this one and I'll be able to keep her from getting to big. I have seen how this strain can produce massive plants.
Back soon.
Take it easy.


Likes
Comments
Share

@Oyziphar
Follow
I transplanted the plants to 23 liter containers and added 3 extra Guana Flowering Tabs (10grs) 😇and Flower Safer (mycorrhiza)
I gave the plants a liquid booster with OPF 7:2:3 ; Fulvic 25 ; Yuccah ; Biovin liquid ; Earthworm manure extract.
Big Thanks to Luc from Plant Health Solutions / Bioplantenvoeding dot nl 🙏


Likes
27
Share


@adam_pawloski87
Follow
What a great week it’s been!today is day 65 from seed!! One of the Forbiddin Runtz got it’s last feeding on Friday and will get flushed for 2 weeks and will be ready for dry and cure! The rest will still remain getting same dose of nutes the rest of this week and most likely into the next! This batch felt like it went so quick ! Hope you all enjoy an watch out for next week !

Likes
1
Share


Likes
13
Share


@GrandmasBoy2021
Follow
Week 14,
Week 14 was the last week before Harvest/Havrest! I flushed the plant and trimmed her a bit before harvest. I hope you all enjoy the videos and the pics!
Likes
34
Share


@Gassedupfromthemaskup
Follow
This week one of the plants has really began looking tropical and the smell is danker by the day. It wreaks of fruity gas in my tent. Everything is basically on cruise control from here. Two of the plants look ready for a flush while the others are a week or two behind. One of the phenos is a good bit behind and was since day one but looks like it will yield a good bit.
🍻🍻
Mid week: I spotted few amber trichomes and started flushing on two of the 5 girls. One is way behind and two are maybe a week behind. 👌💨 Ready for these beauties to finish😍
Likes
100
Share


@ILoVeThiSpLaNt
Follow
Giorno 49
Ho girato in fioritura.
Le due Zombie come già detto nelle settimane scorse sono due fenotipi completamente diversi. Uno sicuramente haze e l'altro bubba Kush. Stanno bene entrambe ma la più grande l'ho dovuta defogliare per bene e sono certo che tra 15/20gg farò una seconda passata. Ultima bevuta prima di mandare in fioritura EC 1.28 ph 5,8.
Anche le due Rainbow Belts sono diverse perché sfregando il gambo una sa di Zkittlez l'altra di frutta quindi penso più a qualche fenotipo dosidos.
La Milk Monkey è quella che per struttura mi piace più di tutte.
Per la prima volta ho preso dei cloni anche se non so dove tenerli e sotto che luce. Per ora li ho messi in un vaso ricoperto da velina nel box delle autofiorenti


Likes
40
Share


@xbrico
Follow
***New Addition***
Day 82 - Big tank change out. Had a massive drop in pH while EC rose some again (Only been adding RO water the last few days to keep tank in check around EC1.2-1.3, had jumped to 1.6. PH Drop was from 5.9-6 to 4.9-5.0 from it being stable for 4-5 days). After epsom salting the leaves last week, still noticing some lower leaves "Praying" and some dead and drying ones hanging from the plant. Its getting to about the mid-way point of the plant now (again, all that's under the scrog but...) but getting too close for comfort!!! Have edited my formula slightly for this change out to:
*2ml/L Bloom A & B (So 100ml of each in a 50L tank)
*1ml/L Silicon
*0.6g/L Epsom Salts
*1ml/L 9/18 PK Warrior (This was a f**k up, should have been 0.5ml/L - hopefully doesn't impact or isn't the cause for Mg issues - causing a lockout)
2ml/L Sumo Active Boost
2ml/L Fulvic Acid
2ml/L Sensizym
2ml pH Down to bring the lot to pH 5.7-5.8
This brought me to about 1.6EC, pH6.4 (Expected value was 1.521 from Hydrobuddy Calc for the * ingredients - My water bases at 0.2EC so a close enough calc!!!) - Higher than I have been putting in but i think most of the EC rise is from the Sulfate in the Epsom Salts (The Sulfur alone is about 0.32EC).
Also, with it coming late autumn and the tent in an outdoor cabin, got a temp controller to bring on a heater to stop the temp dropping below 16.5C...its now averaging out around 18.7 during the night so that's decent enough (Was potentially getting sub 15C - recent day temps have been 9-11C so could have been pretty chilly in there!!!). Also put my aquarium heater in the tank to bring the solution to around 19C as 1 of the plants has grew an absolute root mass into the tank itself - It is defying the Smart Pots and getting itself into there even after a pruning a few weeks back!!!
So, tank change happened a few days early but what the hey...passed the time with a hot whiskey or 5!!! :P
********************************************
Day 78 - Really haven't done anything with the girls the last week. Just been topping up with pH adjusted water, bringing down the nute strength a bit as they're taking on water but not really taking on any nutes. General monitoring.
Think I am going to have to get a heater out in the cabin as the night (IRL Day temps) are getting 15C and below so worried that could be impacting some nute uptake - Gave them an epsom foliar last night and then the bi-weekly Geisha foliar spray just before lights out this morning.
Apart from that, nothing new.
Happy growing all.


Likes
6
Share


@Lazuli
Follow
The best photoperiod strain ive grown, its not too stretchy and put on insane amount of weight. 10/10
Processing
Likes
22
Share


@eldruida_lamota
Follow
De nuevo familia traigo la cuarta semana de floración de estas critical a granel, que me regaló grow barato.
Aunque sean a granel tampoco vamos a desecharlas, ya que aun así podemos conseguir muy buenas flores.
Este cultivo va fenómeno también. Ya empiezan a desprender su aroma tan característico, buen porte predominante indica 55/65 días están.
.
La humedad esta al 45% la temperatura está entre 21/25 grados , y como siempre el ph , ya que es de lo más importante,está en 5,8/6,0.
.
AgroBeta:
1 ml x L Flowering black line , vía radicular.
0,2 ml x L Beta shark, vía radicular.
0.5 gr x L mega PK , vía radicular.
0,8 ml x L Terminator, vía radicular.
0,5 gr x L Engordacogollos, vía radicular.
0,3 ml x L Tucán , vía radicular.
0,1 ml x L Betazyme, vía radicular.
0,3 ml x L Tricoma, vía radicular.
0,05 ml x L Gold Joker, vía radicular.
0,2 ml x L Silver, vía radicular.
.
Hasta aquí todo familia 🕸️ , un saludo y buenos humos fumetillas💨💨💨.


Likes
3
Share

@Grisly
Follow
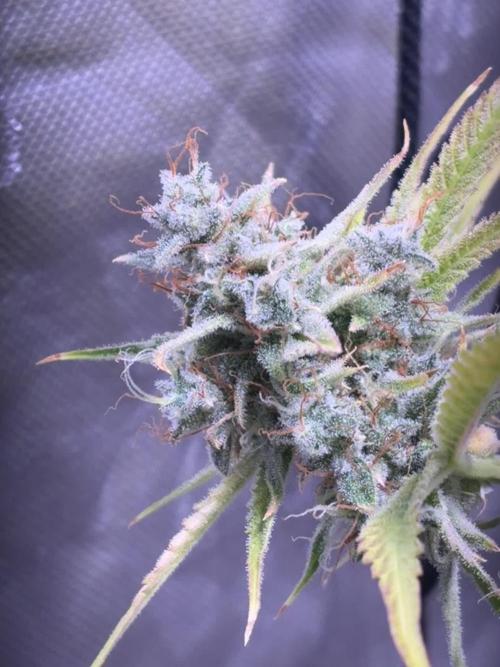
Great to be able to let a plant go, little care and then get a gift of some tremendous looking bud. Can't wait to smoke test but for now I'm happy with day 3 of drying and the amazing smell is still intact. 😁


Likes
5
Share


@HighHolidays
Follow
The flowers are starting to form, and I’ve decided not to follow the fertilizing schedule recommended by the manufacturer. I’m concerned that adding more nutrients at this stage could lead to over-fertilization. There’s good airflow around the lower part of the plant, and soon I’ll apply a preventive antifungal treatment, since the environment here tends to be humid during the winter due to frequent rain.
Likes
24
Share


@Frank_cultiva
Follow
Mismos riegos que la semana anterior de acuerdo a la tabla de advanced nutrients.
Las 4 nenas que están en floración(maceteros de 11lt) beben mucha agua, 8lt cada dos días y reciben un riego a la semana con nutrientes, el resto de riegos sólo con agua.
Mientras que las otras 2 que siguen en vegetación (maceteros de 30lt) están bebiendo 9lt cada tres días, también con sólo un riego con nutrientes por semana.
Saludos! Muy buenos humos a toda la gente que le da vida y vibra positiva a este mundo 💚🍀🤓

Likes
24
Share

@Frank_cultiva
Follow
Las 4 nenas del scrog iniciaron con el ciclo 12/12 el día 05/11/2021: están siendo alimentadas con advanced nutrients(dosis indicadas en la foto de la tabla)
-micro
-blom
-grow
-b52
-rhino skin
-big bue
-bud ignitor
-bud candy
-sensi cal mag xtra
Las 2 nenas en macetas de 30LT 18/6:
por el momento están siendo alimentadas con advanced nutrients(dosis indicadas en la foto de la tabla)
-micro
-grow
-blom
-b52


Likes
15
Share


@AK1210
Follow
The bud sites are just covered in tricomes, I had my magnifying glass out to check the colour and most are milky but not as much as I thought by going by the pistol coloring, as they are mostly brown.
There is a more of a spicy dank smell to her now and the fan leaves have mostly died or are close to dying.
Hopefully I can start the flush process soon but will not do this till I'm happy with the tricome colouring.
Likes
59
Share


@Coopmc
Follow
Looking good only one has not came up yet!!
6 out of 7
Looks like 3 decent ones 3 not so much
Maybe I got one more good one but I think I got 3 runts to toss
Dug up 5 th of secon batch she was growing upside down turned her over looks like she doing good now!!
The one failed on well one doing great!!
Supper Happy with there are 3 more I’m rooting for also