Likes
Comments
Share


@thevaporino
Follow
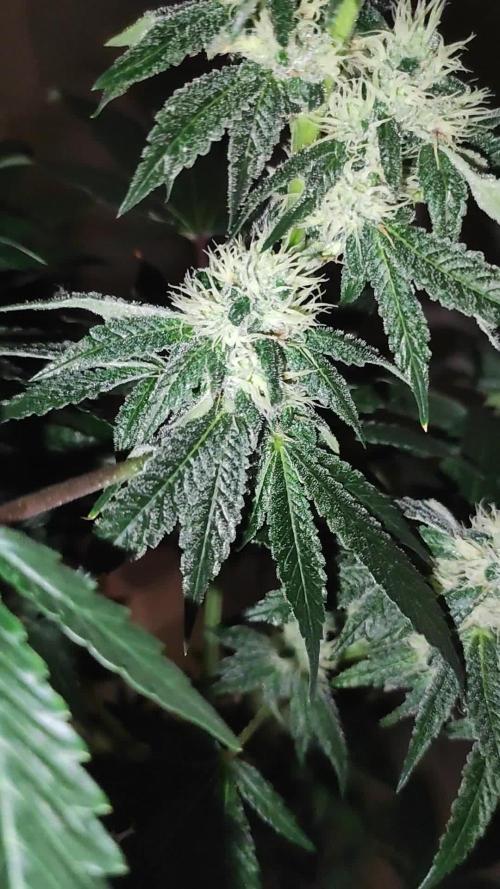
Entramos en la 9 semana y seguimos con heladas en el exterior , las mínimas con luces apagadas son de 15º y las máximas con luces encendidas



Likes
90
Share


@OrganicNature420
Follow
Germination date 🌱 29/11/2021
Day 70 09/02/2022
Strain 🍁 SinCity seeds Frosted Biscotti
(Biscotti Sundae x Whitenightmare)
THC% • Unknown
💡 Mars Hydro FC-E6500
• Power draw 650W + 5%
• Max coverage 5 x 5
• LED 3978 pcs high quality chips
• Max Yield 2.5g / watt
• Noise level 0 DB
• Removable Driver & Light bars
• Daisy chain
• Fast cool system
https://marshydroled.co.uk/ 🇬🇧
PROMO CODE • (organicnature420) DISCOUNT
https://www.mars-hydro.com/ 🇺🇲
PROMO CODE • (ORG420) DISCOUNT 👍🏻
⛺ Mars Hydro 150 x 150 x 200cm
📤📥 AC infinity 6inch
💧 10lt dehumidifier
❄️ 3.1kw air con system
💉 Nutrients Living soil (dry amendments)
Grow
Bloom
Bloom2
MycoBoost
Barley
🌱 Growing Media • Soil
Notes 📝
Not as good as some of the others but no complaints. Lights working wonders and now upto %85. I will leave it there and go full power next run as I've had no problems 💚🌱
Discount codes in bio for Mars hydro

Likes
5
Share


@HighOhioAn
Follow
Loving the buds on two of the strains I’ve only had black buds one time before, and it was some of the best, but I’ve ever had super excited for this grow🔥💯
Likes
11
Share


@Canadian_Bud
Follow
25-3-2023
Colors are starting to be more pronounced as she comes to her final week or not. Probably looking to a Good Friday Harvest of those sweet smelling eggs. 💪😎
Minor Feeding as she goes into Shop Vac Flush next week. Harvest just around the corner.


Likes
25
Share


@crystal_garden_0
Follow
Great week, all seeds germinated and plants looking good . Transplanting in the next few days to 5 gallon pots.

Likes
7
Share

@420DeepGrow
Follow
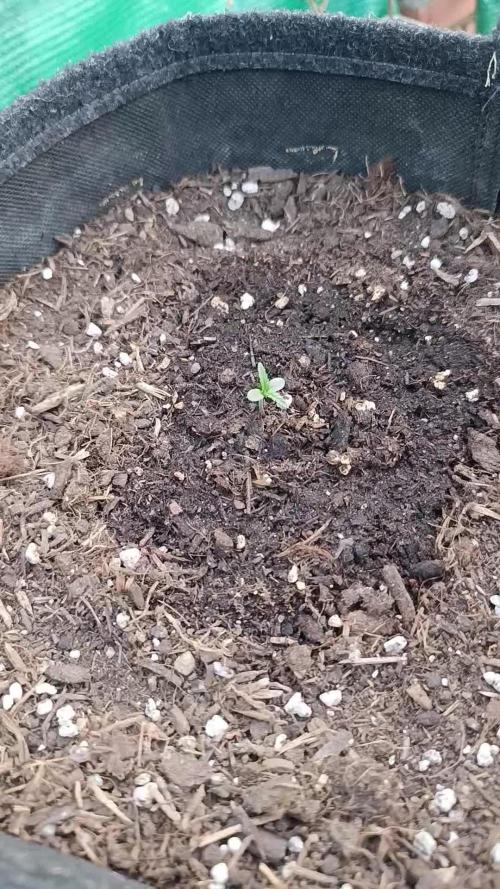
📆 Semana 1:
La plántula entra en su primera fase real de crecimiento en exterior, desarrollando nuevos pares de hojas con buen ritmo y manteniendo un color verde sano. Se aprecia una ligera elongación inicial típica de estos días, pero dentro de lo normal y sin comprometer la estructura.
Se retira progresivamente el “vaso”, permitiendo que la planta se adapte al entorno natural. La respuesta es positiva, con buena turgencia y sin signos de estrés, comenzando a ganar fuerza en el tallo.
Los riegos siguen siendo controlados, ampliando el perímetro para fomentar una mayor exploración radicular. Se mantiene el uso de estimulador de raíces, sin introducir aún carga nutricional significativa.
El aumento progresivo de horas de luz y la intensidad solar empiezan a marcar el ritmo, preparando a la planta para un crecimiento más explosivo en las siguientes semanas.
⚡ EC: 0.4–0.5
💧 pH: 6.2–6.3
🌡️ Agua: 18–20°C
🌫️ Humedad: 50–70%
☀️ Luz: sol directo principios de Abril
🔥 Nota de cultivo: Adaptación progresiva + raíz activa = clave para desbloquear todo el potencial en exterior desde fases tempranas.
Seguimos creciendo fuerte 💪!
Likes
43
Share


@TheCannaProphet
Follow
~Entry for the 'Best Rarest & Smallest Pot by Seedsman' contest~
Starring 🤩....
~ Seedsman Zkittlez Auto ~
Zkittlez (Grape x Grape Apple) Auto x Auto Fruit (Auto Fruit Cheese x Auto Blueberry)
Zkittlez Auto is one of the very sweetest-tasting auto strains available anywhere. It is a sativa-dominant (60%) strain that was bred from Zkittlez (Grape x Grape Apple) Auto crossed with a male Fruit Kush Auto, the latter a remarkable fruity strain bred from Fruit Cheese Auto and Blueberry Auto. Growers can expect to harvest some good yields of high-THC buds.
Zkittlez Auto remains a fairly short plant, rarely exceeding 120 cm. in height wherever it is grown. This is a vigorous plant which is able to metabolize a high level of nutrients and she's a thirsty girl too! If growing indoors close to neighbors it is strongly advised to ensure good and effective carbon air-filtration in order to neutralize powerful odors. This strain's life-cycle is approximately 90 days from seed to harvest.
The leaves on this plant are big and wide serving to convert every lumen available into Zkittlez goodness. Indoor growers should obtain between 400 - 500 gr/m2 while plants cultivated outdoors will produce slightly more at 500 - 600 gr/m2. Lateral branching is very good and it is recommended to use supports/ties to prevent snapping and keep buds close to the light source.
This strain's scent is sweet and fruity with candy and berry notes. Its high-THC has been measured at between 21 - 24% with less than 1% CBD. The effect is well-balanced, cerebral and euphoric, and is very good for social situations as well as for relaxing in front of the TV either alone or with company. It also has the added effect of helping to relieve chronic pain, helping with nausea, insomnia and depression as well as stimulating the appetite.**
**Credit to Seedsman.com
________________________________________________________________________________________________________________________________________________________________________________________________________________________________________________________________________________________________________________________________________________________________________________________________________________________________________________________
~ The Setup ~
~ Grown in a 2qt plastic popcorn pot filled with Mother Earth Grow 70/30 Coco/Perlite with Xtreme Gardening Mykos added.
~ Seed was germinated directly in the medium without any 'pre-soak'
~ Feeding will be by Dutch Pro Nutrients
~ 24hr light cycle while germinating
~ 20/4 light cycle after first leaves appear.
~ 4x8 Gorilla Tent
~ HLG 650R w/ 30w Supplemental UVA Bar controlled by a Trolmaster Hydro X controller set for a 15min Sunrise/Sunset simulation. (also a HLG Blackbird for additional side lighting if necessary)
~ Supplemental co2 controlled by an AutoPilot APC 8200 co2 controller
~ AC Infinity Cloudline T6 with Controller 67 using a Terrabloom 6x24" carbon filter
~ De-Humidifier and Humidifier when needed.
~ 14k BTU IdealAir portable A/C unit plumbed into tent for temperature control.
~ BlueLab testing instruments
~ Two Hurricane 18" oscillating fans
~ Two 6" Clip-on fans
~ Two 10" floor mounted fans
________________________________________________________________________________________________________________________________________________________________________________________________________________________________________________________________________________________________________________________________________________________________________________________________________________________________________________________
Weekly Update:
11/8- Well here we go into the first week of Veg for the Zkittlez Auto from Seedsman Seeds! I have her nestled in between a bunch of other autoflowers that are one month old now so she's got lots of company!
Since sprouting the Zkittlez has bee doing exceptional, with good color and vigor. I was a little concerned about her when she first sprouted as her first leaf set had a funky color to them and I feared that she wouldn't survive. But low and behold, when she opened up her leaves they turned a beautiful green and she's been looking healthy ever since!
Today I gave her her first water/feed with 20oz of well water with a base ppm of 100, to which was added the following Dutch Pro nutrients: Grow 'A' & 'B' @ 10ml/g, Multi Total @ 7.6 ml/g, Take Root @ 3.8 ml/g, Silica Von Liebig’s Special @ 1.2 ml/g along with Earth Juice's Oily Can @ 5 ml/g. After adding the nutrients I ph'd the solution to 6.1 @ 74℉
11/10- The Zkittlez is doing really well in her little Popcorn Bucket! I didn't water her today, but will wait until tomorrow to avoid over watering her.
11/12- Yesterday I went ahead and watered/fed the Zkittlez with 20oz of well water with a base ppm of 100, to which was added the following Dutch Pro nutrients: Grow 'A' & 'B' @ 10ml/g, Multi Total @ 7.6 ml/g, Take Root @ 3.8 ml/g, Silica Von Liebig’s Special @ 1.2 ml/g along with Earth Juice's Oily Can @ 5 ml/g. After adding the nutrients I ph'd the solution to 6.0 @ 75℉.
The Zkittlez Auto is doing great, has good color, vigor and already has her third leaf set emerging!
11/14- Today when I checked her pot the Zkittlez auto was still pretty moist so I'll be waiting until tomorrow to water/feed her.
The Zkittlez Auto is doing fantastic without any visible health issues, has good color and now has her third leaf set almost fully emerged!
Well it's been a fun week watching this little girl grow and the coming weeks promise to be more exciting as they pass and she gets her groove on! See you next week! 😎❤️
~ Thank you from the bottom of my heart for following my grows and for all the ❤️and support you give! 💚What you grow - Grow what you💚
Likes
15
Share


@DudeGrowsWeed
Follow
November 6, 2021
The Quick Critical is taking off!!! I started feeding some nutrients this week and she really seemed to like it. I could flip her to flower now, but I'm going to wait another 1-2 weeks so the other two ladies can veg longer (and to give the autos a chance to finish).
Critical Sour looks like she is ready to start rocking, I expect to see significant growth this upcoming week.
CBD Medi Kush is finally starting to look like a cannabis plant! I have no idea what caused the delayed growth in the initial couple of weeks, but she's seems on track now. Lots of good growth in the past couple of days. This morning when looking at her closely I noticed she is growing two stems. This is going to be fun to watch how she develops. I just hope she doesn't herm out later.
Neither of the two Dr Bruce Banner seeds nor the one CBD Lemon Aid seed I tried planting ever popped. This is now a 3 plant diary.


Likes
6
Share


@HappyGrower420
Follow
i was using bottle water since the firat day but dint realise that the water was filtered (probably) and had only 7mg/l of calcium ,mag and iron.
Instead of buying cal +mag (which i will buy for my next grow) i checked other brands of bottles water and found Evian that has 80 mg/l calcium ,25mg/l mag (i know its not worth it but i was feeling safer to use "bottle" water at the begining because it was also phd at 6.5)
so my question now is : plant had a cal+mag def . Considering that before i was giving it only 7mg/l of cal+mag now that im giving it 80mg/l of calc and Around 40-50mg/l magnesium just by changing water brand also 4 ml of alg a mic that has cal+mag + molasses that iv started this week 1(tablespoon has around 100mg of calcium) .Do you think it will be enought to fill the needs of the plant? As i said buds are still growing normally and plant has another 14-17 days to still fatten the buds :) Today if seen some orange hairs on them .
thank you
thank you.

Likes
15
Share


@Waveform
Follow
Day 60 and a new week, with lady #2 starting to show her age by getting some more yellowish fan leaves. Sugar leaves on both started to show a very lovely, deep violet color. By breeder information they should be ready in 60–63 days. I guess it will be a few more in my case.
Lady #1 is foxtailing a bit. Summer grow, definitely, and it was over 30 °C outside most of the daytimes, so I couldn’t avoid peak temperatures of more than 31 °C fully. Like every indoor grower – no restriction to this kind of plant only – I like to see self-grown green become big and bushy, but I guess with a 1,60 m tent it‘s better to stick with shorter specimen.
Even some fan leaves are getting into their autumn dress now, and wow, I like their style! Pistils are still white to more than 50%, so ne reason to check for harvest proximity or to feed them pure water only.
Day 62: With their cola foxtailing, tallest bud is now at 91 cm. Color is gaining saturation. A bit more intense leaf curl on very few of the uppermost leaves; nothing to worry about at this stage. Think I can do a microscope tour soon, even if I know it’s too early. ;)

Likes
26
Share


@PatriciaGant
Follow
Dane, We all should help one another. Human beings are like that.
We should live by each other’s happiness - not by each other’s misery.
We don’t want to hate and despise one another.
In this world there is room for everyone. And the good earth is rich and can provide for everyone.
The way of life can be free and beautiful, but we have lost the way.
Grow High and Give the world A smile. Have A Great Day.
What n°2 is lacking is n°1 compensating,
(day 11, dont know what to do ph is right ppm is right themperature is ok light is ok should be recovering within 3-4 days i hope.)
roots are already grown into water bucket.(should i picture them as well?)
ph lv is such a pain in the ass but grow speed is worth all the trouble in hydro.
(16 n°2 still not good i placed another one next to her with luck she recovers if not another one already in place to grow)
(19 all hope is lost she probably doesent make it i set replacement already so waiting for her sisters to pop out and take over)
(20 it is the same water in the buckets so im a little lost why one explode and the other one not,)
(21 n°2 complete reset, new water, new nutrients new clay. probably died cause to shock now)

Processing
Likes
13
Share


@LockDownGrow
Follow
Coming along really nicely now and well into the stretch that I am tucking as much as I can under the netting , they are also sucking the pots dry now within just over 24 hours ,
I'm not sure if that is because of the result-c I added because as soon as I added it the plants instantly started too drink like never before
Likes
10
Share


@Minuteman_Organics
Follow
A few of the zed blacks hermed..spreading pollen into the flower tent. Already seeing some seeds develop. It is what it is. I should have done a better job checking on them. I kept the Zed blacks that only had a couple flowers on the bottom but tossed anything that had flowers growing up the majority of the plant. Some of the most famous strains in the world were self pollinated so I don't have issues with a couple male flowers. They're just trying to improve their fitness as nature intended.
The plants are doing very well. A few of the bottom leaves are dying which is normal...senecense! Sucking up those nutrients. I've been liquid feeding using the fish, seaweed, humate and recharge.
I have saved the males and they are trying to reveg. Still popping out a few flowers which I'm cutting off. 1 rainbow belt. 1 zed black. 3 hash plants
The hash plants are smelling incredible. Definitely a few keepers mixed in here. Maybe 3/7. Hopefully the quality of the flower backs it up.
Zed blacks have 2/3 I'm interested in. One is very very low yield. Unless its a really high quality plant I'm gonna toss it
Rainbow belts are both smelling ridiculous. Super frosty. Good yield. One is slightly more frosted than the other. The zkittles pheno has pure Skittles smell with a little lemon cleaner chem to back it up. Probably my keeper!

Likes
14
Share


@MG2009
Follow
02/23/2022
Lots of stretching this week,not much to say so I let the pics and videos talk for them selves🙏🏻
Enjoy
Grape Skunk tall and lanky one I'm loving! I will number her for future reference.
Biscotti Skunk has some droopy leaves, it's watering day.

Likes
2
Share


Likes
21
Share


@Siriuz
Follow
Alright guys so here's to last week
My first time doing sweet seeds
And I must say it was really awesome
Yo, I ran my first Cream Mandarine XL from sweet seed and at the very beginning thought she was going to die, she was sad and having it rough but with lots of caring she came back to life and even better, this is also one of the longest autos and the tallest I've had with many colas, Im still learning so I should probably train them better in the long run once I get to run another one, well if you look into my profile at my grow diary I'm running gorilla XL right now and I'm training her little by little, more precisely I'm making sure she's getting plenty of light so we don't waste any single spot of energy once she's got to bloom!!
But hey we keep talking bout cream Mandarine XL and it's sad to say goodbye but it's also her time, she's got to the point of no return and we've got to take her out
Thanks a lot for everything pretty girl
You rock and I love sweet seeds
Thanks a lot for those good good smokes
Sweet smokes to all of you running them genetics also thanks a lot to the whole community who supported me in the whole process I do appreciate it
Also thanks again sweet seeds Apollo for your support letting me run your genetics and given the opportunity to show the world my farming level
Hopefully with the great people around I will become better :')
Alright now time to harvest this girl
Peace and love brothers
If you got any questions just shoot

Likes
11
Share


@Bread_n_Buds
Follow
Our Jet Fuels are plants that promise very well, we have always loved the strains of the Diesel family, a bit gassy and for this particular taste we have great expectations. You could say that it is the favorite taste in the BreadandBuds house I have to study the terpenes a bit better to tell you better but one thing at a time we will delve into everything.
Never stop at the first good results guys, always improving is fuel for the next day, to keep the passion alive and have results.
Growing Projects ----- I will follow this procedure, it has given birth to a plant before that will be worked with topping x16 buds and various LST and I have just germinated the second plant that will be born about 13 days after the first and will go straight to the conclusion with the main cola. I have to tell you in the past I was a topping maniac, then I felt nostalgic for the main cola. It is always a major sacrifice to give up the Main Cola. To avoid depression and to give a better vision to our super trusted breeder, home breeder and Zamnesia heart breeder we make a plant in topping and a straight one preserving the main cola. Those videos with the rotating Main COla were liked and we produce the best Maincola of the situation-
The first week went only with Power Roots 1 Ml/l and Pure Zym 1ml/l from now on we start with ALga Grow. The plants were transplanted shortly after germination because the biodegradable pots were very small. The soil is Plagron Pro Mix 100% organic renewed with 30% new soil and 20% Perlite added. (Pro mix don't have perlite but is airy we added anyway)
Plagron fertilizers are available on Zamnesia in convenient Pack formats for all growing styles. I used this with a simple search you can find the other products.
---- https://www.zamnesia.io/en/12119-plagron-top-grow-box-100-natural.html
Try a seed of this strain that drives us crazy...
---- https://www.zamnesia.io/it/11258-zamnesia-seeds-jet-fuel.html
Zamnesia Description // Jet Fuel (also known as G6, Jet Fuel OG, and G6 Kush) is a modern hybrid rich in THC and terpenes with a diesel aroma. Originally created in Colorado by crossing Diesel with Aspen OG, this 60% sativa-dominant hybrid is a must-have for any smoker who enjoys an uplifting and energizing high. Now, thanks to the hard work of our breeders, the original Jet Fuel is even easier to grow at home. Order your seeds, plant them in soil, and enjoy their rapid growth. After just 9–10 weeks of flowering, you can expect a generous harvest of premium sativa buds!
Growbox and Air System - Secret Jardin DS120w + fans + Exhaust fans and filters DF16 kit ---- https://www.secretjardin.com
All the best that mother nature can offer is on ----www.zamnesia.com
Call for collabo: I am available for collaborations with companies of Lights and various equipment for growing (No Seeds and Nuts company please) I would like to renovate my 120x120 space that has slightly obsolete lights, and I would like to try some controllers. If you have proposals available.
Likes
17
Share


@Naujas
Follow
She is much prettier than she was a week ago :) I remembered that I have my first grow light, which is more compact and it will give me more space, so I changed my light, now the girl's side branches get light too:) I add a lot of video memes, because I really want to win Iphone16 pro ;) and those who don't take risks don't drink champagne:) good luck to everyone.