


Likes
Comments
Share


@SkunkyDog420
Follow
Hallo zusammen 🤙.
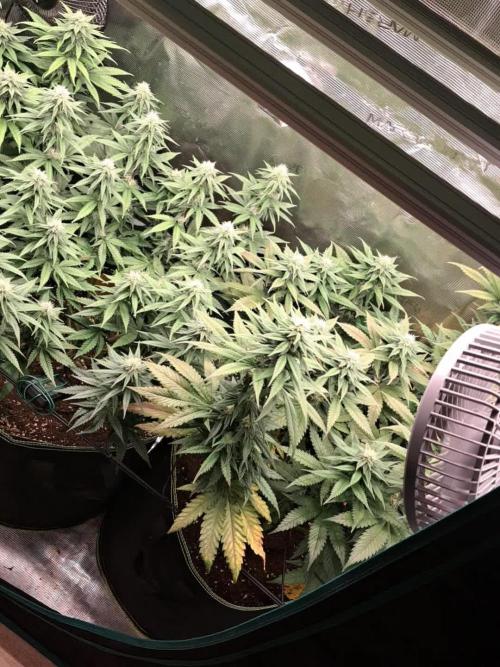
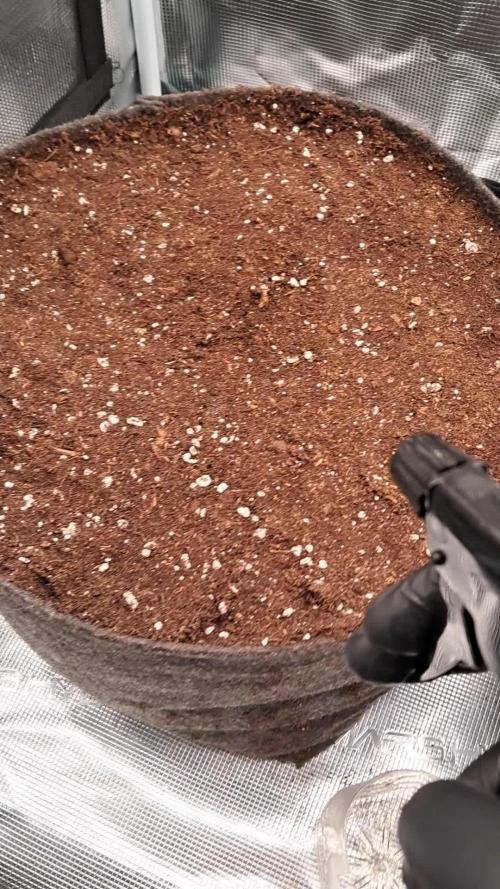
Sie wächst sehr schön und macht keine Probleme.
Sie riecht sehr schön nach Vanille.
Sie erhalten 25 Prozent Rabatt in unserem Shop
Mindestbestellwert beträgt 75 Euro
https://greenbuzzliquids.com/en/shop/
Code: GD42025




Likes
30
Share


@valiotoro
Follow
Week 3 has passed✔️
LST always with Ennio Morricone🎵
She’s doing very well growing at fast pace with a beautiful green color on the leaves🔥
For the nutrients Plagron as always💜
Foliar spray Plagron vita race once a week💦
Processing
Likes
19
Share


@MadeInGermany
Follow
Hi everyone :-)
This week she was repotted, just like the other Wonder Pie Phenotype from the GHSC Cup in the other diary :-).
I am excited to see how it will develop with canna bio in contrast to Grennhouse Feeding 😊👏🏻.
I wish you all a nice weekend, stay healthy 🙏🏻 and let it grow 👏🏻😎
Likes
155
Share


@deFharo
Follow
Bienvenidos cultivadores de marihuana clandestinos y también a los que tienen la fortuna de no serlo!🖐️👨🌾👍
Este diario es un relato semanal de técnicas, experiencias de cultivo y Bio preparados orgánicos caseros, los cuales llevo experimentando dos años en cultivos de marihuana interior.
• Activación de Microorganismos de Montaña con Calabaza, zanahoria, minerales y quitosano para fortalecer las defensas de la planta contra patógenos.
- Publicado el 😋 22/02/21
Después de 45 días de fermentación anaeróbica he abierto, lo que espero que sea un gran fertilizante para usar desde la etapa de crecimiento vegetativo hasta la preflora y primeras semanas de floración... después de usarlo durante un año en todos mis cultivos, puedo decir que es excelente.
La calabaza y la zanahoria contienen multitud de minerales y vitaminas que ayudan a fortalecer el cultivo y ayudan a la expansión de las raíces. Este preparado es comparable, funcionalmente, con los extractos de algas, aunque mucho más completo. Esta hortaliza es rica en antioxidantes. Destaca su contenido en carotenos, que son los responsables del color característico de la calabaza. ¿Será que esto puede influir en los colores de las cepas?... en observación!!
Gracias a la fermentación anaeróbica con Microorganismos de Montaña, los nutrientes, vitaminas y minerales son quelados por la acción de los MM, consiguiendo así un caldo nutritivo de primer orden que las plantas asimilan de inmediato.
INGREDIENTES fórmula básica:
Agua de manantial alcalino: 2,5L
Suero de leche: 1L
Microorganismos de Montaña Sólidos (varias cepas): 400g
Melaza orgánica: 120g.
Levadura de cerveza y fresca: 10g.
Calabaza y zanahoria fresca: 475g.
Cáscara de camarón deshidratado y molido (Quitosano): 6.5g
• Extra Minerales:
10g de Roca fosfórica: P
7g de Azomite: Ca, Fu, Fe, K, Si, B y trazas de el resto de minerales de la tabla periódica.
8g de Ceniza de palmera: Ca y K.
5g de Piedra Pómez: Si, Al, Fe, Ca, K.
8g de caolin con Illita: Fe, Si.
5g de Sal de Epsom: Mg.
• Elementos contenidos en la calabaza y zanahoria:
Aminoácidos: alanina, arginina, cucurbitina, cistina, glicina, histidina, isoleucina, lisina.
Ácidos: linoleico, aspártico, oleico, palmítico salicílico y fólico.
Vitaminas: Vitaminas A, B1, B2, B3, B6, B9, E, A, C, K
Minerales: calcio, cobalto, boro, magnesio, zinc, potasio, hierro.
Azúcares: sacarosa
PROCEDIMIENTO
En este bio preparado he hecho una pre-hidrólisis de la calabaza y zanahoria, cociéndolas durante una hora con melaza para mejorar luego, en la fermentación, la disolución de todos sus elementos. También he hecho una pre-hidrólisis con la cáscara de camarón, esta vez he hecho una hidrólisis alcalina con KOH, que luego de dos horas añado a la mezcla final, además he diluido, todo lo posible, los minerales mediante una agitación violenta..
Disuelvo todos los elementos y añado levadura de cerveza y fresca para dar comienzo a la fermentación. Coloco en una bolsa de malla los Microorganismos de Montaña Sólidos de mis dos semilleros, donde reúno los Microorganismos (Bacterias de la familia de los Actinomicetos, Levaduras y Hongos (Micorrizas), Microalgas y Protozoarios) de seis bosques vírgenes de mi zona.
Cierro el bidón herméticamente con válvula de escape de gases, como estamos en Enero y hace frío he puesto una cinta de calor alrededor del bidón para mantener una temperatura constante de aproximadamente 36°C, de esta manera el preparado puede estar listo en tan sólo 30 días, si fuera el caso de dejarlo a temperatura ambiente el preparado demoraría 2 meses más en estar disponible para uso. La fermentación comenzó a los 60 minutos y se ha alargado durante 25 días sin interrupción.
He abierto el bidón a los 45 días, el olor ha fermentado es muy agradable, el color fantástico, algunos Microorganismos se ven prosperando en la superficie, separo medio litro para ir usándolo y cierro el bidón otra vez.
Tengo varios cultivos incipientes donde voy a aplicar este fertilizante y observar sus efectos.
Hasta la próxima semana...
SALUDOS, SALUD Y GRANDES COSECHAS A TODOS!! 😁👨🌾💧💦🌞💡
=================================
🙄👇👌👍👉👉🖐️👨🌾👍👈👈👈🤜👌🙏👇🤩🖐️🏻
Likes
6
Share


@A_Beefy
Follow
A bit of nute burn. Burnt tips on a few leaves but still continued to feed nutes to this lady. Good growth. Will not be topping this one just defoliate.
Likes
2
Share


@Justrite
Follow
Going well and strong in this week ,
Feed upped a touch and reacted very well ,
Quite impressed with this quantum board led light so far
Also plucked off the petal leafs and first set of branches as they are non productive branches to work with
Water is heated to 22oC and then cal mag is added till a level is set to 0.4 and stir in very well then add base nutes of mIcro stir very well then gRow then stir very well then add bloom stir very well and then finally b52 and stir in very well

Likes
213
Share


@Rock_n_Roll_Randy
Follow
35 days in flower and im seeing swollen bud sacks everywhere so..... IT WORKED. Nuken pollen on my monkey dough and gorilla glue and backcrossed a couple nukens
Likes
15
Share


@Insaniac_0
Follow
Flower Week 6 Day 42 to 48 - 3/26 to 4/1
Stepped up my attention with these this week and hope I didnt let them go too far for a decent harvest. I defoliated for the last time this week and spotted more purple leaves. The buds are super dense so I have higher hopes than I did last week
Feed this week was 1.25 gallons 2 times. 700ppm total before add-ins. I used 400ppm Bloom concentrate mix (recipe week 5). Then I added 1ml/gal of CaliMagic (General Hydroponics 1-0-0) PH balance this week was 6.6
I plan to feed 1.25gal 2 times with 6.6ph and half nutes. This will also be the same for all remaining feeds before harvest. From this point Im simply watching for signs to harvest in the pistils, calyx, and trichomes

Processing
Likes
13
Share


Likes
10
Share


@Rychap
Follow
The plant has really jumped in size 20 inches I have started out using 1.25mls (Dutch nutrients bloom a/b) per L using 2 gallons of water each watering and letting water drain checking the ph of the drainage water as well and it's the same ph going in as going out 6.2

Likes
4
Share

@Maindrugger
Follow
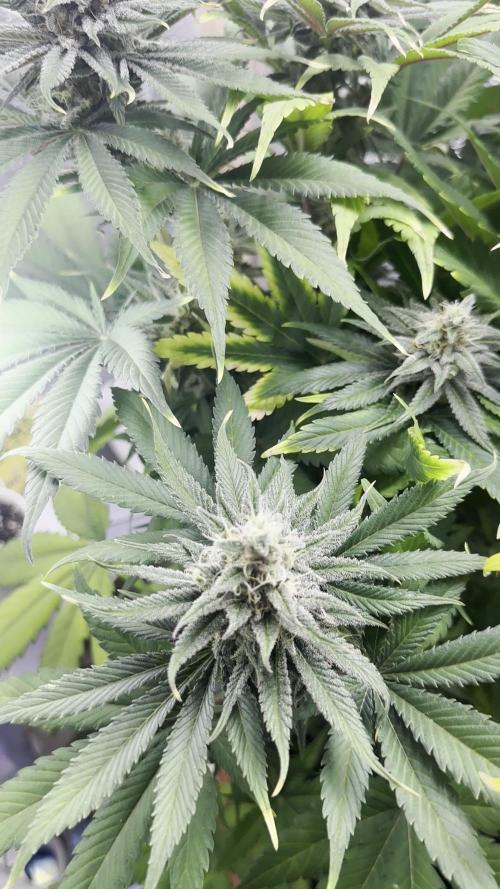
Завтра харвест. Я бы дал может ещё чуть чуть но не хочу. Поливал только водой давал по 5л. Последний полив был 3 дня назад. В последние 3 дня открываю окно чтоб ночью было холодно так что у него последние 2-3 ночи было градусов 15

Likes
3
Share


@mad_scientist
Follow
This grow started as auto flowers... But someone in dinafem was smoking weed when he was packing my seeds and put inside some photoperiod. After 50 days at 20/4 and with my plants not flowering i decided to switch my lights at 12/12. The plants indeed started to flower. I am very disappointed because i spent so much nutrients for vegging 50 days for no reason, because i spent so much electricity at 20/4 and because when i started this grow, with my calculations it should be over at 1-5 of june. Yet here i am at the middle of summer in Greece trying to deal with the temperatures and it is very hot. Anyway, things going well.

Likes
175
Share


@love_2_grow
Follow
Day 29
Overall I have no big plans for the girls this week. Just letting them recover from topping last week, and I'll continue to adjust the LST wires as needed. Also, I have decided to stop measuring the plant size every day as it is a bit pointless this far into veg. Instead, I will measure the girls at the end of each week.
I started this week by feeding the plants' compost tea as well as foliar feed them. I have a small hand sprayer which works well as I only have a couple of plants. The bendable nozzle is convenient as it allows me to feed all sides of the plants easily. I just need to be careful when I do the underside of the leaves with the nozzle pointing upwards so I don't get my face full of wormpoop juice.
I gave each girl around 2 liters of tea, and I completely forgot to check the pH. Sigh. Also, it is worth noting that I gave the tea to the plants just after the lights out so that the tea didn't burn on the leaves.
I noticed some light green/yellow tips on the new growth at the very top of the right girl. New growth further down doesn't show any yellow tips, so I suspect that I might be dealing with light bleaching. I checked the light level at the canopy, and it was up around 850 PPFD which is relatively high. (I completely forgot to raise the lights as the plants grew. DOH!) I moved up the light around 10 cm and then measured around 640 PPFD at canopy level. Hopefully, that will sort out those yellow tips but I'll keep my eyes on it.
Day 30
All I did today was to once again cut back the cover crop a bit and tighten the LST wires. I did pull a bit too much on the left girl and heard a "crack". Turn out that the branch broke just right by the main stem but I think it will heal just fine as it was a really small break. Time will tell.
Day 31
Today was moving day and I finally moved out all tomatoes and pepper plants. Good to have a bit more space again considering how cramped my tent is. I also did some more cover crop trimming and it is insane how much it grows.
I removed a couple more leaves from the right girl as they weren't getting any light that far down on the plant. The branch on the left girl that I broke yesterday looks like a lost cause at this point but I'll give it another day or two to see if it heals. Kinda doubt it but let's see. I also tightened all the LST wires further and gave each girl around 2.5 liters of pH 6.0 water.
The tops are looking good in the propagation tray but no visible roots yet. I gave them a bit more aloe tea.
Finally, I hung up a CO2 bag in the tent. One of the problems with my setup is that the tent gets quite hot due to the powerful lights and since the tent is so small I can't fit an AC in there. Hopefully, the CO2 will help with the heat problem now when the weather is getting better which means that the tent will become even warmer.
Day 32
Today I went on a field trip to a nearby horse ranch to hunt down and gather compost worms. I gathered around 50 red wrigglers, cleaned them up, and added them to my pots.
Even though I watered the girls yesterday, the right one was dry today, so I gave her around 2 liters of pH 6.5 water. Thirsty girl but then she is also large and bushy, making sense that she drinks more than the other plant.
Yesterday, I hung up a CO2 bag in the tent, and unfortunately, it really smells like shit. Literally. I hope the smell will decrease with time because right now, it stinks pretty bad when I open the tent. Ugh.
Finally, I removed that broken branch as it was clear it wouldn't make it.
Day 33
Ahhhhh, the wonderful feeling of opening up the tent and get hit by a wall of shit smell. My girlfriend even bitched me out that the entire apartment stinks. This was the first time I bought this brand of CO2 bags and I seriously doubt that I will repurchase it...
More watering today, and I gave each girl 2.5 liters of pH 6.5 water. At least all this watering keeps the humidity at a reasonable level, but I really should get around to hooking up the Blumat system, so I don't need to hand-water all the time. I'm way too lazy to have to water every day.
I did some additional defoliation on the left girl. Nothing crazy. It was just removing a few leaves that weren't getting any lights at the bottom of the plant.
I also installed a scrog net but am not thrilled about how it fits. I'll leave it for now but think I will have to make my own in the future.
Finally, I managed to put up a plastic pocket on the wall of the tent. Something that I have considered since getting the tent but never gotten around to doing. It is just a place where I can put the tools that I use most - scissors for cutting back cover crop and defoliation, PAR meter to check light levels, pH meter to make sure that my water is ok, and glasses for inspecting the plants.
Day 34
Today my girlfriend was hiding in bed, under the cover, as I opened the tent. Just in case... Sure, enough. It still stinks.
No big mission today. Just a quick maintenance mission where I cut down the cover crops a bit and removed another few leaves to increase air circulation. I also repositioned and tightened the LST wires. That was it.
Day 35
End of week 5 of vegetation and another fairly easy day. I gave each girl 3liters of pH 6.2 water, tightened up a couple of LST wires, tucked in a few branches into the net, and super-cropped a couple of branches on the right girl. The left girl is 24 cm tall and the right one 34 cm tall.
I also moved the tops out of the tent as very little light reaches the floor of the tent now when the girls are getting bushy. I put them under a ViparSpectra light together with my tomatoes and chilis. I still have no exact plan what to do with the clones if they survive but maybe I'll plant them outdoors and see what happens.

Likes
10
Share


@Dreadnug
Follow
Laid out the Srog nets with intention to change the light setting next week. Added pre-flower nutes as well as a 1" top dress - with some added nutrient mix. Thoroughly watered and ready to start training.


Likes
28
Share


@DudeGrowsWeed
Follow
I fed her some molasses last weekend. Personally I never really notice much difference after feeding molasses but I still try feeding it 2 weeks before harvest anyway. I have beed giving her just water since then. Going to flush real good this weekend, then let her dry out til the following weekend when I am going to harvest her. That should put the harvest date right around 1/27/18, which would be a full 3 months of growth - seed to harvest.
The Blue Mammoth has been just a great plant to grow so far. I did not do anything to her except some defoliation. No bending, training, topping, etc... And she looks awesome in my opinion. She's bigger than the Girl Scout Cookies I harvested a few weeks ago, which yielded 2.6 oz.
Looking forward to harvest, cure and smoke👍
Likes
28
Share


@Esoteric_growing
Follow
Buds starting to link up nicely, no issues apart from ph seems to be creeping down in between feeds so dropped ec a touch and raised ph by a point.
Likes
34
Share


@Damonkey
Follow
Not finished with the harvest yet will update when I’ve done a second trim on everything and weighed in. The pics so far just a branch from each plant. 3 slightly different phenotypes. The buds I’d swear have a pinkish hue. Very strange colour came through in the end almost has a purple look about it.
Very happy with results and yield. The yeild could be much bigger given space and time for veg but for my needs This was an awesome grow. Really nice sticky hard buds on the most. One of the Phenotypes was a bigger yield and much tighter fatter buds but all look great.✌️🏻
I should also say a big thank you to Barney’s for providing free seeds for this grow. It’s a pleasure growing your girls.
So smoking this stuff properly tonight, yeah it’s good. Very heavy warm stoned feeling after a few spliffs.. my tolerance is quite high but this stuff has rocked my night. Really pleased with the results after curing for a few weeks I think I found a new favourite🤤🤤😂😂well until the next one. The buds are nice and dense and really have a nice firm feel to them. They also had a fairly decent covering of trichomes that sit in the herb well, it’s surprisingly smooth to say it’s not cured yet.
It’s gonna be beautiful stuff oh yass yass yass.
Update/ getting super tight now, it’s going to be very difficult to keep my hands off it for too long🤤😂
So a friend came around to see me yesterday. I let him have a good smoke of Phantom OG. He left with both fists clenched and thumbs pointing skyward.
This cannabis really is top class, and really does have medicinal value. I’d say it’ll make a great stress killer for anyone I think it’ll quash any anxiety issues going on as well✌️🏻😌✌️🏻
Likes
13
Share


@Gorilaweed420
Follow
Muchas gracias por dejarme participar BsF y grow diariaries y compartir este cultivo gorila glue 4. Fue un hecho en scroog en un metro veinte cuadrado usando dos masetas de 23 ltrs usanso microorganismos y productos orgánicos súper contento con esta sepa, fueron criadas con dos focos galoponeros en un armario con poco a lo q tengamos podemos hacer mucho lo importante es aprender un poco todos los días y disfrutar de nuestras cosechas un fuerte abrazo para todos @gorilaweed420
