


Likes
Comments
Share


@Mazgoth
Follow
This plant at week 4 was little bit stunned because she is getting all the cold and is stressed out,the fan hits directly into the plant.I was feeding all the plants same amounts of nutrients but this one didn’t handle it well so I flush her one time and at week 5 she got a lot taller and stronger 💪

Likes
42
Share


@Dr_Boom
Follow
This was a fun week. She continued to stretch and started to show some flower at the end of the week. I popsicled her to clean her up under the canopy. I'm trying to avoid getting a lot of popcorn when she finishes. I don't want anything under the trellis. She is really showing good growth, and will need some defoliation soon.


Likes
10
Share


@toxicswine462
Follow
Here I am again, I've been neglected this diary for 3 weeks so I made a fast update on the last 3 weeks, not so detailed unfortunately.
Today is day 58, some leaves are yellowing and I don't understand what it could be. It seems a Phosphorus deficiency but there are also this strange rusty spots on some leaves on top of the plant. From what I know in case of deficiencies the first leaves to suffer should be the ones in the bottom part of the plant but I don't know. I upped the calmag a little because the rust spots could indicate calmag deficiency. Learning something new everyday with this hobby, I just hope I manage to stop the problem because in my previous grow I had a similar problem and didn't managed to stop it so in harvest time all the leaves were basically dead.
Anothe detail I'm not happy about is the not so even canopy I created. I think I started LST a little too soon and therefore deformed a little too much the plant. Next time I'll try to top for the first time.
Other than the problem I mentioned the buds are stacking up really really nice and they smell amazing. Real frosty buds it seems as you can see from the video. I hope I'm doing good :D

Likes
33
Share


@Wicked_Stix
Follow
Started a little training this week. This plant is pretty bushy with tight nodes. Will be doing some more training and a little defoliation over the next week to get her ready for flower. Other than that, just watching and waiting

Processing
Likes
6
Share


@AbbyRose
Follow
The ladys are showing pistols and they are drinking from the bottom and blooming out beautifully.


Likes
44
Share


@Cogollo_eu
Follow
**Encontrarás la traducción a español al final de la descripción**
From/Desde: 10/05/19 || To/Hasta: 16/05/19
From day/Desde día: 78 || To day/Hasta día: 84
You can find the Money Maker Diary here:
** Podéis encontrar el diario de las Money Maker aquí:**
https://growdiaries.com/diaries/25667-gorillamakingmoney-gorilla-vs-money-m
-----IMAGES & VIDEOS-----
5 - HomeMade Organic & Cheap CO2 generator (more info in week summary)
9, 10, 11 & 12: The bud on the right is a Gorilla one, the buds in the left or/and in the middle are Money Maker ones.
15 - Same Gorilla plant buds, one affected by CO2 in the roots and the other not.
-----WEEK SUMMARY-----
The smell is more sweet and intense every day, friends that came home turned them eyes into crystals when they see this little babys. The size isn't awesome, but the high ammount of buds full of crystals plus the strong sweet aroma makes them awesome. Buds are growing and fattenning very very well.
This week i added a boost of HomeMade CO2, i never measured the results of this invention so i can't give CO2 measurements. This method is widely used in home aquariums and there is where it comes from. For those interested i'm going to write here more detailed instructions. The 4 liters i've made will last for about 2 weeks.
---NEEDINGS---
- 250 ml Bottle
- 6~10 l Bottle
- 400 g Sugar / l water
- 1 Envelope of organic baker's yeast / l water (CHEMICAL WILL NOT WORK)
- 3 mid plastic tubes 40~50 cm
- 1 short plastic tube 5~6 cm
- 4 tube adapters
- Hot glue to seal adapters
The process of creating CO2 is simple, mix water, organic yeast and sugar in a bottle, and the sugar will free CO2 in the process of fermenting to alcohol due to the yeast.
1. Make a hole in the center of the big bottle cap, insert an adapter and secure it with hot glue
2. Make 3 holes in the small bottle cap and glue the other 3 adapters
3. Link both caps with one of the mid tubes and insert the other tubes on free adapters
4. Insert a short tube in the bottom of the small cap in the adapter that came from the big cap
5. Watch the Video!!
-----WATERING CALENDAR-----
Plants are beginning to drain the pots a bit faster so from now on i will raise the water ammount on each watering day 0.25 l.
11/05/19 - 1,5 l with All week nutrients -(Nirvana & Blombastic) also Big Bud half dosed @ PH6.4 & 2 E.C.
14/05/19 - 1,5 l with Bud Candy, Big Bud, Nirvana, B52, Bud Factor-X, Sensizym & Blombastic @ PH6.4 & 1.5 E.C.
*****ESPAÑOL*****
-----IMÁGENES Y VÍDEOS-----
5: Generador de CO2 casero, barato y orgánico (más info en el sumario semanal)
9, 10, 11 & 12: El cogollo que sale a la derecha es de una Gorila, el de la izquierda y/o el de en medio son de una Money Maker
15: Dos cogollos de la misma planta, uno afectado por CO2 en las raíces y el otro no
-----SUMARIO SEMANAL-----
El olor es más dulce e intenso día a día, los amigos que vienen a casa a verlas se quedan ojipláticos al verlas. El tamaño no es una maravilla, pero la gran cantidad de cogollos llenos de cristales añadido al aroma que entra por las fosas nasales las hacen increíbles. Los cogollos crecen y engordan de maravilla.
Esta semana he añadido un boost de CO2 casero, nunca he hecho mediciones de los resultados por lo que no puedo darlas. Este método es ampliamente usado en peceras caseras y de ahí saqué la idea. Para aquellos interesados dejo aquí instrucciones más detalladas. Con los 4 litros de agua que he preparado yo da para unas 2 semanas.
---NECESITAMOS---
- Botella de 250 ml
- Botella de 5 a 10 litros
- 400 g de azúcar por litro de agua
- 1 sobre de levadura de postre orgánica (LA QUÍMICA NO FUNCIONARÁ)
- 3 tubos de plástico de tamaño medio 40~50 cm
- 1 tubo de plástico de tamaño pequeño 5~6 cm
- 4 adaptadores para los tubos
- Cola caliente para pegar y sellar los adaptadores
El proceso de generar CO2 es simple, mezcla agua, levadura orgánica y azúcar en una botella, y el azúcar liberará CO2 en el proceso de fermentación a alcohol.
1. Haz un agujero en la tapa de la botella grande, inserta un adaptador y séllalo con cola caliente
2. Haz 3 agujeros en el tapón pequeño y haz lo mismo con los otros 3 adaptadores
3. Conecta los 2 tapones con uno de los tubos y conecta los otros 2 tubos a los adaptadores restantes
4. Conecta el tubo pequeño en la parte libre del adaptador del tapón pequeño que viene del tapón grande
5. Mira el vídeo
-----CALENDARIO DE RIEGO-----
Las platas comienzan a secar los tiestos un poco más rápido, asi que de ahora en adelante incrementaré 250 ml de agua adicionales en cada riego.
11/05/19 - 1,5 l con todos los nutrientes semanales -(Nirvana & Blombastic) BigBud mitad de dosis @ PH6,4 & 2 E.C.
14/05/19 - 1,5 l con Bud Candy, Big Bud, Nirvana, B52, Bud Factor-X, Sensizym y Blombastic @ PH6,4 & 1,5 E.C.

Processing
Likes
1
Share


@Tri_Op
Follow
A lot of stretch during week 2, buds also beginning to develop, still very little to no smell. Plant hasn’t shown any signs of stress and is up taking normally. Will defoliate to allow for more light penetration at the end of the week.

Likes
14
Share


@StoneyMelony
Follow
This was not a very diffecult plant to grow. I wanted to see how the plant was growing without training it. I didn't have luck on that because she grow so big, 3 times her size when vegged. Obviously very sativa. So in the end i had to bend the shit out of all the stems. After all the LST you could see she stacked up really nice and as time went by and she grew fatter and fatter. All the buds became top heavy and i had to tie everything so i didn't snap my branches. I think although it was maybe not the prettiest grow to watch the outcome is great. i cannot believe it myself. So because i had 2 plants in the room i had to devide the lights also in 2. That being said it is a lot of weed from 1 autoflower . So i can only say i am very happy with this. :-)

Likes
6
Share


@Cannabis4Crohns
Follow
I've unshackled the plant by removing the ties I was using for LST. She continues to streach while producing new flowering sites.
I've decreased the Nitrogen and increased the Phosphorus and Potassium ratios in the feed.
Now watering 2 litres of water every 3/4 days.


Likes
19
Share


@cubansoldier
Follow
So far the girls are doing okay. I had a little problem with stretching at the beginning which is why you see me supporting them with the yoyos. Next grow I will start with the fluorescent light extremely close. I will grow 2 of these plants with only organic nutrients n the other 3 with synthetic to see which comes out better.

Likes
2
Share


@OldskoolHed
Follow
Used bud clips to spread the branches out after topping to the 4th node. Doing well and super vigorous. Did some minor defoliation and set up a blumat this week.

Processing
Likes
15
Share


@HollowSource
Follow
Loving this ladies canopy. It makes me smile every time I see it 😍 Great development so far. Hoping for a quick flower period for this one!
Likes
1
Share
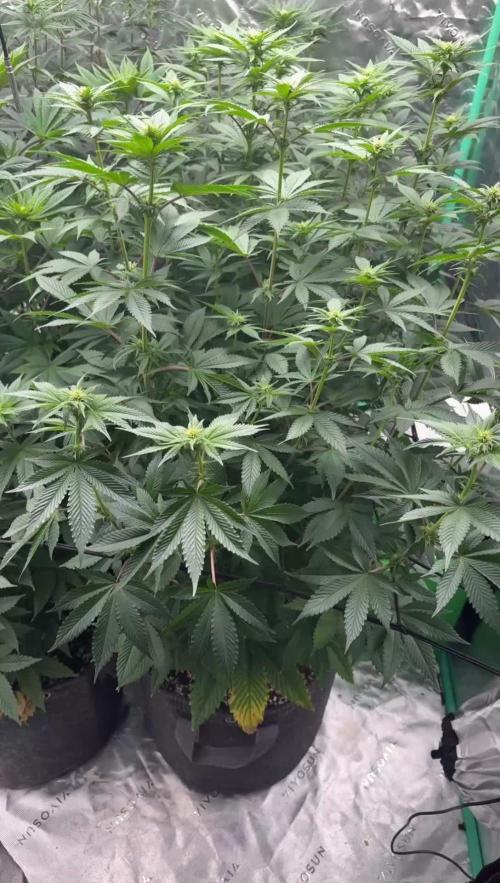

@TTerpz
Follow
Week 3 Day 1: 8/16/25
Fed with nutrients : 8/15/25
Flushed with sledgehammer: 8/18/25


Likes
5
Share


@OhanaMatata
Follow
stopped feeding the plants nutrients let them flush for the final few weeks.

Likes
18
Share


@MadeInGermany
Follow
Hey everyone ☺️.
It gets more beautiful from week to week 😍👍.
I have them all this week Sprayed again properly with neem oil in the veggie phase ☺️.
There have been no trips for 2 weeks, but prevention is better 😀.
Because of the neem oil, the plants look very dark and shiny, which I really like when they shimmer like that 😝.
I didn't do any training these days, that will be done again the next few days 👌.
it was watered twice this week with around 0.6 l per plant.
The Ph / Ec measuring device was also recalibrated.
Otherwise there is nothing to report for this week and we'll see you again with the next update ☺️👍.
I wish you and your families a Merry Christmas 😊.
Stay healthy and let it grow 🍀
You can buy this Strain at :
https://sweetseeds.es/de/red-mandarine-f1-fast-version/
Type:
Red Mandarine F1 Fast Version
☝️🏼
Genetics:
Red Poison Auto®️ (SWS39)
X
Tangie (California Orange x Hybrid Skunk)
👍
Vega lamp:
2 x Todogrow Led
Quantum Board 100 W
💡
Bloom Lamp :
2 x Todogrow Led
Cxb 3590 COB 3500 K 205W
💡💡☝️🏼
Soil :
Canna Coco Professional +
☝️🏼
Fertilizer:
Green House Powder Feeding
☝️🏼🌱
Water:
Osmosis water mixed with normal water (24 hours stale that the chlorine evaporates) to 0.2 EC. Add Cal / Mag to 0.4 Ec Ph with Organic Ph - to 5.5 - 5.8 .


