






Likes
14
Share


@PEAKYPLANTERS
Follow
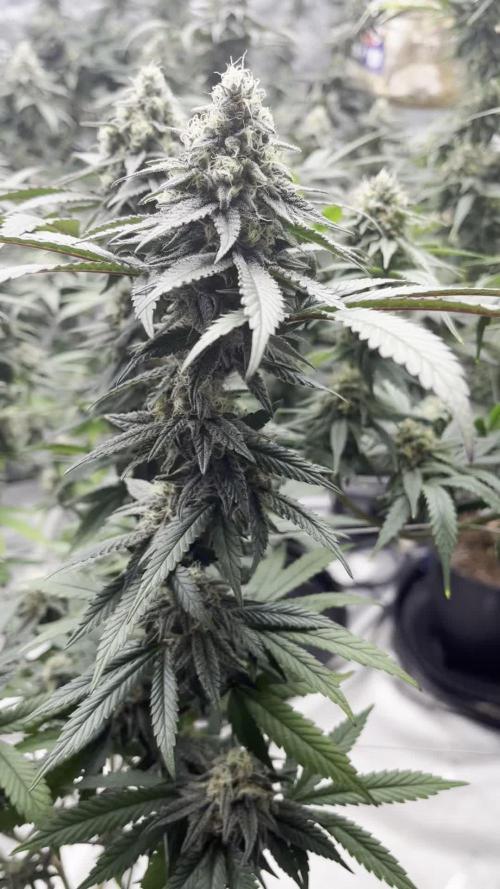
Hello everyone and welcome back to Madame Peaky's Gardens
let's start the dance and bring the light to 12h to trigger the flowering of these splendid girls

Likes
4
Share

@DogDoctorOfficial
Follow
✨ Fairytale Leaves & Phenotype Magic
Welcome to flowering, where potential meets reality.
Both Gelonade phenos are stepping into this new phase with vigor, balance, and beauty — but one of them is telling a very special story.
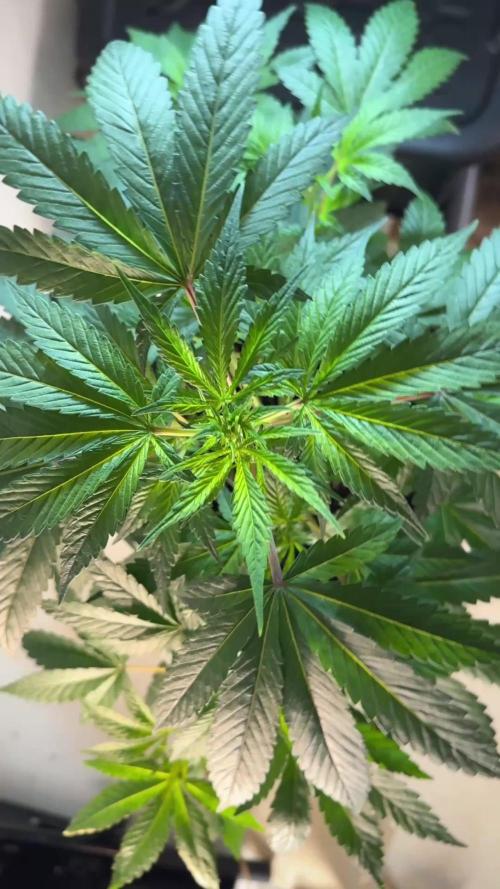
🍃 Pheno #2: The Leaf Dancer
This pheno has leaves that defy convention — opening in a structure that resembles a human hand folding out from the palm, each finger unfurling in elegant rhythm.
Imagine:
• Three central “fingers”
• Each outer one splitting into three more
• Forming a seven-pointed star, nested within a trinity of growth
It’s not a mutation that hinders — it’s a genetic flourish.
A dance of symmetry, expression, and vitality. 🌿
These aren’t just leaves. They’re art.
🖼️ We’ve captured this in photos and video — no filter needed. Just nature doing its finest work.
Plant Stats – Week 1 Flower / Week 5 from Seed:
• Height: approximately 40 cm
• Light Intensity (PPFD): 766 µmol/m²/s
• Temperature: 31°C
• Humidity: 50%
• VPD: 2.23 kPa
• EC: 0.6
• pH: 6.1
Despite slightly high temps and VPD, the girls are loving it. They’re adapting, stretching slightly, and showing excellent turgor and coloration.
⸻
💧 Nutrition & Soil Strategy
This run is driven by a super soil base, and it’s doing the heavy lifting. That’s why we’re keeping the water feed light and strategic.
💦 Current Feed (per liter):
• Aptus Regulator – 0.15 ml
→ Strengthens cell walls, improves nutrient flow
• Aptus CalMag Boost – 0.25 ml
→ Supports structure and photosynthesis
• Aptus Top Booster – 0.25 ml (new this week)
→ Prepares for flower, encourages early bloom structure
⚠️ No All-In-One Liquid now
→ The slow-release pellets in the soil cover the macro-nutrient demands.
→ This keeps EC low (~0.6) and prevents salt buildup.
We’re letting the soil biome + amendments guide the bulk of nutrition. Water is a carrier, not a crutch.
⸻
Why Switch from Start Booster to Top Booster?
Start Booster = roots & early leaf
Top Booster = flower signal + potassium focus
This switch marks the turning point:
Roots are now established, and it’s time to nudge the girls toward blooming, gently and with precision.
Top Booster also enhances:
• Early bud site formation
• Transition metabolism
• Potassium availability for cell expansion
⸻
Gear Check
Everything is tuned in and working in harmony:
• Lights: Future of Grow LED + ThinkGrow Model One
• Controllers: TrolMaster Tent-X + Spider Farmer GGS
• Airflow:
• Two 6” carbon-filtered exhaust fans
• One 6” filtered intake
• Controlled by both ecosystems
All this tech = manual precision + automated consistency
⸻
🔮 What to Expect Next
We’re not seeing pistils yet, but the structure is shifting.
Nodes are spacing. Branches are reaching. Energy is focusing upward.
Here’s what we might expect in Week 2 Flower:
• First signs of pistils
• Shift in leaf texture
• Possible terpene expression (early scent)
• Stretch phase (up to 2x height)
⸻
The Fairytale of Pheno #2
Sometimes, a single plant will speak louder than others.
Pheno #2 is doing just that, not with speed or size, but with shape, rhythm, and elegance.
The leaves whisper a story:
Of lineage, light, and mystery.
Of something old reborn in a new form.
Of a garden that listens, and a grower who sees.
⸻
💚 Final Thoughts
This isn’t just a grow.
It’s a living exploration of genetics, care, and love.
As the Gelonades move toward flower, we’re watching not just for yield, but for expression. For surprises. For beauty in all forms.
Week 1 of flower is quiet, but underneath, everything is shifting.
Let’s walk slowly. Observe closely. Love fully.
And let’s see what Week 2 has to say 🌸
With love and green respect,
DD (Dogdoctor) & The Gelonade Girls
📲 Don’t forget to Subscribe and follow me on Instagram and YouTube @DogDoctorOfficial for exclusive content, real-time updates, and behind-the-scenes magic. We’ve got so much more coming, including transplanting and all the amazing techniques that go along with it. You won’t want to miss it.
• GrowDiaries Journal: https://growdiaries.com/grower/dogdoctorofficial
• Instagram: https://www.instagram.com/dogdoctorofficial/
• YouTube: https://www.youtube.com/@dogdoctorofficial
⸻
Explore the Gear that Powers My Grow
If you’re curious about the tech I’m using, check out these links:
• Genetics, gear, nutrients, and more – Zamnesia: https://www.zamnesia.com/
• Environmental control & automation – TrolMaster: https://www.trolmaster.eu/
• Advanced LED lighting – Future of Grow: https://www.futureofgrow.com/
• Root and growth nutrition – Aptus Holland: https://aptus-holland.com/
• Nutrient systems & boosters – Plagron: https://plagron.com/en/
• Soil & substrate excellence – PRO-MIX BX: https://www.pthorticulture.com/en-us/products/pro-mix-bx-mycorrhizae
• Curing and storage – Grove Bags: https://grovebags.com/
⸻
We’ve got much more coming as we move through the grow cycles. Trust me, you won’t want to miss the next steps, let’s push the boundaries of indoor horticulture together!
As always, this is shared for educational purposes, aiming to spread understanding and appreciation for this plant. Let’s celebrate it responsibly and continue to learn and grow together.
With true love comes happiness. Always believe in yourself, and always do things expecting nothing and with an open heart. Be a giver, and the universe will give back in ways you could never imagine.
💚 Growers love to all 💚

Likes
1
Share

@Easybudzzz
Follow
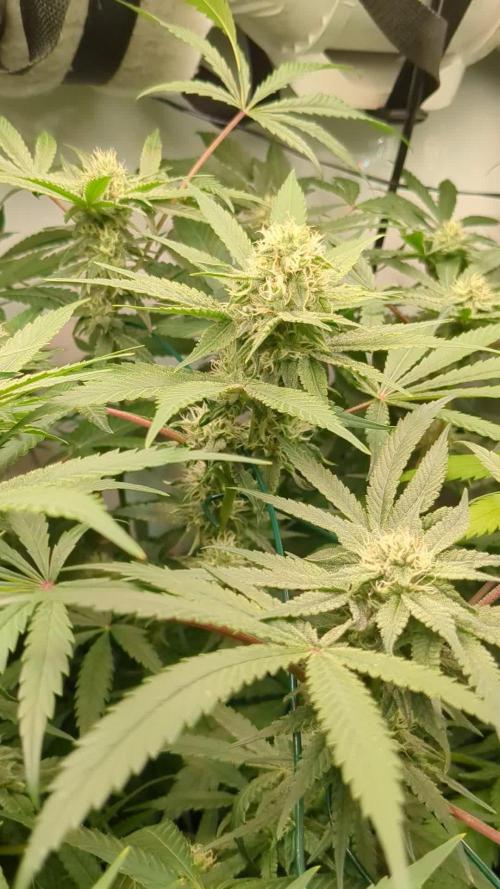
Everything is still going very well. Resin production is already very strong, and the resin has a delicious aroma. No fertilizer has been applied, and the two lamps are running together at a combined 250 watts. The distance between the lamps and the plants is actually too small, but this doesn't seem to bother them.
Likes
43
Share


@Mz876
Follow
We’ve made it to week 5 of Flower. She smells amazing . I’m excited for her harvest . She’s just fattening up . Just water for the rest of the run . No more soil amendments.


Likes
15
Share


@No_Clout
Follow
Haven’t updated recently due to work/getting my forklift license, long story short I passed and now onto the plants.
The gelato are looking very well so far, switched the lights to 12/12 half way through week 4 so should be another week of stretch and then we will have the flower production (my favourite part) I’ve seen some weird marks on some leaves, not sure what they are or if their a problem but they don’t seem to be spreading etc so idk what it is but they seem healthy imo.

Likes
6
Share

@Lokalgrower
Follow
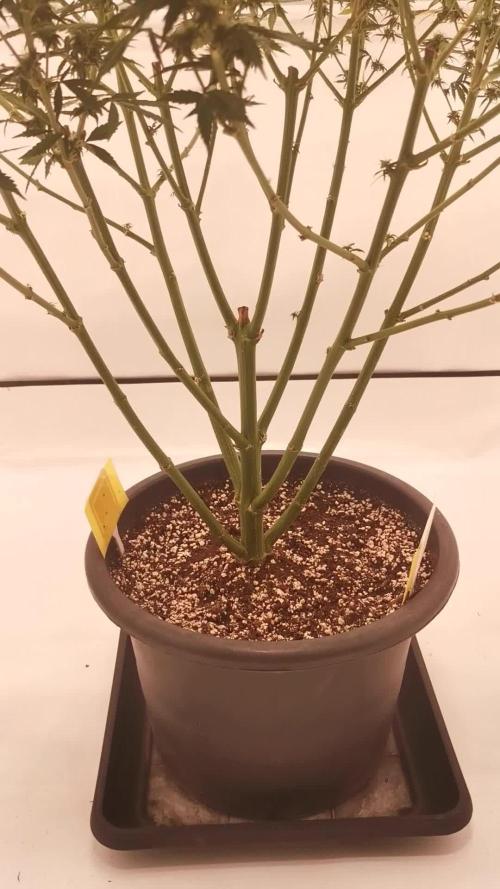
😢😢😢... Hi... Leider musste ich den grow ABBRECHEN 😢🤬😢
Ich habe mir selbst, wahrscheinlich eine Infektion mit Mehltau eingeschleppt 🙈...
( Infektion's Quellen im Garten gab es genug z.b. Kürbis, Sonnenblume, einige andere Blumen)... Obwohl ich auf Hygiene im Zelt achte und auch vorher Hände wasche, Klamotten umziehen, naja das übliche Programm....😢
Nun wird alles entsorgt/verbrannt, das Zelt desinfiziert und dann geht's wieder los... 👋👋👋


Likes
33
Share


@Viridios
Follow
Very excited..plants are looking super healthy, streatching nicely. These genetics are sutch a pleasure to grow. The next couple weeks are gona be epic..😁😁.

Likes
3
Share


@SimplyGrowLogical
Follow
I probably missed a week of pics but when your ladies explode like this there’s a lot of work to be done!


Likes
4
Share


@pzwags420
Follow
On day 1 I changed out my reservoir. I lowered my nutes to 650 ppm(25% reduction). I adjusted the PH down to 6.1. My left plant has some burnt tips from either PH shift or over fertilization. My hope is that the lower ppm will help to resolve the issue before it spreads.
On day 2 I adjusted the reservoirs PH from 6.3 to 5.9.
On day 3 the reservoirs PH is 6.0. I installed my new 200 watt HLG Rspec. I adjusted PPFD readings to 700-1300 PPFD on all tops.
On day 4 I adjusted the reservoirs PH from 5.8 to 6.2.
On day 5 I adjusted the reservoirs PH from 6.4 to 6.0. I diluted my nutrients in my reservoir by removing one gallon of nutrients from the rez and and adding 2 gallons of straight tap water to the rez. This brought the nute concentration from 770 ppm to 540 ppm as the plants will be entering the ripening stage in a few days and they have too much nitrogen judging by the extremely dark green leaves and burnt leaf tips on some branches of the left side plant. The buds seem slightly smaller then my last run which may be due to an excess of nitrogen and maybe not enough light as some of my tops are taller then the others making proper PPFD challenging. All in all the girls are coming along nice and I look forward to the final weeks of flowering 😀
On day 6 I adjusted the reservoirs PH from 5.9 to 6.2. I think I have halted the nute burn as I haven't seen it progressing any more on the leaves. I will continue to monitor closely during these final weeks. The trichome production is increasing with some trichs on top of colas starting to go cloudy. The pistils are turning brown with roughly 40-50% are turning brown all signs I'm getting closer to the harvest window 😆. I dimmed my light to give 600-1000 PPFD to tops.
On day 7 I reduced my temps to 75 during the day and 68 at night. I adjusted the PH of the reservoir from 6.6 to 6.1. My reservoirs ppm was too high so I diluted the rez with 2 gal of tap water. This brought it down to 480ppm. The average ppfd to all 14 tops is 604 with no top receiving more than 1000 ppfd
Likes
1
Share

@gdogfunk
Follow
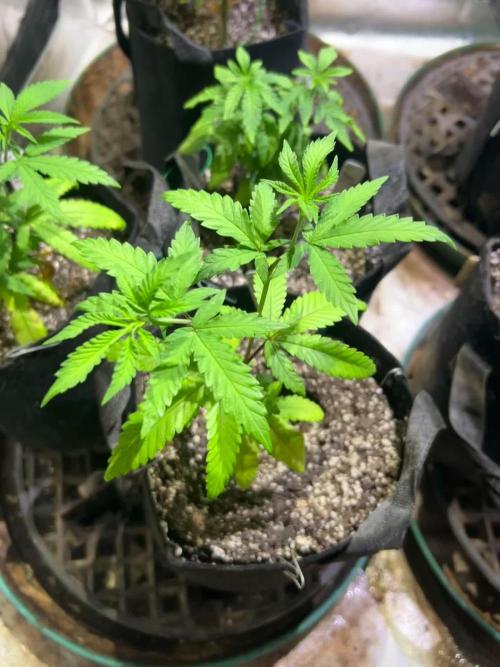
She’s loving the fabric pot! Plenty of room for root growth and I have a feeling she’s going to be huge very quickly!

Likes
14
Share


@Kakui
Follow
11 Noviembre: Primer riego con 2.5EC y 5.9pH, runoff de 2.9EC y 6.2pH, en una semana más ya deberían estar recibiendo 3.0EC y seguir con esa concentración por todo el cultivo. Alturas están entre 15cm y 20cm.
13 Noviembre: Riego 2.5EC y 5.9pH, runoff de 3.3EC y 6.2pH. Hoy se removieron los primeros nodos de cada planta y se les hizo poda apical.
14 Noviembre: Riego 2.5EC y 5.9pH, runoff de 3.3EC y 6.2pH en la mañana. En la tarde se realizó transplante a maceteros definitivos de 5 litros con 4 litros de sustrato aprox. el cual fue pre cargado hasta la capacidad de campo, con 3.0EC y 5.8pH, desde este punto se debe esperar un par de días hasta que el dryback(secado) del sustrato sea de un 35-40%, lo cual vendría siendo el primer P3 del cultivo, una vez se alcance ese porcentaje de secado, se comenzará con los primeros riegos de precisión llamados P1.

Likes
4
Share

@Chubbs
Follow
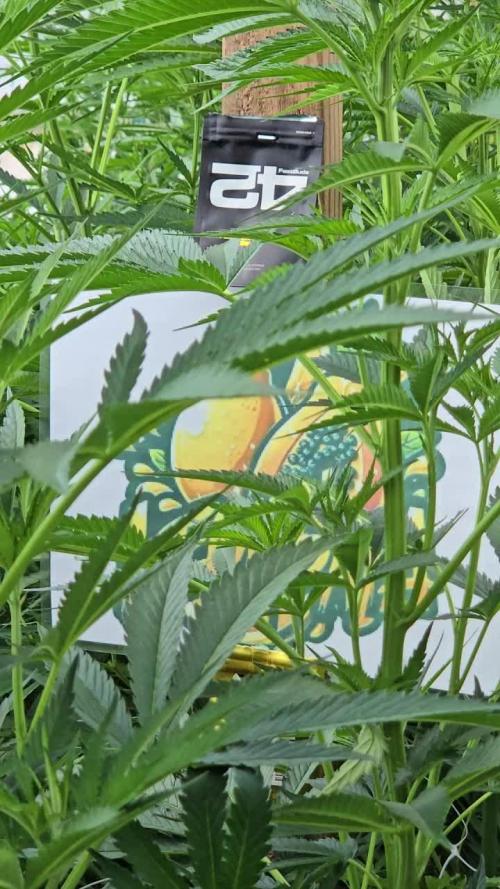
Weekly update for these lovely ladies. They've grown and grown since the last update so much I had to raise the greenhouse. Cinder blocks under the frame gave me an extra 16in. They're growing probably a foot of week and still reaching for the stars. I did switch to Athena's Bloom A & B and P&K booster this week giving 5-10ml per gallon. I really couldn't be happier with how they've grown up to this point.
All in all Happy Growing.
Likes
18
Share


@DreamIT
Follow
-Sponsored by:
🌴SPLIFF SEEDS🌴-💡VIPARSPECTRA💡-💐GREEN BUZZ LIQUIDS💐-🛠️WEDRYER🛠️
🏁18/6 hello growerz, with today I start the resumption of diaries on GD. I have 13 new genetics in germination and as many diaries. I start by putting the seeds in water for 24 hours, after a day I will put the two seeds in two different jiffies, one with humic acid from greenhouseseeds and the other with just plain water. Get comfortable and follow the updates 😉👋🦄
19/6 The seeds were divided and placed in two different jiffies, one with humic acid and one with water only.
21/6 after another 24 hours in the dark the jiffies were moved under the lamp. let's start the dances!
23/6 nothing to report
24/6 ready to say hello to the world ( only the one in humic acid at the moment )
25/6 I wait for the seed to appear in the water
30/6 finally even the second seed has opened! yeeee, I had lost hope and instead there he is looking at me 😀
__________________________________________
Personal advertising (contains affiliate links)
__________________________________________
🦄 Are you new to the world of cultivation and don't know where to safely buy your seeds?
Fast and anonymous shipping. Check out their hilarious graphics. (no affiliate links)
✅https: //bit.ly/spliffseeds_
__________________________________________
Did you know that Green Buzz Liquids fertilizers are 100% vegan? A complete line of products ready to give the best to each of your plants! Visit the site and see my journals to see how they work 🦄
🤯 And with the code "dreamit" you will immediately receive a 15% discount on your purchases
✅https: //bit.ly/GreenBuzzLiquidsPro
__________________________________________
👀 Are you looking for a good lamp to start with? 👀
🌞Viparspectra has something more than the others, take a look at their site.
⏩ Use "GDVIP" for an extra discount or "DREAMIT3" for an extra 5 %% discount
👀 Search for it on Amazon
✅Amazon USA: https://amzn.to/30xSTVq
✅Amazon Canada: https://amzn.to/38udUVe
✅Viparspectra UE: bit.ly/ViparspectraUE
✅Viparspectra USA: bit.ly/ViparspectraUS
______________________________________________
🌈 Tired of blowing on your weed hoping it dries quickly? Check out the Wedryer website! You will find a well-made accessory that will help your weed dry in just 8-10 days without the annoying risk of finding mold or other annoyances! (no affiliate links)
✅https: //bit.ly/Wedryer_
______________________________________________
📷🥇Follow the best photos on Instagram 🥇📷
https://www.instagram.com/dreamit420/
Backup
https://www.instagram.com/dreamit4200/
🔻🔻Leave a comment with your opinion if you pass by here🔻🔻
🤟🦄💚 Thank you and good growth 💚🦄🤟

Likes
78
Share


@Basementganja
Follow
Gave her a heavy defoliation! She's growing very strong, and needed a little thinning out!
The defoliation promotes the lower buds growth, by allowing more light penetration!
The defoliation also ensures that airflow throughout the plant is strong!
Likes
220
Share


@CRiSPrGrow
Follow
These had a pretty good life. I actually only fed NPK the one time . Germinated them in a Zambeza propagator, i really recommend getting one of those propagators, they're reusable and really take the heat off those first days when you're sweating. Pooped them into their plugs they sprouted out strong, germinated 5 kept 3. transplanted them no problem. Veged these for 4 weeks, then they shot up. during veg they stretched out a bit early on i should have been giving some specialised micro i had on had but for some reason on the other i didnt. They needed extra support for their first three weeks, so i decided to LST them around week 2. Two camping hooks one anchor for the main stem and one to keep the plant down. Once i dialed in my lamp to plant distance they benefitted by slowing down on the stretch a bit. they all took to LST extremely well, bushing out and creating an nice even canopy. They pushedout these thick indica leaves, one of my plants was a lighter colored leaf pheno, the vertafort one. The Six Shooter genetic really stretches, if just off the top of my head it seems that the plants quadrupled in size over an 8 week period, completely eclipsing their neighbours and creating a thick dense canopy throwing shade down below. Each turned into a bush with three or more mains sticking out the top by week 6. IThe results start to look real pro around week 8. Before that though I hadn't been defoliating. This and simple lack of light means that I had loads of undevellopped colas. If I'm honest I should have tried to harvest in stages but by colas. Anyway these kind of grew like a gorilla glue but with much different and much better flower structure. The plants started pushing out flowers and pistils and preflowers etc early, but then took a while to gear up towards towards getting fat. The flower branch out in a spiral pattern up and down the main and secondary colas evenly, creating this misssile shaped colas, but they branch out once sometimes twice, which means less branch to nug ratio than a gorrilla glue by a full multiple. They started smelling like lemons around the time they were fattening up. Then they started getting buff, really little by little, what did rippen rippened evenly. Some colas was basically waste especially the colas stuck on the sides of the tent and some of the colas where for some reason or another there was no light there due to the dense canopy. Truly a BEAST OF A PLANT, HIGH POTENTIAL, great BRANCHING, if you look carefully each plant has more than a dozen colas,
Timed it so the harvest was on a day the plants were chock full for plain water after ten day's worth of additive aided flushing. hung to dry slowly in the tent, got it around 55RH inside the buds over 12 days then trimmed and jarred in miron glass with boveda 62. The trim was a great experience, took a while but not that long because the flowers were so nice in the way they are. you do have to trim every sugar leaf one by one though if you're doing it by hand, broke these sizzors that @Mrs_Larimar sent me because of the resin lol. so I pull these plants out my tent and I just kinda look at them and they're basically dark green because of all the sugar leafs, i'm thinking to myself "shit i messed up this isnt even that frosty". well, what i found out is every time i clipped one of those trademark long sugar leafs off it revealed absolutely resious white frost. That's what can keep someone motivated. ! Once jared, if there's boveda in your jar, you dont really need to burp it daily, or even weekly i just let it sit there, obviously i've been smoking it and following the cure, let me tell you this one needs longer to cure than you're used to maybe, at least two more weeks of cure after a slow dry. Four weeks after the chop , it's a strong weed !
Didn't smell all that loud, but I have a 1300M3/H exhaust so... i'm not surprised. I will say though that my neihbour said she could smell weed even when I wasnt home and she could smell weed in the corridor, from the times I was trimming and basically every time I open my jar. Gonna need a new carbon filter for the next grow. I retired my lightbulb too. Hard to put my finger on the taste because the smoke is so smooth, and when i saw GD had a tag for Woody, i knew right away this was that taste i felt. I will say this though, cure this correctly, dont rush, dry it real slow, then cure it, citrussy tastes, usually those will evaporate, leaving this distinguished terpene heavy hitter much better tasting. So what can i tell you, this weed is white weed, so frosty. Bag appeal is great too, this strain pushes out pistills like no other, maybe even more than the gorilla glue. that means this is a chill weed right? One of the phenos I grew had more pistils than the other two. Mr. B's did, but i dont know if you can really tell from the close ups, i'll try to put some more pictures up. I got two maybe three phenotypes in terms of taste. Mr. B’s is much pine-ier than the others, and when the joint goes out and you light it again, it’s even more piney … I’m actually really happy about that reminds me of white rhino from the east coast back in the day but way piney-ier than that even. When you smoke the other phenos the smell is incense and the taste is really really smooth & woody. Sometimes I find different after tastes on the exhale like coffee, pepper, and maybe sweet/fruity sometimes too depends on the pheno I'm toking on. It is LOUD THOUGH, always have a spare filter on hand IT’S NOT WORTH IT get it !
Well at the end of my first grow, i'd like to quickly review all of Bulbi's own :
Bulbi"s Own Early VegMicro: Fine green powder with calcium and all the rare metals in it. I didnt use it ! Damn, next time I'll amend my soil with it like i did this time on the FBT1
Bulbi's Own Cal Mag : Organic fine white powder with calcium and magnesium, i used it in the feed and sometimes as a spray. I didnt know how much to put in because these things dont come with instructions so i ended up putting 1/4 doses most of time. The correct amount should have been 2.5G/L.
Bulbi's Own Flower Micro : Organic fine beige powder that I used mixed in with the sulfur. I think this one's a keeper, really helped my plants make it through the stress of bottom feeding and all that heat.
Bulbi's Own Mag Sulfur : Organic fine red powder that I used mixed in with the Flower Micro I used this one in my spray too , to great effect, in my opinion
Bulbi's Own Beneficials Trio : This was the base beneficials mix I had, you need to put 7.5 to 15g/l , watch out for clumps, use at the night fall, or when still dark.
Bulbi's Own Anti Afid : I threw it in there i think just in time to protect my plants when I intentionally overwatered when I went on my trip. There were some white flies that emerged, because... well that's what they do isnt it. but there were just a few of them and they ended up flying around wierdly, and within four days, no more white flies, didnt even use yellow sticky tape ! You mix this one with the trio for even more effect. I used these in a spray I think , also.
Bulbi's own Anti-Worm : This one is more directed against larvae, and can be combined with the base trio. I was weary of using it, but I'm glad i did to give my soil matrix that full spectrum of biological protection.
Bulbi's own Humic Acid : This one i loved, looking back I'm regretful not having used it more. the dry humic acid is a great experience, the quality of it was impressive, clumps would seperated into more clumps ad infitum the feed slowly turning completely ink black. definituely using this once a week from now on
Bulbi's own Amino Acids : this one is just amino acids, maybe next time I'll use it at the same time as the humic acid, but I'm not 100% on that. What i did do was spray the top layer of the soil with amino acids when I accidently ran into some issues from spraying kelp all over the place. So in that sense it's an absolute life saver and a must to have on hand.
Bulbi's Own Kelp Extract Concentrate. Loved this one too haha, so thick, and green, check out the video of when i pour it lol. Worked great, raises the pH some so be careful, i used this one as a sprat aswell to get those plant growth hormones pumping during the seeding and veg stage.
Bulbi's Own CO2 : well part of what I set out to do was to test the CO2 theory. Like roots do absorb CO2 but at a lower efficiency than leaves say 15% vs. 85% the theory being enriching your water or feed with CO2 would ultimately benefit the plant. So i enriched water with these ceramic based co2 tablets, because CO2 is a soluble gas, it stays in water. Then i fed the plants in this manner in the feed and also as a spray. The idea behind that was that co2 enriched water would come in direct contact with the plant allowing for absorption of some quantity of CO2 through the leafs. Someone explained to me that these are actually old school techniques. Well I know i started late and didnt follow a regular schedule like i wished for but the plants didn t die, or show any immediate negative upon innoculation, so what can I say? I'm doing this again, perhaps. Only problem is that these things are really a pain to pH correctly
General Hydroponics Dry pH Down : GREAT PRODUCT, hard to find but amazing – not registed on GD for some reason
I still have to make my bubble hash so any advice welcome ! 🚀