


Likes
Comments
Share


@valiotoro
Follow
Hello everyone week 5 of flower has passed for this Mint Jelly auto ❄️
For the feeding schedule i stopped feeding Power Roots and Pure Zym and started feeding Green Sensation 0,5/l
Mars hydro FC-E6500 75%
have a great day and wish you all happy growing 😎👨🌾🏻

Likes
14
Share


@Downunder90
Follow
## Week 6 Update: Strong Vegetative Growth Continues 🌿💚
### 🌱 Preparing for Flowering 🌱
Welcome back! In Week 6, all three of our plants—Greenhouse Super Lemon Haze, Humboldt Seed Bubba Kush, and Blueberry Muffin—are still in the vegetative stage. They are thriving, and this extended time in veg is allowing them to develop robust structures, setting the stage for a strong flowering phase later on.
---
### 🌼 Vegetative Progress 🌼
**Greenhouse Super Lemon Haze 🌞**
- Growing vigorously, with significant height and branch development.
- The plant is responding well to LST, creating a wider and more even canopy.
**Humboldt Seed Bubba Kush 🌿**
- Compact and bushy, with strong, dense growth.
- Ideal for smaller spaces, this plant is developing a solid foundation for flowering.
**Blueberry Muffin 🥞**
- Showing lush foliage and thickening stems.
- The extended vegetative period is helping to ensure a healthy, resilient plant ready to support heavy buds.
---
### 🌱 Vegetative Techniques 🌱
To maximize growth during this stage, I’ve focused on several key techniques:
- **Low-Stress Training (LST):** Continually training the branches to spread out and create multiple bud sites.
- **Topping:** Applied to promote bushier growth and enhance yield potential.
- **Defoliation:** Light defoliation to improve air circulation and light penetration to the lower parts of the plants.
- **Nutrient Management:** Maintaining a balanced nutrient schedule with an emphasis on nitrogen to support healthy vegetative growth.
---
### 🌿 Looking Ahead 🌿
With all plants still in the vegetative stage, the focus remains on building strong, healthy plants. This extended veg time will pay off when we finally transition to flowering, ensuring that the plants are well-prepared to produce large, high-quality buds.
Stay tuned for next week's update as we continue to nurture these plants and prepare for the eventual switch to flowering!
Happy growing! 🌿💚


Likes
4
Share
@Canda
Follow
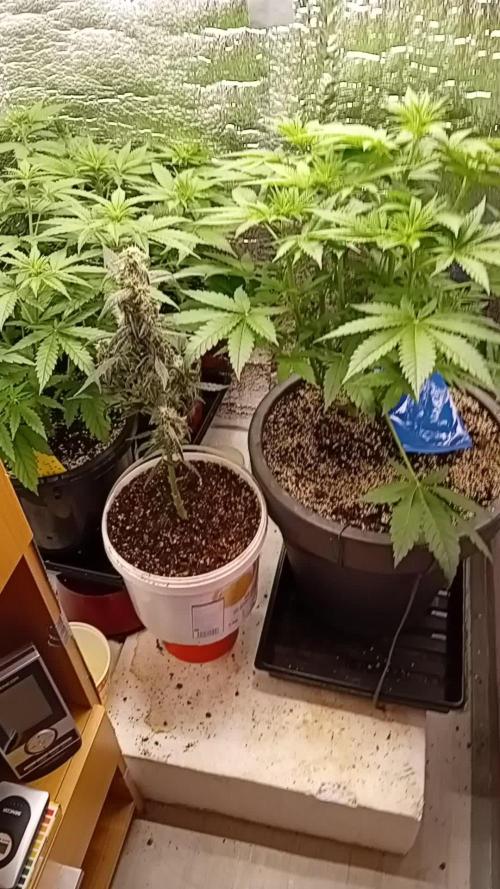
Holkám se daří dobře, vypadají zdravé a vitální, co se týče stretch,. tak vystrelili ze do 300% moc nechybi
Guano odvádí spolecne s vodou dobrou práci a v jidelnicku mame kdyztak biobizz bloom ,jestli bude potřeba tak uvidíme. .jedna z holek ukázala lehce bile spicky listu ale nesiri se to, nemění to barvu tak mam zato ze jde o projev toho ze substrat je nabitéj a chce jenom vodu ..uvidime jak to pujde dal ...
At vám to roste Hombres..Dasvidáňa :D

Likes
13
Share


@russrahl
Follow
Had a bumpy week this week a little bit, started to get a bit to cold I think at night and this combined with a nitrogen abundance made her slow glowing this week. She’s coming around now though, just diluted my water/nutrients mixture in half and left her be. Got my AC exhaust from one of my flower tents pulling through this tent now so the temps are back up again to normal as well. Be moving her soon to the big tent, I’m guessing a week or so till it’s ready for her. Will be starting lst soon to get her ready for the screen as well, didn’t wanna stress her last week anymore while she was bouncing back still. That’s it for this week. Cheers💨

Likes
24
Share


@Firepharmer
Follow
This new LED’s from futur vert is the best of the best !! Worth every penny


Likes
66
Share


@DrGreenThumb95
Follow
Finished the last week of flushing WOO! and its harvest time! I put them in 48 hours of darkness on Wednesday ready to crop for saturday, I will do a proper harvest report next week when I have them ready to go into curing jars along with some pictures and a full report, but I will add this some of the smells I was getting whilst trimming where unreal smells like pine, citrus, beef and a really faint sweet smell I cant put my finger on... I'm not saying that's 100% what it smells like but it smells similar to wild garlic. Well these b*tches took 14 long hours( could of done it quicker but we made a day of it ) all bud is trimmed and primed for drying then curing.
Happy Growing 👊👍
Likes
3
Share


@drewnagy0510
Follow
I was very shocked on how fast it grewand how much it produced very great strain a must for you Indica lovers very strong I went to about 80% red hairs perfect smoke a lot of cannabinoids and a lot of leftover sugar leaves great for lovers of bubble hash

Processing
Likes
9
Share


@Kushizlez
Follow
Day 69 (March 6th)
Just gave everyone their last watering. I’m going to harvest and wash everything tomorrow night on day 70. I‘m not going to do that whole 48 hours of darkness thing because I didn’t see a difference last time I did it. In fact, it made my plant under watered before drying which caused it to dry too fast. Slurricane and cheese will be washed with h2o2 and the rest will just be rinsed off in warm RO water and hung up. Before and after washing I’m going to go over each branch with a flashlight and make sure there is no dog hair or debris in or on the buds. I will be drying in my spare bathroom (that no one uses!) from hangers. Aiming to keep it around 60-62F and 50-60 RH. Hoping for that 10-12 day dry. I wanted to do a full plant hang but the tent got pretty dirty and I would feel more comfortable just cutting and rinsing everything off branch by branch. I’m going to try my best to keep the full plant intact. Got my humidifier hooked up and running RO water because with tap water it deposits calcium and lime all over the buds and walls. For air flow I’m just indirectly running a small usb fan. I’m not worried about air flow in the bathroom honestly. It stays nice and breezy down there anyway.
Got the food grade peroxide and RO water to wash up the slurricane and cheese. Everything except for the cheese and garlic#1 is looking more than done. Trichomes all look pretty well done. Some of them have even burst open. Smells are all super ripe and mature too. Can’t wait to smell each individually in jars.
Next week I will recap what went wrong and what I will do differently next time to keep it from happening again.
(Day 70F) Just got everything chopped, washed and hanging. The vast majority of the PM was washed out but I can still see very small amounts. When they dry out I can shake the branches a bit to get the rest off. At very least it’s sterile now. There is no question I lost some potency while washing but the amount is negligible for a much cleaner product.
I could see lots of dirt and other debris float to the surface of the water after being washed. And no those are not trichomes, those sink to the bottom. I could put that nasty water through a bubble bag and wouldn’t get all that much. Although it probably does remove a lot of the actual trichomes heads. I’ll have to check with the microscope.
Everything is rigged up for a nice slow dry. Temp is sitting at 64 and RH is at a nice 60%.

Likes
56
Share


@Master_weeda
Follow
Bonjour à tous les padawans et les maîtres jedis
Le LST est fini mon tronc en forme de colonne vertébrale fais un tour sur lui meme (vidéo jour32) cette forme me satisfait pleinement je décide donc de retirer la majorité des fil de fer servant au LST
Le pincage d'Apex offre à la plante une canopé homogène (photo jour 32 34)
Jour33 arrosage avec 2 litres d'eau ph6 à laquelle j'ajoute 0.5ml de topmax biobizz (dosage très léger pour ne pas provoquer un lock-out) cela favorisera son entrée en floraison.
J'effectue une légère defolliation pour permettre une meilleure pénétration lumineuse aux apexs du bas.
Quesque la defolliation ?
LES CULTIVATEURS AMATEURS, PRENEZ GARDE, MAIS NE PRENEZ PAS PEUR
La défoliation consiste à retirer les feuilles des plants de cannabis en intérieur afin d'accroître le rendementfinal. Le cultivateur amateur doit faire preuve de vigilance lorsqu'il commence à appliquer cette technique de taille. Malgré le débat sans fin entre ceux qui prônent cette technique et ceux qui la dénigre, il n'y aucune raison pour qu'un amateur ne s'y essaie pas afin de voir si ça lui convient ou non.
COMMENT DÉFOLIER
Que vous tailliez les feuilles ou les branches des plants de cannabis, il vaut mieux utiliser un sécateur stérile qui est confortable en main. Arracher des feuilles à la main manque de finesse et engendre souvent par accident, l'arrachement des couches d'une tige en plus de la feuille. L'objectif principal de la défoliation est de permettre une meilleure pénétration de la lumière et de promouvoir la production de plus grosses têtes. Les feuilles éventails qui font de l'ombre doivent être retirées. Tailler la tige principale et/ou les pousses secondaires n'est pas de la défoliation.
La règle d'or lorsque vous donnez à vos plantes un rafraîchissement est de commencer avec les feuilles nourricières les plus grandes et les plus larges, en taillant du bas vers le haut. Il est important de retirer les feuilles stratégiquement et non pas au hasard. Pensez également qu'il vous faut limiter votre rafraîchissement à approximativement 10 à 20 % des feuilles totales de votre pied. Il est très facile de s'emporter durant la taille et de se retrouver avec des plantes chauves. Un excès de taille de feuilles empêchera la photosynthèse et paralysera vos plants.
QUAND FAUT-IL DÉFOLIER
Il est assez rare d'appliquer la défoliation comme seule technique pour obtenir un fort rendement. La taille des feuilles est généralement associée à d'autres méthodes de tailles et de palissage pour un meilleur rendement telles que le topping ou étêtage, le FIMming, le LST, le manifolding, le supercropping et le ScrOG. Les cultivateurs utilisant la méthode ScrOG auront besoin de retirer toutes les croissances inférieures ainsi que les feuilles et les tiges se trouvant sous le filet.
Les plants de cannabis peuvent être défoliés dès lors qu'ils sont passés de la phase de plantule vers la phase de croissance végétative. Cependant, il est recommandé aux cultivateurs amateurs de laisser aux plantes 1 à 2 semaines de croissance végétative avant de s'attaquer à la défoliation de celles-ci. De plus, certaines variétés sont plus sensibles à la taille que d'autres et de ce fait, seront plus stressées par la taille des feuilles. Surveillez minutieusement le comportement de vos plants après la taille. Une période de convalescence de minimum 3 à 7 jours avant de recommencer la défoliation est fortement recommandée pour éviter trop de stress aux plants. Les cultivateurs peuvent également défolier pendant la phase de floraison, ce qui permettra à l'énergie de la plante d'être concentrée vers la production de têtes tout en limitant l'ombre et l'excès d'humidité. Néanmoins, il est important de ne pas défolier trop tard sous peine de simplement blesser ses plants inutilement.
LES AVANTAGES DE LA DÉFOLIATION
Évidemment, l'avantage numéro un de la défoliation, c'est l'augmentation du potentiel de rendement de cette technique de taille pour tous types de cannabis allant de la photopériode aux variétés autofloraison. Ce n'est pas un secret que les fleurs qui reçoivent plus de lumières deviennent plus grandes et larges que celles dissimulées dans l'ombre des feuilles. De plus, retirer les feuilles intérieures des plants touffus aide à prévenir toutes menaces de moisissure. Les plants très feuillus avec un feuillage intérieur dense produiront une quantité importante de têtes pop-corn. Dans le pire des cas, les branches de têtes et les têtes qui sont denses succomberont au pourrissement.
Si vous observez des gouttes d'eau se former sur la surface des feuilles, il est grand temps de penser à faire de la défoliation. Libérer la zone inférieure et médiane des feuilles est un excellent moyen d'améliorer la circulation de l'air.
LES DÉSAVANTAGES DE LA DÉFOLIATION
Les plants de cannabis en intérieur bénéficient de la défoliation pour deux raisons. La première est parce qu'ils reçoivent la lumière d'une source stationnaire au-dessus d'eux, et la deuxième est parce que les conditions environnementales sont contrôlées par le cultivateur et non Mère Nature. Les plants d'extérieurs eux, n'y gagnent pas beaucoup, car les cas échéants se vérifient pour eux. Le soleil traverse le ciel, illuminant sur sa route, différentes portions de la plante de son lever à son coucher.
Les cultivateurs en extérieur n'ont pas besoin de manipuler les plantes afin qu'elles se développent en adoptant une structure plate puisque le soleil est infiniment plus puissant que n'importe quelle lampe de culture et qui plus est, il est toujours en mouvement. Tailler les feuilles des plants extérieurs les rend également plus vulnérables aux conditions humides et brise leurs barrières naturelles contres les nuisibles.
De nombreux cultivateurs d'intérieur peuvent, et malheureusement, c'est souvent le cas, réduire le rendement final à cause d'une défoliation faite au mauvais moment et/ou excessive. Tailler les plantules n'est pas conseillé et engendre souvent des plants nains. Scalper les plants matures est encore pire, et au lieu d'obtenir de longues branches de têtes, vous obtiendrez probablement encore moins de fleurs. De même, tailler des plants malades ou en mauvaise santé à n'importe quelle période de la croissance risque de paralyser la croissance plutôt que d'encourager la formation de fleurs denses.
Que la force soit avec vous 💪

Processing
Likes
41
Share


@Gr33nGiant
Follow
Going good still..... backed off nute amount...... getting some foxtails due to light proximity.....starting to use less water.... trichs are about 25% amber.....

Likes
31
Share


@JeyGanesha
Follow
🦍 cookies ancora pochi giorni ed è cotta anche lei.. buonissima,!! Ha un profumo delizioso super.
I'attesa si fa lunga 🤣😉🤣😉

Likes
7
Share


@GanjaFarmer101
Follow
Smooth week, lots of trimming and approaching the end of the harvest now (for the autos)
Likes
7
Share


Likes
10
Share

@GnarlySeedGenetics
Follow
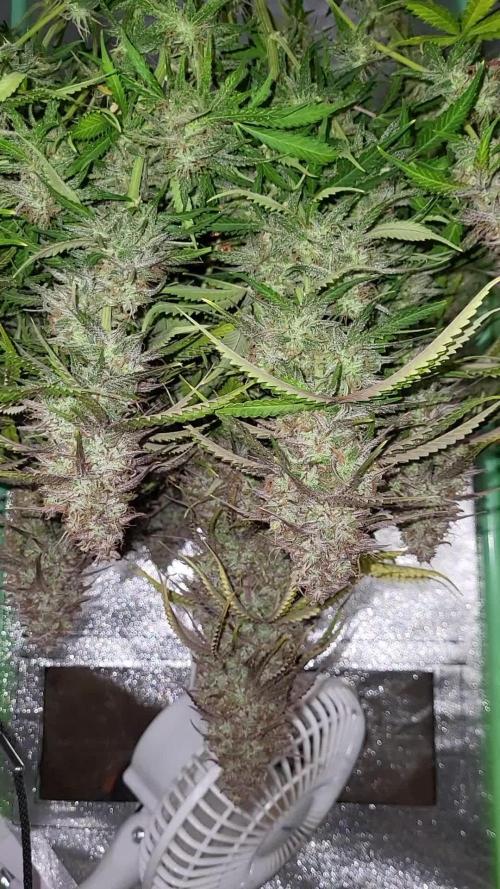
Super chuffed with how this Lady's turned out... nit weighed her wet but will weigh her once all dry and manicured 👌
Shout out to fastbuds for some A class genetics
Likes
92
Share


@DogDoctorOfficial
Follow
Week 4 Veg Report - TrolMaster Chronicles 🌱
What a week it’s been in the garden! We finally transplanted the Papaya Zoap into its final Autopot, and let me tell you, this plant is something special. Though her roots weren’t quite where I wanted them to be yet, the move was needed to help her catch up with the rest of the crew. She’s already looking fantastic in her new home, and I have no doubt she’s about to explode with growth in the coming days. Sometimes, you just have to trust the process, and I’m feeling like this is one of those moments. It’s almost as if the room itself is taking on a life of its own. 🌿
In fact, I’m starting to believe that what we’re building here is something greater than ourselves—there’s this energy in the room, a feeling of everything coming together perfectly. I can’t wait to see how this journey unfolds!
Dialing in the VPD with TrolMaster’s Tech
Now, let’s talk VPD (Vapor Pressure Deficit) and how I’ve been keeping everything in check with the Tend-X and the incredible (DSH-2U) Humidity Station. VPD is crucial to plant health—it’s all about finding that perfect balance between humidity and temperature to optimize transpiration and nutrient uptake. The (DSH-2U) Humidity Station, connected directly to my humidifier, has been an absolute game-changer in this regard. With its real-time data and automation, it allows me to monitor and adjust the RH with pinpoint accuracy.
Simple yet brilliant, the (DSH-2U) Humidity Station is keeping my room at the sweet spot I need. Whether I’m tweaking the settings from my phone while I’m out and about or just fine-tuning things while relaxing at home, this machine does it all. It’s like having an extra pair of hands in the grow room—and when you’re managing something as complex as VPD, that’s invaluable!
And yes, the TM+ Pro App—let’s not forget how awesome it is. I’m adjusting my grow room from the couch, the car, or even the bathroom 😜. I’ve said it before, but this app is making growing easier than ever.
Feeding the Girls: The Perfect Blend 🌱
We’ve upped the game by adding CaMg-Boost at 0.25 ml/L to the feeding schedule. Along with the 1 ml/L of the all-in-one liquid, this brings the TDS up to 320 ppm, with a pH of 5.99 and solution temperature of 24.8°C. In the soil, readings are around 415 ppm, with temperatures hovering around 25°C The plants are absolutely thriving, and I can already see the difference this new feed is making.
I can’t help but have a bit of fun with this process—it feels like I’m spoiling them with the best of the best. And they’re rewarding me with beautiful growth and vibrant green color. You know how it is, with the right care and attention, these plants are truly becoming a masterpiece in the making. 🌱
Shoutouts 💚
Big shoutout to TrolMaster and ThinkGrow LED for the phenomenal gear that’s making this grow smoother than ever. Also, massive thanks to Aptus Holland for their top-notch nutrition, and of course, to the community here on GrowDiaries—you guys keep the energy alive! 🌱
Last but definitely not least, shoutout to all the seed banks supporting this journey. You’ve been a huge part of this process, and I couldn’t do it without you!
Remember, for exclusive behind-the-scenes content and updates in real time, head over to my Instagram and YouTube channels @DogDoctorOfficial. We’ve got tons of epic content lined up, and you won’t want to miss it!
P.S.
Let’s talk about the new Model One LED Bars—these beauties are not only powerful but super efficient. I’ve been able to dim them down, save on electricity costs, and still maintain an incredible PAR and spectrum. It’s all about fine-tuning the balance of power and performance, and these lights make it easy to get the best results while being eco-friendly. Whether you’re running them full throttle or dialing it back, you’re still getting optimal growth conditions for your plants. That’s the kind of innovation that takes your grow to the next level. 💡
Growers Love to all 🌿💚


Processing
Likes
39
Share


@Belverde
Follow
Ola 🙂... the two sisters grow up very well ... first time I try them.. the seeds were given to me by the boy from the grow shop, after buy some Barney's seeds ..
With them, under the 205 BD LED light, there is also the sister, who can actually find in the diary SUPER SOIL LED (if you want to see the differences) 😉...
5th week started by giving him a nice lunch based on banana macerate (10 days to macerate), about 0.5 in 1.5l h2o ..
pH I never check it when I am using a ready-made soil .. the water I use is quite good and does not contain chlorine (fundamental in organic) .. it has a pH always around 6.5 / 7.5 and is ok ... afterwards I only gave h2o to drink for once, again without letting it come out of the bottom of the vase .. two days after treacle-based sweet like the past week .. this time I gave 1 teaspoon apiece (they will be about 5ml, I think, but that's okay) in 1.5l h2o ... time after still water .. and today, Friday 27th, I finely chopped a bit of barley malt and I made a top dressing, wetting with water in mix with 3ml topmax for 3l h2o, to increase the malt action ..
I see just one or two thrips every now and then, but I'm under control .. I have not used anything to drive them out .. only the fan always on and the humidity left slightly higher ... They start to smell good and very sticky too ..
I don't know how to describe the aroma at the moment .. sweet .. but complex .. we'll see .. hi, thanks for the time 🙏 and tell me if you like it ... See you next week😉✌️

Likes
2
Share


@BetterBud
Follow
Didn't train this nearly enough as I should have, growing vertical instead of horizontal like I would have liked.

Likes
1
Share

@A-C-H
Follow
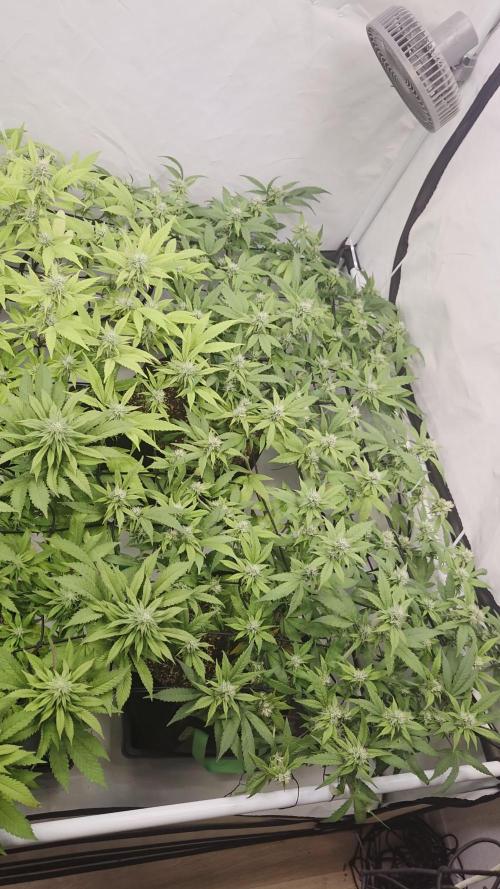
Die Blüte schreitet gut voran, auch wenn es etwas kühl ist...
Einige meiner ICE rink Pflanzen fangen bereits an, ihre Farbe zu verändern, und bei einer Pflanze auf (wild cherrie) der rechten Seite stelle ich immer noch dasselbe Problem fest
Likes
14
Share


@TheDankofScotland
Follow
191 gram off dry bud and 54 gram of trim and small buds the bud lost its smell in the drying bud I'm just going make shatter with most off it I've done a trim run and am Defo please with the terps and outcome of the overall shatter
Likes
4
Share


@Lazuli
Follow
So this was my third tropicana, so far all different phenos, this was the biggest yielder of them
Likes
19
Share


@Sergio_721
Follow
So far it seems to be fine even if the high humidity worries me even if the temperatures are still high then they have stopped growing and will finally focus on the flowers and slowly we recover these small deficiencies