


Likes
Comments
Share


@GorkedOut
Follow
Ever so slight nutrient burn. This is somewhat expected as I am giving a very high N-P-K.
4-35-26. Ph is around 6.4-6.5
I will try to get it a little lower for it's remaining days

Likes
283
Share


@love_2_grow
Follow
FD57 - We're at the start of the ninth week of flower. Everything is just coasting along this late in flower, and there isn't much to do except check trichomes. I'm seeing less clear and more cloudy and amber, and I estimate that chop day is one, mayyyyyybe two weeks away.
The RH is the tent has dropped somewhat to mid-high 50s. It is still higher than what I prefer at the end of flower but should hopefully be ok. I turned up the circulation fan to increase air movement and make it more difficult for botrytis to take root.
D63 - End of the ninth week of flower and I'm debating whether to chop tomorrow or wait another week until I get home from a trip. Decisions, decisions...


Likes
7
Share


@Jays_Not_Here_Man
Follow
Another easy week, weather has been beautiful! Lot’s of ☀️. They have been very thirsty as a result, I was able to get three waterings in this week. Just keep bringing them in and out of their pop up greenhouse daily. Started to taper down some of the feeds, two plain oh waterings and one feed this week. I don’t really “flush” but I do taper down to just ph water for the last few feeds. Happy growing folks! 🇨🇦❤️🌱😎💨


Likes
58
Share


@MadeInGermany
Follow
Flowering day 37
since time change
to 12/12 h.
Hey guys :-)
The buds have developed incredibly nicely this week.
The smell is getting more and more extreme :-) .
The whole plant itself looks perfect 👍.
The growth has slowly stopped as the full energy goes into the production of the buds.
This week it was watered 3 times with 1.2 l each (nutrients see table above)
They were individually inspected and checked for their health.
Osmosis water for the coming week was refilled in a 100 l tank 👍.
Have fun reading the diary and stay healthy 💚🙏🏻
👇🏼👇🏼👇🏼👇🏼👇🏼👇🏼👇🏼👇🏼👇🏼👇🏼👇🏼👇🏼
You can buy this Nutrients at :
https://greenbuzzliquids.com/en/shop/
With the discount code: Made_in_Germany you get a discount of 15% on all products from an order value of 100 euros.
👇🏼👇🏼👇🏼👇🏼👇🏼👇🏼👇🏼👇🏼👇🏼👇🏼👇🏼👇🏼
You can buy this strain at :
https://www.thegratefulseeds.com/shop/feminized-seeds/limited-edition/blue-javaz/
Water 💧 💧💧
Osmosis water mixed with normal water (24 hours stale that the chlorine evaporates) to 0.2 EC. Add Cal / Mag to 0.4 Ec Ph with Organic Ph - to 5.8 - 6.5
MadeInGermany

Likes
107
Share


@Tropicannibis_Todd
Follow
💩Holy Crap Growmies We Are Back💩
Entire grow has been stunted by the soil/medium
Code Name FBT2309
Well growmies we are at 63 days in and everything is going as good as possible 👌
👉 Well folks shes been a busy girl , making a ton of bud , just hope she chunks up 👌
Lights being readjusted and chart updated .........👍Even with early major issues due to the soil/medium she's come a long way 👈
👉I used NutriNPK for nutrients for my grows and welcome anyone to give them a try .👈
👉 www.nutrinpk.com 👈
NutriNPK Cal MAG 14-0-14
NutriNPK Grow 28-14-14
NutriNPK Bloom 8-20-30
NutriNPK Bloom Booster 0-52-34
I GOT MULTIPLE DIARIES ON THE GO 😱 please check them out 😎
👉THANKS FOR TAKING THE TIME TO GO OVER MY DIARIES 👈

Likes
13
Share


@GrowIT
Follow
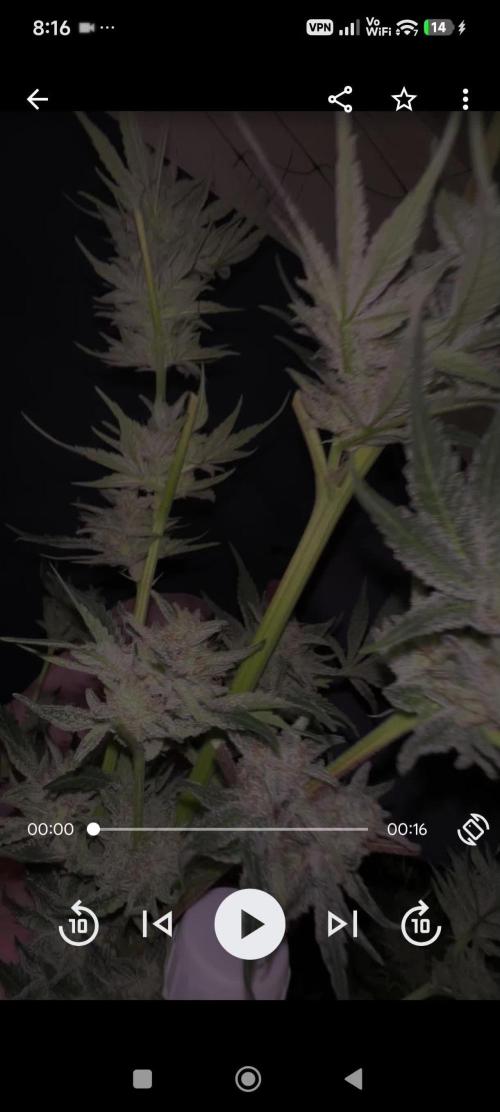
I think we have reached the end of another life cycle, this week I only used water to make the plant properly drain the nutrients in fact the leaves have lost all the green of the chlorophyll. now i think i will turn off the lights for 48 hours and then cut! 💪🏼🤞🏼

Likes
47
Share

@Sadhus
Follow
**Semaine Harvest : Récolte Finale – Sticky Broccoli (28 avril 2026)**
**Note :** Fin du cycle Eternity Grow Cup 2. Récolte effectuée en semaine 10 de floraison (légèrement anticipée). Tout le journal de culture est maintenant complet.
### Contexte et Bilan du Cycle
Après 10 semaines de floraison (semaine 14 globale), la récolte a été déclenchée suite à un départ de botrytis sur une autre plante du même espace. J’aurais pu laisser encore quelques jours pour laisser mûrir un peu plus les trichomes ambrés, mais la sécurité prime.
La plante dominante (150 cm) a donné un beau rendement qualitatif, avec des buds denses, extrêmement frosty et résineux.
**Poids frais : environ 780 grammes** (poids humide total des buds trimés, sans les grosses tiges).
Mise à jour prévue dans 2 semaines pour le **poids sec final** après un bon curing.
### Observations à la Récolte
- **Buds** : Denses et compacts, très collants. Couverture trichomale exceptionnelle (majoritairement laiteux avec quelques têtes ambrées). L’aspect sugar est magnifique, les buds brillent littéralement.
- **Odeur** : Très agréable, sucrée, épicée et florale, typique de Sticky Broccoli. Puissante même après le flush.
- **Résine** : Extrêmement résineuse au toucher – parfait pour du dry sift ou un petit Ice-o-Lator.
- **Structure** : Belle densité globale, même si la taille individuelle des buds reste dans la moyenne haute pour la variété (pas les plus gros que j’ai vus, mais la qualité trichomale compense largement).
- **Santé** : Plantes propres jusqu’à la fin, pas de carence visible. Le flush des 3 derniers jours (EC 0,7) a bien aidé à nettoyer les sels.
**Clones** : Quelques clones prélevés plusieurs semaines auparavant ont été repiqués avec succès dans leur nouveau système. Ils sont bien enracinés et prêts à repartir pour un prochain cycle de végétation/floraison. La génétique est conservée !
### Paramètres en Fin de Cycle (semaine 10)
- Température jour/nuit : 19-21 °C / 14-15 °C
- Humidité : 48-58 % jour / 29-39 % nuit
- VPD : 0.9-1.3 kPa
- PPFD : 550 (DLI 24)
- UV : 90 min/jour
- EC final : 1.0 puis flush à 0.7 (Terra Aquatica seul)
- pH : 5.8-6.0
- Steering : génératif jusqu’à la fin
- 48h de blackout avant récolte : appliqué pour booster la résine et améliorer la qualité des trichomes.
### Plans Post-Récolte
- **Séchage** : 7-10 jours à 18-20 °C et 55-60 % d’humidité dans un espace sombre et ventilé.
- **Curing** : Minimum 2-3 semaines en bocaux (burping régulier) pour affiner les terpènes et la douceur. Mise à jour dans 2 semaines avec le poids sec final.
- **Utilisation** : Une partie en fleurs séchées/cure, et un petit batch pour **dry sift** + **Ice-o-Lator** (bubble hash) histoire de se régaler avec la résine exceptionnelle de cette Sticky Broccoli.
**Tips éducatif final : Le flush et le blackout en fin de cycle**
- **Flush** (3 derniers jours à EC très bas) : Permet d’éliminer les sels accumulés et améliore nettement le goût final (moins de chimie, plus de terpènes purs).
- **48h de blackout** : Technique simple mais efficace qui stress légèrement la plante de manière positive, augmentant la production de résine et la clarté des trichomes juste avant la coupe.
Ce fut un très beau cycle, propre et instructif malgré l’interruption due au botrytis. La qualité résineuse et l’odeur compensent largement. Merci à Zamnesia et Plagron pour le matos !
**#GrowLegendary #Zamnesia #Plagron #EternityGrowCup2 #StickyBroccoli**
Dans 2 semaines je mettrai à jour avec le poids sec et les premières impressions après curing.
**Estimation du poids sec final**
Avec **780 grammes de poids frais** (buds humides, après trim initial mais avant séchage complet), voici une estimation réaliste pour cette Sticky Broccoli :
### Estimation raisonnable
- **Poids sec attendu** : **180 à 230 grammes** (environ **23-30 %** du poids frais).
**Pourquoi cette fourchette ?**
- Les buds frais contiennent typiquement 70-80 % d’eau.
- Après un bon séchage (jusqu’à 10-12 % d’humidité résiduelle) + curing, il reste généralement **20-30 %** du poids humide initial.
- 20 % → **156 g** (estimation basse, si buds très denses ou séchage poussé)
- 25 % → **195 g** (estimation moyenne, la plus courante pour des buds compacts comme les tiens)
- 30 % → **234 g** (estimation haute, si les buds retiennent un peu plus d’humidité ou sont particulièrement résineux)
Tes buds étant décrits comme **denses, très collants et frosty**, je pencherais plutôt vers le **milieu/haut de la fourchette** : **190-220 grammes** une fois bien secs et cured.
### Facteurs qui influenceront le résultat final
- **Qualité du séchage** : Température 18-20 °C, humidité 50-60 %, bonne circulation d’air sans vent direct → perte d’eau progressive et uniforme.
- **Trim** : Si tu as fait un wet trim assez serré, le poids sec sera un peu plus bas que si tu as laissé plus de sugar leaves.
- **Densité des buds** : Plus ils sont compacts et résineux, moins ils perdent de poids relatif (mais ils sèchent parfois un peu plus lentement).
- **Curing** : Pendant les 2-4 semaines en bocaux, tu perdras encore un peu d’humidité, mais le poids se stabilisera.
### Prochaines étapes
1. **Séchage** : 7-10 jours jusqu’à ce que les tiges cassent net (pas pliables).
2. **Curing** : Minimum 2 semaines (idéalement 4+) avec burping quotidien au début.
3. **Pesée finale** : Une fois le poids stabilisé (après 2 semaines de curing),

Likes
14
Share


@Quintall
Follow
Trocken Gewicht folgt
Geschmack 10/10
Wirkung 10/10
Evtl liegt es daran das es mein erster grow ist aber viel entspannter was man sonst so bekommt.
Ich bin jedenfalls zufrieden und freue mich auf den nächsten grow.
Da werden die Fehler dann ausgebessert.

Likes
88
Share


@DogDoctorOfficial
Follow
🌾 Harvest Day — The Grand Finale of the Eternity Grow Cup 🌾
Days 72–73 | Trimmed on May 25 | Posted May 27
What a journey this has been — and what a finish. These five incredible Runtz phenos have now completed their cycle, and today, we celebrate the final stage of their flowering life: the Harvest.
We sent the girls into darkness on Day 70, allowing them a full 48+ hours of rest and reset. The dark period was just a bit longer, truth be told, because time… it flows as it must. This extended dark time helps increase resin production, allowing the trichomes to mature just that final bit more.
On Days 72 and 73, we harvested them with care and reverence.
Each plant was hung upside down, whole, in a perfectly controlled 60% humidity environment for 13 full days. Before hanging, we gently removed only the fan leaves, leaving all trichome-rich sugar leaves in place — a natural armor for the delicate resin glands during drying. Why do we do this? Because those sugar leaves help protect the essential oils and terpenes, preserving potency, flavor, and aroma for the smoothest experience later on.
🌿 The Dry Room & The Trichome Guardians
Throughout the drying, we used a moisture meter to monitor the moisture content in the stems. Once it dropped to around 12–13%, we knew it was time. This tool is a simple but game-changing ally in ensuring a perfect dry — not too fast, not too slow.
We then trimmed everything by hand over a 6.5-hour focused session. Armed with trim bins and good energy, we collected an abundance of glistening trichome heads in the process — a golden bonus from these resin-packed beauties. The leaves themselves told a story: deep purples, near-black shades, autumn fades and metallic tones — just stunning.
Each girl was trimmed in order:
#5 → #4 → #3 → #2 → #1,
revealing dense, chunky buds all the way from top to bottom. Not a single pop-corn bud among them — only rock-solid nugs, heavyweight champions in every sense.
📦 Cure Begins – Grove Bags & Glass Jars
Once trimmed, the buds were tucked carefully into Grove Bags and glass jars, each stabilized at around 61% RH. The Grove Bags handle the microclimate beautifully, keeping humidity between 58–61%, perfect for preserving all that hard-earned quality.
We’re now opening the jars daily, monitoring aroma and feel. This part of the process — the cure — is where the soul of the flower truly comes to life.
☀️ UV, Reds & The Perfect Run
Part of what made this run so special was the precision in light spectrum. 40% whites, full reds, UV and IR, and the girls responded like royalty. The UV pushed trichome development to the max. The deep reds gave us thickness, color, and weight. All of it under ThinkGrow Model Ones powered through the Trolmaster ecosystem — everything syncing in harmony.
This run was stable, lush, expressive — a grower’s dream. To my eyes, this was a perfect run.
⚖️ Final Yield: 1,302 Grams (1.3 kg)
In a 4x4 tent — that’s just 1.2m x 1.2m for metric friends — we pulled in 1,302 grams of flower, not even counting the buds that were taken for filming, photos, or “quality control testing” along the way. 😉
Dense. Loud. Sticky. Resinous.
🌿 The Hidden Half: A Tribute to the Roots
In every grow, there’s a part we don’t always see — a part that lives underground, quietly holding everything together. The roots. And this time, I wanted to honor them too.
When we unpotted the plants after harvest, we were met with massive, dense root systems, completely filling the Autopot trays. These roots were vibrant, white and healthy, looking like noodles in a thick herbal soup — a true sign of vitality. The Autopots system, combined with the Aptus Holland Clean Program and Plagron Green Sensation, made sure they had the perfect environment to expand, absorb, and thrive. The PRO-MIX soil was the perfect foundation — light, fluffy, with excellent aeration. It all worked in harmony.
After unpotting, I carefully washed every root system, removing all soil to prepare them for the next chapter of their story. Now, they’re hanging and drying — and will be left to cure for at least one month, possibly more, in a dry, dark, and well-ventilated space.
But why keep the roots?
Because cannabis roots hold ancient value — both medicinal and ritualistic. Though they don’t contain cannabinoids like THC or CBD, they are rich in alkaloids, triterpenoids, sterols, and other therapeutic compounds that can be anti-inflammatory, analgesic, antifungal, and calming.
Medicinal Benefits of Cannabis Roots:
• Friedelin – known for liver protection and anti-inflammatory effects
• Pentacyclic triterpenoids – believed to support immune and anti-tumor functions
• Alkaloids – some studies suggest pain-relief and muscle-soothing properties
• High levels of fiber and tannins – excellent for digestive and skin applications
🍵 Root Medicine — Ways to Use Dried Roots:
Once fully dried (they should snap like twigs, not bend), they can be gently crushed, powdered, or infused:
🌿 Cannabis Root Tea
Soothing & Detoxifying
• 1 tablespoon of dried, ground roots
• 3 cups of filtered water
• Simmer gently (do not boil) for 20–30 minutes
• Add a bit of ginger or lemon for taste
• Sip warm, especially good for menstrual discomfort, inflammation, and general relaxation
🍲 Healing Root Soup Base
Brothy & Nourishing
• Add a handful of dried roots into a veggie broth or bone broth
• Simmer for 2+ hours
• Strain before serving
• This adds a subtle earthy tone and allows the healing properties to infuse your meal
Topical Root Cream or Balm
Great for sore muscles or irritated skin
• Infuse roots in olive oil or coconut oil (low heat, 2–3 hours)
• Strain and mix with beeswax to form a balm
• Add essential oils like lavender or eucalyptus
• Apply to temples, joints, or sore areas
🛁 Root Soak Bath
Perfect for grounding and full-body relief
• Bundle dried roots in muslin or cheesecloth
• Steep in hot bathwater for 15 minutes before entering
• Let the soak draw out toxins and ease tension
⸻
The roots are more than just the anchor of the plant. They are its memory, its foundation, its quiet miracle. By using them, we honor the entire lifecycle — nothing is wasted, and everything has a purpose.
This part of the process is new for many growers, and I truly encourage anyone reading this to try saving and reusing the roots. Dry them, process them gently, and let them offer you one final gift.
Much love to Aptus Holland, Plagron, Autopots, and PRO-MIX — this wouldn’t have been possible without their harmony working underground while the beauty bloomed above.
🌱 The Gift That Keeps Giving: Reusing the Soil
As we say goodbye to one incredible season, we begin quietly preparing for the next. But not everything gets thrown away. In this garden, nothing is wasted. Just like the roots, the soil gets another life.
After each harvest, I carefully remove the remaining roots and break up the soil. I inspect it, rejuvenate it with compost and beneficial microbes when needed, and most importantly, I repurpose it — giving it a second life in my outdoor veggie garden.
Why do I do it?
Because this soil has already done something extraordinary. It has supported life, held moisture, breathed air, balanced nutrients, and fed plants that became medicine. It’s not just dirt — it’s a living ecosystem. And to throw it away would be to ignore its potential.
In my veggie garden, this recycled soil now nurtures cucumbers, tomatoes, courgettes, and so many other little miracles waiting to unfold. It’s a beautiful way of continuing the cycle, taking all the energy and intention that was once used to grow cannabis and transferring it into growing food. 🌞🍅🥒
🌾 The Benefits of Reusing Soil:
• Sustainability — less waste, less environmental impact
• Cost-effective — no need to constantly buy fresh medium
• Soil memory — rich in organic material, microbial life, and structure
• Nutrient potential — amended soil still holds value for many plants
• A deeper connection — a way to honor the entire cycle of growth
When we reuse our soil, we’re not just being resourceful — we’re believing in tomorrow. We’re trusting that what we’ve built can be rebuilt. That what has been used can become useful again. That from what seems like an ending, something new can always emerge.
And maybe that’s the most powerful message of all in this journey:
Planting is believing in tomorrow. 🌍🌱
Every seed in the ground is a little act of faith.
So as this season comes to a close, the first tomatoes have been planted. The cucumbers are reaching for the sun. The courgettes are settling in. And the same soil that once gave us dense, resinous flowers is now feeding the vegetables that will grace the table.
From harvest to hope — the cycle continues. And it’s beautiful.
🎉 The Final Touches
Fun fact:
• Trimmed on May 25
• Photo shoot on May 26
• This report: May 27
• Dry Bud Exclusive Photo Set: Coming soon
Stay tuned — the next upload will be something special, just in time before the Eternity Grow Cup closes on May 31st.
⸻
💚 Thank You
To Zamnesia — your genetics were nothing short of extraordinary.
To GrowDiaries, for hosting such a powerful space for community.
To everyone following this journey, your support, love, and kind words fuel this project and keep the spirit alive.
Let’s keep pushing boundaries, together.
With roots deep in the earth and eyes on the stars — the next chapter begins soon.
Much Growers love always,
🌱 Dog Doctor Official 🌱
Genetics - Runtz https://www.zamnesia.com/6000-zamnesia-seeds-runtz-feminized.html
Nutrients - Plagron https://plagron.com/en/hobby
- Aptus Holland https://aptus-holland.com/
Controls - Trol Master https://www.trolmaster.eu/
LED - https://www.futureofgrow.com/en
LED - https://www.thinkgrowled.com
Soil - https://www.promixgardening.com/en
Germination - Cannakan https://cannakan.com/?srsltid=AfmBOopXr-inLXajXu3QFgKXCXXos4F1oEvScjMKIB5MR5dk8-GJ-F49
DOGDOCTOR 15% off
Smoking Papers - https://ziggioriginal.com/
Terpene saver - https://grovebags.com/
As always thank you all for stopping by, for the love and for it all , this journey of mine wold just not be the same without you guys, the love and support is very much appreciloved and i fell honored with you all in my life
With true love comes happiness Always believe in your self and always do things expecting nothing and with an open heart , be a giver and the universe will give back to you in ways you could not even imagine so
As always, this is shared for educational purposes, aiming to spread understanding and appreciation for this plant. The journey with nature is one of discovery, creativity, and respect. Let’s celebrate it responsibly and continue to learn and grow together!
Growers Love To you All 💚
#EternityGrowCup #RuntzHunt #GrowersLove #CannabisCommunity #AptusHolland #ProMixSoil #TrolMaster #Zamnesia #Plagron #ZiggiPapers #Grovebags




Likes
20
Share


@OGJesus
Follow
The last week before I flip them into bloom. I'm seeing a lot of cracks in the leaves I'm hoping that is from the over watering and the ensuing drought that I gave them to stop but we'll see.
I've checked the plants over for bugs and have seen none so we'll see how the coming weeks treat the girls.

Likes
46
Share


@Capo420
Follow
Been an awesome week 😎
Lots of things going on last week.. We started LST, made a few adjustments, gave the ladies a haircut, and further refined the nutes👍
Looking forward to seeing some signs of flowering this week. 🙏
I had believed that I was a man of patience 😅
Stay tuned for pics and videos throughout the week.🙌
Happy Growing!
🤙💚💪🌱😎🌱💪💚🤙
Likes
4
Share

@Ensign420
Follow
|»» LOG DISCLAIMER: Not intended as a grow guide. Grow log entries are usually posted 3 weeks later and are for my learning reference. ««|
Introduction - Week 15 Summary -
Ensign's log, stardate 17541.8,
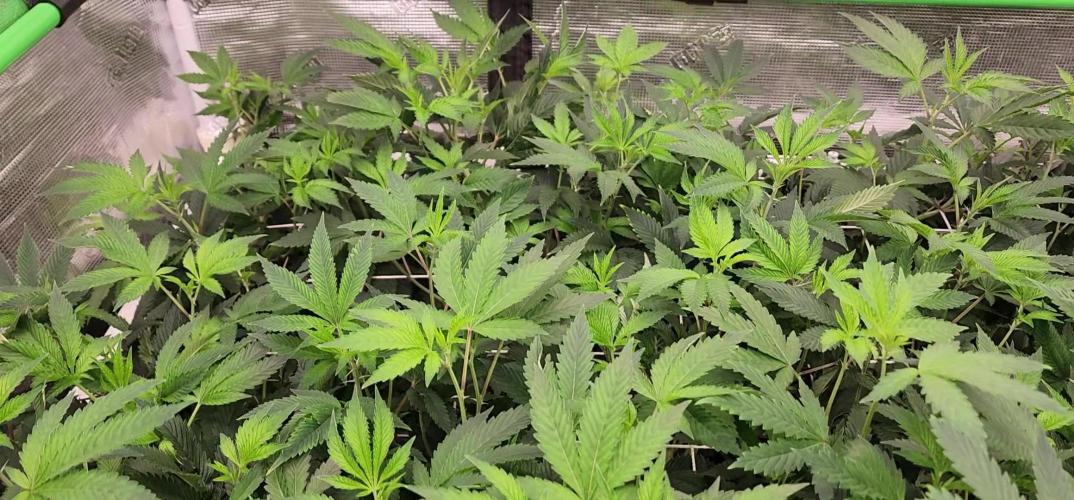
Wow what an epic grow week! First week within a 12/12 light cycle and lots of training got done!
Ca-Caw! Heady OG is blowing up with tops and been tucking to spread the canopy out a bit in the front left quadrant. But also started to let the right side grow through the netting.
As for TKO, been training growth upwards as she stretches through the scrog netting. Towards the end of the week, her top soil sensor started to cut out and had to swap it out with a new one.
Both the Heady OG and TKO clones have been transplanted into solo cups, but Heady OG is clearly struggling. To prevent the potential loss of the genetics, decided to take two more Heady OG cuttings.
Started my first batch of lactobacillus (LAB) serum and am waiting for the water to activate.
Also been researching about tissue culture and think this can be the solution to preserving genetics when space is limited.
Anyways,
Onwards Ensign!
[START OF WEEK 15]
==========================================================
---------- [ 4x4 MAIN TENT ] ----------
Heady OG BX1 #1 [Round4 ~Wk8] - WEEK 15 - Pre-Bloom [Stretch Wk1]
TKO [Round2 ~Wk13] - WEEK 15 - Pre-Bloom [Stretch Wk1]
----------- [ 3x3 VEG TENT ] ------------
Garlic Budder OG#1 - WEEK 07 - Full Veg
Garlic Budder OG#2 - WEEK 07 - Full Veg
Gorilla Goat #1 - WEEK 07 - Full Veg
Gorilla Goat #2 - WEEK 07 - Full Veg
07/28/25 → 08/03/25
This Week's Estimated Goals
----------------------------------------------------------------------------------------------
DLI: ~13 mol/m²/d
PPFD: ~300 μmol/m²/s
VPD: ~1.0 kPa
This Week's Meter Readings & Averages
----------------------------------------------------------------------------------------------
Light On/Off: 19:00 - 07:00 | Wattage: ~326.5W [LV04]
Distance From Canopy: ~31”, 27”
DLI: ~15.60 mol/m²/d
PPFD: ~361 μmol/m²/s
VPD: ~0.71 kPa
Soil %: [49.6, 36.1, 49.0, 47.1, 42.6, 43.0, 43.0, 44.6]
==========================================================
Day 01 - Monday - 07/28/25 - Total Days: 106
-----------------------------------
Daily Averages ~[+01:00]
- Temps: 83.6°F [28.7°C]
- Humidity: 82.0%
- VPD: 0.72 kPa
- Soil %: [50, 36, 49, 47, 43, 43, 43, 45]
-----------------------------------
- [+04:07]: Ca-Caw!! Let’s get this flower cycle started!
--- Time to switch the clocks from 18/6 to 12/12 which will begin the stretch to flower! Let’s go!
--- Within the AC Infinity App,
--- For the Main Tent [4x4] controller,
--- Changed the schedule from 'Vegetative [18/6]' to 'Flower [12/12]'
--- Also made sure to sync the settings for each device. The current settings are:
------ GROW LIGHT (MARS HYDRO FC-6500):
--------- The Mode is set to ‘ON MODE’
--------- The START/END times are set to 07:00PM/07:00AM
--------- The SUNRISE/SUNSET Duration value is set to 20Min
--------- The MAX value is set to 4
------ EXHAUST FAN (AC INFINITY CLOUDLINE T6):
--------- The Mode is set to ‘CONTINUOUS AUTO’
--------- The Temperature HIGH/LOW trigger’s value are set to 85°F/OFF
--------- The Humidity HIGH/LOW trigger’s value are set to 87%/OFF
--------- The MIN/MAX values are set to 1/8
--------- The Temperature Dynamic Transition buffer value is set to 2°F
--------- The Humidity Dynamic Transition buffer value is set to 2%
------ HUMIDIFIER (AC INFINITY CLOUDFORGE T7):
--------- The Mode is set to ‘CONTINUOUS TARGET’
--------- The VPD target value is set to 1.0kPa
--------- The MIN/MAX values are set to 0/8
--------- The VPD Dynamic Transition buffer value is set to 0.2kPa
------ HEATER (AC INFINITY THERMOFORGE T3):
--------- The Mode is set to ‘CONTINUOUS TARGET’
--------- The Temperature target value is set to 78°F
--------- The MIN/MAX values are set to 0/8
--------- The Temperature Dynamic Transition buffer value is set to 2°F
--- The only difference is the ON/OFF times for the grow light. Now lights will be on from 7pm to 7am (19:00 – 07:00).
--- Everything else is identical to the previous veg schedule.
--- Anyways,
--- LET THE TWO-WEEK STRETCH TO FLOWER BEGIN!!
- [+00:55]: Night check on the 4x4 tent.
--- Ca-Caw! Looking great my ladies!
--- Heady OG (BX1 #1) is continuing to blow up with more tops! The canopy is looking incredible!
--- TKO is also looking great with tops everywhere! She has taken over this grow and hyped that
- [+01:54]: Trained and tucked the top growth under the netting.
--- Canopy is flat and even again. Great!
--- Day one into the 12/12 flip and growth is looking great!
- [+01:56]: Checked the Ecowitt soil moisture sensor data:
------------------ [ 4x4 MAIN TENT ] ---------------
------ 46% - [CH01 FT » G30 - Heady OG BX1 #1]
------ 36% - [CH02 FB » G30 - Heady OG BX1 #1]
------ 50% - [CH03 BT » G20 - TKO]
------ 47% - [CH04 BB » G20 - TKO]
------------------ [ 3x3 VEG TENT ] ----------------
------ 40% - [CH05 BL » GR7 - Garlic Budder OG#1]
------ 41% - [CH06 BR » GR7 - Garlic Budder OG#2]
------ 40% - [CH07 FL » GR7 - Gorilla Goat #1]
------ 44% - [CH08 FR » GR7 - Gorilla Goat #2]
--------- Veg: 38% - 45% | Flower: 45% - 55%
--------- General: 30% [Dry] «| 45 - 60% [Moist] |» 70% [Wet]
- [+01:59]: Checked the 3x3 veg tent.
--- Mothers are all vegging along and the canopy is bushy and beautiful!
--- Pots also look good too. No gnats!
- [+02:01]: Checked on the propagation dome (in the 3x3),
--- To refresh the air, lifted the top off for a bit.
--- Clone growth looks great for the most part and getting curious on root growth.
--- Heady OG looks green, but she has been very droopy the entire time. Not sure if this cutting will root, but there is no yellowing. May have messed up something in cloning.
--- The TKO clone looks beautiful. incredible!
--- Using a spray bottle, misted the top growth with RO water.
- [+02:05]: Checked the humidifiers.
--- Tanks are still full and no leaks found.
--- Over the past week or so, been research about Lactobacillus and the organic benefits. Plan to give it a try and will start the process tomorrow.
--- Shout out to Jeremy at BuildASoil for the YT videos and the Lacto recipe!
--- LOYAL TO THE SOIL FOR LIFE!
--- Anyways, Onwards Ensign!
Day 02 - Tuesday - 07/29/25 - Total Days: 107
-----------------------------------
Daily Averages ~[+01:00]
- Temps: 83.3°F [28.5°C]
- Humidity: 80.4%
- VPD: 0.78 kPa
- Soil %: [50, 36, 49, 47, 43, 43, 43, 44]
-----------------------------------
- [14:24]: Okay! Time to start some Lacto Serum!
--- This lactobacillus serum is used to improve soil health and nutrient availability. This LAB serum can also be used to create fermented plant or fruit juices (FPJ/FFJ).
--- Anyways,
--- First need to make the rice wash solution!
--- Filled a mini wide-mouth mason jar with 1 cup of White Rice.
------ Added 1 cup of RO Water
--- Mixed the rice and water for a bit.
--- Covered the jar with a paper towel and rubber-band.
------ [ ~10 MINUTES LATER ]
- [14:38]: Great!
--- Mixed the rice and water again before pouring a little over 1/4 cup into a mini wide-mouth mason jar.
--- Covered the jar with a paper towel and rubber-band.
--- The current room temps are around 80°F
--- To start the microbial activation, going to let this rice water solution sit for a few days.
- [14:45]: Smelled the solution through the paper towel.
--- The solution smells like flour. Nothing foul.
--- From what I understand the process is pretty simple:
------ Create the rice wash solution and let it sit for a few days to activate (white or brown rice).
------ Mix 1 part activated rice wash solution to 10 parts whole or raw milk. Then let it sit for a few more days for the lacto cultures to proliferate.
------ Once the milk separates into essentially curds and whey, strain out the curds and the extracted whey is the finished Lacto Serum.
------ This serum should remain shelf stable in the fridge for several months.
------ Alternatively, black strap unsulfured molasses can be added to the serum at 1 part molasses to 4 parts serum. This will make the product stable enough for non-refrigerated storage (lasts several months).
------ As for application, the serum can be used as a soil drench or foliar feed at 4mL (~1tsp) per gallon of water.
--- Anyways,
--- Will check on this in a day or so and am waiting until the solution turns from a flour odor to more of a sweet aroma.
- [19:35]: Night check on the 4x4 tent.
--- Ca-Caw!! Looking great my ladies!
--- Both Heady OG and TKO are raging with more tops!
-- [20:37]: Trained the top growth.
--- Now starting to tuck mainly tucked Heady OG to spread growth out under the netting.
--- Letting TKO stretch through the netting and only tucked the taller tops. Mainly trained the back area (won’t be able to train this once growth starts to ramp upwards) and made sure each square has at least one apical top.
--- Also plucked and defoliated the Heady OG’s lower growth. Cleaned her legs and now she’s nice and smooth!
--- Wow TKO’s main stalks are huge! Can really reach back area now so going to let her grow.
- [20:47]: Checked the Ecowitt soil moisture sensor data:
------------------ [ 4x4 MAIN TENT ] ---------------
------ 45% - [CH01 FT » G30 - Heady OG BX1 #1]
------ 36% - [CH02 FB » G30 - Heady OG BX1 #1]
------ 45% - [CH03 BT » G20 - TKO]
------ 46% - [CH04 BB » G20 - TKO]
------------------ [ 3x3 VEG TENT ] ----------------
------ 42% - [CH05 BL » GR7 - Garlic Budder OG#1]
------ 40% - [CH06 BR » GR7 - Garlic Budder OG#2]
------ 47% - [CH07 FL » GR7 - Gorilla Goat #1]
------ 41% - [CH08 FR » GR7 - Gorilla Goat #2]
--------- Veg: 38% - 45% | Flower: 45% - 55%
--------- General: 30% [Dry] «| 45 - 60% [Moist] |» 70% [Wet]
- [21:34]: Checked the 3x3 veg tent.
--- Ooo yea! All veg mama’s are thriving and bushy!
--- Getting close to the grow light again so time for more training!
- [21:53]: Super-cropped and trained the top growth.
--- Pinched and bent the taller branches and lowered the canopy by 5-6 inches.
- [21:58]: Checked on the propagation dome,
--- To refresh the air, lifted the top off for a bit.
--- Clones are growing along and hopefully rooting.
--- Heady seems to be struggling, but she is still green.
--- TKO is looking great and she is starting to get taller!
--- Plan to check for roots in a couple days.
--- Using a spray bottle, misted the top growth with RO water.
- [23:07]: Time for a mini upgrade! Got a set of magnetic levels.
--- Attached two levels to both the main tent and veg tent’s grow lights.
--- Not really necessary, but the added levels will be useful during height adjustments.
- [23:23]: Checked the humidifiers.
--- Tanks are still full and no leaks found.
Day 03 - Wednesday - 07/30/25 - Total Days: 108
-----------------------------------
Daily Averages ~[+01:00]
- Temps: 83.6°F [28.7°C]
- Humidity: 82.1%
- VPD: 0.72 kPa
- Soil %: [49, 36, 48, 46, 43, 43, 43, 44]
-----------------------------------
- [23:36]: Night check on the 4x4 tent.
--- Ca-Caw!! Looking beautiful my ladies! Wow! This is why we grow!
--- Both Heady OG and TKO are looking healthy and tops are bursting through the netting!
- [23:54]: Trained the top growth.
--- Mainly tucked and continued to spread Heady OG out to fill in more squares in the front left quadrant.
--- Did minimal training on TKO. Just letting her grow through the netting and wow growth is raging!
--- Wow! The canopy is looking beautiful!
- [23:59]: Checked the Ecowitt soil moisture sensor data:
------------------ [ 4x4 MAIN TENT ] ---------------
------ 55% - [CH01 FT » G30 - Heady OG BX1 #1]
------ 36% - [CH02 FB » G30 - Heady OG BX1 #1]
------ 49% - [CH03 BT » G20 - TKO]
------ 46% - [CH04 BB » G20 - TKO]
------------------ [ 3x3 VEG TENT ] ----------------
------ 42% - [CH05 BL » GR7 - Garlic Budder OG#1]
------ 47% - [CH06 BR » GR7 - Garlic Budder OG#2]
------ 47% - [CH07 FL » GR7 - Gorilla Goat #1]
------ 40% - [CH08 FR » GR7 - Gorilla Goat #2]
--------- Veg: 38% - 45% | Flower: 45% - 55%
--------- General: 30% [Dry] «| 45 - 60% [Moist] |» 70% [Wet]
- [+00:03]: Checked the 3x3 veg tent.
--- Wow mother growth is raging again!
--- Really wish I can flip these ladies to flower, but don’t have the space.
--- Plan to start another round of mother cycling soon. Will probably super-crop tomorrow.
- [+00:04]: Checked on the propagation dome (in the 3x3),
--- To refresh the air, lifted the top off for a bit.
--- Wow clones are growing!
--- Heady OG is definitely going through some sort or rooting issue, but growth is still green. She is now starting to show signs of yellowing, so there may be roots, but not sure.
--- On the flipside, TKO is crushing it! She looks healthy and perky! The yellowing of the lower growth along with the healthy and perky top growth means there’s successful rooting and the clone is translocating nutrients to produce root growth. I think.
--- Using a spray bottle, misted the top growth with RO water.
--- Oh! Also continuing to research tissue culture (TC) and have decided to give it a potential go.
--- Shout out to Laur and ‘Plants In Jars!’ Her incredible YT videos have been a huge game changer and a highly recommend free resource for anyone trying to get into DIY tissue culture!
--- Pretty much now I think tissue culture is the solution to my mother plant issue.
--- From the little I understand, tissue culture is basically an advanced form of plant cloning and can be done quite safely at home.
--- If done properly, plants suspended in tissue culture can be propagated and maintained indefinitely until needed.
--- Each TC sample is basically a mini self-contained mother plant pod.
--- Once needed, a TC sample can be brought back to a clone-like state for planting into solo cups.
--- Aside from the technical process (which is going to be fun to learn), the largest challenge is maintaining a sterile environment during propagation.
--- Anyways!
- [+00:10]: Checked the humidifiers.
--- Tanks are still full and no leaks found.
Day 04 - Thursday - 07/31/25 - Total Days: 109
-----------------------------------
Daily Averages ~[+01:00]
- Temps: 83.5°F [28.6°C]
- Humidity: 81.2%
- VPD: 0.75 kPa
- Soil %: [49, 36, 49, 46, 43, 43, 43, 44]
-----------------------------------
- [08:42]: Checked on the 3x3 veg tent.
--- Both growth and pots are looking great!
- [08:43]: Checked on the propagation dome,
--- Clones both look bad and good.
--- Concerned about Heady OG, but TKO has been healthy and perky the whole way.
- [08:45]: Time to check for roots.
--- Heady OG had one tiny root. Not ideal, but was actually surprised to find any root growth. Nice!
--- Woah! Nice! TKO is bursting with roots! She’s definitely ready to be transplanted!
--- Decided to plant both clones. Hoping that Heady OG will do better in the soil.
--- Time to transplant the rooted cuttings!
- [09:13]: Took 2 used solo cups (has bottom corners cut for drainage) and labeled each cup (Heady OG BX1, TKO).
--- Partially filled each with some fresh (dry) BuildASoil 3.0 potting soil.
--- Made sure that the soil was well packed.
--- Inoculated each cup with Great White mycorrhizae along with a bit of Beauveria Bassiana.
--- Misted the dry soil with a bit of RO water (~3 sprays each).
------ Sprinkled 1/64tsp of Beauveria Bassiana Plus
------ Sprinkled 1/16tsp of Great White
- [09:26]: Time to plant! One clone at a time,
--- Placed each clone into solo cups (also removed the clone tag).
--- Made sure each solo cup had enough room for more soil.
- [09:32]: Inoculated each Coco Coin with Great White mycorrhizae.
------ Sprinkled about an 1/16tsp of Great White onto each Coco Coin.
--- Made sure to get the top and sides evenly.
- [09:35]: Gently filled each solo cup with more soil.
--- Completely covered the top of each Coco Coin and made sure to tuck the sides fairly snug with soil.
--- Evened out the top soil. Each Coco Coin is about 1/4-1/2 inch below the top soil.
- [09:44]: Added some BuildASoil Organic Straw Mulch to the top.
--- Using the small straw bits at the bottom of the bag is great for solo cups.
--- Time to water!
- [09:51]: Filled a measuring cup with 2 cups of RO water.
------ Added 1/64tsp of Quillaja Saponaria Extract [60]
------ Added 1/16tsp of Horticultural Coconut
------ Added 1/16tsp of Horticultural Aloe
------ Added 1/8tsp of Mycrobe Complete
--- Mixed and poured the solution straight into a spray bottle.
- [09:54]: Took the dry soil weight of each pheno before watering,
------ Heady OG (BX1) weighed 261.4g
------ TKO weighed 240.9g
--- Marked the starting weight on the back of each cup.
--- While on a scale,
--- Gently misted the straw mulch of each cup.
--- Focused on the straw and sprayed as evenly as possible.
--- Misted 5-10 sprays. Waited a few seconds, then misted again.
--- Repeated this process until both cups weighed at least 300g
--- There was no runoff.
--- Oops!
--- Had to slightly extend the day period (Lights usually turn off at 10:00).
- [10:04]: Took the weight of both phenos after watering,
------ Heady OG (BX1) weighed 301.2g
------ TKO weighed 301.4g
--- Marked the saturated wet weight on each cup.
- [10:12]: Placed both cups into the propagation dome.
--- Removed the side extensions along with the plug tray and have the cups resting in the main drip tray.
--- Have the lid and lights suspended above the tray (~00 inches).
--- Also increased the propagation dome’s bar lights.
------ Increased the intensity from 1 to 5
- [10:13]: Took general PPFD readings.
------ Clones were around 109 μmol/m²/s which gives a DLI of 7.06 mol/m²/d under an 18/6 light cycle.
--- Turned the lights off and made sure that both were back to an 18/6 cycle (on from 16:00 to 10:00).
--- Ca-Caw!! Done!
--- Not worried about TKO, but getting concerned about Heady OG. Not sure if she is going to make it.
- [14:23]: Checked on the Lacto Serum.
--- The solution has been resting for 2 days.
--- Smelled the rice wash solution through the paper towel.
--- The odor has changed from the original flour odor but has not become sweet. However, the smell is getting there. I think.
--- Will continue to check and still waiting until the solution changes into a sweet aroma.
- [19:24]: Night check on the 4x4 tent.
--- Ooo yea! Growth is looking beautiful and raging along!
--- Both Heady OG and TKO are thriving with growth! The stretch is definitely ramping up!
- [20:08]: Trained and tucked the top growth.
--- Mainly focused on the Heady OG and spread her out a bit more evenly to fill in more squares.
--- Wow TKO by far going to be the largest plant I’ve grown in a 4x4 tent. She’s extremely dense with healthy tops shooting up everywhere!
--- Since I’m not tucking TKO anymore and she is getting taller, need to take readings and measurements.
- [20:38]: Took the weekly general PPFD readings.
------ Heady OG (BX1 #1) was still around 361 μmol/m²/s which gives a DLI of 15.60 mol/m²/d under a 12/12 light cycle (at ~326.5W).
------ TKO was around 365 μmol/m²/s which gives a DLI of 15.77 mol/m²/d under a 12/12 light cycle.
- [20:40]: Took the weekly height and light distance measurements.
------ Heady OG (BX1 #1) was still about 21.5" tall.
------ TKO was about 26" tall.
------ Heady OG (BX1 #1) was about 31" away from the grow light.
------ TKO was about 27" away from the grow light.
--- Since Heady OG is clearly struggling to root, going to take a few more lower cuttings to make sure the genetics survives.
- [20:52]: Filled a measuring cup with 1.5 cups of RO water.
------ Added 1/8tsp of Horticultural Aloe
--- Mixed the solution and poured it straight into a solo cup.
- [20:56]: Time to take the cuttings!
--- Using a pair of trimmers (AC Infinity),
--- Gently cut 2 small cuttings from Heady OG (BX1 #1). Took lower branches that did not reach the top canopy level.
--- Trimmed and cleaned most of the nodes leaving the top node or two.
--- Did not cut any leaf fingers.
--- Made sure the tip of the stalk had a slanted cut (about 45-degree).
- [21:02]: Placed both cuttings into the cup of aloe solution.
--- Also made sure the cuttings were tagged. Not really necessary, but why not.
- [21:05]: Placed the cup into the 3x3 veg tent.
--- Have the cup resting in the propagation dome next to the planted clones.
--- Going to let these cuttings soak for a day before refreshing with straight RO water.
--- Let the two-day soak begin!
- [21:06]: Checked the Ecowitt soil moisture sensor data:
------------------ [ 4x4 MAIN TENT ] ---------------
------ 47% - [CH01 FT » G30 - Heady OG BX1 #1]
------ 36% - [CH02 FB » G30 - Heady OG BX1 #1]
------ 50% - [CH03 BT » G20 - TKO]
------ 46% - [CH04 BB » G20 - TKO]
------------------ [ 3x3 VEG TENT ] ----------------
------ 44% - [CH05 BL » GR7 - Garlic Budder OG#1]
------ 41% - [CH06 BR » GR7 - Garlic Budder OG#2]
------ 43% - [CH07 FL » GR7 - Gorilla Goat #1]
------ 46% - [CH08 FR » GR7 - Gorilla Goat #2]
--------- Veg: 38% - 45% | Flower: 45% - 55%
--------- General: 30% [Dry] «| 45 - 60% [Moist] |» 70% [Wet]
- [21:08]: Checked the 3x3 veg tent.
--- Looking great in the mother tent!
--- Was planning on defoliating and taking new veg cuttings, but since Heady OG is struggling, going to wait a bit longer to start the mother cycling process.
- [21:18]: Super-cropped and trained the top growth.
--- Lowered the canopy a good 4-5inches.
- [21:19]: Checked on the clones,
--- Looking great!
--- Heady is still struggling, but hoping she’ll perk up soon.
--- TKO is looking perfect! She’s perky and I have no doubt that she’ll root just fine.
--- More worried about Heady OG.
- [22:08]: Checked the humidifiers.
--- Tanks are still full and no leaks found.
Day 05 - Friday - 08/01/25 - Total Days: 110
-----------------------------------
Daily Averages ~[+01:00]
- Temps: 83.4°F [28.6°C]
- Humidity: 83.0%
- VPD: 0.68 kPa
- Soil %: [51, 36, 49, 46, 42, 43, 43, 45]
-----------------------------------
- [22:10]: Night check on the 4x4 tent.
--- Ca-Caw! Let’s go ladies! Wow the garden is packed and looking incredible!
--- Heady OG and TKO are looking perky and stretching through the netting with nodal growth everywhere!
--- By far my healthiest grow cycle yet!
- [22:21]: Did a bit of training.
--- Slightly tucked and spread Heady OG a bit more to fill in the front left quadrant.
--- Just going to let the rest grow!
- [22:25]: Checked the Ecowitt soil moisture sensor data:
------------------ [ 4x4 MAIN TENT ] ---------------
------ 52% - [CH01 FT » G30 - Heady OG BX1 #1]
------ 36% - [CH02 FB » G30 - Heady OG BX1 #1]
------ 54% - [CH03 BT » G20 - TKO]
------ 46% - [CH04 BB » G20 - TKO]
------------------ [ 3x3 VEG TENT ] ----------------
------ 44% - [CH05 BL » GR7 - Garlic Budder OG#1]
------ 41% - [CH06 BR » GR7 - Garlic Budder OG#2]
------ 46% - [CH07 FL » GR7 - Gorilla Goat #1]
------ 48% - [CH08 FR » GR7 - Gorilla Goat #2]
--------- Veg: 38% - 45% | Flower: 45% - 55%
--------- General: 30% [Dry] «| 45 - 60% [Moist] |» 70% [Wet]
- [22:34]: Checked the 3x3 veg tent.
--- Ooo yea! The veg garden is beautiful and wow growth is raging!
--- Wow! The canopy is already stretching upwards and will probably need to train again tomorrow.
--- Checked on the clones,
--- Nice!! Growth is all around healthy and looking great!
--- Heady OG looks less droopy. I think.
--- TKO is looking perfectly healthy and already getting taller! Wow!
--- Nice! Both Heady cuttings are looking healthy and not droopy.
- [22:38]: Time to swap the aloe water out!
--- Replaced the solo cup with a clean one filled with fresh RO water (1.5cups).
--- Going to let this soak for another day before transplanting into Coco Coins for rooting.
- [22:44]: Checked the humidifiers.
--- Tanks are still full and no leaks found.
Day 06 - Saturday - 08/02/25 - Total Days: 111
-----------------------------------
Daily Averages ~[+01:00]
- Temps: 82.6°F [28.1°C]
- Humidity: 83.2%
- VPD: 0.66 kPa
- Soil %: [50, 36, 50, 47, 42, 43, 43, 45]
-----------------------------------
- [07:59]: Quick morning check on the propagation dome (in the 3x3 veg tent).
--- Ooo yea! The clones and cuttings are looking healthy and green!
--- Heady OG (BX1 #1) is droopy and seems to be recovering. I think?
--- TKO is looking healthy and looking beautiful!
--- Nice! Both Heady OG (BX1 #2 and #3) cuttings are looking good! These cuttings are quite a bit smaller than the last round, but they are healthy and green!
- [20:06]: Night check on the 4x4 tent.
--- Ca-Caw! Wow the canopy is thriving!
--- Heady OG is looking healthy and perky!
--- Wow! TKO is stacking up with nodal branching and crowning is everywhere with perky tops!
- [20:13]: Did a bit of tucking on the front left quadrant.
--- Could have trained Heady OG another week in veg before flipping to flower, but oh well. TKO needed to be flipped.
- [20:32]: Checked the Ecowitt soil moisture sensor data:
------------------ [ 4x4 MAIN TENT ] ---------------
------ 45% - [CH01 FT » G30 - Heady OG BX1 #1]
------ 36% - [CH02 FB » G30 - Heady OG BX1 #1]
------ 66% - [CH03 BT » G20 - TKO]
------ 47% - [CH04 BB » G20 - TKO]
------------------ [ 3x3 VEG TENT ] ----------------
------ 47% - [CH05 BL » GR7 - Garlic Budder OG#1]
------ 44% - [CH06 BR » GR7 - Garlic Budder OG#2]
------ 42% - [CH07 FL » GR7 - Gorilla Goat #1]
------ 43% - [CH08 FR » GR7 - Gorilla Goat #2]
--------- Veg: 38% - 45% | Flower: 45% - 55%
--------- General: 30% [Dry] «| 45 - 60% [Moist] |» 70% [Wet]
--- Needed to swap out the batteries for TKO’s top soil sensor (CH03).
--- Apparently there is a slight flaw with the programing on the WittFlows. Since the watering function is based on the channel and not the sensor, when TKO’s top sensor cuts out, the new CH03 (which is TKO’s bottom sensor) takes over.
--- Anyways,
- [20:38]: Checked the 3x3 veg tent.
--- Veg garden is looking beautiful and wow top growth needs more training!
- [20:53]: Super-cropped the top growth a bit.
--- Lowered the canopy a few inches.
--- Growth is getting out of control! Wow! Need to take cuttings soon to start the cycling process.
--- Anyways!
- [20:54]: Checked on the clones,
--- Wow clone growth is looking very good!
--- Heady OG seems to be recovering nicely in the soil and I’m getting more confident that she’s going to make it. Nice!
--- TKO is looking great! She’s going to root and will be ready for transplant in a week or so.
--- Both Heady OG cuttings are looking healthy and ready to be rooted!
--- Time to plant the second round of Heady OG (BX1) cuttings!
- [21:13]: Filled a measuring cup with 1.5 cups of RO water.
------ Added a pinch of Quillaja Saponaria Extract [60]
------ Added 1/64tsp of Horticultural Aloe
------ Added 1/32tsp of Mycrobe Complete
--- Mixed the solution thoroughly.
- [21:17]: Dropped 2 Coco Coins into the measuring cup.
--- The coins immediately started to expand.
------ [ ~10 MINUTES LATER ]
--- Took each fully saturated Coco Coin and temporarily placed them in half-cut solo cups.
--- Using a squeeze bottle filled with Clonex,
- [21:38]: Gently filled each pre-made hole with Clonex rooting gel.
--- Time to plant the cuttings!
- [21:43]: Using a pair of clean trimmers, made a final 45° cut.
--- Also stripped and scrapped some of the stem’s outer membrane.
--- To help with planting, gave each Coco Coin a squeeze to loosen the coco.
--- Made sure to insert each stem straight and snug with the tip about a 1/4 inch from the bottom of the Coco Coin.
--- Also secured the stem by pinching and pressing in the sides of the Coco Coin.
--- After both cuttings were planted,
--- Temporarily took the clones out of the propagation tray. Also placed the plug tray back in.
- [21:53]: Placed both Coco Coins into the propagation dome’s tray.
--- Since these cuttings are both identical cultivars, no need to really name.
--- Added 1/2 cup of RO water to the bottom of the tray.
--- Since I’m not using the dome lid (which is currently hanging above the tray), misted a couple of clear cups with RO water.
- [21:55]: Covered both cuttings.
--- Will need to mist the cups for the first few days in the tray.
--- While rooting the cuttings, noticed that both clones (Heady OG BX1 and TKO) need to be watered already.
--- Let’s go!
- [22:02]: Took the initial starting weight range of both clones before watering,
------ Heady OG BX1 #1 » 261.4g → 301.2g
------ TKO » 240.9g → 301.4g
--- General Solo Range: [Dry] «| [Initial Cup Weight] + ~55-100g |» [Wet]
--- All phenos were last watered 2 days ago.
--- Took the starting weight of both clones before watering,
------ Heady OG BX1 weighed 278.2g
------ TKO weighed 253.5g
--- While on a scale,
--- Gently misted the straw mulch of both cups with RO water.
--- Focused on the straw and sprayed as evenly as possible.
--- Misted 10-20 sprays. Waited a moment, then misted again.
--- Repeated this process for both cups.
--- There was no runoff.
- [22:18]: Took the saturated weight of both clones after watering,
------ Heady OG BX1 weighed 278.2g
------ TKO weighed 253.5g
--- Marked the final wet weight on the back of each cup. Also marked the watering date on the front.
- [22:27]: Placed both phenos back into the tent.
--- Done! Grow strong little ones!
- [22:33]: Checked the humidifiers.
--- Tanks are still full and no leaks found.
Day 07 - Sunday - 08/03/25 - Total Days: 112
-----------------------------------
Daily Averages ~[+01:00]
- Temps: 83.1°F [28.4°C]
- Humidity: 83.0%
- VPD: 0.68 kPa
- Soil %: [48, 37, 49, 51, 42, 43, 43, 45]
-----------------------------------
- [08:13]: Quickly checked on the propagation dome (in the 3x3 veg tent).
--- Wow the clones are looking incredible!
--- Heady OG is looking better and she’s still recovering.
--- TKO is looking healthy and getting bigger. Nice!
--- Both Heady OG cuttings are also looking healthy and look better than the first attempt (the recovering clone).
--- Misted both cups with RO water.
- [19:06]: Night check on the 4x4 tent.
--- Ca-Caw!! Woah these ladies are definitely in full stretch! These girls are getting taller by the hour! Wow!
--- Heady OG is looking beautiful and she is exploding with upwards growth! The middle of the canopy is basically at the same height as TKO. Incredible!
--- Ooo yea! TKO is crushing it! Wow! She’s a good 7 inches above the scrog netting!
--- The canopy is getting stacked with nodal growth! This garden is ramping up to be my best grow cycle yet!
- [19:14]: Checked the Ecowitt soil moisture sensor data:
------------------ [ 4x4 MAIN TENT ] ---------------
------ 54% - [CH01 FT » G30 - Heady OG BX1 #1]
------ 37% - [CH02 FB » G30 - Heady OG BX1 #1]
------ 50% - [CH03 BT » G20 - TKO]
------ 41% - [CH04 BB » G20 - TKO]
------------------ [ 3x3 VEG TENT ] ----------------
------ 41% - [CH05 BL » GR7 - Garlic Budder OG#1]
------ 47% - [CH06 BR » GR7 - Garlic Budder OG#2]
------ 47% - [CH07 FL » GR7 - Gorilla Goat #1]
------ 49% - [CH08 FR » GR7 - Gorilla Goat #2]
--------- Veg: 38% - 45% | Flower: 45% - 55%
--------- General: 30% [Dry] «| 45 - 60% [Moist] |» 70% [Wet]
- [19:16]: Checked the 3x3 veg tent.
--- Wow veg growth is raging with health and vigor!
--- Mothers are looking beautiful and canopy is bushy!
--- Nice! Clones and cuttings are looking healthy!
--- Misted the cutting’s cups with RO water.
- [19:46]: Back in the 4x4 main tent,
--- Decided to tuck Heady OG a bit more and tried to spread the growth in the front left quadrant.
--- Growth is going to be uneven but I think the left side will eventually even out. I think.
- [19:54]: Quickly checked on the auto-watering system.
--- System is still charged and no leaks or kinks found in the tubing.
- [19:58]: Checked the humidifiers.
--- Tanks are still full and no leaks found.
--- Another week done and the garden is vibing and thriving!
--- Next week will be the end of the stretch phase and as growth slows down, will hopefully see signs of budding.
--- Ca-Caw! Stoked for this grow and can’t wait until these girls start to flower.
- [+02:20]: TKO’s soil sensor cut out again..
--- Swapped out the unit with a new one and re-synced the channel to correct sensor ID.
--- The old sensor got water damage. Going to try to dry it out, but really glad I have a couple spare units.
--- Also glad that TKO seems to be taking the extra watering without any issue! May try to increase the soil moisture average next week for both pots.
--- Anyways! Onwards Ensign!
[END OF WEEK 15]
Likes
11
Share


@Tuki3
Follow
Hermoso el proceso, la verdad cada vez me gusta más todo lo que involucra al mismo! atencion, detalles, etc.
Las chemical bride como verán salieron 2 fenotipos diferentes, uno con hojas más finas (tirando a sativa) y la otra hojas mas gruesas y las flores aparentan ser más "comprimidas". El olor que siento cuando toco las hojas con Resina es muy muy sabroso, realmente parece un caramelo de ananá (muy dulce, hasta empalagoso diría).
En estos días voy a intentar subir un poco más el panel porque está muy cerca. Muy contento realmente con los resultados que vengo observando!

Likes
6
Share

@Bobbo94
Follow
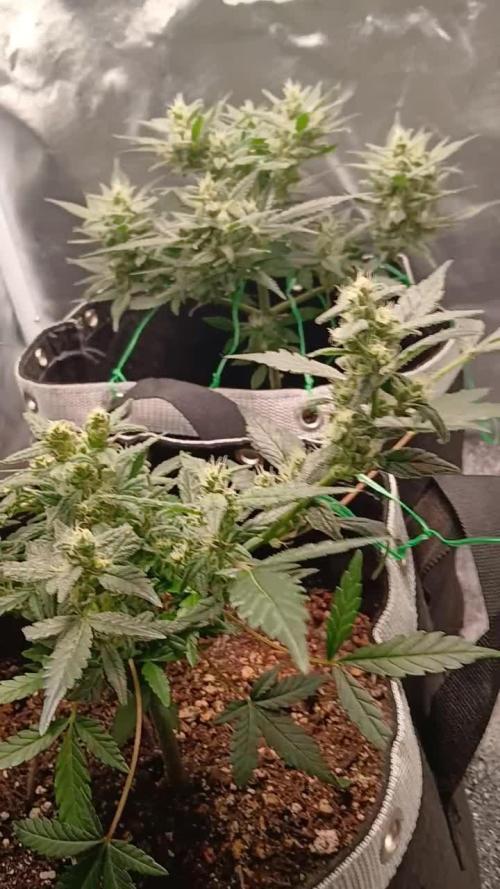
Day one of the 12th week, cutting off the nutrients I feel like it is time to flush. And what I did wrong in the beginning of this grow, was that I placed the plants too far away from the light the first 4 weeks of veg or so. My thought was too make the plants stretch taller in the beginning, but disregarding the par, the ppfd I realized too late that the branches did not get what they needed for length. These plants could have been much larger just for growers information.
Likes
75
Share


@Reyden
Follow
Ho messo le due bimbe che ormai sono cresciute quasi 50cm nei vasi che mi ha mandato Royal queen Seeds ma dovevo farlo prima quando erano più piccole 🙄
Sto tenendo le ragazze fuori dalla finestra stando attento ai vicini che sono sempre curiosi 😛🔜🤞🔛🕉️🔈
Ho continuato il manifold e adesso gli arrivano circa 14h di luce in tutto….promettono bene questo è sicuro 🤘🏻👨🚀🏻
Likes
42
Share


@DrLaggis
Follow
🌱 Day 57 - Start of the Second-to-Last Flowering Week 🌱
Hello, Grow Friends!
Today marks the start of the second-to-last flowering week—Week 9 overall, and Week 5 of flowering. 🌿 I’m getting more and more excited as my first grow nears its end. As I approach harvest, I’ve decided, based on my research, to stop feeding nutrients and stick to just pH-adjusted water for the final two weeks. 💧⚖️
Watering Routine:
I’ll keep the same watering schedule—1 liter every two days, which is about 10% of the pot volume. 🌱💧 This should be enough to flush out the remaining nutrients, ensuring a clean finish for the plant.
Temperature & Humidity:
The temperature remains stable between 19-23°C, which I believe is ideal for this stage of the grow. 🌡️🍂 No more high temperatures to worry about! The humidity is fluctuating between 45-58%, and I’m keeping a close eye on it to stay below 60%. 💧🔍 Everything seems on track for now. 🌿
Plant Health & Growth:
The plant still looks very healthy overall. 🌱💪 However, I’ve noticed that in the past three days, there haven’t been any visible changes in the size of the buds. 🤔 It could just be that I’m not seeing the growth clearly, but the only noticeable change is the daily opening of new flower calyxes. 🌸
Harvest Preparation:
I’m already getting my equipment ready for drying after harvest. 🛠️ Once it’s time to cut, I’ll be hanging the plant to dry for the first 10 days. 🌿✂️ I want to make sure everything is set for a smooth drying process.
Stay tuned for more updates, and as always, daily photos of the plant will be posted! 📸🌱
Day 62 - Last-Minute Decisions with Urgent Changes 🌱
Hello, my grow friends! Due to the trichome pictures I took on Day 61—which you can check out too—I’ve made an unexpected decision to harvest my plant a bit earlier than planned and make some changes.
🌿 Watering and Flushing:
The last time I watered was on Day 61, using all the usual nutrients at the doses I mentioned before. But after seeing the trichome pictures, I decided to start a light flush today. I gave the plant 4 liters of plain water to begin flushing and will now only water lightly on Day 64. After that, no more water until harvest on Day 67.
🌑 Dark Period:
From Day 66 to Day 67, I plan to keep the plant in darkness. I’m not entirely sure if this will make a difference, but I’m curious to try it out.
✂️ Defoliation:
The plant is doing well, and I’ve done a thorough defoliation. I removed all leaves that aren’t sugar leaves or directly attached to the buds to improve air circulation and reduce the risk of mold as I approach the end of the grow.
💭 Trimming Decisions:
I’m still undecided about whether to do a wet trim or a dry trim. Based on what I’ve read, especially regarding the yield from trim, I’m leaning towards dry trimming, as it might give me more usable trim material.
I can feel the plant entering its final phase, and I’m getting really excited about the results and what the next few days will bring. Remember, I post a video update every day. If you have any tips or suggestions, I’d love to hear them!
Until next time! 🌱