


Likes
Comments
Share


@Budley
Follow
Final week of the grow! Feeding it plain water from this point on. Buds have fattened nicely and the plant smells amazing. Very happy with everything so far.

Likes
7
Share


@Stickygreens420
Follow
10/17/2022 start of week 3. Plants still look healthy. Been LST the Strawberry Gushers and Newberry for a few days and some of the lower branches are catching up. Trying to keep the canopy as uniform as possible. The Strawberry Gushers appears to be in preflower already, which is a bit concerning. Was hoping to get at least another week out of her. Orange Bubblegum is still the smallest of the three, but she continues to grow at a steady pace. I think someone pulled a fast one on me with my cover crop. I have what looks like blades of grass growing, with only a few small clovers showing up so far. Guess that is what I get for shopping on Amazon. Also, increased my DLI to 500. Not much more to report at this time.
On 10/19/2022 I watered 1 liter per pot with the Rootwise and ThermX again. This amount every 2 to 3 days seems to be sufficient for their current size. The pots are wet on the bottom, but no run off. Also, removed just a few of the lowest leaves and fan leaves blocking the lower branches. The LST is allowing the lower branches to catch up.
10/21/2022 watered both the Strawberry Gushers and Newberry with about 1.5 liters each. They are both really growing fast now. The Orange Bubblegum is beginning to speed up, it's just seems like a shorter plant with shorter node spacing. I just misted the surface of the Newberry since the pot was heavier than the other two. Still doing some minor LST on the main trunk and some selective deformation and leaf tucking of leaves blocking bud sites.
10/23/2022 was a big day for the Strawberry Gushers. Top dressed with Gnarly Barley, BuildASoil Craft Blend, and BuildASoil BuildFlower, then watered 2 liters. Plant is starting to stretch so I wanted to make sure she has access to the nutrients she needs. The Newberry and Orange Bubblegum just got 1 liter like usual. Plan to top dress them as well once they get a little bigger.
Avg. VPD: .8
PPFD: 500
DLI: 32

Likes
51
Share


@Hempface86
Follow
All right here we are guys Midway through week 3 of flower and she should have more production but due to the extreme training and the amount of Bud sites there's a lot of energy being distributed between so many areas that I don't think I'm going to be left with many huge buds but as I mentioned before many thumb size which is fine by me as long as the nugs are tight and smoke as good as I can hope for.. strawberry cough has been one of those elusive strains for me for one I never thought I'd ever even be able to grow cannabis let alone grow the strain that I've been wanting to grow since I was 14 and I'm 38 now going on 39... Long story short this has been a long time coming and so now I'm only a month and a half or so away from it becoming a reality is really awesome... I hope everyone out there is doing good I hope their ladies are doing good and God bless everybody happy growing ✌️😎
https://weedseedsexpress.com/us

Likes
5
Share


@Falcon123
Follow
Gelly Cream Cake & Slurricane #7 S1 from seeds
Platinum S1 & King Sherbet are clones
Gelly Cream Cake & Slurricane #7 S1 techniques were used: Topping + LST + Defoliation
Platinum S1 & King Sherbet techniques were used: LST + Defoliation


Likes
37
Share


@NewbieLearner
Follow
I would definitely recomend trying this strain. I am not sure if my seeds were from this breeder but my word the seeds i got were an absolute gem to grow compared to the other plants.


Likes
40
Share


@MadeInGermany
Follow
Info:
Unfortunately, I had to find out that my account is used for fake pages in social media.
I am only active here on growdiaries.
I am not on facebook instagram twitter etc All accounts except this one are fake.
Hey everyone :-)
Another nice week goes by and it is slowly becoming a bush from training 😊.
This week it was poured 2 times with 1 l each time (For nutrients, see the nutrient table above).
She was trained once again with topping.
You still have some time until it blooms until space is free :-).
Otherwise everything was checked and cleaned like every day.
Have fun with the update and stay healthy 🙏🏻
You can buy this Nutrients at :
https://greenbuzzliquids.com/en/shop/
With the discount code: Made_in_Germany you get a discount of 15% on all products from an order value of 100 euros.
You can buy this Strain at :
www.Zamnesia.com
Type:
Runtz
☝️🏼
Genetics:
Zkittlez x Gelato
👍
Vega lamp: 2 x Todogrow Led
Quantum Board 100 W
💡
Bloom Lamp : 2 x Todogrow Led
Cxb 3590 COB 3500 K 205 W
Soil :
Canna Coco Professional +
☝️🏼
Nutrients :
Green Buzz Liquids :
Organic Grow Liquid
Organic Bloom Liquid
Organic more PK
More Roots
Fast Buds
Humic Acid Plus
Growzyme Big Fruits
Clean Fruits
Cal / Mag
Organic Ph - Pulver
☝️🏼🌱
Water: Osmosis water mixed with normal water (24 hours stale that the chlorine evaporates) to 0.2 EC. Add Cal / Mag to 0.4 Ec Ph with Organic Ph - to 5.8

Processing
Likes
34
Share


@DudeGrowsWeed
Follow
Sour Diesel Haze looking and smelling wonderful!! She still has a few weeks til harvest, but she's getting close. I have a feeling this will be my Diary of the Month entry for June. 😃

Likes
126
Share


@nonick123
Follow
Dia 1 (17/01): La semilla ha germinado! (+3 días) 💥 Enciendo la lámpara del armario a PPFD 225
Dia 2 (18/01): Fuerte y vibrante plántula
Día 5 (21/01): Las plántulas se han estirado ligeramente, por lo que subo a PPFD 300
Día 8 (24/01): Las chicas están asomando las raíces por la parte inferior de la maceta. Parecen fuertes!
Nutrients by Gen1:11 - www.genoneeleven.com
Substrate PRO-MIX HP BACILLUS + MYCORRHIZAE - www.pthorticulture.com/en/products/pro-mix-hp-biostimulant-plus-mycorrhizae

Likes
24
Share


@S_Dubz
Follow
This OGgelato is a champ! Not the heaviest producer, but its been a real pleasure and was easy to grow. No matter what nutrients I throw at her, or aggressive pruning, she bounces right back.
This week I found bud rot on one of my other plants in the greenhouse but this plant has so far been resistant and is healthy. I thinned the canopy and defoliated out quite a bit to create more air flow. I now have fans on 24/7 and sprayed with a mycorrizhal fungicide that suppresses botrytis.
Also this week I have stopped pulling the tarp on and off each night (for total darkness) because it seemed to trap in too much humidity at night. The humidity outside has been 80-90% for over a week! And the rain was so heavy all last week. This week is slightly warmer with less rain so hoping we can make it.
The trichomes are starting to get milky. I imagine I have 1-2 weeks left but am not sure.
This has been a pleasurable experience for sure, but this is stressful right now! The smell is so strong you can smell it on my block. You can see *everything* from the alleyway adjacent to the greenhouse. I'm worried about mold and thiefs and can not wait for this to be dried and in jars!
Likes
9
Share

@Mannirumpel420
Follow
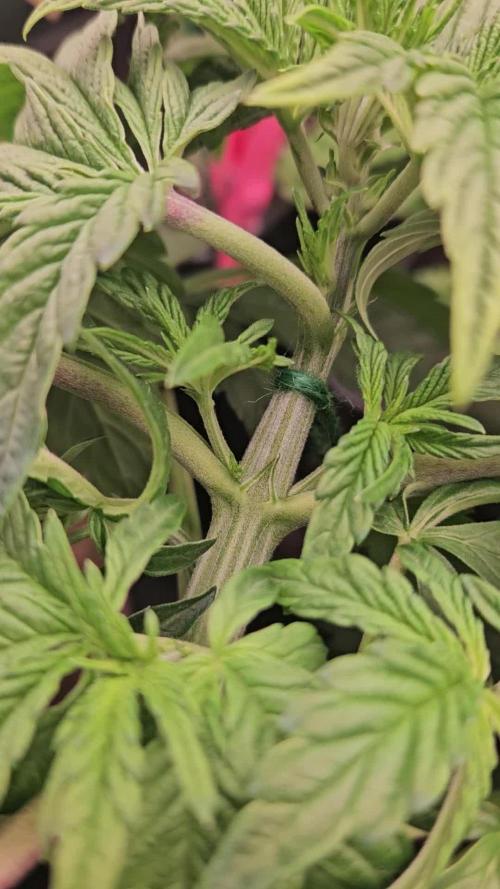
Ihr Stamm ist sehr schnell fest geworden,was das LST des Haupt triebes etwas erschwert.Ansonsten macht sie gute Fortschritte,wenn man bedenkt dass es momentan noch max 17 Grad celsius und 80 Prozent Luftfeuchte sind.Dies sollte sich jedoch in der nächsten Woche regeln,da es dann wärmer wird und ich die schlitze des Zeltes dann aufmachen kann,ohne dass es darin zu kalt wird.
Ihr Topf ist schon gut durchwurzelt und wahrscheinlich benötigt sie bald einen größeren,jedoch lasse ich sie ersteinmal wachsen und nehme in einer Woche ein paar stecklinge.
Diese Genetik ist echt der Hammer,sie hat einen Ultra dicken stamm für ihre größe und bildet an einem Seitentriebe noch einen zusätzlichen Mini Trieb aus.Aus diesem Grund nehme ich mir von ihr einige Stecklinge und versuche die Genetik als Mutterpflanze zu halten.
Likes
9
Share


@Hempcules
Follow
WEEK 8 (Day50-56)
Week No. 8 went quite smoothly.
One of the plants still has a slight deficiency due to the intense light, while the other has stretched way too aggressively. At one point, it was almost 15 cm taller than its neighbor, which I didn’t like at all. So, I took a rather bold approach. Using supercropping, I brought the plant back to approximately the same height as the others. I bent the shoots and stabilized them in the new position using plastic training clips and some tape. This was done just before the photos were taken, so they don’t look their best at the moment. However, I’m confident it will work out well.
Other than that, I haven’t changed much. The lighting remains at 24 hours, and I slightly increased the amount of fertilizer again.

Likes
7
Share


@Madman2020
Follow
28APR 4May
5day flush
Started Trim 1day before Chop
Didnt add co2 because i think it was to late to care
Trichimes were mostly amber at start of week. I started harvest to late
Week8

Likes
21
Share

@Diips
Follow
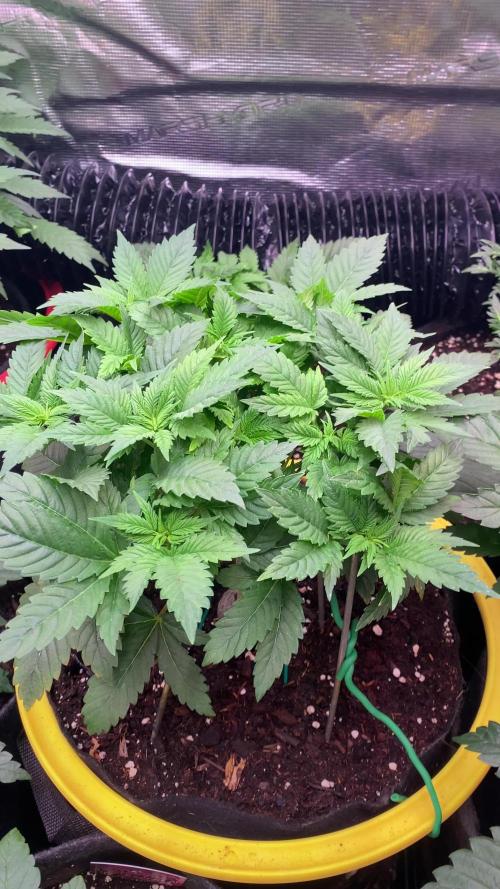
shes also is going to become very beautiful i think! nice lush color in the leaves and tops
shes so lush, reminds me of a rosen bush. shes gonna flower real good!

Likes
7
Share


@OwlGang_Uk
Follow
Week 4 - Sometimes You Got To Lose To Gain Phase 2 - I took off the fan leaves so that the plant would redirect its energy into the stem and branches rather than the leaves. I also cut of the top heads so that the energy would go into the development of the 2 heads below.
Likes
16
Share

@sanibelisl
Follow
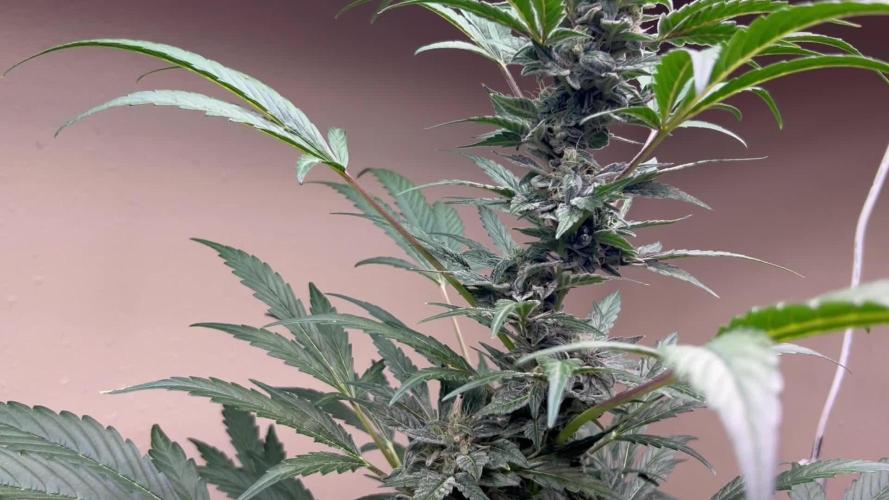
Well it been a week since the move indoors and she is just getting accustomed to the new surroundings. Things took a couple days pause and had no growth for the first few days but she seems to have finally started to fatten up her flowers again. She is drinking about a third less water than before but maybe that will pick up some more as well since her flowers are getting bigger. She is pretty sparse in terms of vegetation so will only remove leaves on a must need basis only. Watered her this morning and she received a low dose of calmag and bloom nutrients ( King Kola) by Emerald Harvest so should see an increase in flower size shortly. Have been increasing the duration of light each night and am currently at 18/6 have been toying with the idea of going to 20/4 and beyond to get the DLI up into flowering requirements. We are stuck at 450 PPFD so I don’t think I can her too many hours of light per day. I will be watering the other two girls later today with a update for them also.
Harvey Wallbanger. Miss Harvey is recovering well. Every day is better than yesterday and the past forty eight hours have been very good with her flowers starting to grow again. Trichomes and terpines have started to show up and she is going to be very sticky and have a pleasant sweet aroma. There are already fan leaves covered in trichomes and we have only just begun the process of flowering. She lost so much during the assault. She was going to be truly special. Maybe she will still be special we will see.
Vanilla Fizz. Ms. Fizz, alive and well. Had us scared for a while as she was slow to respond for a couple of days, no growth after her assault and subsequent relocation took its toll on her but happy to see things have turned around for her and now even doing better than expected. Prayers help. Flowers are growing and she has a certain perkiness to her that is inspiring after all that she’s been through. She is a bushy girl and removed a fair amount of foliage and will need to do some more later on some here some there. Trichomes and terpines arrive and are in abundance for both. Everything is covered in trichomes even fan leaves and smells like my Uncle John’s vanilla French toast and my Aunt Shelly’s Guava jelly, amazing!
*Update Day 68* 91 Grapes
She is doing well, blooming! Her flowers have decided to start growing and swelling in good ole Chem91 fashion, kind of just stacking up upon the flower below, and dense! Orange pistils have arrived and she is going to be pretty showing off an array of colors soon enough. With her being in flower mode and needing some extra energy decided to up the lights to 50 power despite my concerns for that being too high of power. We will see. I can always turn them back down if I see a problem. I hope to see a significant increase in flowering soon!
Vanilla Fizz. Ms. Fizz , we’re going to start calling her Ms. Fuzzy, she is so covered in trichomes! Bushy my goodness I have never had a plant with so much vegetation. I have seriously removed over a hundred leaves already and there will be more many more. But she is amazing in terms of smell, if you have ever smelled distant scent of a guava tree you would have an idea. Throw in just a little skunk and you nail it. She is going to be a sticky bitch to trim when the time comes.
Harvey Wallbanger. Miss Harvey, has the assault behind her now and the continuing rehab has proven to be beneficial. She had such perfect form and even after all the injuries she still shows off her balance. I picture her in a massive hotel lobby in a tropical destination in a corner where the elevators are. She was so perfect. Pinkish orange hairs now accompany her beauty as she displays the deepest of green fan leaves. Trichomes encapsulate the entire flower and she has a very floral scent. She seems to be the furthest along at the time. But we will see.

Likes
10
Share


@L1lium
Follow
Es ist soweit! Am Freitag habe ich die fünf Easy Buds nach knapp 11 1/2 Wochen abgeschnitten und geerntet.
Leider musste ich feststellen, dass eine Pflanze ziemlich stark befallen war. Ich vermute eine Milbenart oder möglicherweise Fliegeneier. Unterhalb der Blätter waren etliche dunkelgelbe und dunkelbraune Eier, die man auf den ersten Blick kaum erkennen konnte. Bei genauerem Hinsehen sieht man jedoch, dass sich der Befall auf die ganze Pflanze ausgeweitet hatte.
Glücklicherweise blieben die vier anderen Pflanzen verschont. Aus diesem Grund trockne ich die Pflanzen auch getrennt voneinander. Die befallene Pflanze wollte ich nicht direkt wegwerfen, sondern erstmal trocknen lassen. Im Nachhinein werde ich schauen, wie ich mögliche Schadensbegrenzung betreiben kann.
Die vier gesunden Pflanzen werden in einem geschlossenen Zelt in einem Trocknungsbeutel getrocknet.
Die befallene Pflanze habe ich in dem Folienzelt aufgehängt und mit einer Plane abgedeckt. Nach wenigen Tagen der Trocknung sieht soweit eigentlich alles gut aus. Die Eier scheinen nicht mehr zu schlüpfen, sondern fallen von der Blüte ab oder verschrumpeln zu Kompost. Ich hoffe, dass es dabei bleibt.
Der Geruch hat sich nach dem Abschneiden deutlich verändert. Schon nach der kurzen Trocknungszeit kann ich einen intensiveren Geruch feststellen, der sich noch nicht so richtig beschreiben lässt. Die Blüten waren stark mit den sogenannten "Sugar Leaves" verwachsen, weshalb ich sie grob getrimmt habe, um sie zum Trocknen aufzuhängen. Nachdem die Blüten vollständig getrocknet sind, werde ich die Buds noch einmal einzeln trimmen und durch meine Trimm-Maschine von Vevor jagen.
Der Ernteprozess hat zu zweit circa eine Stunde gedauert. Die Pflanzen waren zum Zeitpunkt der Ernte noch sehr gesund und kräftig. Die Verwurzelung war trotz des geschlossenen Topfes sehr gut.
Die schönste Bud hat definitiv die zentrale Pflanze, Greta, ergeben. Nass hätte ich den Bud auf mindestens 12 g geschätzt.
Ein Gesamtgewicht des nassen Pflanzenmaterials habe ich nicht ermittelt. Sobald alles trocken und fertig beschnitten ist, werde ich das Tagebuch um den trockenen Betrag ergänzen. Stand jetzt würde ich schätzen, dass der Ertrag aller Pflanzen bei circa 40-50 g liegt, was mich für meinen ersten Grow ziemlich zufrieden stellt, besonders in Anbetracht dieser wirklich sehr simplen Strain.
Mehr Infos und Fotos folgen in Kürze, wenn das Curing beginnt.
Bis bald! :)


Likes
6
Share


@griffy
Follow
week 8 in the books lemon is still swelling up but has slowed kinda thinking just packing on some weight now im hoping . Trichs are starting to get cloudy but alot still clear so going to wait until i see mostly cloudy and few amber and start a week or 2 flush on her depending on what her leaves are showing me . smells delish and stickyyyy . amnesia on the other hand is either just taking her sweet time to flower i beleive it say 9 week max to flower which im there or she reverted to a photo or something . If she still hasnt flowered by the time i harvest def gonna switch lights for a lil while and see if that can trigger her . Thats all for this week .
Likes
120
Share

@Hologram
Follow
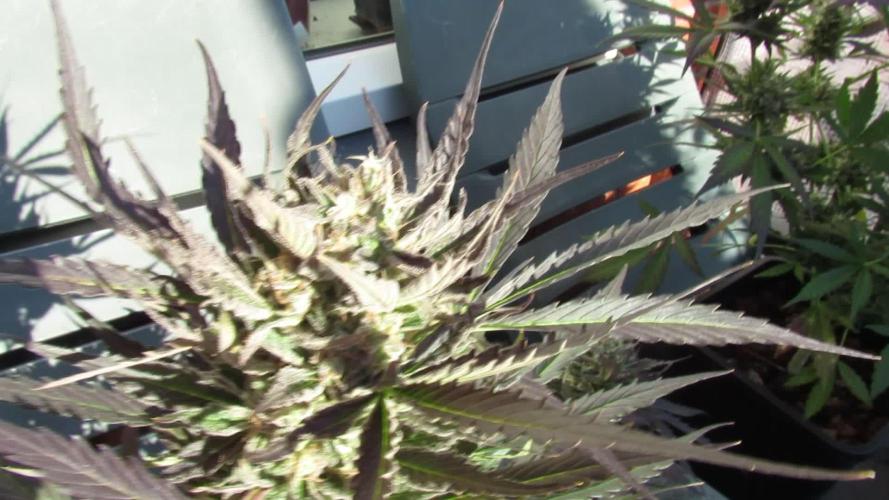
OK, im doing an update now becouse my breakup cake is going tranny!!(hermie)
I already have noiticed she was not growing as strong .. but u can blame that on anything , especially when growing outdoor..
but this morning i saw that she was g(r)oing 'bananas'!😢
I have put her aside from the rest (in the back of garden) but think gonna have to terminate her asap!..(and i will, right after this post👍)
The weed she will give will be filled with seeds and those seeds will be hermies too, so wothless..
and if i dont throw her away quick she can infect the rest.
So goodbye breakup cake..😢
who wants to eat a cake when they are breaking up anyway..😒 (just hiding my pain with lame humour 😳)
happy growing for all ✊

Processing
Likes
2
Share


@Little
Follow
Semana 3 de crecimiento y parece que todo va un poco mejor. Las plantas tenían demasiada luz porque los leds estaban a muy poca distancia,.
Creo que una de las plantas se llegó a quemar,¿Alguien lo puede confirmar? es la primera vez que lo veo. Aunque parece que poco a poco se va recuperando. Desde que las trasplanté sólo he regado un par de veces.
Ahora he aumentado la distancia de la luz y espero que crezcan más fuertes. A partir de ahora empezaré con Top Veg.
Por cierto! La AK que tenía el caparazón de la semilla pegado, ahí sigue. Y creo que es la que mejor va!
Saludos y buenos humos!