


Likes
Comments
Share


@BruWeed
Follow
🍀Estuvo bien en toda su etapa, no tuve ningún problema. Los resultados fueron muy buenos, se encuentra muy resinosa y con aroma a dulce.
🍀En total saque 143g de una sola planta.
🍀En total estuvo 105 días de vida desde su germinación.
🍀Recomiendo esta genética, por el momento son cocos Premium, ya quiero probarlo para saber que sabor tiene.
🍀Ahora se encuentra en etapa de secado, cuando ya estén para la etapa de curado subiré más imágenes.
🍀🇦🇷Podes seguirme en Instagram como @bruweed_arg🍀🇦🇷

Likes
34
Share


@Gorrilla420
Follow
Still getting abit attacked by slugs, got to go down tomorrow with some copper tape and slug pellets. Lost few inner nodes and the 2 tops 1 is lagging behind the other. But gave a big feed so hoping will help and once these slug deterrents down they won’t endure anymore stress.
That’s all this week. Happy growing🌱


Processing
Likes
9
Share


@russrahl
Follow
Flipped to flowering on these girls as the screens are now almost full across the 4x8 tent and we will still need to train them along the screens for the next 2-3 weeks. So working for a packed tent this time hopefully. Plants have been exploding in growth daily. Water was changed out and new water added with 3/4 Remo Flowering lineup and UC Roots at full strength. Smell is starting to get noticeable when you open the tent and is very pleasant.

Likes
10
Share


@BOMbolenath
Follow
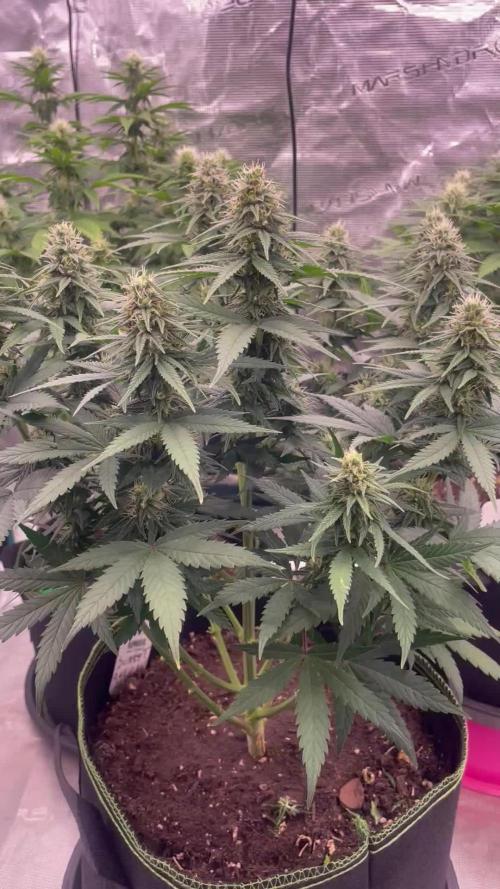
Flowers still growing, i will let one more week or so before harvest.
Giving water only.
Flowers are very dense like rocks.
Smell is amazing, like fresh sweet fruity gas :)




Likes
12
Share


@pigywigyswag
Follow
Wasn’t planning on updating this diary until after the cure, but why not. She was harvested on August 10, and placed into an empty grow tent at 60F & 55% RH. By August 17, the outer buds were dry enough, so I had used a wood moisture meter to measure the moisture content of the inner buds and they were ready to jar. I didn’t measure wet weight as I hung the entire plant whole and didn’t want to account for the weight of stems & fan leaves on the plant, but dry weight was 90.45 grams For my first grow, I don’t know if I did everything right… I will know by the end of cure, but so far I am more than content with the way she turned out. I have another Bourbon Berry Twenty20 outdoor grow I might post on here soon which is currently curing, & Chocolate Haze by RQS which is in week 2 of flower.

Likes
17
Share


@AlpineGoat
Follow
Quest'anno si comincia col botto! Come buon proposito dell'anno nuovo mi sono deciso a metter mano ad un vecchio cassone che c'è in casa mia (prima era una base per un acquario). Ora sarà tut'altro >:D
Dopo aver fatto una bella ricerca e raccolta di semi, averli testati e messi alla prova, mi sono finalmente convinto a fare questa benedetta veg box.
L'altro box era un 80x80x160, perfetto per la fioritura. Questo invece è un 60x100x80, un box più slim del mio e sdraiato, riesco a dividere lo spazio per tenere madre e cloni contemporaneamente :)
Per il momento sto ospitando alcune piante di un amico, piante che dovevano avere dimora in un comodo 120x120 ma che ora sono tutte stipate come sardine a casa mia per le prossime settimane. Mi sto prendendo cura di loro: mi assicuro che germoglino per bene (vedi la girl scout cookies e la runtz in serra), trapianto quando necessario, e mi occupo delle mie bambine personali, la banana sherbet e la critical 707. Piccola curiosità: quando mi ha portato le piantine, stavano tutte a 1 settimana di vita, alcune appena germinate, e ho notato che la bruce banner 3 ha prodotto un gemello! Due germogli da un seme! Sono riuscito a dividerli con successo e mi terrò il gemellino sfortunato per cercare di riportarlo in forze.
Al momento ci sono 10 piante in totale: 5 automatiche (tutte del mio amico) e 5(+1) femminizzate (3 mie ,2 del mio amico e 1 in fase di germinazione).
Vorrei provare a fare un clone di Monster Skittlez, visto che ha delle foglie particolarmente strane e arricciate (in inglese si dice "webbed" se non sbaglio)... indagherò!
Saluti a tutti dal caprone
Alpine Goat


Likes
21
Share


@chillshot03
Follow
This week they got their last feeding today by top dressing the medium working it in the top couple inches and getting thoroughly drenched with some calmag and fox farms kangaroots microbe liquid. Shouldn't have to do anything from here on out except water and admire the ladies.
Likes
18
Share


@berlinbeginner
Follow
SD2 has/had nutrient burn. I will water her till run off to lower the run off ppm

Likes
25
Share


@Kush_queen
Follow
Well my beautiful ladies are stacking on the buds and there are some really lovely buds on there the trichomes are starting to turn cloudy and there are a few Amber but they are not quite ready yet I check them religiously everyday to make sure I don't miss the optimal time to crop there are 2 I believe will be ready first so my plan is to start a 48 hour flush as soon as they give the the final sign
So excited to be able to see the finish line now going to decide what plants to do next this weekend.
Stay blessed 💚


Likes
21
Share


@DeeDeeKushner
Follow
Day 19 of flower, I went ahead and lollipoped both girls. This will be my last time defoliating that heavy. As the days go by, I will defoliating here and there. They’re growing strong and healthy as well. 51 days until I harvest. I can’t wait!
Catch yall on the next update ✌️🏾


Likes
Comments
Share



Likes
5
Share


@SEGA_Y_Griega
Follow
I like development at this stage😁
13.3.23 poured clean water 150ppm
light at 50%
Frosted Guava | Original Sensible Seeds
Frosted Guava ist eine atemberaubende Marihuana-Sorte, die eine große Menge fester, kompakter Blüten hervorbringt, die mit potenten THC-Trichomen übersät sind. Durch die Kombination von Guava und Frosted Skywalker lässt Sie die tiefe Indica-Sensation auf Wolke 7 schweben. Machen Sie sich bereit für den Start nach einem 9- bis 10-wöchigen Indoor-Blühzyklus. Diese mit Zucker überzogenen Knospen sind bereit für den Fang und was für eine Ernte sie mit rund 600 g bringen m2. Feminisierte Frosted Guava-Samen gedeihen auch im Freien, werden Anfang Mitte Oktober fertig und ernten etwa 700 g plus pro Pflanze. Mit einem exotischen Terpenprofil aus Caryophyllen, Limonen und Pinen ist die Beute von Frosted Guava eine Kombination aus süßen, fruchtigen Aromen mit Tönen von sauren Erdbeeren und Grapefruit, aber machen Sie sich bereit, die Potenz ist belebend und bereiten Sie sich darauf vor, mit vollständiger Entspannung von Körper und Geist entrückt zu werden .
Alle schriftlichen und visuellen Materialien sind nur für Informations- und Bildungszwecke bestimmt.
this week I decided to install a large tent Mars Hydro 120•120, for one and a lamp with a large coverage FC E4800. I set up the climate control, now the temperature is around 24, I installed two fans to blow the Secret Jardin monkey fan 20w, I wanted to buy them for a long time. The heater also works! Hope it warms up soon 😅

Processing
Likes
12
Share


@GrowGuy97
Follow
Have seen a lot of good diary’s on these had to get some for myself to see how it goes! Hopefully we get some super purple buds! Stay tuned & happy growing friends!🤙🏼✌️🏼🌱
Day 1 - Finally got them planted & water with fox farm big bloom (6tsp per gal)
Day 2 - all 5 have sprouted & doing great!
Day 3 - 2 out of 5 seeds have fallen off but they are all still growing & looking good! Watered them a little more this morning👍🏼
Day 4 - Looking great🙏🏼
Day 5 - Grow babies Grow!!
Day 6 - Plain PH water 6.4

Likes
9
Share


@AlekZombie
Follow
Hey sry the delay, this tuesday started the 5th week
Watering:
07/7: 1l with 0.5ml bacteria/mycorrhizae each + 1 ml bio boost/flores
CO2:
Reaktor is using their phase 2 which it supose to give us 800 ppm


Likes
18
Share


@xtchill
Follow
Oh my god.
Apart from the yellowing they are looking fire.
Lovely dense buds and smells insane.
Loving how formed they are only doing a 7 week veg from seed.
Probs my best looking plants so far but don't think I'm going to yield massive.
Quality over quantity tho.
