Processing
Likes
Comments
Share
Likes
8
Share
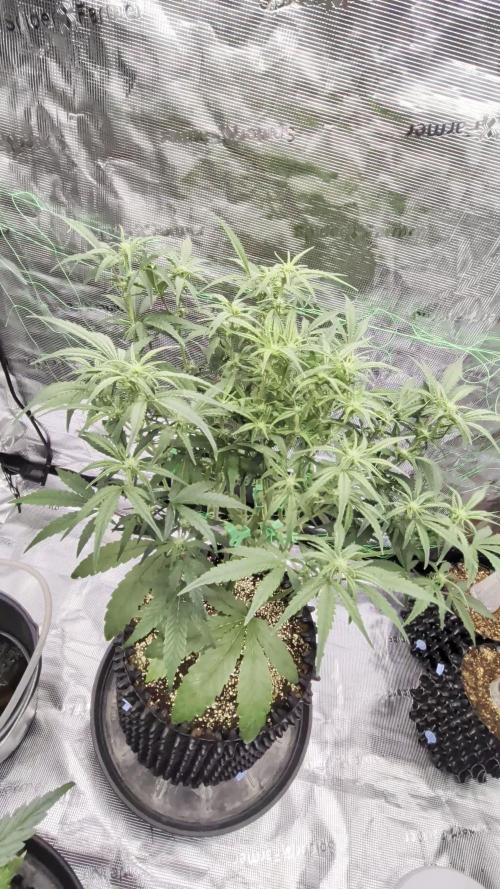
20/04/2023 I neglected the girls this week, I've been lazy but they did ok without attention. Watered today since two girls were droppy, 0.8L per pot with Bioenhancer and Biobizz line.
Likes
19
Share
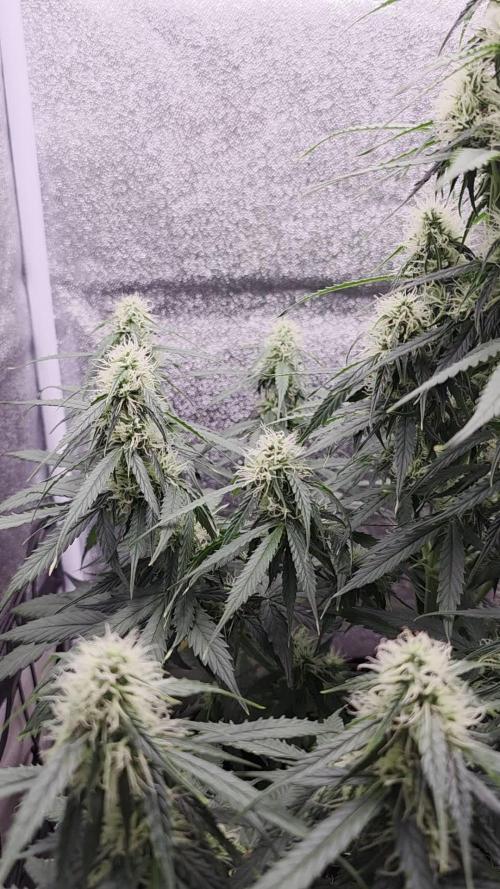
Undicesima settimana.siamo arrivati quasi al traguardo.la vendemmia si prepara... .il profumo invade tutta la mia stanza.. delizioso,😂😉🤣🤤🤤🕉️
Likes
155
Share
@deFharo
Follow
Bienvenidos cultivadores de marihuana clandestinos y también a los que tienen la fortuna de no serlo!🖐️👨‍🌾👍 Este es un diario semanal de técnicas de cultivo y Bio preparados orgánicos caseros, los cuales llevo experimentando dos años en cultivos de marihuana interior. Esta semana dos en uno: 1) ELABORACIÓN DE AUXINAS EN POLVO EXTRAIDAS DE ALUBIAS NEGRAS GERMINADAS. La primera vez que hice este preparado y lo publiqué en GD fue en Octubre de 2019, lo volví a hacer en Junio de 2020 y llevo dos años usándolo, me ha costado el precio de 2kg de alubias negras. INGREDIENTES: - 1kg de alubias o frijoles negros, porque son las semillas que más concentración de auxinas contienen, comparándolas por ejemplo, con lentejas o cualquier otro tipo de leguminosas, también se puede usar granos de maíz. Preferentemente, se deben usar semillas de alubias nuevas y cultivadas cerca de tu zona. - Agua pura. PROCEDIMIENTO: - Se cubren las alubias con agua y se dejan a remojo durante una noche. - Al día siguiente se separa el agua. Esta agua la puedes usar para riegos, contienen varios minerales. - Se mantiene la humedad en el recipiente de las alubias por unos días, hasta que germinen. Se pueden cubrir con un paño húmedo y compensar la perdida de humedad rociando agua. Se debe observar que la mayoría de las semillas hayan germinado. - Cuando las alubias, en su mayoría estén germinadas, se añade unos dos litros agua pura y se bate todo. - Ahora filtramos con malla y escurrimos los restos sólidos. (Reservamos esta materia para un segundo lavado) - Dejamos reposar el líquido durante dos días, hasta que se vea acumulación de materia en el fondo. - Retirar la mayor cantidad posible de agua clara. - Dejar al sol cubierto con una malla, hasta la completa deshidratación del producto. - Moler y guardar en un sitio seco y oscuro, en estas condiciones puede ser efectivo durante años. -- A los residuos sólidos recuperados del primer filtrado, les añado agua, los bato y los filtro con doble malla, lo embotello y guardo en el frigorífico (no más de 15 días, pues fermenta), lo uso para mezclas de riego. Los residuos finales se aprovechan, para aquellos que tengan tierra en exterior o hagan compost. QUE SON LAS AUXINAS Y USOS: - Las auxinas son un grupo de hormonas vegetales naturales, que regulan varios aspectos del desarrollo y crecimiento de las plantas, en la marihuana sobre todo en el periodo de crecimiento vegetativo y en el comienzo de la floración, después no hacen falta. - Uno de los aspecto más característicos es el efecto que causan en el desarrollo del crecimiento radicular, promoviendo sobre todo la formación de raíces secundarias y adventicias gracias a la estimulación celular que provocan las hormonas. - Otro aspecto de las auxinas es que distribuye su energía principalmente al ápice primario, reprimiendo el desarrollo de las ramas laterales, lo que provoca dominancia apical, pero esto es en el caso de plantas de marihuana sin corte apical y donde se quiere conseguir un cogollo principal monstruoso, su uso puede dar muy buenos resultados en cultivos SOG... pero ¿Qué pasa si hacemos un corte apical para promover el crecimiento de ramas laterales y que por ende, de buenos cogollos en cada una de ellas? Cuando se hace un corte apical al ápice principal las hormonas se reorganizan por la planta, ahora para mandar energía a todas las ramas y sus ápices, promoviendo el crecimiento!.. es un buen momento, después de un corte apical, aplicar auxinas para potenciar el proceso. - Finalmente os dejo un gráfico de la actuación de las auxinas en las diferentes etapas de un cultivo, también se ve la importante relación con otras hormonas (Citoquininas o Ácido Giberélico) y los nutrientes claves que no deben faltar para finalizar todo el proceso hormonal. Las Citoquininas y el ácido Giberélico naturales se encuentra en el agua de coco, y es muy interesante conocer como actúan, en la quinta semana de este diario hablo sobre las propiedades del agua de coco. Bien, una vez dicho lo anterior, yo uso las auxinas en polvo de las siguientes formas. - Como mezcla del sustrato donde germino las semillas y donde mantengo las plántulas hasta el trasplante a la maceta definitiva, para potenciar el enraizamiento. - Por la misma razón, lo espolvoreo sobre el cepellón de raíces de la plántula, en el momento del trasplante a la maceta final. - Lo uso como enraizante de esquejes, impregnando el tallo de polvo antes de enterrarlo. - 10 días después de realizar el producto, todavía tenía en la nevera un litro de auxinas líquidas, provenientes del segundo lavado de los restos de las alubias molidas... y entonces pensé que sería buena idea incorporarlo a un fermentado, y de aquí vienen esta segunda parte... 2) LACTO FERMENTO DE AUXINAS ENRIQUECIDO CON NUTRIENTES Y MINERALES En esta ocasión, para la fermentación anaeróbica, elegí hacerlo con suero de leche como base de microorganismos (Ácido láctico, Bacterias Acidolácticas BAL y Lactobacillus) que harán el trabajo de solubilizar los nutrientes y quelatar los minerales, es un preparado muy eficiente para riegos y aplicaciones foliares, en este caso lo hice enriquecido, mezclando diversos materiales orgánicos con otros minerales. Puedes ver la lista arriba. Sobre esto tengo que decir que después de dos años haciendo diferentes lacto fermentos, ahora los hago más específicos, sin mezclar tantos nutrientes, por ejemplo, si quiero solubilizar guanos, harina de huesos o algas, lo que hago es crear un lacto fermento con cada uno de ellos, en el caso de lacto fermentos con minerales, sigo preparándolo mezclando varios, este preparado es muy eficiente en quelatar minerales, y sobre todo en solubilizar fósforo. PROCEDIMIENTO: A veces consigo suero de oveja de un vecino que hace quesos, a veces hago suero de leche cruda de vaca y cuando no tengo ninguna de estas fuentes, hago suero a partir de leche pasteurizada, como el caso de este. - Mezclo el suero (1l) con la melaza y la miel, lo caliento a unos 30°C. - Peso los ingredientes. Como regla general, en el caso de componentes orgánicos usar del 8 al 10% como máximo, respecto a la cantidad de líquido. En el caso de minerales del 4 al 5%. - Añado la levadura al suero con la melaza y la miel. - Añado los componentes secos al barril. - Añado el suero con la melaza y la levadura al barril y agito. - Añado el litro de auxinas líquidas y agito bien. - Lo cierro hermético con válvula de gases. - Guardo el barril a oscuras al menos durante 30 días, pero cuanto más tiempo lo mantengas cerrado antes de abrirlo por primera vez el resultado será mejor. La fermentación comienza violentamente a los pocos minutos dura varios días así y después se hace más lenta. USOS: Este es un preparado que uso como complemento a las auxinas en polvo, lo uso para hacer riegos o aplicaciones foliares de disponibilidad inmediata. - Hago aplicaciones foliares en plántulas, en las primeras semanas de vida. - Lo uso al comienzo de la etapa de crecimiento vegetativo en conjunto con agua de coco. - Riego con este preparado después de hacer cortes apicales. - Lo vuelvo a usar en riego en conjunto con el agua de coco al comienzo de la floración, y esta es la última vez que lo uso en un cultivo. Una señal inequívoca de la actuación de las hormonas, es que las plantas son más susceptibles al fototropismo, esto se traduce en una respuesta mayor a la incidencia lumínica, las plantas, sus hojas y brotes se inclinan y se dirigen hacia la mayor fuente de luz. Yo lo he visto muchas veces después de aplicar auxinas. y esto es todo por hoy... 😅 Hasta la próxima semana... GRACIAS POR ESTAR AHÍ, CULTIVADORES!!🖐️👨‍🌾💧💦🌞💡 =================================
Likes
17
Share
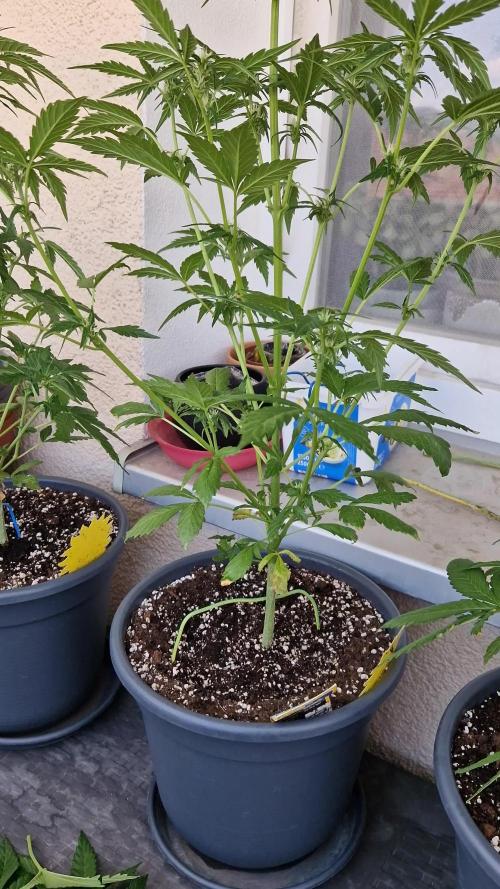
Que pasa familia, vamos con la séptima semana de floración de estas Gomu Gomu Mango feminizadas de HighBreed. Vamos al lío ,se colocaron en macetas de 7 litros definitivamente. El ph se controla en 6.0 , la temperatura la tenemos entre 24/20 grados y la humedad ronda el 50%. El ciclo de Floración puse 12 horas de luz, el foco está al 100% de potencia. De momento va creciendo, tiene buen color, van progresando y engordando guay,ya van desprendiendo aromas dulces. Comentar que superaron el estrés hídrico porque subí par de grados por la noche y va volvió a comer normal . Gracias a Agrobeta por el kit para la temporada, unos jefes, siempre apoyando 💪. - os dejo por aquí un CÓDIGO: Eldruida Descuento para la tienda de MARS HYDRO. https://www.mars-hydro.com Hasta aquí todo, Buenos humos 💨💨💨
Likes
Comments
Share
I made this week's feed to reach around 550 to which was a big jump from 250 ppm. This was my usual start out but once I saw the information on the Royal Queen Seeds Website I decided to up my juice! Check out my Instagram page for more of my home grow! @Canha_patch🌿🌿🌿
Processing
Likes
32
Share
@Dunk_Junk
Follow
So she only grew 3cm in vertical height this week. But look at all the side branches she's pushed out!!! The girl's doing well 😍
Likes
29
Share
@Smokwiri
Follow
Welcome to week 5 of my Runtz gum diary by Original sensible seeds. Switching to 12/12 today, cant wait to see the first signs of flowering... Viparspectra discount: Amazon: http://url-9.cn/0y9i Amazon US: https://amzn.to/3e0P2bk Amazon CA: https://amzn.to/3bTnEJC Amazon discount Code: it10smokwiri XS1000 10% XSsmokwiri XS1500 8% it20smokwiri XS2000 5% it40smokwiri XS4000 5% ViparSpectra 8% DISCOUNT CODE on the viparspectra websites (.com/.eu) RUFFSELEKTAH
Likes
6
Share
Week 1 24 hours ethos popped and began to stretch Temp 76 humidity domes on top 5 of 5 out going directly into pots and 24 hour lighting on day 3! gonna run 24/7 for 30 then switch over hopefully. Nothing added but FishShit and rootdrench to pop
Likes
1
Share
Added Buddy into the feed halfway through this week. Really impressed with these nutrients so far. All plants look happy, healthy and green.
Likes
12
Share
@Shinobi
Follow
Máme tu dosť silné búrky so silným vetrom.rastlina 1 dostala zabrať.jeden konár spadnutý na zemi,ale nebol zlomený.použil som pletivo ako podporu.stále vyzerajú ok.dnes posledné kŕmenie .držte im palce.mier
Likes
52
Share
Hey guys . A wonderful week goes by with a super growth :-). After I topped it for the first time last week, it recovered very quickly and showed great growth. I don't think I will use topping again on the lady because I should slowly blossom with a few other women :-) think it will be ready in the next 7-14 days for Flowering 👍. This week it was poured 3 times with 1 l each time (for nutrients, see table above). The tent was cleaned and the health of all women was checked :-). After the photos she was sprayed again with neem oil so that the last little tripse disappeared. Even if you can't see any more trips I will spray it one last time next week to make sure :-). I wish you all a happy new year 2022 ☺️. Stay healthy 🙏🏻 👇🏼👇🏼👇🏼👇🏼👇🏼👇🏼👇🏼👇🏼👇🏼👇🏼👇🏼👇🏼 You can buy this Nutrients at : https://greenbuzzliquids.com/en/shop/ With the discount code: Made_in_Germany you get a discount of 15% on all products from an order value of 100 euros. 👇🏼👇🏼👇🏼👇🏼👇🏼👇🏼👇🏼👇🏼👇🏼👇🏼👇🏼👇🏼 You can buy this strain at : https://www.ripperseeds.com/en/feminized/kmintz-feminized-cannabis-seeds Water 💧 💧💧 Osmosis water mixed with normal water (24 hours stale that the chlorine evaporates) to 0.2 EC. Add Cal / Mag to 0.4 Ec Ph with Organic Ph - to 5.8 - 6.4 MadeInGermany
Likes
4
Share
@Rizza78
Follow
Week 4 for the majority in the veg tent. Orange creampop had a rough go with the happy frog soil. Almost lost her but transplanted and she is taking off. Just topped her on 3/30.
Likes
59
Share
@BnV405
Follow
Great I did have to pull seed cap off from seedling. I usually don't have to. I planted it directly in soil. Happy growing everyone!
Likes
22
Share
Welcome to Harvest in Flower Week 9-10 of Divine Seeds Auto Black Op1um I'm excited to share my grow journey with you all as part of the Divine Seeds Autoflowering Competition 2025. It's going to be an incredible ride, full of learning, growing, and connecting with fellow growers from all around the world! For this competition, I’ve chosen the Feminized Automatic strain: Auto Black Op1um Here’s what I’m working with: • 🌱 Tent: 120x60x80 • 🧑‍🌾 Breeder Company: Divine Seeds • 💧 Humidity Range: 50 • ⏳ Flowering Time: 8W-10W • Strain Info: 25%THC • 🌡️ Temperature: 26 • 🍵 Pot Size: 0.5l • Nutrient Brand: Narcos • ⚡ Lights : 200W x 2 A huge thank you to Divine Seeds for allowing me to be a part of this amazing competition and Sponsoring the Strains. Big thanks for supporting the grower community worldwide! Your genetics and passion speak for themselves! I would truly appreciate every bit of feedback, help, questions, or discussions – and of course, your likes and interactions mean the world to me as I try to stand out in this exciting competition! Let’s grow together – and don’t forget to stop by again to see the latest updates! Happy growing! Stay lifted and stay curious! Peace & Buds!
Likes
23
Share
~ FASTBUDS TRAINWRECK AUTOFLOWER~ ~FastBuds Trainwreck Auto~ Quick Service!-High Route! -Hit you like a freight train. -A potent high that will leave you feeling good all day long. -Super yields. This strain grows up to 120cm and yields 550gr/m2 in just 63 days! -Perfectly balanced. Especially bred to develop the best of Indica and Sativa traits. -Suited for everyone. Top-quality buds without much maintenance or extra attention. -The good old days. An upgraded fast flowering version of the classic, bred to perfection. __________________________________________________________________________________________________________________________________________________________________________________________________________________________________________________________________________________________________________________________________________________________________________________________________________________________________________________ STRAIN DESCRIPTION: -A fast flowering hybrid variety suited for all types of growers, it’s an easy-to-grow strain that takes 9 weeks from seed to harvest, growing up to 120cm and yielding 550gr/m2 without needing much maintenance or extra effort. Expect hard-hitting nugs that will catch everyone’s attention due to the sweet pine-sol terpenes that stink out the whole room as soon as you light up the joint; This variety will be among your favorites once you experience the exceptional effects that may not seem too potent at first but slowly creeps up on you and get you high as a kite for hours. -Bud description: Trainwreck Auto’s buds grow quite thick, with plenty bright yellowish-orange hairs that wrap around the medium-sized calyxes, complementing the light-green nugs beautifully. Expect extremely dense buds that grow stacked and end up looking like one giant nug in each branch. You’ll be amazed by the trichome production, the sugar-dipped nugs with some colorful leaves coming out of them will leave your fingers full of resin and, as soon as you start grinding them, overwhelm you with a pungent lemony pine-sol with a touch of sourness and a spicy background. -Smoke report: After a couple of hits, you will experience a really cozy and stimulating head high that will get you in a comfortable state of mind and feeling good with everything and everyone; The long-lasting uplifting effect promotes a very calm and centered state of mind with a relaxed edge at first. The motivating effect will gradually transform into a more Indica-like high that deeply relaxes your muscles and relieves pain without leaving you too sedated, an ideal choice for those who want to stay alert during the morning and need to relax when the workday ends. -Plant appearance: Growing on the taller side, this autoflower can reach up to 120cm while growing quite compact and bushy, you’ll see lots of dark-green fan leaves coming out of everywhere and a couple of side branches that can grow as tall as the main cola. Thanks to its Sativa heritage, this variety yields as much as it grows; Expect yields ranging from 350-500gr/m2, making it an ideal choice for all types of growers who are looking for a low-maintenance and fast flowering version of the classic. *The above Strain Information/Description courtesy of FastBuds ____________________________________________________________________________________________________________________________________________________________________________________________________________________________________________________________________________________________________________________________________________________________________________________________________________________________________________________ MY SETUP: Planted into Jiffy Peat Pellet that was hydrated with de-chlorinated water with SuperThrive added then ph'd to 6.0 @ 80℉ where it took 3 days for her to break ground. Grown 100% organic in 4g fabric pot by Gronest filled with Mother Earth 70/30 Coco/Perlite medium amended with (my 'Secret Recipe): 2tbs/g of Down To Earth 4-4-4 / 2 cups/g of Earthworm Castings / 1tbs/g of Dr. Earth Flower Girl 3-9-4, 1tbs/g of Dr. Earth Bat Guano, 3/4 cup of Down To Earth Azomite and 1 tsp/g Down To Earth Fish Bone Meal. 24hr light cycle during Germination, 19/5 light cycle for the remainder of the run under UnitFarm's UF-4000 and UFS3000 LED's which I have to say just blew me away with the results they gave!!! If you're on a budget and want a light that is about as low profile and cool running as they get you really need to check out UnitFarms lights. Believe me... I run a pair of HLG 650R's and a HLG 225 in my 4x8 so I'm no stranger to 'high end' lights but lemme tell ya, these two UnitFarm lights absolutely blowup my 4x4 and don't overheat the tent! She received straight water ph'd @ 6.2-6.8 when needed and weekly Compost Tea's for the entire grow which is one of the beauty's of growing 100% organic, you establish a microbial colony in your medium, then feed the microbes every 3-4 weeks keeping them fat and happy... They, in turn, through their life processes take care of feeding the plant. Pretty freaking cool if I may say so, and there's no simpler way to grow IMHO 😎: 1: This Trainwreck's structure was perfect and didn't require me to top her, only requiring minimal LST and tucking shade leaves that were blocking light penetration. She grew fairly tall to 31" with wide node spacing allowing for excellent light penetration making her a growers dream, low maintenance, extremely tolerant of temperatures and disease/pests ) and a healthy yield of some epic super dense GASSY buds glistening with trichomes... What more could you ask for? 😍💖 All in all, this strain has made it's way onto my 'list' and you'll be seeing it run again by me for sure as she's a hard one to stay away from! I highly recommend this one... Go grab some and put a huge smile on your face too! 😁: 1:💚
Likes
25
Share
Likes
8
Share
@Max1973
Follow
Day 35 - few pics and vids..... everything going along nicely 👍 This is a pretty big update, so i'll add to it over the next few days, as i finish building it all.... i'm building these 2 x SS haze, the full tent, just finishing up the setup..... trimming them, changing solutions to 12/12 and flower..... changed the exhaust fan and filter setup to the better outside the tent method.... and installed 12v CPU computer fan, lol ("alta9" fits in 4in ducting perfectly), drops wattage on extractor fan.... 10w tops... got a few kg of active carbon and making/replacing the carbon filter .... i'll add afew vids of the new setup in afew days... Day 36 - few pics/vid of new tent setup...... "alta 9" fan :) post tomorrow after i finish trimmin and settin up night mode etc...... and into tomorrow we go, lol ... Day 37.... slowly getting there..... little bit more to go... this should make things abit more interesting..... right tank (short babie) has : 19 lts of tap water @18oC + 150 ml -dutch master one gold FLOWER.... 6.4 PH - 1400 PPM left tank has : 19 lts of tap water @18oC + 50 ml of elements a and 50ml of b and 10 ml of nitro and 20ml of Crystalic (molasses/pot) .... 6.5 PH - 1200 PPM more pics / vids of the finished tent setup.... roots, transfer, etc... Day 37 is alot of vids of the clean and change to flower..... edit - day after build noticed left tank (nutrifield) not enough bubbles..... pulled out the 4 air pump and swapped to the 2 x original oxipumps... much better, also to fix the problem with ph goin high, and bubbles not stirin the mix, was to add another 10ml of crystallic and another 5ml of nitro... then pumped both tanks with ph down and set em to 5.8-6.2 - both plants have fully recovered from the big trim, and bounced back within 12-24hrs, post pics/vid in abit..... Day 39 - made a freaky video... was curious about what the plants would see looking up at the lights... the lights and buzzing of air compressors and bubbling tank water, and dazzling lights turned out pretty cool in vid editor, was in selfie mode.... and final vid of the bounceback from trim :) 👍😎