Likes
Comments
Share
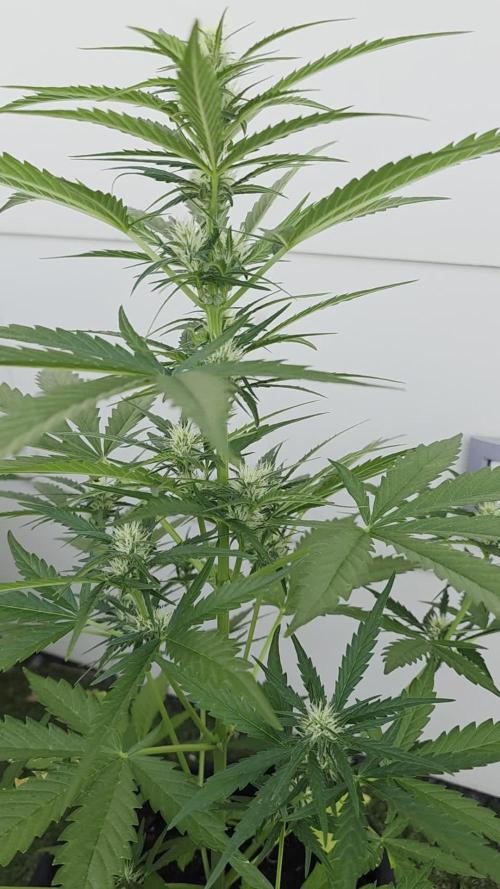
A great week of growth and development. Did a small defoliation, and clean of the tent. The girls are very leafy, and some of that needed to go to increase air flow and prevent issues from developing. Love this time of growing as there is not much to do, but watch the buds stack! Happy Gardening 👊❤️🇨🇦
Likes
24
Share
@nonick123
Follow
Día 9 (10/06) N/A Día 10 (11/06) N/A Día 11 (12/06) Llueve mucho. Humedad alta por aquí. Eso les favorece Día 12 (13/06) Se empiezan a desarrollar las hojas verdaderas a una buena velocidad! Todo en marcha! 💨 Día 13 (14/06) Riego ligero 100 ml sólo H20 EC 0,5 en previsión del trasplante en el día 15 de la planta Día 14 (15/06) Se nota que estamos en el día 14 desde germinación y la mayoría de las plántulas van viento en popa! Día 15 (16/06) Hoy procedemos a trasplantar a las chicas a su maceta intermedia de 6,5 litros Se prepara con 5,5 Litros (85%) de sustrato PRO-MIX HP BACILLUS+MYCORRHIZAE + 1 Litro de Insect Frass (15%) + 65 gramos de Earth Vibes Super Soil (10 g/L substrato) Se llena la maceta de sustrato con las manos (limpias) y rompiendo los trozos más gruesos, para que el sustrato esté aireado y esponjoso, sin presionar Se coloca una maceta vacía de 1L para que quede la forma perfecta de la maceta donde están las plántulas (ver fotos) Se espolvorea la parte proporcional de la probeta de microorganismos sobre el agujero de trasplante Se saca la plántula de su maceta actual (bonitas raíces 😍) y se coloca en la maceta final Se riega muy lentamente hasta percolación profunda con H2O EC 0,5 pH 6,5 Se coloca mulch (acolchado) de paja para evitar traspiración excesiva y cuidar a los microorganismos del suelo A ver como reacciona al trasplante! 💦Nutrients by Lurpe Solutions - www.lurpenaturalsolutions.com 🌱Substrate PRO-MIX HP BACILLUS + MYCORRHIZAE - www.pthorticulture.com/en/products/pro-mix-hp-biostimulant-plus-mycorrhizae
Likes
48
Share
@Rit031
Follow
You should try this one. I will update when she dry.
Likes
13
Share
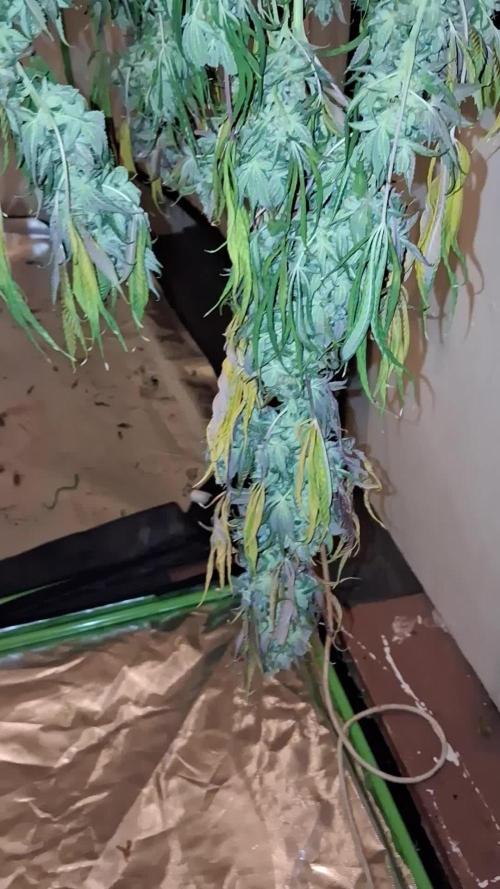
Unfortunately I had to harvest early due to personal reasons. I am proud of my harvest though. The buds could have gone another week but that’s fine. The trichomes were to my liking. They’ve been drying for about 5 days now. All in all it was a pretty easy grow, just water every couple days and top dress every 3 to 4 weeks. I did make some very potent canabutter from the trim 😋
Likes
11
Share
Likes
39
Share
Se aplicó una defoliación a todas las hojas amarillas y bajas que aún quedaban para ir limpiando un poco lo que no traerá frutos. Seguimos, cada vez queda menos 👽
Likes
17
Share
Welcome to Flower Week 5 of SuperStrains OreoZ I'm excited to share my grow journey with you from my SuperStrains Project . It's going to be an incredible ride, full of learning, growing, and connecting with fellow growers from all around the world! For this Project , I’ve chosen the Feminized Photo Strain OreoZ: Here’s what I’m working with: • 🌱 Tent: 225x150x150 • 🧑‍🌾 Breeder Company: SuperStrains • 💧 Humidity Range: 50 • ⏳ Flowering Time: 8-9 Weeks • Strain Info: 22%THC • 🌡️ Temperature: 26 • 🍵 Pot Size: 20 • Nutrient Brand: Hy-Pro • ⚡ Lights : 600W x 2 A huge thank you to SuperStrains for allowing me to try my Best with this amazing collection from Photo Strains they managed to Sponsore side by side with theyre Hy-Pro Nutriets . Big thanks for supporting the grower community worldwide! Your genetics and passion speak for themselves! I would truly appreciate every bit of feedback, help, questions, or discussions – and of course, your likes and interactions mean the world to me as I try to stand out in this exciting competition! Let’s grow together – and don’t forget to stop by again to see the latest updates! Happy growing! Stay lifted and stay curious! Peace & Buds!
Likes
8
Share
Days 99 - 105 (from sprout) 8/30/24 - 9/5/24 Raised light above canopy of The Good Shit - PAR on main tops is 800-700+ while remaining lowers are seeing closer to 450-500 Loompa's Headband x TK fading to a close this week - trichome check starting to show amber on the bracts Sweet 16 S1 now starting senescence and a little fading on some fan leaves The Good Shit showed signs of some overwatering, so a newly made FPE was added to feed schedule to assist the microbiology Light schedule lowered to 10 hrs this week IPM: Applied enzymes (tweetmint) at a rate of 0.5 fl oz to 1/2 gallon and sprayed on cover crops + mulch throughout the week. Significant decrease in pest population, now needs a high quality compost top dressing for long term correction
Likes
7
Share
A friend of mine was at my house today, and as soon as he saw this plant, he spent half an hour saying, "I can't believe it's an autoflowering," and I explained, "Don't worry, buddy, it's Karen Kush Automatic, a monster from Zamnesia." He insisted for a bit, but then he caved when I showed him what can happen with Zamnesia seeds if you work hard and are open to using quality fertilizers and additives like those from Plagron. To me (and my friend who only grows dwarf plants, he basically told me when he grows autoflowering plants) these seem to greatly stimulate the plant's metabolism, resulting in more flowers. It's not a market legend, but it really is like their slogan #growlegendary. The main cola is magnificent, standing out at the top in the characteristic indica shape where the main cola grows much higher than the side colas, which therefore need to be carefully trimmed at the bottom to avoid producing fake flowers. We're a week behind the others, and I thank God and all the saints for having planted this seed. It's very tall, but so is the other one, showing great stability in the strain. It smells really pleasant! Techniques chosen - Here the plant grew straight, only with careful trimming at the bottom, just like mom did, and as usual with autoflowering strains, nature chose the best method. We are 100% organic and 1000% Plagron, as always. The soil we chose is the recently launched Plagron Bio LightMix, which will allow us to start growing more smoothly and reliably, without the sudden changes that liquid fertilizers can cause. A week is enough, so don't overdo it. We're in the final flowering stage and things are starting to get serious, so let's add our legendary bloom stimulator and get started with Bloom. - Pure Zym 1 ml/l - Silic Rock 1 ml/l - CalMag Pro 1 ml/l - Sugar Royal 1 ml/l - Power Buds 1 ml/l - Alga Bloom 0 ml/l (Too much dark juice additives to boost buds) - Green Sensation 1 ml/l Ready to flush, started on the day of the photos, but last week she was fed only additives to give the flowers a final boost. Choose your preferred style and calculate your results on the website: www.plagron.com Take a look at the new growshop section with everything you need for cultivation. Z - https://www.zamnesia.io/it/531-growshop A very good strain, it will grow tall and with wide internodal spacing, making it ideal for LST but also stunning when grown upright. Z - https://www.zamnesia.io/it/10783-zamnesia-seeds-karen-kush-auto.html Z - Zamnesia Seeds - There's no need to complain about this strain: Karen Kush Auto will satisfy even the most demanding smokers with its dense flowers, fragrant terpenes, and high THC content. Created by crossing Monster Bud Kush, White Widow, and ruderalis, Karen Kush Auto boasts first-class genetics that leave no room for complaint. Inhale its sweet aroma of spices and diesel and enjoy the physical buzz that envelops you. After a few minutes, the only thing you'll want is a comfortable place to relax. And best of all, you won't find this strain anywhere else, as it was created by the geneticists at Zamnesia Seeds. Karen Kush Auto is slightly indica-dominant, which manifests itself in its bushy structure, resilience, and moderate height. Despite its name, Karen Kush Auto is anything but demanding. It only requires good soil, regular watering, and fertilizer to fuel its vigorous vegetative growth. When it transitions to the flowering stage, it will stretch to a final height of around 70–90cm, depending on the space available. If you like what you've read about growing Karen Kush Auto, wait until you smoke it. This 60% indica strain produces dense flowers loaded with resin and vibrant terpenes that evoke aromas of sweet citrus, black pepper, and diesel. The floral notes create the perfect backdrop for the pungent diesel scent. And after smoking, sit back and let the waves of euphoria and heavy physical intoxication glue you to the couch with a big smile and slitted eyes; it's perfect for evening use or weekend relaxation! You know it, but I recommend it. Here you'll find many beautiful things, essentially "all the best nature has to offer." Z - www.zamnesia.com Music // www.radionula.com + Feng Shui music + Frequency 432t
Likes
8
Share
@Hawkbo
Follow
They all doin pretty good, leaves are a little too yellow for my liking at this point I should have added some grow to the mix but they will be fine I think. This one is another one of the shorter ones with fat buds. It has a huge main cola and is maturing at a more rapid clip than everything else except the purple one. REMEMBER , IF YOUR SHOPPING FOR GEAR YOU CAN USE THE CODE “BANGDANG” FOR 10% OFF YOUR ENTIRE PURCHASE FROM ANY OF THE FOLLOWING COMPANIES. @greenbuzzliquids @rainscience_growbags @gorilla_grow_tent @growlightscience.led NEW* @Rocbudinc Seeds on his website * *****Gorilla grow tent discounts extend to all companies affiliated with grow strong industries which include..***** @super.closet Lotus Nutrients Kind LED grow lights
Likes
8
Share
@FarmerT
Follow
Both front lsd25 autos are growing good the back left big bud auto is doing great and the cherry cola on the back right is slow but showing signs of growth(4 days behind others)
Likes
5
Share
@Lazuli
Follow
I grew in cold , the max temperature was 20 celcius day and 14 at night.
Processing
Likes
6
Share
@Moss420
Follow
Added the first screen into the tent. Decided to kick Big Mumma out because she just wasn't growing any taller and the other plants were really over growing her. For the new setup I used kitty litter trays and mesh to sit the plants on - each plant gets its own tray so I can track runoff EC individually and I cut little flaps in the mesh so I can wet vac the runoff. With this setup I shouldn't need to move the plants out of the tent until harvest. For the scrog I just tied some builders rope around the poles of the tent and tied the trellis netting off with training wire. I've been manipulating the growth just to try and fill out the whole screen, I also gave them a good haircut because I plan on flipping them soon, don't want them to outgrow the tent.
Likes
4
Share
Watering with CalMag and Simplex PK Boost (1 ml/L), then lowering pH to around 6.0–6.3. Adding 5 drops of Simplex pH Down – I transferred it into a 10 ml dropper bottle (from VitaS stimulator) for easier dosing without a pipette. Three days ago, there was a heatwave, and I left for the mountains for a few days. The plant got dried out – leaves drooped. Realized I need to upgrade the 3L auto‑watering tank – it only lasts two days max. Switched to a 5L tank, but a 15L canister with a drainage tray would be better. That would easily last 3–4 days. At +29°C, the plant drinks and evaporates at least a liter per day. Other than that, leaves look healthy, buds are beautiful. IZI is delightfully low‑maintenance :) Watering is done with an auto‑watering pump (1 L/min flow rate) – 5 seconds every hour. There’s also an airstone in the solution for mixing and oxygen saturation. The plant has slowed down in vertical growth and is now bulking up the buds. I’ll continue feeding PK Boost for another 3 weeks, then a flush – and then wait for harvest.
Likes
32
Share
@Chucky324
Follow
Hello All. I took a lot of pictures. Hope you don't mine, but I had fun. I think everyone likes to see large harvest pictures. It all started back in early January when I took clones of my favorite plants. It was a cold winter here this year, for these parts. So it was mid March when I got the plants out in the greenhouse. The spring was damp and cold too. I found powdery mildew in the garden about 2 weeks before I found it in the greenhouse. I got it on the Skunkberry and the Burmberry, But not on either Amnesia Lemon or the Sister Amnesia Lemon. I was very pleased about that :) I found some spider mites in the last week and a half. I decided to turn up the fans instead of spray. Yes they still spread but very slowly when they can't spin their webs. I didn't find many when I harvested. Everything else went well this season. I found a male Dr. Atomic Northern Lights that I liked. So I'll try to make some seeds with the Amnesia Lemon, Skunkberry and the Burmberry. I'm trying to fatten up the Burmberry. I'm interested to see if the Amnesia Lemon gets fatter buds and carries the P.M. resistance to the seeds, I'm hoping. The tall Sister Amnesia lemon in the middle did cause a drop of production from the plants on either side of it. They were in more shade. Something to work on for next year :) The Skunkberry had the most P.M. I used a new produce that I'm pleased with, it's White Wash frequency altered water. Knocks the P.M. right out. I found that if you put a large tray under where you are spraying you can catch the run off. I could use it a couple of times with no change in effectiveness. It must be the Scottish in me. I try to reuse or recycle as much as possible. Cuts costs, and help make me feel like I'm doing good and helping the planet. My feeding schedule was: I had a 15 gallon half barrel and pump with hoses and nozzles. I filled the barrel with nutrient solution and watered by minuets, 15 for clod days and 25 or 30 minuets on hot days. After 3 or4 days I added water when the solution got low. Mixed new solution once a week, and cleaned the barrel and pump. I also took the hose in the greenhouse and soaked them till run off once a week and measured the ph. I saw a few fungus gnats, but the spiders and nematodes (from my compost I added when I mixed soil) sure help to keep the numbers down. I like to put my buds in a paper bag to dry and cure. Inside I hang the buds for 3 days before putting the buds in paper bags. But it was so hot in the green house that 2 days was more that enough before putting the buds in the paper bags. The bags sat in the greenhouse for 3 days and then went in to the basement to finish. The old hippies told me that they use to put their buds to cure in the middle of a bushel of straw. I seems that the drying buds gives off a gas, that when trapped around the buds helps to take away the bitterness and raunchiness' of the uncured buds. The bags also help in wicking away the moisture of the drying buds, just like the straw did. After a week I check to see if it is dry enough. If the buds are dense the bag might need to be rehung for a few days to finish. I prefer a dryer bud. I like to hear a light crunch when I put a bud in my pipe. I like to hear a light crunch when I put the bud in a grinder. > Amnesia Lemon- Plant #1 North plant=343 g. >Amnesia Lemon - Plant #2 South plant=397 g. > Sister Amnesia Lemon - Middle Tall Plant=401 g. Winner :) > Skunkberry - Southern Middle Plant=316 g. > Burmberry - Plant #1 North Plant=239 g. > Burmberry - Plant #2 South Plant=294 g. > Total= 1990 g. or 71 oz. or 4.4 lbs. In Conclusion: This was my best grow ever! Big thanks to Barneys farm, for great seeds. I've got LSD started and I will try that in the greenhouse next year, 5/5 for mold and pest resistance. I'm very happy with the results. I was concerned because I have 2 rental houses behind me and one of them had a big backyard party at my week 5 of flowering. You could smell the grow by then and I was hoping I wasn't going to get ripped off. I looked through the fence a few days later and saw about 12 large plant pots, growing cannabis. I'm very happy. Cheers Chuck. > November 3 Added pictures of the seeds I made this summer.
Likes
23
Share
Chugging along. Much better fertilization rate than expected. All looking good up and down each branch. Almost all budsites are stacked with seeds even the lower ones Moved to different tent cuz original one was a damn mess with plant matter and whatnot on the floor. Only one that looks possibly behind us the PotG. I just think it’s a matter of not having seeds busting out the bracts quite like the others. Very happy with the results Check out previous weeks for procedure information. I’ll add them to each with soon. If not showing now go back to first couple weeks of the diary to see specifics on what I used, and how.
Likes
4
Share
@KhaVigga
Follow
i went to work like 2-3 days not coming home and she is nearly dry out to dead but luckily i came back in time and fix it.
Likes
47
Share
@KA_LE
Follow
- Defoliated the bottom half pf the plant at the start of the week removing all leaves and little stems so the plant can put more energy into the buds on the main stem. - Some of the outer leaves are getting burnt from the strip lighting. Nothing I can really do about this, next grow ill make sure the plant doesn't get so big. - Looked like the plant was getting some slight nute burn so I decided to back off from the Canna PK this week. I might bring it back in week 17 if shes looking hungry. - Installed a feeding tube to avoid spilling nutrients on the buds and reduce the amount I have to move the plant in and out of the bucket. - Tested my runoff Ph and its at about 6.5. Should I lower the Ph of my nute mix to compensate or is this normal? - Buds are coming along nicely, smell is very fresh and light.
Likes
4
Share
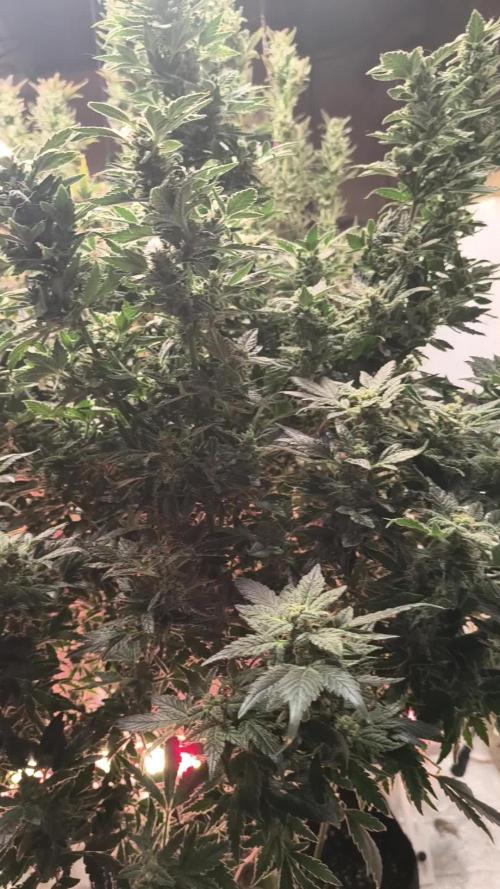
Week 5 and looking alive! Lol added a few things this week. Two infared heat lamps for warming up the cool start to their day. I also added a deep red light for evening and morning simulation.