


Likes
Comments
Share


@Migrow32
Follow
I maxed out my nuits on the chart before I flushed and switched them.
First attempt on scrog looks like I know what I’m doing but i probably don’t lol.


Likes
6
Share


@Chino8
Follow
Decided to start dark period(24-48hrs) day 85 mostly milky not much amber maybe some amber on the sugar leaves. I wanted to go 90+days with this auto but I needed the space in the tent for my photos and she looks almost ready, would’ve liked to see a little more amber but nevertheless I haven’t grown much at all so don’t have too much preference yet on trichomes. I’ll chop in a day or two and dry in my smaller tent and hopefully it goes well, my first harvest I dried too fast in low humidity and wasn’t that pleased with the end result. This time I’m planning on lowering exhaust speed and to not be so scared of 50+humidity in drying area and raise it to around 60humidity after a few days. Can’t think of anything else to write, but I’ll update after the chop and dry and 🙏 hopefully all goes well.

Likes
14
Share


@GoldenWeedGrower
Follow
D71/F27 - 10/06/23 - Added Nutes and water, EC 1 and pH 5.0
D72/F28 - 11/06/23 - Nothing to report
D73/F29 - 12/06/23 - Added Nutes and water, EC 0.8 and pH 5.3
D74/F30 - 13/06/23 - Nothing to report
D75/F31 - 14/06/23 - Added Nutes and water, EC 0.9 and pH 5.3
D76/F32 - 15/06/23 - 👉Changed Water. Some signals on the leafes. I think it is because of heat but I0m going to ask to the community.
D77/F33 - 16/06/23 - I've asked to the community and is heat stress, so I'm going to change the light hours to 12/24 (4 only red ligh and 8 red-white)

Likes
44
Share

@THcHunteR23
Follow
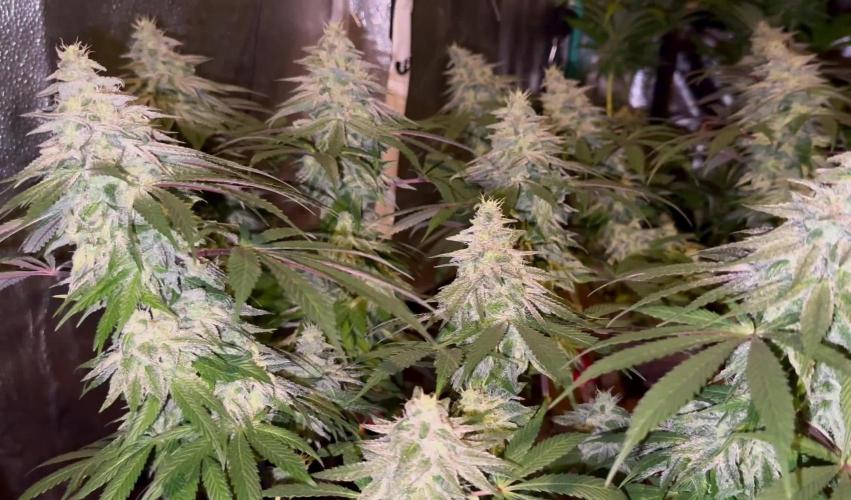
Toujours le même programme de nutrition. Elle grandit bien ! Encore 2 3 semaines
J’ai installé un scrog vue que les tête commençais tous a pencher.

Likes
22
Share

@420DeepGrow
Follow
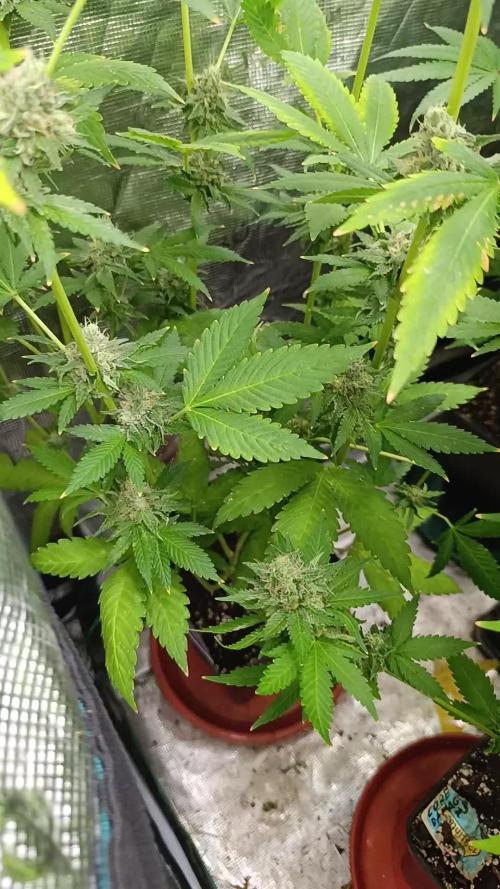
📆 Semana 8:
Los cogollos continúan aumentando rápidamente su volumen, peso y densidad, entrando en una fase avanzada de engorde y maduración. Los cálices siguen hinchándose y apilándose, formando flores cada vez más compactas y pesadas. Los pistilos comienzan progresivamente a retraerse y oscurecerse, mientras la producción de resina se mantiene muy elevada y los aromas se vuelven cada vez más intensos y complejos.
⚡ EC: 1.7–1.8
💧 pH: 6.2 – 6.5
🌡️ Agua: 20–21°C
🌫️ Humedad: 45–50%
💡 Intensidad: 900–1000 PPFD
🔥 Nota de cultivo: Mantengo una nutrición estable y unas condiciones ambientales controladas para acompañar el engorde final de los cogollos, favoreciendo la máxima producción de resina, densidad y calidad de los terpenos.
¡Seguimos creciendo fuerte! 💪
Likes
11
Share


@CanarianGrow92
Follow
Week 6 flowering for the purple banana punch from fastbuds 420!
At the moment the buds are getting bigger and getting more and more thc, i dont think that a lot of time is left so we gave some extra food this werk and we will stop soon feeding to start with the flush and give only water the last week.
This week we gave amino, sugar shot, sticky fingers, bloom booster, enzymes, silica and some more master roots

Likes
60
Share

@420DeepGrow
Follow
La semana 1️⃣ a ido bien 👍, destacar que la próxima vez, estresaré lo mínimo posible a las plantas, ya que si quieres una cosecha rápida y saludable lo mejor creo es no estresar a las plantas, nada de low stress ni mierdas, dejarla desarrollar como si estuviera solita.
📅 Día 8: 🔹Pulverizo las hojas con Rootbastic de Atami a 0,15 ml/litro.
📅 Día 9:🔹 Última pulverización con Acti Vera y Alg-A-Mic a 1 ml/litro respectivamente. A partir del día 11 no se le aplicarán más abonos vía foliar para controlar la humedad en el cuarto de cultivo y así evitar que se disparen estos niveles de humedad.
📅 Día 10🔹Última pulverización con Special THC PLUS.
📅 Día 11🔹Riego según la tabla de nutrientes y bajo la dosis de agua ya que me he pasado con el riego. Aplico 350ml e iré subiendo cuando note que no dura 24h mojado.
🔹Cambio los platos de las macetas por una bandeja de 80 x 80para así poder hacer un mejor riego y no molestar a las plantas, ha entrado justa. La pongo sobre una mesa de metal de 60 x 60 cm.
📅 Día 12:🔹 Low Stress
📅 Día 13:🔹Low Stress
📅 Día 14 🔹Riego según la tabla de nutrientes.

Likes
14
Share


@TheCannaProphet
Follow
~ FASTBUDS TESTER #2202 ~
Well friends, here we go on another 'canna-venture' together!
The grow room has had a complete remodel and some upgrades done to it including brand spanking new 4x8 and 4x4 tents and a Trolmaster Hydro X controller along with a new Control Panel.
This tester strain is one of six tester strains that FastBuds has graciously provided me with and I'm looking forward to seeing what this girl has to offer when she's grown to her full potential!
One drawback of 'testers' is I have little to no information on it other than its number and that it's an autoflower... 🤪 But, it's ALWAYS a blast growing them for me because not knowing a lot allows me to just concentrate on the essentials: Light, Environment, Water, Nutrients and possibly a bit of LST... not complicated, just basics like keeping a constant temperature and RH in the tent at a level that gives a good VPD, watering when almost dry and maintaining proper light levels according to their stage of growth.
____________________________________________________________________________________________________________________________________________________________________________________________________________________________________________________________________________________________________________________________________________________________________________________________________________________________________________________
~THE SETUP~
~Initially seeds were lightly scuffed, then soaked for 3 hours in 78℉ distilled water after which they were transferred to moist paper towels laid out in a Jiffy Pellet plastic starter tray with lid. Underneath the tray was placed a Vivosun Heat Mat with Controller that was set to 78℉ where they stayed until their tap roots emerged.
~Planted into Jiffy Peat Pellets that were hydrated with distilled water warmed to 78℉ with a 7.0 ph.
~Once roots emerge from the Jiffy Pellet they're transferred to their fabric pots.
~Grown 100% organic in a 4g Gronest fabric pot and a 3g fabric pot by Wraxly filled with Mother Earth 70/30 Coco/Perlite medium and initially amended with Dr. Earth 4-4-4 / Earthworm Castings / Dr. Earth Flower Girl 3-9-4 and Coast of Maine Stonington Blend Organic Plant Food 5-2-4.
~19/5 light cycle for the entire run with supplemental UVA added during flower. Lights are controlled by a Trolmaster Hydro X controller set for a 15min Sunrise/Sunset simulation.
~Top dressing every 3-4 weeks with slow release dry amendments and Earthworm castings.
~Straight water ph'd @ 6.2-6.8 when needed and bi-weekly Compost Tea's.
____________________________________________________________________________________________________________________________________________________________________________________________________________________________________________________________________________________________________________________________________________________________________________________________________________________________________________________
Weekly Updates:
12/1- I soaked both seeds for 3 hours in 78℉ distilled water after which they were transferred to moist paper towels laid out in a Jiffy Pellet plastic starter tray with lid. Underneath the tray was placed a Vivosun Heat Mat with Controller that was set to 78℉ where they stayed until their tap roots emerged roughly 24 hours later.
12/3- Today their tap roots were about 1/2 to 3/4" so at 11 am I transferred them into Jiffy Peat Pellets that were hydrated with distilled water warmed to 78℉ with a 7.0 ph using a tine off of a plastic fork as a 'mini trowel' to make a hole in the pellet and to gently cover the tap root, leaving only the seed head slightly exposed. This method accomplishes most of the initial work the seed has to do by eliminating having to orientate itself, push it's root down and head up. By 10pm the #1 seed had her cotyledon leaves opened and the #2 isn't far behind!
12/5- Well this is the full Day One for the #2 FBT #2202 and the second day for her sister! I'll keep them in the covered/heated Jiffy tray until I see their roots beginning to emerge from the peat pellet, then I'll transfer them gently into their respective fabric pots. The #1 will be going into the 4g Gronest pot from FastBuds and the #2 will reside in a 3g pot by Wraxly, which I'm trying out for the first time.
12/7- Yesterday I checked the #1 tester and she had roots starting to emerge from her pellet so I transferred her into her 4g Gronest pot. After making a hole in the medium for the peat pellet, I coated the entire surface with Xtreme Gardening Mycos then placed the pellet in the hole and planted her in. Lastly, I watered her in with about 4oz of de-chlorinated water with 3ml/g of FishShit added which was then ph'd to 6.4 @ 75℉ after which I placed a humidome over her for 24hrs to ensure that the humidity stays constant.
The #2 tester is doing great and I'm confident that she should be ready to transfer into her fabric pot in the next couple of days!
😎💚 Thank you for checking out my passion in life! Please visit as often as you wish and I hope you enjoy this journey as much as I know I will! Grow Strong! 💪😎🤙


Likes
71
Share


@Roberts
Follow
She is doing well. I have only done a solution change. Will be switching to flowering next update. She is in a New Level Hydro bucket, under a Spider Farmer SE5000 light. Thank you Spider Farmer, New Level Hydro, and Quebec Seeds. 🌱🤜🤛🌱
Thank you grow diaries community for the 👇likes👇, follows, comments, and subscriptions on my YouTube channel👇. ❄️🌱🍻 Happy Growing 🌱🌱🌱
https://youtube.com/channel/UCAhN7yRzWLpcaRHhMIQ7X4g
SE5000
https://amzn.to/3qFpAML
Spider Farmer Official Website Links:
US&Worldwide: https://www.spider-farmer.com
UK: https://spiderfarmer.co.uk
CA: https://spiderfarmer.ca
EU: https://spiderfarmer.eu
AU: https://spiderfarmer.com.au
Coupon Code: saveurcash
Www.newlevelhydro.com
Www.hygrozyme.com


Likes
6
Share


@Farmerbry71
Follow
Day 28 smell is geting stronger frost is building very large bud growing very fast will most likely be a heavy yield handling the higher temperatures


Likes
54
Share


@Rasta_Faraev
Follow
Привет, мои дорогие друзья. Все хорошо у халкберри, отметила круглую дату в 50 дней. Одуваны опухают вовсю и они покрыли весь куст своими огромными стигмами, ожидаю от неё серьёзного результата. А я ей в этом помогу. Спасибо за ваше внимание. Я надеюсь, что Халкберри будет лидером этого забега, она младшая, а потому и забота о ней чуть большая😄👍🏻
28.10.21. Халкберри 53 дня от рождения. Цифры ппм и пш дренажа показали, что девчонка начала активно кушать на цветение. Все как по учебнику. Отличная салышка👍🏻
Likes
5
Share


Likes
17
Share


@DudeGrowsWeed
Follow
Hi there. Here’s a few photos and videos over the past few weeks. I transplanted the Wedding Cheesecake Fast Flowering ladies outdoors around May 24th. A little sooner than I had planned, but they were starting to get root bound in their starter containers. They have been exploding with growth since the transplant. The larger plant is already 4’ tall and the shorter one is 39”. Fast Buds website says up to 3 Meters (10 Feet) outdoors. At this pace they might exceed that!!!👍👍
Likes
64
Share

@yan420
Follow
FERMAKOR BARREL MIX – BASE IN USE
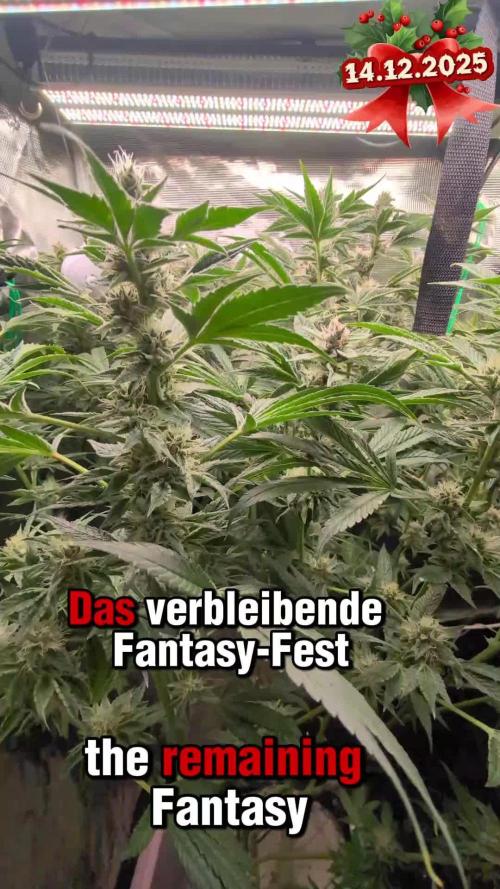
(Testing on the Fantasy Feast girl we pulled out of another diary
https://growdiaries.com/diaries/274722-grow-journal-by-yan402 )
(FERMAKOR BASE SYSTEM KOH VERSION diary
https://growdiaries.com/diaries/278391-grow-journal-by-yan402)
(Urea & Micros on the way — first week running without them)
🍶💧🍶💧🍶💧🍶💧🍶
💧 30 L Barrel – Current Working Mix
🍶💧🍶💧🍶💧🍶💧🍶
Step 1 – Calcium Nitrate (Part A)
7 L warm water (~35–40 °C) → added 45 g Calcinit, stirred until fully clear.
That’s the calcium + nitrogen backbone for the feed.
Step 2 – FERMAKOR PK Base (Part B)
15 L water in the main barrel → added 30 ml FERMAKOR PK Concentrate, mixed well.
This forms the main P + K part of the formula.
Step 3 – Combine Solutions
Slowly poured the Calcinit mix into the barrel while stirring — no reaction, still crystal clear.
That confirms the mix is stable and precipitation-free.
🌿 Step 4 – FPJ / FFJ Batch
Added 30 ml homemade FPJ (fish + veg batch) ≈ 1 ml/L.
Color shifted to a light-amber tone — looks alive and active.
🍋 Step 5 – Citric Acid Balance
Added 1 tsp citric acid after everything was blended to fine-tune pH and help chelate micros later on.
📦 Step 6 – Top Up & Check
Filled to the 30 L mark with plain water → pH tested with drops, showing yellow-green — roughly 5.8 – 6.0 range.
Nice clean look, stable smell, no residue.
💧 Current Base Ingredients (Active Mix)
Warm Water ≈ 22 L total
Calcinit 45 g → N + Ca foundation
FERMAKOR PK Base 30 ml → P + K support
Citric Acid 1 tsp → Chelation + pH balance
FPJ / Fish Emulsion 30 ml → Organic enzyme booster
Result: clean amber mix, mild and balanced.
I’ll let this version run for a week before adding anything.
👀👀👀👀👀👀
Observations and changes
👀👀👀👀👀👀
27.10.25 VW27 noticed some min burnt tips so I decreased Calcium Nitrate 45 to → 40g, decided to add two more elements micros and Epsom salts just to make sure they got everything, Fetrilon Combi 1 (Micros): 0.5 g, Epsom salts: 8 g
28.10.25 VW27 she seems devoid of any deficiencies, seems ready for the flip to 12/12
02.11.25 VW27 girl is looking good so I decided to stop making daily videos and do a standard once a week update.
09.11.25 aVW28 7 days since flip,stretch in full swing, first pistils showing, leaf color deep and healthy. Slight tip burn early week → gone after pH stabilized.
Feed stayed clear, no residue, roots clean and sweet-smelling, did what I hope is a last cleanup and pruning🎥
10.11.25 VW29 added Phosphoric acid pH down to the schedule for flowering stage.
14.11.25 FW1 FERMAKOR PK Micros 40 → 50 ml
23.11.25 FW2 got some burnt tips, observe and act accordingly in case it worsens, diluted by 25% for this week.
05.12.25 FW3 about 2 weeks ago Calcium Nitrate 35 g → 25 g, FERMAKOR PK Micros 50 ml → 60 ml
12.12.25 FW4 Calcium Nitrate 25 g → 20 g, FERMAKOR PK Micros 60 ml → 80ml
16.12.25 FW4 Calcium Nitrate 20 g → 17 g, FERMAKOR PK Micros 80 ml → 110 ml
🌱💦🌱💦🌱💦🌱💦🌱💦🌱
🌿 Day to day tasks & actions 🌿
🌱💦🌱💦🌱💦🌱💦🌱💦🌱
Fed about 5l a day of #1 and on the weekends I do a pure FERMAKOR PK flush 2l runoff
(*RUNOFF reused for tomato plants)
💧💧💧💧💧💧💧💧💧
🌱 Nutrients in 30 L #1 Veg – FERMAKOR
💧💧💧💧💧💧💧💧💧
Calcium Nitrate (Calcinit / Nitcal):
45 → 40 g → 35 g → 25 g → 20 g → 17 g
= 1.50 g/L → 1.33 g/L → 1.17 g/L → 0.83 g/L → 0.67 g/L → 0.57 g/L
= 207 ppm N / 253 ppm Ca
→ 184 / 225
→ 161 / 197
→ 115 / 141
→ 92 / 113
→ 78 / 96
PK Concentrate (FERMAKOR Base):
30 → 40 ml → 50 ml → 60 ml → 80 ml → 110 ml
= 1.00 → 1.33 ml/L → 1.67 ml/L → 2.00 ml/L → 2.67 ml/L → 3.67 ml/L
→ balanced 1:1 P:K + light micros (from extract)
Home-made FFJ/FPJ (Fish + Veg): 30 ml
= 1.00 ml/L
Epsom Salt (MgSO₄·7H₂O): 8 g
= 0.27 g/L → ~26 ppm Mg + ~35 ppm S
Fetrilon Combi 1 (Micros): 0.5 g
= 0.017 g/L
→ Fe 0.7 ppm · Mn 0.7 ppm · Zn 0.3 ppm · Cu 0.3 ppm · B 0.1 ppm · Mo 0.02 ppm
Phosphoric Acid (pH down) + Citric Acid (chelation): as needed
→ First set pH with phosphoric acid, then add a little citric only if you want extra chelation
Target pH: 5.8 – 6.0 (drop test yellow-green)
📦 TOTAL:
Liquids:
60 → 70 → 80 → 90 → 110 → 140 ml per 30 L
= 2.00 → 2.33 → 2.67 → 3.00 → 3.67 → 4.67 ml/L
Solids (CaNO₃ + Epsom + Fetrilon):
53.5 → 48.5 → 43.5 → 33.5 → 28.5 → 25.5 g per 30 L
= 1.78 → 1.62 → 1.45 → 1.12 → 0.95 → 0.85 g/L
YouTube Link: https://youtube.com/-m8h?si=A7x4Zlr2kj-_ga31
Likes
16
Share


@ChewiesGrow420
Follow
They all basically look the same at this point. Plant 4 popped a day later so it’s a little smaller. At day 12 I sprinkled some great white shark around each plant. And added just 1 tsp of green harvest bone meal.