


Likes
Comments
Share


@Madman2020
Follow
Vegetative steering
Aiming for:
leaf Temp -70f
CO2 300
VPD +.93
Planning for:
MJ and bras foilar
60%+1.5/-71f set to 68f+1.5
Leaf Temp is about 3f higher than ambient temp
At 68f outside, grow room still wont hit 68 with lights off
Day 24
No Co2
50-55klux
15inch from light
Leaf Temp 71-73f
60%/72F
Veg steering
Coconut water
Uneven canopy(11 at 29inch, 3ag 31 inch
————————
Day 26
56%68f(humidity dropped because i havnt watered in two days 🤡)
23inch-34inch tal. Arranged in order.
52-59klux
Sprayed
5Bras,(23inch)70 leaf temp
4Jas,(29inch) 70 leaf temp
4Bras&Jas(34inch)72f leaf temp
———————
Day 27
Watered once
————-
Day 28
Im pretty sure the sprays worked.
Noticed leaf burn with 3 plants sprayed with MJat 147ppm(.5ml)
No leaf burn with the .1Bras sprays
I wonder how long both are good for. Also, can i pour the unused spray in the medium? I just dont want to waste it.
Plants are noticeably more vigorous.
I am wondering if now is a good time for my defoliation. i was planning for Week 5. I feel like the buds are to developed for me to be pruning off lower buds and makes me feel like i should have pruned beginning of week4
__________


Likes
8
Share

@GERGrowDesigns
Follow
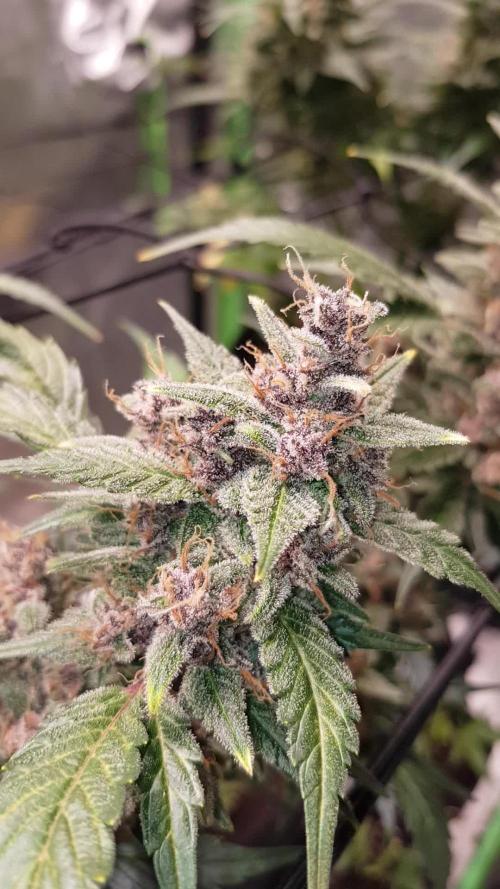
Welcome to Flower Week 5 of Fast Buds Blackberry Auto
I'm excited to share my grow journey with you from my
FastBuds Project . It's going to be an incredible ride, full of learning, growing, and connecting with fellow growers from all around the world!
For this Project , I’ve chosen the Feminized Auto strain Blackberry :
Here’s what I’m working with:
• 🌱 Tent: 120x60x80
• 🧑🌾 Breeder Company: Fast buds
• 💧 Humidity Range: 50
• ⏳ Flowering Time: 9-10 Weeks
• Strain Info: 23%THC
• 🌡️ Temperature: 26
• 🍵 Pot Size: 12
• Nutrient Brand: Hy-Pro
• ⚡ Lights : 600W x 2
A huge thank you to Fast Buds for allowing me to try my Best with this amazing collection from Automatic and Photo Strains they managed to Sponsore . Big thanks for supporting the grower community worldwide! Your genetics and passion speak for themselves!
I would truly appreciate every bit of feedback, help, questions, or discussions – and of course, your likes and interactions mean the world to me as I try to stand out in this exciting competition!
Let’s grow together – and don’t forget to stop by again to see the latest updates!
Happy growing!
Stay lifted and stay curious!
Peace & Buds!

Likes
40
Share


@BudXs
Follow
Explosive growth this week. They are ready for the flip and will be going into 12/12 in two days
This strain is by far and away the fastest and most heavy veg growth in the garden. Seeing some of the harvests on here (AstroBoy) makes me drool.
Big thanks to OSS for the tester beans


Processing
Likes
70
Share


@CBD_Sweden
Follow
@MephistoGenetics,
Hi all the happy people here in GrowDiaries.
This is my second cultivation ever and it will be fun to try a bigger space than my closet grow.
First, I'm just going to say I'm done with the construction of my new growroom.
The room is 2.14 meters by 1.7 meters and has a ceiling height of 2 meters.
It provides a floor area of 3.6 square meters.
I use a 54 Watt Lightwawe T5 for germination and 2 Pcs 400 Watt HPS lamps.
I have a channel fan that replaces the room air about 40 times an hour to get a comfortable environment in the room, the air enters a fresh air intake from the outside.
The air is purified through a carbon filter to then leave the room to the rest of the basement.
Then I use that heat to heat the rest of the basement.
I will use 10 pcs 15 liter Autopots to grow with and a 100 liter water tank that supplies the pots of water and nutrition.
I will grow completely organically in soil and will watercure my buds to get the best possible medicine for me.
But there are no cultivation rooms to be displayed here, so I continue with what is most important.
Today I have put my seeds in paper towel and hope the seeds have germinated within a few days.
I am very excited to see how the new growroom will work and how this Illuminauto 21 - Sour Crinkle will turn out.
Illuminauto 21 - Sour Crinkle (Grape Crinkle x Sour Crack)
Two of our fastest and frostiest varieties collide to make a sweet and sour delight!
Expect super frosty, compact nugs that won't be a toke for novices.
Destined to be a great strain for extraction work too!
Plant size - Small - Medium
Cycle time - 60-65 days from sprout
Indica/Sativa - 80/20
Frost level - Extra Ridiculous
https://www.mephistogenetics.com/product-page/illuminauto-21-sour-crinkle
.................................................................................................................................................................................................................................................................................................................................................
2017-08-21. Started to germinate the seed.
.....................................................................................................................................................................................................................................................................................................................................................
2017-08-23. Seed germinated and put in small pot in the humidity dome.
.........................................................................................................................................................................................................................................................................................................................................................
2017-08-27. Slow and steady she grows.
---------------------------------------------------------------------------------------------------------------------------------------------------------------------------------------
2017-08-28. Transplanted in 15 liter autopot. Check the roots on this girl
-----------------------------------------------------------------------------------------------------
2017-08-29. New movie of the girl.
-------------------------------------------------------------------------------------------------------------------------------------------------------------------------------------------------------------
2017-08-29.
Hello to you who read my diary, I just want to say that I am pleased that you have chosen to check in with me and in my diary.
I just want to say that I do this for myself and for a steady flow of my medicine.
Everything you read and see in my diary is 100% honest and I will never distort or beautify anything here.
I document my crops so that I can learn from my mistakes and also to look back at those different crops.
I try to update with pictures every day and with text if something special has happened in the garden.
This is my strainhunt for the best medicine and the beginning of my journey with cannabis and the cultivation of it.
-----------------------------------------------------------------------------------------------------------------------------------------------------------------------
2017-08-30. Cleaned the room this morning, just vacuuming and cleaning with chlorine solution. Im testing the fan to control temp and humidity, it works great.
Added some pics and a movie. Everything is looking great right now.
-------------------------------------------------------------------------------------------------------------------------------------------------------------------------------
2017-08-31. 3 new pics.
---------------------------------------------------------------------------------------------------
2017-09-01. New pics and a video from the grow room today.
------------------------------------------------------------------------
2017-09-02. New pic.
--------------------------------------------------------
2017-09-03. New video from this morning.
---------------------------------------------------------------------

Likes
6
Share


@420medic
Follow
Both the gelato and the forbidden runtz have nice bushy structure as of now.. I may train them when they get a little bit older but as of now I will let them be and see how they veg out.
Likes
49
Share


@AsNoriu
Follow
Day 40. Very busy week for me, this weekend I'll make a plan and we will see were each girl is ...
Till then only pure water all week.
Girls are starting to pump up and maybe I'll have 2 ounces from half of the plants, that's a lot better than my first view after holidays was ...
Happy Growing !!!

Likes
3
Share


@KcKush
Follow
* Looks like we got 2 males so far number 2 and 6.
*Soil Ph climed back up to 6.2 by adding about 1TBs of lime.
*On one of the males I believe #2 I did find what appears to be thrips. So I sprayed down everything no sign of anything on any plant. Now that i see it they are small aphids
*Increased PH from 450 to 550


Likes
1
Share

@PicoDeGallo
Follow
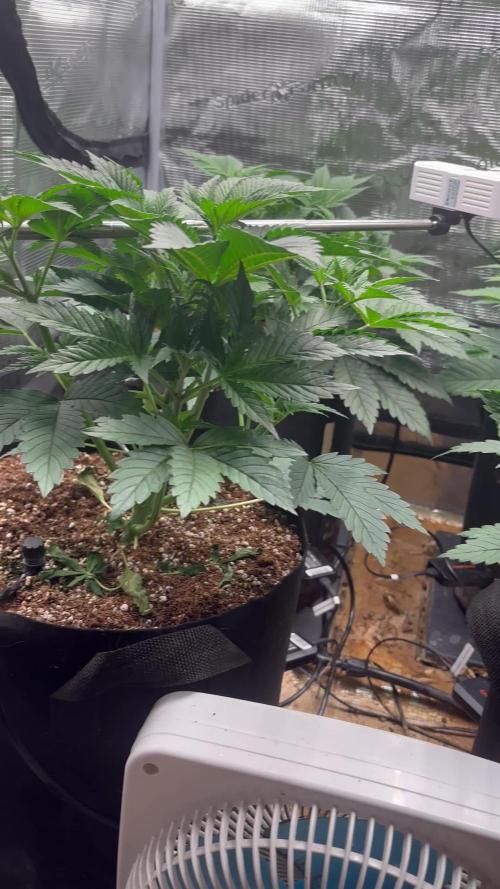
Skunk #1 by Homegrowncannabis
These guys are growing great.
Just starting to smell like skunk.
I took out a bunch of fan leaves and topped them a day after these photos.
I’m going to pin the branches down today. I also ordered some branch benders for future use.
Processing
Likes
27
Share


@BorisGroen
Follow
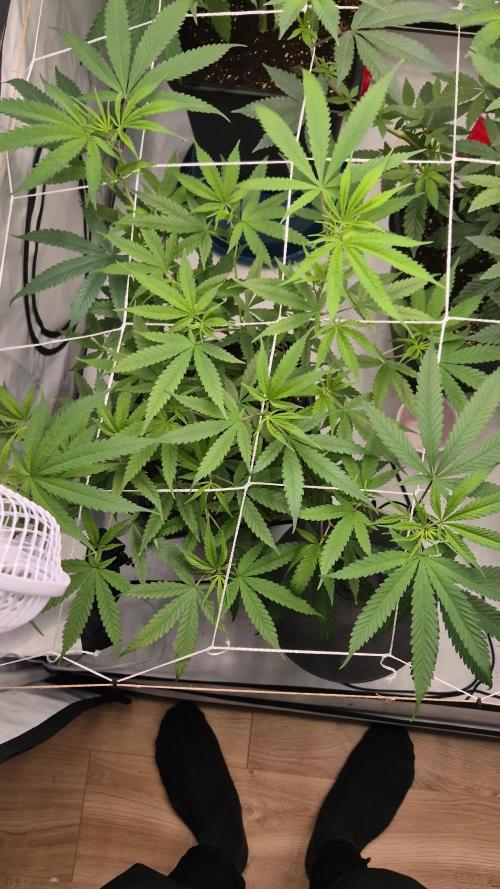
visible flowering week 4 the bruce banner seems to be a late flower
there doing well on there Plagron nutrients
and there loving the new sun Spectrolight Blast 400




Likes
9
Share

@KcKush
Follow
*topped all the plants.
*one of the phenols looks small and desorted let’s see how that one comes out.
*increased PPM To 550 from 450.
Ph seems to be good.

Likes
2
Share


@ItalGrow506
Follow
Así cumple su 11va semana de vida y 7ma semana en Floración, esta semana han habido cambios en el jardín ya que al fin pude adquirir un tent, muy contento puesto a que es lo suficientemente espacioso como para meter 6 planta. La Amnesia luce preciosa en el tent, los capullos están bien pesados y llenos de resina, tuve que amarrar los capullos principales dado a que el peso de los mismos se llevaban las ramas para abajo. En esta semana se regó una vez con fertilizantes, en la solución de riego se utilizó: 3ml Flora Gro, 4.5ml Flora Bloom, 3ml Flora Micro y 3ml MagiCal. La solución de riego marcó 515ppm y 6.0 PH.


Likes
6
Share

@Chucky324
Follow
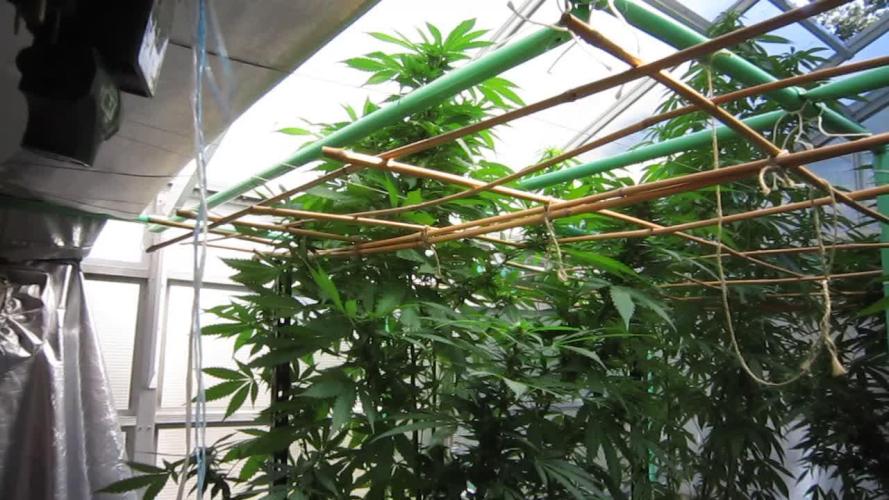
Hello. This is the end of week 4 and the beginning of week 5 of flowering.... I think.
I'm finally seeing flowering on all 5 plants now. A couple of them took their time showing their white pistils.
Looking very sativa-ish in here. The tallest plant is over 80 inches and might be growing through the roof vent before it's done.
Plant #3 is the keeper of this lot... but it has a strong, lemony, used laundry water, type of smell to it. Sleepy Joe has this type of smell too.
Been hot in here this week. I've had to water by hand each day to avoid wilting.
Haven't felt very well this week... Got a flu or something.... Feeling better today..
OK. Be Cool.
Chuck.

Likes
165
Share


@SlowpokeFuegobud
Follow
🐟 🐠 🐙 🐡 🐟 🐠 🐙 🐡 🐟 🐠 🐙 🐡 🐟 🐠 🐙 🐡
Welcome to week 2!
Dedication is the task now, and I really enjoy caring for the little fish cookie.. 😍
I can clearly see how increasing the EC will bring the leaves up. So interesting.
Giving her EC 0.9 now and flushing the whole medium every 3 or 4 days, to make sure it always has the intended nutes and not more. 💧
I kind of like coco. 😊
The nutrient solution is always used up much faster than I expected..
I feel in the flow at the moment with this. 🌊
Thanks, growmies, for checking in! 💚 💚 💚 😘
Let's start 2023 with a wave of love and peace! 🙏
____________________________________________________________________
Strain info:
Tropicana Cookies Auto is the perfect variety for growers of all levels, especially beginners as this strain performs very well outdoors and indoors, and can produce up to 500gr/m2 in 56-63 days without needing extra maintenance. Reaching up to 110cm, this strain grows fairly tall with medium-sized branching, showing its mixed heritage. Definitely the right choice for those with a high tolerance looking to get their hands on the strongest autoflowers out there. Thanks to the 27% THC, you can expect an extremely powerful and long-lasting high that’ll boost your mood and give you that extra push you need to start your days on the right foot. This variety offers the whole range of citrusy and woody flavors with a strong candy-sweet background that will keep you coming back for more and more.
Bud description
Tropicana Cookies Auto produces gorgeous dark purple flowers, so expect really dark buds with gorgeous hues of pink, purple and blue, and thick dark-orange hairs that get completely covered in resin by harvest time, giving them an almost shiny-white appearance.
This variety develops a typical Indica-like structure and very few sugar leaves that will make your trimming sessions a breeze. But make sure to store your trimmings as the gorgeous flowers reek of a mouth-watering blend of lemon peels, orange juice, and sandalwood that gives it almost a citrus candy-like flavor that makes for the most aromatic hash and extractions.Smoke report
Thanks to the 27% THC, Tropicana Cookies Auto’s effect starts with an energizing head rush that gets your mind up and running while leaving you in a nice calm state. As the Indica-dominant side kicks in, the powerful cerebral effect gradually moves downwards and hits your whole body with a deep relaxation that leaves you with a joyful stoney sensation that alleviates chronic pain while leaving you in an overall happy and positive state of mind.
It’s the perfect daytime and nighttime strain as it can boost your mood and enhance a night out with friends but can also quiet your mind as you get ready for a good night of sleep. No matter the scenario, expect a powerful high that lasts for hours on end.Plant appearance
Tropicana Cookies Auto reaches up to 110cm and develops a tall main cola with shorter side branches, typical of hybrid strains. You can expect a stocky yet tall main cola with medium-sized side branches and thin fan leaves that fade into a yellowish hue with a beautiful dark purple tint. Thanks to the excellent selection, this variety develops a short internodal spacing that makes the medium-sized flowers look like they’re growing stacked on top of each other. It’s the ideal choice for growers who want to get big yields without having to deal with huge plants, as this monster yielder can produce up to 150g per plant while growing relatively short.
Grow tips
This variety grows super dense buds so make sure to space out the branches by tying them down, this way you improve airflow which helps prevent mold and other pests. Tropicana Cookies auto reek of a delicious sweet and sour smell so make sure to flush thoroughly to enhance the aromas even more. This terpene heavyweight finishes with lots of resinous sugar leaves that make for fantastic hash and extractions so remember to have your trim bucket ready!Flavor
Tropicana Cookies Auto boasts remarkably sweet flavors that resemble a blend of lemon peels and fresh orange juice, with subtle floral undertones that make it the perfect choice for extractors looking for unique terpene profiles.
Expect an overall citrusy zest that’ll coat your whole mouth and leave a delicious tropical candy-like flavor aftertaste. The sweet and sour flavors get balanced out with a herbal background that gets stronger as you exhale and gradually opens up, bringing out the whole range of woody, floral, and spicy flavors, making it the perfect choice for the most flavorful extracts.
https://2fast4buds.com/seeds/tropicana-cookies-auto
_________________________________________________________________________________
SETUP:
80x80x180 cm Zelsius
240W Full Spectrum LED IR UV dimmable
DW240H-A6-HS
Heatsink color red
LED Chips:
512pcs SAMSUNG LM301H + 24pcs Osram 660nm + 8pcs Osram IR 730nm + 8pcs UV 385nm
Color mix: 2700K + 4000K
2,8umol/J
Driver HLG-240H-C2100B
Coverage: veg 5x3ft / flower 4x2ft
Product size: 628x205x68mm
Green Buzz Nutrients
Shouts go out to my sponsors @GreenBuzzNutrients, thanks so much for your support! ❤️
If anyone would like to try their amazing organic products, use code GD42025 for generous 25% discount (for orders of minimum 75€) ✨
https://greenbuzznutrients.com/
Mills Nutrients
Biobizz Lightmix
custom exhaust fan 320/270cm³/h
Carbon Active Granulate 240cm³/h
tab water pH 8 - EC 0,25 with Calmag to 0,5
Advanced Hydroponics pH minus Grow + Bloom to pH 6.2
🐟 🐠 🐙 🐡 🐟 🐠 🐙 🐡 🐟 🐠 🐙 🐡 🐟 🐠 🐙 🐡
Likes
13
Share


@J_diaz420
Follow
Luego del transplante comencé inmediatamente a realizar l.s.t con un amarre del tallo central al borde de la maceta.
Se aplicó tierra de diatomeas en el sustrato para prevención y aporte de silicio.

Processing
Likes
9
Share


@Bakeryguy420
Follow
Gelato what a fucking beautiful plant she is becoming :)! Shit literally looks like some mephisto genetics frosty as fuck. Shit wish I had another tent I'll run the rest of my gelato seeds this shit is prob going be my fan favorite :) but fast buds still has plenty more for me to grow. Tbh every fast buds I grown I haven't been disappointed:).
Looking to harvest this one in next 4 weeks or so so excited:)! Easily 4 zips calling it now ! :)
Likes
39
Share


@Adamlovesgreen_98
Follow
JULY 6: MACARON KUSH!!!! THE SEEDLING LOOKs REALLY WELL. I FIGURED I START THIS NEW GROW SINCE I TOOK A SHIT ON THE BLACK DOMINA AFGAN KUSH SEED. ITS STILL GROWING ,BUT AT A SLOW PACE. I DONT LIKE WATCHING SOMETHING SO SLOW SO WILL POST MACARON. WILL STILL KEEP UP WITH ALL PLANTS SO U ALL SEE THE BEST I CAN. THANKS FOR SUPPORT AND LIKES AND COMMENTS OF ENCOURAGEMENT AND HELP AND ADVICE.July 6 ; THE GIRL is IN TOWN AND BRINGING THC WITH HER!!!July 7; I moved HER into the tent today,I could of waited but the environment in tent is very nice now. HER little leaves lifted to the light. I like that. I had some 🥥 Coco left over and used it but ran out at the last pot. Filled almost half way. So I made just a little Coco and cleaned it along with perlite. They were both disgusting and dirty. I bought cheap brand. You get what u pay for I guess. It was only a little. The rest of my Coco is good,and got way better on the way. Everything going well. Happy growing and blessings on all you grow! July 8: THE GIRL DOING GOOD.July 9: She looking good could tell she likes humidity.July 10: She looks good.July 11; She doing ok .She really likes it better in the floragrow. I'm going to let her grow a bit more before I place her in big tent. Well happy growing my fellow growers.July 12; Today the girls are hooked up. They really like the floragrow area better. They need to grow a bit more before enter Veg..Will load pictures in awhile for today.July 13; Today just going to tend to the baby girls as they grow. JULY 14 ; SHE DOING FINE. JUST KEEPING EYES 👀 ON HER AS SHE GROWS .WAITING TO VEG HER BUTT!!July 15: She growing not to fast. I'm starting to see it's not really my growing that's my causes this slowness it's seeds. I popped some other seeds from Nasty Genetics and they moving. Hope are what they do said because was not to cheep. I'm going to get some really REALLY CRAZY STUFF FOR NEXT SUMMER. IM HOOKING IT UP,IN TIME. Well blessings on all you grow!! JULY 16; TODAY I REALLY GAVE HER A FRESH WATERING SHE GETTING HER BEAUTIFUL GREENISH COLOR BACK. I DAMAGED HER A BIT BUY PUTTING HER IN TO STRONG OF LIGHT AND TO BIG OF POT. I WAS RUSTY AND DONT KNOW WHAT WAS THINKING,BECAUSE I WAS NOT! NOW REFINED IN THAT AREA A BIT BETTER SHE NICE AND COMFORTABLE UNDER THE FLORAGROW.GOING TO LET HER MATURE A BIT TILL HET LEAFS PASS THE SIDES OF HER POT AT LEAST AND THEN SHE IS OFF!!! WELL BLESSINGS ON ALL YOU GROW. AND AT END OF GROW I HAVE DETAILED LOG I KEEP OF PLANTS TEMPS, HUMIDITY,ROOT TEMP AND ANYTHING I HAVE DONE.July 17: Well the baby girl is doing good. I put one of her sisters in a small d.w.c. because that's going to be my mother plant in the small tent.That grow coming soon like winter ❄️ GOING TO HAVE THE MACARONS OVER FOR THE WINTER,LOL WELL BLESSINGS ON ALL YOU GROW .July 18: She looks very well today. She growing well ,NOW! She really getting a beautiful green. It will be soon that you see her bust out on the run way in New tent. Just a note there will be detailed logs after grow I keep in note books,yes I'm old school. I have track of daily numbers . Well blessings on all u grow.July 19; She doing good here is a new picture. Can't wait till her leafs pass side of cup and she going to the big girls tent. .blessings on all you grow my fellow growers.
JULY 20; GOOD MORNING MY FELLOW GROWERS. I JUST TURNED ON MACARONS KUSH LIGHTS AND THEY ON THE MOVE. RIGHT NOW COCO AND DWC ARE NECK AND NECK. HONESTLY THE COCO ONE HAS BETTER COLOR. WELL THESE GIRLS GOING TO BE SICK WITH DANK. I NEVER SMOKED MACARON KUSH. THEY SEEM LIKE STRONG GIRLS. I CANT BELIVE HOW RUSTY I GOT WITH SEEDLINGS. CLONES SPOILED ME LOL,AND OUTDOOR GROWING. WHATS CRAZY IS HOW I MISSED IT SO MUCH. BLESSINGS ON ALL U GROW. REMEMBER CANNABIS IS A LIVING CREATURE THAT WILL TREST U AWESOME IF YOU TREAT HER AWESOME.
JULY 20 ; MACARON KUSH IS STARTING TO MOVE. NOW IM TRYING TO SLOW THEM DOWN AS I ENTER FLOWER IN OTHER PLANTS. I DONT WANT TO HAVE TO PUT UP OTHER TENT, IM TRYING TO WORK OUT A PLAN. I WANT TO TRY AT LEAST TWO IN AS TWO FINISH SO ALWAYS HAVE MY KILL MEDS. I WILL WORK OUT THE KINKS. I LOVE GROWING,WHEN LOVE SOMETHING U LOVE TO DO IT!! BLESSINGS ON ALL YOU GROW FELLOW GROWERS. July 21: She doing really well now. Her growth has picked up. This grow is going to go a little extra long till I finish the girls that are in tent now.I have another good size tent put away but trying to stay away from using HPS . I'm only growing LED to save some cash . Yet it's kinda good to have long veg to get the girls nice and mature for there gorgeous flowers.. Let's see what happens we never know.Well blessings on all u grow my fellow growers. JULY 22,2022: WELL SHE DOING GOOD. Im impatiently waiting for when I let these girls loose in grow tent. I'm having to slow processing because of two plants I started earlyer. One was a clone,a BOMB clone from JJ GARDEN SUPPLIES. This MACARON going to be beautiful ❤️ as long as I give her a top notch living area. She will grow very well if I set up a nice feeding schedule after study of others grows and plants genetics . Read what seed bank says and the dos and don't. I sometimes go out the box with my special mixed up stuff. It's so fun and the coolest there is only one of you. You are ONE OF A KIND!! WELL THIS IS WHAT A BLACK JACK SUGAR WAX DAB DOES GETS ME GOING. Well it's time to get to work. BLESSINGS ON ALL U GROW
Likes
43
Share


@TheCannaProphet
Follow
~Entry for the 'Best Rarest & Smallest Pot by Seedsman' contest~
Starring 🤩....
~ Seedsman Zkittlez Auto ~
Zkittlez (Grape x Grape Apple) Auto x Auto Fruit (Auto Fruit Cheese x Auto Blueberry)
Zkittlez Auto is one of the very sweetest-tasting auto strains available anywhere. It is a sativa-dominant (60%) strain that was bred from Zkittlez (Grape x Grape Apple) Auto crossed with a male Fruit Kush Auto, the latter a remarkable fruity strain bred from Fruit Cheese Auto and Blueberry Auto. Growers can expect to harvest some good yields of high-THC buds.
Zkittlez Auto remains a fairly short plant, rarely exceeding 120 cm. in height wherever it is grown. This is a vigorous plant which is able to metabolize a high level of nutrients and she's a thirsty girl too! If growing indoors close to neighbors it is strongly advised to ensure good and effective carbon air-filtration in order to neutralize powerful odors. This strain's life-cycle is approximately 90 days from seed to harvest.
The leaves on this plant are big and wide serving to convert every lumen available into Zkittlez goodness. Indoor growers should obtain between 400 - 500 gr/m2 while plants cultivated outdoors will produce slightly more at 500 - 600 gr/m2. Lateral branching is very good and it is recommended to use supports/ties to prevent snapping and keep buds close to the light source.
This strain's scent is sweet and fruity with candy and berry notes. Its high-THC has been measured at between 21 - 24% with less than 1% CBD. The effect is well-balanced, cerebral and euphoric, and is very good for social situations as well as for relaxing in front of the TV either alone or with company. It also has the added effect of helping to relieve chronic pain, helping with nausea, insomnia and depression as well as stimulating the appetite.**
**Credit to Seedsman.com
______________________________________________________________________________________________________________________________________________________________________________________________________________________________________________________________________________________________________________________________________________________________________________________________________________________
~ The Setup ~
~ Grown in a 2qt plastic popcorn pot filled with Mother Earth Grow 70/30 Coco/Perlite with Xtreme Gardening Mykos added.
~ Seed was germinated directly in the medium without any 'pre-soak'
~ Feeding will be by Dutch Pro Nutrients
~ 24hr light cycle while germinating
~ 20/4 light cycle after first leaves appear.
~ 4x8 Gorilla Tent
~ HLG 650R w/ 30w Supplemental UVA Bar controlled by a Trolmaster Hydro X controller set for a 15min Sunrise/Sunset simulation. (also a HLG Blackbird for additional side lighting if necessary)
~ Supplemental co2 controlled by an AutoPilot APC 8200 co2 controller
~ AC Infinity Cloudline T6 with Controller 67 using a Terrabloom 6x24" carbon filter
~ De-Humidifier and Humidifier when needed.
~ 14k BTU IdealAir portable A/C unit plumbed into tent for temperature control.
~ BlueLab testing instruments
~ Two Hurricane 18" oscillating fans
~ Two 6" Clip-on fans
~ Two 10" floor mounted fans
______________________________________________________________________________________________________________________________________________________________________________________________________________________________________________________________________________________________________________________________________________________________________________________________________________________
Weekly Update:
12/20- Here we go into the fourth week of flower for this little lady!
The Seedsman Zkittlez Auto is doing fantastic so far and Honestly I was a little concerned that she might get root bound and that it would negatively affect her, but she's doing great so far!
She seems to be doing well getting watered/fed every other day right now and only shows a very slight sign of drooping before I water/feed again after a day of drying out thoroughly.
Today she was given 0.25g of well water with a base ppm of 100 to which I added the following Dutch Pro nutrients: Bloom 'A' & 'B' @ 10ml/g each, Explode @ 3.8 ml/g, Silica Von Liebig’s Special @ 1.2 ml/g along with Earth Juice's Oily Can @ 5 ml/g to end up with a total 1200ppm(500 scale) nutrient solution. After adding the nutrients and checking the EC (2.4 EC), I ph'd the solution to 6.3 @ 72℉ then watered until I had runoff. After she finished draining, which took around 5 minutes, I turned her pot 1/4 turn.
12/22- Well the Seedsman Zkittlez Auto is looking like a Rock Star with excellent color, great vigor and she's stacking her flowers like crazy... What more could I ask for?😎👍
Today she was given 0.25g of well water with a base ppm of 100 to which I added the following Dutch Pro nutrients: Bloom 'A' & 'B' @ 10ml/g each, Explode @ 3.8 ml/g, Silica Von Liebig’s Special @ 1.2 ml/g along with Earth Juice's Oily Can @ 5 ml/g to end up with a total 1200ppm(500 scale) nutrient solution. After adding the nutrients and checking the EC (2.4 EC), I ph'd the solution to 6.5 @ 73℉ then watered until I had runoff. After she finished draining, which took around 5 minutes, I turned her pot 1/4 turn.
12/24- 🎄🎅MERRY CHRISTMAS TO ALL!🎅🎄
12/26- Yesterday, for Christmas, I fed/watered her (she was drooping) to runoff with 0.25g of well water, that has a base ppm of 100, to which I added the following Dutch Pro nutrients: Bloom 'A' & 'B' @ 10ml/g each, Explode @ 3.8 ml/g, Silica Von Liebig’s Special @ 1.2 ml/g along with Earth Juice's Oily Can @ 5 ml/g to end up with a total 1200ppm(500 scale) nutrient solution. After adding the nutrients and checking the EC (2.4 EC), I ph'd the solution to 6.3 @ 74℉.
Well there's four weeks of flower behind us now and she's got at least another 2-3 weeks in her for sure... stay tuned, it's getting ready to get exciting! See you next week fam! 😎🤙❤️
~ Thank you from the bottom of my heart for following my grows and for all the ❤️and support you give! 💚What you grow - Grow what you💚
