


Likes
Comments
Share


@SkunkyDog420
Follow
Hallo zusammen 🤙.
Sie wachsen sehr schön und machen keine Probleme.
Sie erhalten 25 Prozent Rabatt in unserem Shop
Mindestbestellwert beträgt 75 Euro
https://greenbuzzliquids.com/en/shop/
Code: GD42025

Likes
16
Share


@HegauHillsFarmers_M11
Follow
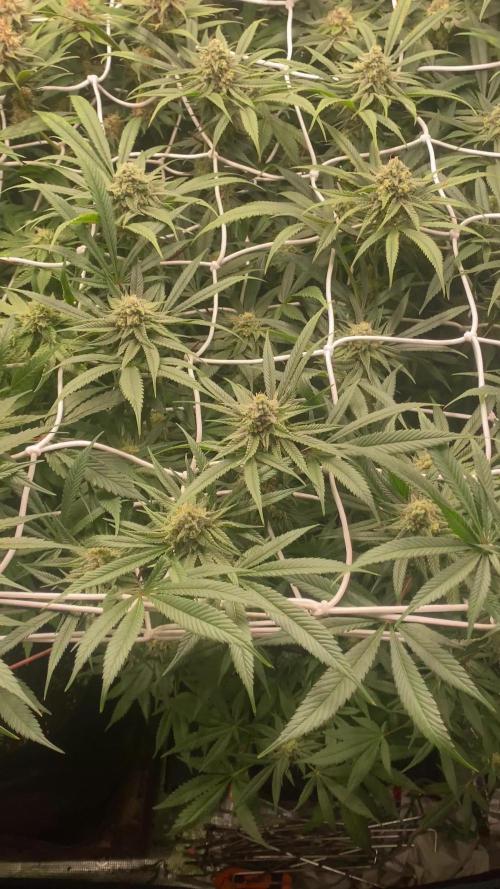
Die Pflanze wurde Mitte letzter Woche an Tag 66 geerntet. Getrocknet wurden die Blüten 6 Tage lang bei einer Luftfeuchtigkeit von 53% bevor sie nun ins Glas kommen.
Getrimmt wurde die Pflanze trocken.



Likes
10
Share


@Virga22
Follow
These Ethos Seeds are showing an amazing burst of energy. Really impressed, it's intriguing me.

Likes
8
Share


@Farmer1
Follow
Greetings growers,I took the two girls out of the greenhouse because it is getting very hot, they will finish flowering outside. Both are starting to produce beautiful compact flowers that are getting bigger every day. Starting to smell very good around here.😎

Likes
6
Share


@captaincondor
Follow
Im suprised the tent can contain her everytime I take a peak shes just go bigger lol. My recomendation is to flip this to flower very early or if your lucky grow it outside where it I guess could easily grow to the size of a tree


Likes
26
Share


@AsNoriu
Follow
Day 36. Morning. Girls are stretching, some are above 50 cm, others still can't beat even 20. Will regroup pots a bit to expose smallest girls.
Pure phed water.
No hermie signs and thats good ;))
All girls very healthy, thinking to give silica next watering.
Day 40. What an Idiot I am ;))))))
Girls just blasted away. All my hopes for one huge cola - gone.
Girls just grow, they are bushy, but leaves cover each other and sweat. I decided to do defoliation on day 15-18 of flower, but ...
All girls are different !!! Some just building preflowers, some are on day 10 of flower, some still in veg !!!
If you check any my diary, 2-3 days is max and all leaves are regrowing, so i can't defoliate in rounds by maturity, neighbours will cover defoliated one. And i can't do all in one go, some will be totally in wrong day for such stress.
Time for new strategy ...
Just i don't know which, what and when ;))))
Day 41. Job done. Slaughtered them last night. Looks ok at the end of day, let's see how many hermie i woke up ;))))


Likes
36
Share


@BrigadeDesTerps
Follow
Bonne reprise depuis la semaines dernière, du fait que j’ai tailler les feuilles, les secondaires se sont plus développés, il forme une belle canope actuellement
Là floraison devrait pas tardé à arriver, on est actuellement à 14h d’ensoleillement quotidien , plus qu’à attendre que le sexe se déclare
Pas de problème à déclarer, elle semble en très bonne santé, belle couleur de feuille, pas de tache, structure solide
Elle commence à avoir une bonne odeur, j’aime beaucoup le parfum qu’elle dégage. En plus comme j’ai de la menthe marocaine dans le pots si dessous, ça se mélange très bien les deux ensemble. J’ai hâtes de pouvoirs faire un thé mauve mutant marocain avec ses deux beau bébé qui poussent


Likes
11
Share


@KushManF
Follow
Good strain, strong strain and good grow. Regular seed ended up as a female which was my wish. Happy 😁. The yields were more than I expected. Came in 100g give or take on the scale as wet weight. Did a little bit of trimming on some of the buds, but will see how it goes during drying and curing. Great great genetics and Strain.
Likes
Comments
Share

@Riboh
Follow
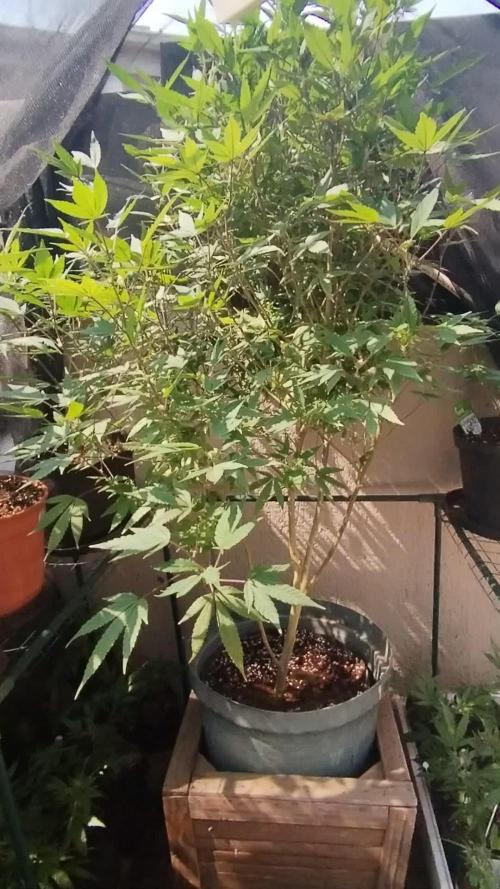
Tart Pops has officially hit that “teenage” flower stage — stretching has slowed, and now she’s starting to throw on some early bling. Bud sites are stacking up like little party balloons, pistils shooting out everywhere like confetti at a rave. 🎉
She’s holding her color beautifully, rocking those purple-striped stems like it’s fashion week. Side branches are flexing too, each one proudly carrying their own little crown of future frost.
Feedings have been smooth sailing — she’s drinking up bloom juice without complaints, and a touch of cal-mag is keeping her bones strong. With airflow kicking around the canopy, she’s dancing happily in the breeze, staying fresh and comfy.
From here on out, it’s all about patience — the sweet scents and crystal show are just around the corner. Tart Pops is looking ready to put on a sparkling flower performance in the weeks to come.

Likes
17
Share


@Kirsten
Follow
25.5.25:
I watered with 3.5ltrs of dechlorinated water PH'd to 6.3
I added Per 6.5 litres;
♡ 1Tsp Bud Explosion
♡ 7ml Trace
PH: 6.3
PPM: 990
SOLUTION TEMP: 30°C
SOIL PH: 7
SOIL TEMP: 21°C
AMBIENT TEMPERATURE: 23-26°C
RELATIVE HUMIDITY: 58%.
26.5.25:
I watered with 3 ltrs of dechlorinated water PH'd to 6.4
I added Per 6.5 litres;
♡ 1/2 Tsp Ecothrive Biosys
♡ 7ml Trace
PH: 6.4
PPM: 590
SOLUTION TEMP: 28°C
SOIL PH: 7
SOIL TEMP: 21°C
AMBIENT TEMPERATURE: 23-26°C
RELATIVE HUMIDITY: 58%.
27.5.25:
I watered with 1.5ltrs of dechlorinated water PH'd to 6.3
I added Per 6.5 litres;
♡ 1Tsp Bud Explosion
♡ 7ml Trace
PH: 6.3
PPM: 990
SOLUTION TEMP: 30°C
Still PH: 7
SOIL TEMP: 21°C
AMBIENT TEMPERATURE: 23-26°C
RELATIVE HUMIDITY: 58%.
29.5.25:
The plant is definitely decreasing the amount of water now. So I believe the plants are coming to an end within a couple of weeks.
I took everything off the timer and am now running 24/0 light schedule.
I want to make the most out of what light is available. The plants need it.
My tent is underpowered in that department, so increasing the duration of the light is all I can realistically do. Hopefully, it will help.
The buds have been developing nicely. They are incredibly FROSTY 😍 so to keep the progress going, I have been sticking with the sea kelp for the potassium.
Occasionally adding phosphorus with the bud explosion PK Booster. With much smaller doses in comparison, each time.
There are definitely signs of nitrogen excess, with the clawing on many leaves. There are also extremely purple stems on the leaves.
As I don't know what the seed was, I can't tell whether it is normal for the strain it is, or a nutrient issue, light stress, etc. (If you have any ideas, I'd appreciate them!)
This one was planted in coco, perlite, and worm castings. Due to this being practically the first time I've used this mix without adding the peat based "light mix".
I had not realised how quickly the pots will dry out, especially during the high water consumption of the flowering stage.
I realise that I need to be treating it as pure coco. This can be fantastic, for example, if you have just one pot/plant and can provide all the waterings and monitoring continually and regularly.
This tends to make you use more nutrients than necessary, as personally I find it difficult to use just plain water. I think many of us still can't help the feeling that we should be adding things to every watering. Therefore, when the frequency of the waterings increases, we are still adding nutrients EVERY time. Which is an overall increase in nutrients, too.
For my part, I'm cutting the amount of nutrients per watering. I feel like nutrients are a bit of a crutch to growers.
I'm still getting used to the coco and the waterings, but I am really enjoying it. If you don't check your plants multiple times a day, it may not be the best choice of substrate.
For me, I'd much rather the pots dry quickly because it reduces the chances of mould and mildew, which I'm always concerned about.
30.5.25:
I watered with 4L of plain dechlorinated water PH'd to 6.1.
Thanks for stopping by and hanging out 💚 ✌️ 🍃 😊 🌱
Likes
Comments
Share

@Pipokush
Follow
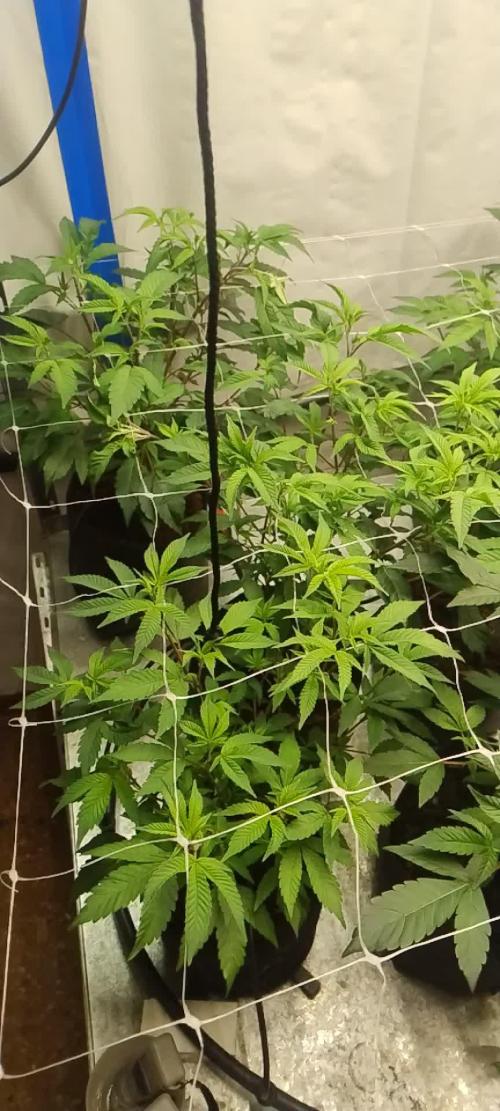
En la ultima semana de vegetativo, se colocó la red para hacer scrog y emparejar todo el canopy.
El 4/8 poda de bajos, para aprovechar a sacar clones y mantenimiento de la tepache
La cheetah piss viene con ritmo asique nol e hice mucho mas que sacar algunas chalas satelitales.
Con respecto a la comida, como se ve en los videos, les faltaba un poco. Aumente la concentracion a 1.6. el 3/8 y para el 9/8 una con 1.75.
Que la idea con esto es meterle bien fuerte a la preflora para que exploten en la flora.
En el video se ve como hay una "capa" de hojas que amarillean y arriba como vuelve el verde.
El 10/8 se paso a florar y ahora estamos a 20/8, los primeros diez dias de flora estan volando. pronto mas actualizaciones
Buenos Humos
Processing
Likes
15
Share


@420Consinc
Follow
- Week 6 -
----- Day 36 -----
No feeding today as it was tomorrow so nutrient line up isn't up yet. I'll do that tomorrow.
Ladies are perfect, I can't wait. less than 30 days away.
----- Day 37 -----
Today is feeding but back left is behind the other 3 again, gave the other 3 500ml of tap water (10ppm) to prevent turgor pressure loss while back left dries up.
Should be feeding in 3-4 hours. 23L 1100-1500ppm (new feeding, so ppm end is not known atm) 6.4 pH
Plants are insane, big Bertha has become middle Bertha as the other stems have fattened up quickly.
Speaking of which plants are in bulk period, 3~ weeks left so it's an exciting time to watch them fatten up.
**UPDATE** Fed at 1000ppm 23L 6.4pH
The removal of FloraNova Bloom, and letting the chelated Diamond Nectar go to work on the molasses brings down the "accountable" parts by the machine I use. 1000ppm is full strength on all fertilizers being used.
I might add more molassses in the future and bring it up to 2ml/L, and maybe a smidge of epsom salts next feeding via foliar or direct feeding after I do some research.
No more KoolBloom liquid, KoolBloom powder begins and she's a strong one.
----- Day 38 -----
Yesterday back left plant has me unnecessarily anxious. It didn't need watering till 2 hours before lights off.
What I did is fed the other 3 90% of the feeding, and only gave back left 10% (closed the irrigation heads till the end of feeding).
I'm HOPING it was the plant transitioning from pre-bulk flower to bulk-flower stage, and maybe it slowed down photosynthesis to concentrate on hormonal changes. I dont know I'm anxious and just talkin out loud.
I'll know within 72 hours if there's a major issue with back left. Plant looks fine, i'm just paranoid.
Pictures later today around mid light cycle. Buds are getting insanely fat.
**Update**
Was bored. Here's some wicked shots. Still 25-27~ days left and its big bulk time. Can't wait to see them at the end.
----- Day 39 -----
Everything is great.
Feeding late tonight or potentially tomorrow depending on back left plant. I want to make sure bottom center of the root zone has dried out and doesn't begin to mold before I water again.
This will also help prevent fungus gnats in the soil.
I'll keep the other 3 away from turgor pressure loss, but they got 90% of the feeding last time so I expect them to dry by the time back left is.
*** Update ***
Now the other 3 plants who were faster on water intake than back left yesterday have slowed down.
Weed growing knowledge at a Horticultural greenhouse scientific repeatable level is pure fucking garbage.
I have 6~ books and checked dozens of sites and there was major conflicting info on water intake.
That's the problem with cannabis, it was illegal for so damn long horticulture practices and knowledge never molded or were used in the process and now it's anyone's fucking guess as to who is telling truth or is spouting bullshit bro-science.
Don't even get me started on names.
What a stupid god damn naming system "counter-culture" created... I'm growing wedding cake.. WEDDING CAKE? Wtf.
That's stupid as shit. Give weed botanical Latin names based on appearance and technical factors PLEASE!!!!!!
If I could name this plant it would be (Cannibas v. hybrid 'multa-magnum-fragum-gemmae-dulcis') why? It's due to it being a; Cannabis plant, hybrid variety 'multiple big bud strawberry candy' showing off multiple long bud stems smelling of candy,
Is that more convoluted and arrogant than Wedding cake?
YES, it is.
Is it better?
YES fuck your stupid wedding cake name.
That's dumb. And you should feel bad.
Still want to argue? Name it Cannabis v. Hybrid 'crustulam nuptias' THERE! Wedding cake. fuuuck!
99.99% of plant names are Latin.
Anyways... back to the point...
I hypothesize that there is a secondary transition portion of flower where the plant (like in stretch transition) pauses its growth to move the hormone and nutrient production to other sources. This secondary pause happens JUST before bulk session begins.
This hypothesis states roughly that up until final big bulk period (last 3-4 weeks), fan leaves and sugar leaves could still be produced by the plant during a "predator" or "high weather event" situation that would cripple the plants photosynthesis for final bud/seeding production during early to mid stage flowering.
Once the plant has reached adequate nutrient reserves or some other time or light cycle based trigger, it removes the hormonal/internal production/ability of sugar/fan leaves still being potentially produced out of the internode stem cells and fully stops that ability and concentrates 100% of growth on bud structure and protection of bud structures through THC/CBA/CBC/CBD etc. (Im a little tipsy, can't spell cannabinoid leave me alone...) production.
Tonight I will at 30 minutes before lights off be judging the water requirements during sleep of each plant to prevent turgor pressure loss, and to allow each plant to finish this transition and get back to major water intake by feeding tomorrow morning.
It's insanely obvious somethings changed.
I Was worried that leaving back left plant with stagnant water in the bottom saucer (pot doesn't sit directly in the water but is 3 inches above it) had released mold spores and started destroying the root mass of the back left plant but:
1) No obvious plant death signs, weakness or other aspects of it being a slow death from bottom up.
2) The other plants did the same damn thing within 48 hours.... and the back left plant is by far the largest and gets the most "light" due to its size hence it would most likely (HYPOTHESIS) finish its secondary cycle a bit faster due to just volume and weight.
Listen i'm not gonna say this is all 100% correct knowledge, It's based off feeling and "knowing" plant cycles as a greenhouse certified Horticultural Technician.
Repeated efforts to grow and replicating situations that created these things over and over is the real proof and will come in time.
One major benefit is the fact I WILL be re-flowering these for the VERY LEAST 3 full flowering cycles as long as they don't die during flower to veg transition.
I will be getting them THC tested EVERY SINGLE flower cycle to prove without a doubt the "maximum maturity" possible of a weed plant re-veg flower cycling, just like how we know by the 5th or 6th successive clone, the DNA will deteriorate and the grow will be stunted or a lesser bud high and yield.
God I fucking ramble when I'm bored and tipsy.
----- Day 40 -----
Fed at 1350ppm 6.3pH 23L
Plants are doing great.
**Update**
Little fun video from mid light cycle.
Roughly 20-25 days left.
Will finish at 30% amber 70% cloudy and will cut branch by branch as they are done, not in a rush to do 1 single cut and will let them survive to re-veg easier and less stressful.
----- Day 41 -----
Easy day. Here's some pics.
Just basically have to watch the grass grow today.
----- Day 42 -----
Big photo day, used ruler for most shots.
End of beginning of bulk, big bulk starts tomorrow.
Could probably feed late night tonight but I'm going to just give 500-750 ml of water depending on roots needs before lights off.
Tomorrow will be a big feed for first day of week 7.
Tropicanna Glookies tips on back right are beginning to darken and become purple. I am hoping this whole plant turns purple in last 2-3 weeks.
We will see.
**Update**
Back right plant is starting to turn purple and FAST. Pretty awesome.

Likes
45
Share


@Robbaus
Follow
Settimana molto molto difficile. Causa temperatura elevata mi si è formata parecchia muffa sulla parte della radici esposta all'aria, l'acqua all'interno dei sistemi dovrebbe stare sui 22 gradi e sono arrivato a 26. Aumentando la potenza del vaporizzatore che emana aria fresca e tenendo aperto il box riesco a stare nei parametri ma a luglio sarà dura per le temperature e per l'umidità un pelo troppo alta. Mi manca ancora un mesetto e mezzo, spero di arrivare a fine raccolto senza problemi. Proverò anche ad utilizzare il tricodema per la pulizia delle radici, spero mi aiuti. Ad ogni modo negli ultimi due giorni registro un notevole miglioramento dell'apparato radicale. Per il resto in realtà va alla grande, le piante non sembrano aver avuto problemi relativi a ciò e stanno finendo di allungarsi dopo il cambio d'ore. Sono veramente soddisfatto della situazione. EC forse un po' bassa ma avendo appena rifatto la soluzione nutritiva temporeggio qualche giorno prima di andare ad aggiungere altri fertilizzanti.


Likes
13
Share


@gdogfunk
Follow
Day 63: This should be the last week in veg. It might be a partial week...I'll make the call in a few days. I'm excited to see these babes flower!!!
Day 64: Last night I saw what appeared to be signs of overwatering, so I turned off the humidifier and the temp increased immediately and today, they look just fine. I also raised the 150W LED on that side of the tent just a bit to reduce the intensity. This will be the last week for veg. I flipped the other tent, but these babes need just a little longer before flipping.
Day 65: They looked pretty thirsty today, so I fed 1 gal of late veg nutes per plant. The soil was very dry according to my meter, so if I overwatered last time, they had plenty of dryness today.
Day 67: I came home to near wilting plants! It had been 52 hours since last feeding and I've never seen them this thirsty during this grow. I watered 1 gal/plant again and GZ is showing the same signs of over watering again. The leaf color is fine with zero nutrient issues, so I suspect there may be a root problem. I don't know what else it could be? The photos are about 4 hours after watering.
Day 68: The moisture meter showed bone dry again, so I watered a half gallon of water/cal-mag. I also decided to turn off the extra 150W LED sitting above her and just let the main LED do the work for now.
Day 69: She was dry again today, so I watered a half gallon of late veg nutes and she's appearing to be recovering just fine. I think the heat in the tent might have been causing some issues as well, so good thing I turned off that extra light for now.
Day 70: Last day of VEG!!!

Likes
7
Share


@n1kl24
Follow
Seems to BE alright so far. Banana Kush plants are Like 1-2 ahead of the Skunk XL I guess.

Likes
16
Share

@Bncgrower
Follow
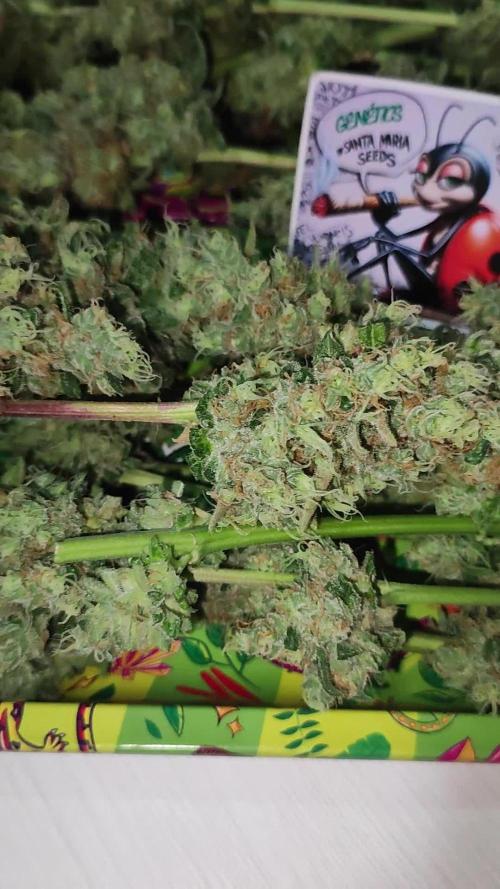
Harvested today, truly strong smell, cultivation was absolutely perfect from start to finish. Very happy with the result, anxious for the drying and curing process! Thank you for following along.. 🤜🤛🌱🌿🌲
Likes
9
Share


@WeedWagon
Follow
Week 2
Day 14:
-playing around with automation
-watering 0.5 l/Plant every 2 Days
-both plants looking happy 😁
-good growth for Week 2