
Likes
Comments
Share


@AsNoriu
Follow
Day 58 since seed touched soil.
Sponsored grow
MARS HYDRO TSL2000: 300W, Flower 2'x4', Veg 3'x5'
It's recommended for beginners.
Low-budget & high-efficiency.
Think its more than for beginners ;)))
Plants coped well with small distance, stretch is over, flowers start tu bulk up, some buds will be really nice.
Today raised light to max, so now they have 15 cm quile healthy distance ;)))
Last top up was too powerful with Nitrogen, i see signs of overdose.
Bomb thinnest, smallest, from heat and wind damage has brown pistils here and there , but is stacked !!! Got light signs of nitrogen toxicity. Did small clearing, but she needs more ;)
Day 60. Some more to cut off
Happy Growing !!!

Likes
Comments
Share


@BruWeed
Follow
Ya se encuentra en su segunda semana de floración.
Su desarrollo es muy bueno, crece rápido y fuerte.
Su aroma ya se puede sentir.
En estos dias estaré publicando mas imágenes de como viene.

Likes
3
Share


@Stash_N_Smash
Follow
2 more weeks or thereabouts.
1 more blackstrap molasses tea. And then it's all Distilled going forward. Reservoir will be opened up 24/7 until emptied. Then top down flushing with aloe water for round 1 and distilled until finished.


Likes
5
Share


@Bluethum94
Follow
All and all I popped 19 seeds lost one after it came above ground 5 of those I will be posting on here which are mandarin cookie crossed with zweet og they are regular photoperiod plants so I will have to sex them it is a small pheno hunt looking for something to keep as a mother plant didn’t use any nutes for the first week
Likes
1
Share


@PlayX
Follow
der größenunterschied ist mittlerweilde mehr als deutlich. nicht wundern, bei jedem gießen drehe ich den topf

Likes
28
Share


@Professor_Chaos
Follow
Beginning of week..
I almost started the flush this week.. But no, they need AT LEAST one more week of like a half dose of feedings.. then, I'll begin the flush. But they are both so beautiful! Lol.. So many purples in the ETHOS Cookies.. And the smell.. I can't get over the way she smells! So intense! Gonna be a great smoke for sure! Just don't want to harvest too early.. I did that with the Early Lemon Berry from ETHOS and it got me high.. But it was a very paranoid high.. Like VERY very paranoid hahaha.. I didn't like it.. But it tasted GREAT! But yeah, I harvested a little too early.. Not enough amber trichomes. And with these girls.. I feel comfortable flushing for 3 weeks if needed.. So this week I'm just gonna give them both a half dose (or so) of nutes but keep the sweetener at full power! Lol anyways.. Just (tRyInG tO) keeping these girls happy till the flush! The Mandarin Cookies leaves are beginning to look pretty pathetic.. They fall off pretty easily.. And look like complete shit in most spots.. Just can't wait to get these girls ready to smoke!!! They are getting STACKED! 💪💪💪
Mid week..
Still giving both plants: water, 1/2 feed, water, 1/2 feed, water, etc.. Mandarin Cookies gets watered/fed everyday (mornings) and the ETHOS Cookies gets watered/fed (afternoons usually). They are both looking like they should finish pretty close together. Trichomes are eVeRyWhErE! Seeing quite a few milky/cloudy.. Still quite a few clear tho too.. And almost no amber trichomes.. A couple here and there.. But not enough to even say amber are even forming really. Lol.. So pointless to even bring up.. Not till I see a gang of them.. Or at least a couple on one calyx to say there are some amber lol.. Just my 2 pesos, I guess.. Yet I suck at timing the harvest just right lol.. Still trying to find MY sweet spot.. Meh.. Anyways.. Just look at those pictures!!! Gorgeous colas! Good fucking job on these genetics ETHOS.. Good.. Fucking.. Job...
End of week...
Wow.. Just.... Wow... These ladies are looking awesome. This next week will be week 9 from 12/12.. Most of the pistils have turned.. Not all.. But more than 50% for sure. They are both looking about the same when it comes to pistils and trichomes.. Just BARELY starting to see some amber coming thru.. Still some clear.. But the next 2 weeks of flushing should give them enough time for the clear to mature a bit and should see more amber by then.. Hopefully not too many.. But I will harvest at the end of this week if they seem to mature too quick for another week.. 1 week of flushing in coco should be plenty.. I just like to overdose these ladies on water at the end.. It really does make a difference in my opinion.. I've even flushed a plant for like 4 or 5 weeks and yeah she looked like shit.. But only the leaves looked shitty.. The buds were still gorgeous as ever and VERY flavorful!.. Anyways.. This is about THIS grow.. These ladies are still loving life.. I have been slowly weaning them into the flush.. Not flushing them completely all at once.. But over a longer period of time so they can still get some nutes in.. But I am happy.. They are happy.. Tomorrow I will begin FloraKleen for both girls... And even run it thru the medium 2 days in a row.. Just to really get EVERYTHING out of the medium.. Then just water as I have been till harvest! Home stretch!!!!... On to the next week!...

Likes
27
Share

@BettyFlores
Follow
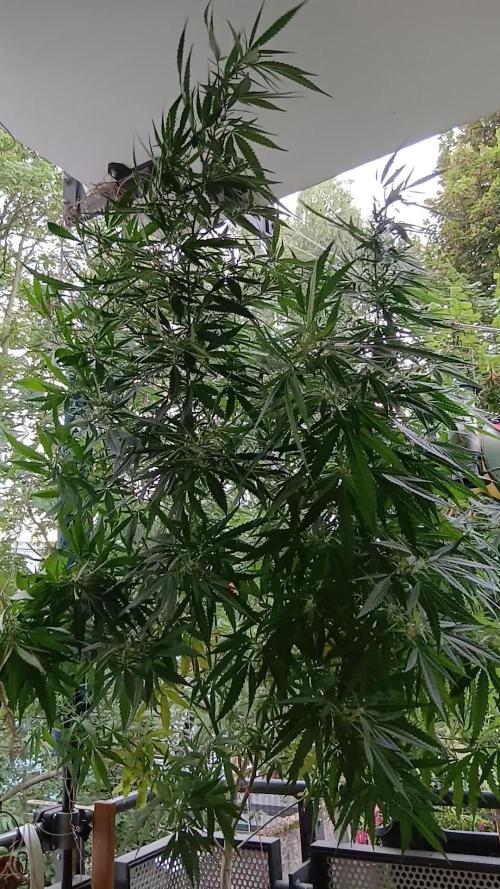
28.08.2025 Leider habe ich den notdürftig befestigten Ast verloren und er war tatsächlich so groß wie eine reguläre Indoor-Pflanze 😅. Es tat mir in der Seele weh, mich von ihm verabschieden zu müssen. Zurzeit ist es sehr stürmisch und regnerisch und ich kann froh sein, wenn ich auch nur eine einzige Blüte ernten werden kann.
Sie ist sooo riesig und sprengt den Balkonplatz. Unglaublich!

Likes
14
Share


@Bread_n_Buds
Follow
Our Black Runtz from Zamnesia are about 10 days later than the others because we had some placenta problems at birth and we replanted them, now everything is fine just a few days later than the others.
We gave Power Roots 1 Ml/l, Pure Zym 1 ml/l, Sugar Royal 1 ml/l, Alga Grow 3 ml/l -
Plagron nutrients are available at Zamnesia in convenient pack formats for all growing styles. I used this one with a simple search you can find the other products.
Try a seed of this strain that drives us crazy...
---- https://www.zamnesia.io/en/11159-zamnesia-seeds-black-runtz.html
Zamnesia Description // Black Runtz comes from a truly legendary genetic pool. Our breeders used three modern classics from the United States to create this strain: Zkittlez, Gelato, and Runtz. With 20% THC and flavors of grapes and berries, Zkittlez passed on her delicious flavors and relaxing effects. Gelato contributed to Black Runtz's immense flavor profile by passing on high concentrations of the terpenes limonene and humulene. Finally, Black Runtz inherited the high potency of the original Runtz, a strain with a respectable 21% THC. The end result of this 3-way cross is a strain with 55% indica genetics and 45% sativa. Black Runtz boasts rapid flowering times, high potency, and contrasting yet balanced terpenes that supports its delicious flavor profile.
Growbox and Air System - Secret Jardin DS120w + fans + Exhaust fans and filters DF16 kit ---- https://www.secretjardin.com
All the best that mother nature has to offer is on ----www.zamnesia.com
Likes
6
Share

@eldruida_lamota
Follow
Vamos familia, actualizamos la sexta semana de crecimiento de estas Papayton de FastBuds.
La temperatura que estuvo entre los 24-26 grados y humedad dentro de los rangos correctos.
Todavía estamos en el ciclo 16 horas luz, 8 oscuridad, estiraron bien y ensancharon bastante también, el color es verde sano.
Se nota que los nutrientes de la marca Agrobeta hacen sus funciones.
También realicé una poda de bajos que yo si las veo necesarias para explotar después la flor.
- os dejo por aquí un CÓDIGO: Eldruida ,descuento para la tienda de MARS HYDRO.
https://www.mars-hydro.com
Hasta aquí todo, Buenos humos 💨💨💨
Likes
26
Share


@Probation2Propagation
Follow
Day 35! One week from transplant and we started our first LST which was topping today. After topping we watered with recharge to help combat any of the stress woes.

Likes
32
Share


@Ksouth1
Follow
Last week went well. She is beefing up nicely. Very happy I have a clone from this beauty! Seems to be a good producer judging by the size and structure of the plant/buds. Also is a good producer of resin, but I expect that from a plant with its parentage! Only thing besides a nice potent indica buzz that I would like but is purely cosmetic...I want it to have some purple coloring of some kind. But will be happy with potent! Going to be some good strains coming in the near future. This girl is smooth sailing for the most part from here on out. Doubt I will have to remove many more leaves and she is done stretching so no more adjusting ties. Until next time happy growing to everyone!

Likes
10
Share


@HideAndFly420
Follow
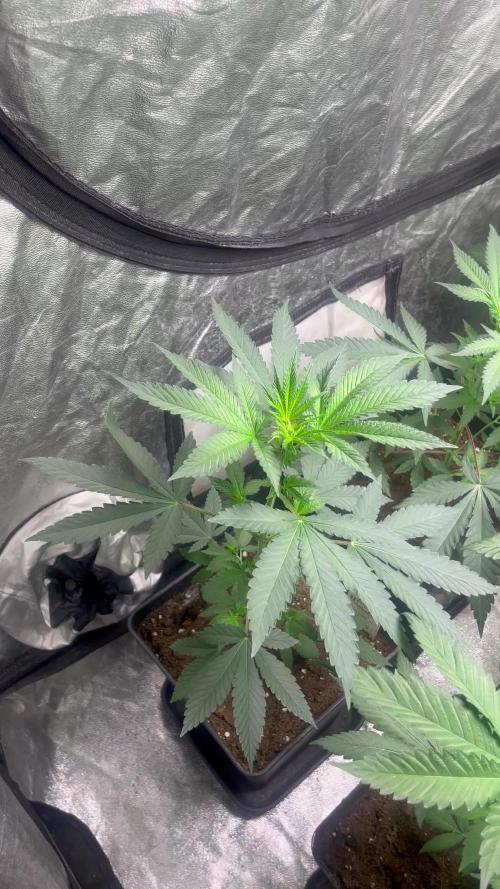
Day 29, I’ve been slowing a little bit with fer too loser as I m going into flow and I used an all mix soil from biobizz that’s already charged with an high ec, I don’t wanna risk any over, I left it for one week with just water and regulator, the development of roots will help to absorbs the ec present in the soil so I will restart to fertilise next week.
I’m using the complete line from aptus and I’m really satisfied I see how healthy the littles are.
I will have my lamp 40 cm for this week and I’ll
Move to 33 at the end of this week
Day 32 this OS is flowering supersoeedy, I can already see buds, i had one of last lst just give her a more clean structure.
I stopped to fertilise in the last 5 days, I just gave ph controlled water and yesterday 0.5 lt of water with just regulator and calmag. I wanted the plant to eat all the nutrients I gave during veg, I think this worked pretty well as I I saw her growing every day and I can. See an healthy nice green on leaves .
I think that max tomorrow I’ll start again with fertiliser.
Day 33 the orange sherbert is really running fast.
I restarted feeding her today, flowering feedings started.
Let’s goo
Let’s goo!!
Processing
Likes
6
Share


@8_SafeMode
Follow
Cookies N Cream Clone one from Zombie66 Clone two from ATMBKK
Likes
9
Share

@KurtThePlantGuru
Follow
These plants are getting so frosty, and so smelly!
The Terps are the most unique blend of Terps I have ever smelled, and I cannot say I expected it!
Terps reek into the whole room, of strong Cherry Berry Wine, a deep ripe/nearly rotten cherry funk, with a background of that Superboof Orange Rinds, and Blue Moon IPA/Hop Terps, with a very slight hints of gassiness but that might be just the orange funk from the Superboof.
Some buds are light and airy, not quite like a super silver haze or a NYC Piff kinda light and airy. It's a nice middle ground and looks as if it's gonna wash well! Some buds specifically the ones getting the strongest light, are a bit more dense.
Beautiful strcuture,.spear shaped nugs with wacky formations, almost cactus like ! Haven't seen any foxtailing but almost seems as if it might as some point!
Color is bright green! Which it's still a bit too early to tell if it's gonna turn purple but according to pictures that the breeder has posted of 2 diff phenos , one being completely purple and the other with a greyish green with spots of purple color! So I look forward to seeing how it looks!
This Pheno has a completely different structure then the 2 Homegrown Genetics posted! Super stable for having such different genetic variation !

Processing
Likes
3
Share


@Simon_Says_Smoke
Follow
22 December 2020
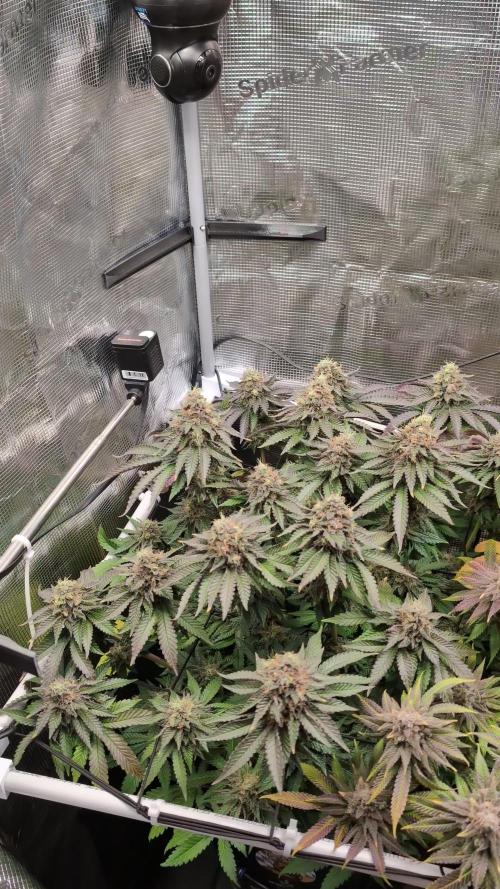
Both of these ladies are almost ready for harvest, not really much to update.
Next week I will remove the scrog and and start flushing these ladies ladies for a week.
Likes
9
Share

@GrowInBavaria
Follow
30.12.2026 – BT58
Bei allen drei Pflanzen wurde – mit Ausnahme der Apples & Oranges – nur noch pH-korrigiertes Wasser mit Cal/Mag gegeben. Die Apples & Oranges erhielt die letzten drei Gießgänge ausschließlich Wasser und wurde nun etwa eine Woche lang nicht mehr gegossen, bis zur Ernte.
Des Weiteren war dies der letzte Gießgang in der Blütewoche mit Cal/Mag. Für die restlichen zwei Pflanzen gibt es nun ebenfalls nur noch Wasser, um im Drain einen EC-Wert von 1,0 zu erreichen.


Likes
77
Share


@SooSan
Follow
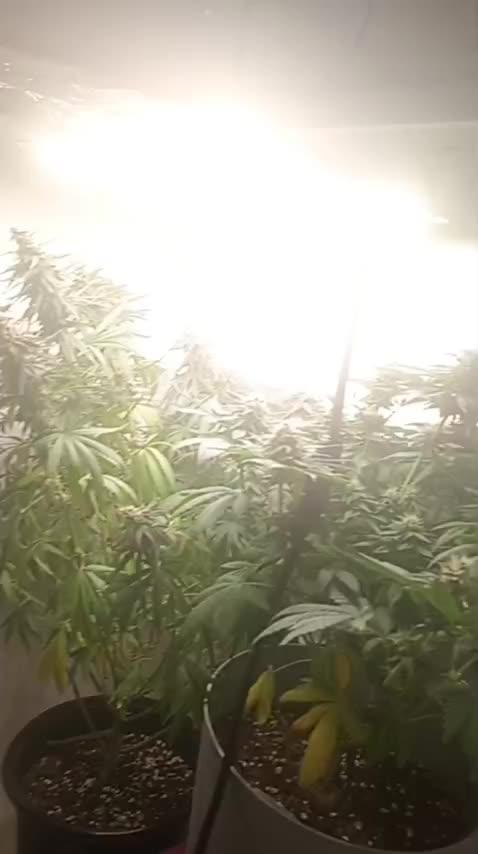
Le stretch est vraiment ridicule, je voulais que ça monte jusqu'en haut... Tant pis...
En tout cas la flo est lancée 😁
Dans l'ordre:
1) Afghan Peach x Blue Monkey
2) Gelato Cake
3) Fast Critical Poison
4) Tropical Fuel
5) Hindu Kush
6) (Blueberry x Black Domina) X (Kosher Kush x Mk-Ultra)
7) Blueberry
8) Herz OG
9) (Blueberry x Black Domina) X (Kosher Kush x Mk-Ultra)


Likes
13
Share


@Damonkey
Follow
Great easy grow, took well to led grow and nutrients never needed to step back. Needed support fairly early on in grow. Heavy flowers not massive but I guess loaded with oils and good stuff. No apple smell or taste with these two phenos at all. Both super heavy chem affairs. One however tastes a lot like gorilla glue, it is one of the parents. This cultivar has shot straight to the top of my lists of grow again. It’s pure fire.

Likes
1
Share


@Growing_Spartan
Follow
May 27th-29th
Trellis net is getting full and plants looked good, could’ve flipped to 12/12 but my smart self completely forgot about that flowering stretch so I vegged them till I saw a “good height” lmao I know but it’s my first grow leave me alone lol