Likes
Comments
Share


@Lucyfer
Follow
So, what's new?
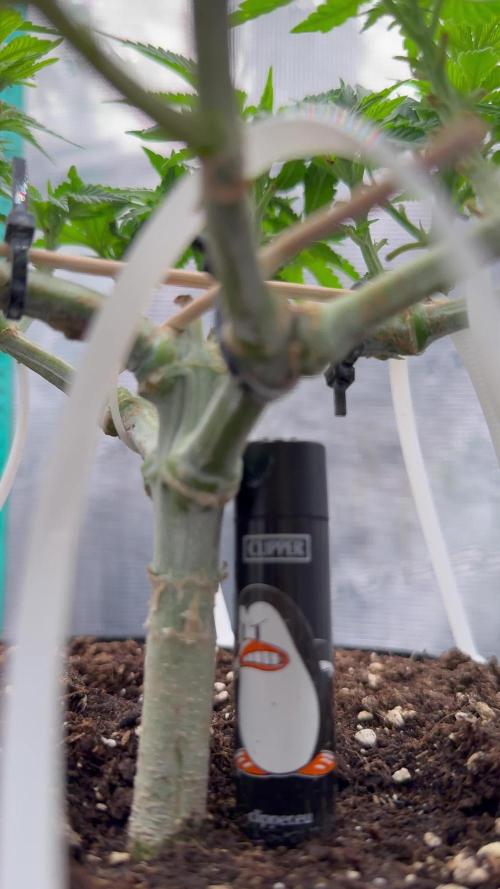
water levels seems to be a pain in my assholes that hasn't had a great success, however it matters little becuase roots are very long now so no need for the levels to be even steven, great success.
have had some mistakes were the LST was so strong i actually broke one stem and was about to break another but noticed in time and manage to save it
been speakign with how weed grow in regards to the grow and so far so good, really recomend his patreon in cae you're seeking peace of mind with your grows.
Just recived my SCROG!!!!, so will be managing plant training with the net and also got my new viparspectra 1500xs pro, whatever name is, looks fancy and feels fancy so greta success there too.
not much to add other than my mistakes and that it's week 4.
wish you all great things with y'all grows, thanks for stopping by.


Likes
21
Share


@gr3g4l
Follow
con 64 dias y viendo el estado de los tricomas diría que voy a empezar a regar con agua sola , unas 3 veces más en el que añadiré en el riego Dos de acido cítrico por uno acido ascórbico
y en 7 -10 dias cosecharé.

Likes
11
Share


@Chuckwaggon420
Follow
This week has been time to put on weight!! They are getting so heavy glad put in secondary scrog net.
Have only been doing water so plants can just pull what they want our the soil they are starting to fade on their own. They have some amazing kinda blue tent to the buds. They have a gassy sweet smell to them!
This will be the last week I feel but still see some clear heads and no amber so shall see over next week!!


Likes
5
Share

@Zeven_Xero_Fyve
Follow
.
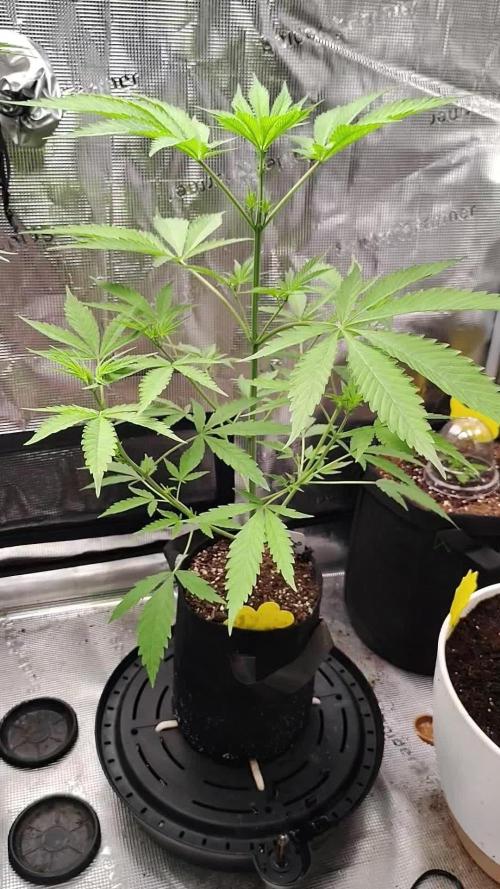
End of Week 5 (day 35):
She's stretching really well, displaying a dominant stem and shorter surrounding shoots that I believe comes from the Gelato #33 genetics. I've not really done much trimming or defoliation, yet she looks almost naked. Her leaves indicate some stress, but the vigorous growth and appetite say "full steam ahead, Mister."
With a sample size of one it's hard to know if she's the 1 in 5 chance Autoflower or not. I may pop the rest of the Gelato x GDP seeds out of curiosity at some point in the future, but its not a priority.

Processing
Likes
5
Share


@Ganjagrandaddy
Follow
DAY 49: This lady has took me round the houses this week. She was looking so close to her finishing with so many browning pistils . Thankfully she has now begun her second flush of flowering all over. Her buds look to be swelling a little more now and she is smelling so fruity sweet still. Her ge.eral health is good and she doesn't have any fade going on anywhere from maturity either. She does have so endive sized colas around her now too so another couple of weeks could give her chance to swell more. I have committed the cardinal sin of nipping odd a lower limb to dry and sample her at this point. 7 weeks and she is looking good already. I do think the second flush of flowering will allow me to keep her going a few more weeks as I think she is a beautiful cross. Her smell is really nice and sweet with a definite creamy after thought. I do have a few more of her mums seeds so will see how they fare in a scrog I think are some point. I am so far , very happy that I germed this to try and am Looking forward to sampling it cured.
Likes
5
Share

@Black_Widow
Follow
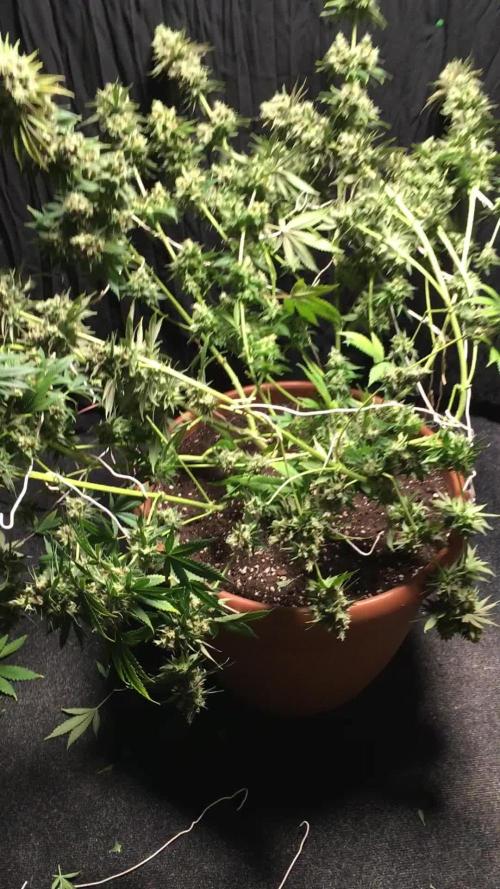
Хороший вырос цветок
к сожалению не получилось сфотографировать ее во всей красе
завалились ветки вся конструкция не устояла под тяжестью цветов
всем удачи всем красивых цветов !!!
Processing
Likes
11
Share


@kcartel
Follow
For the first time this week I added fertilizer of 0.5 each, and faced a very unpleasant problem, the plant rushed up so much that at the moment the top cola reached the height of the lamp, and the temperature there is quite high, very much afraid that it could damage the plant itself, and It all happened because I did the maine lining, and the central cola went to grow up, I don’t know how to solve this issue, but soon I think I’ll decide this question, wait for 6 weeks!
Likes
8
Share

@squalino
Follow
frost banger
la plante m'a surpris. je pensais à vue d'œil recevoir dans les 250 grammes .
mais les tête sont dense et lourde .
donc resultat final 370 grammes humide . le nombre de trichome visible et impressionnant super plante à première vue . plus que le séchage et la dégustation
la deuxième plante est plus grosses.
donc 1er conclusion
elle a l'air d'être exceptionnelle attendre la suite

Likes
147
Share


@MrJones
Follow
MrJones Black Berry OG
🔹🔹🔹🔹🔹🔹GOALS🔹🔹🔹🔹🔹🔹
🌞Flowering Environment - 75/80℉ and 50% Humidity
💧 Feeding - Advanced Nutrients Bloom Regiment - Great APP!
🍃Training / Added the second trellis last week, it is doing a great job with support, SCROG process makes it hard to defoliate the plants.
🕷️ IPM - Will be using Green Cleaner" 1 OZ per Gallon, and CannControl from Mammoth alternating between product each month for Integrated Pest Management.
💡Mars Hydro LED / Veg TS-1000 / Flower 480W FC 4800, this light is just performing very well!
🔹🔹🔹🔹🔹🔹🔹🔹🔹🔹🔹🔹🔹🔹🔹🔹🔹🔹
📝 Rambling - With week 14 here, will be the last week of nutrients and will be starting with PH H20, the buds continue to get fat!
🔹🔹🔹🔹🔹🔹🔹🔹🔹🔹🔹🔹🔹🔹🔹🔹🔹🔹
▶️ Friday - 04.09.21 / Feeding 40 OZ of Advanced Nutrients
▶️ Saturday - 04.10.21/ Feeding 40 OZ of Advanced Nutrients
▶️ Sunday - 04.11.21/ Feeding 40 OZ of Advanced Nutrients
▶️ Monday - 04.12.21/ Feeding 40 OZ of Advanced Nutrients - Thrdr girls are getting PHAT! I was a bit concerned a few weeks ago but now I am just as happy as can be!
▶️ Tuesday - 04.13.21/ Feeding 40 OZ of Advanced Nutrients
▶️ Wednesday - 04.14.21/ Feeding 40 OZ of Advanced Nutrients
▶️ Thursday - 04.15.21/ Feeding 40 OZ of Advanced Nutrients
🔹🔹🔹🔹🔹🔹🔹🔹🔹🔹🔹🔹🔹🔹🔹🔹🔹🔹
📜 Cultivar Information - We have created this strain by crossing the best Black Domina available with Very Berry and our own Lost Coast OG Kush, this plant produces large colas with a super intense sweet berry flavor with a sweet-smelling aroma that varies from fruit and berries to sweet candy. This lady offers tight internal stacking giving a perfect structure for those super heavy colas, which is perfect for growth both indoors and out, if grown outside she is fairly resistant to mold and powdery mildew which is a real bonus with such large colas.
🔹🔹🔹🔹🔹🔹🔹🔹🔹🔹🔹🔹🔹🔹🔹🔹🔹🔹

Likes
20
Share


@TheGourmetWeed
Follow
One more week is now finished, let's have a look as what happened during this last 7 days and nights
Used the weekend to make a nice cleaning again - I like to take all from the tent and clean on Sundays. Gives a good feeling.
The plant is still full flowering, finally some yellowing and browning pistils. The color of the bud is gorgeous.
Flush has started officially, 2l water every second day for a week, and then probably should be ready a few days after.
It's a great smell coming from this plant, so sweet. Is amazing!
Temps and RH are very stable, which is great. 27c day 60%Rh 24c night ~70%RH
That's all for now, next week there'll be more.
Have a nice week, happy grows to all, and better smoke :D


Processing
Likes
30
Share


Likes
52
Share


@DogDoctorOfficial
Follow
Let's realign our cosmic compass and embark on a harvest report for our magnificent Cosmos F1, a pure CBD strain that has taken us on an extraordinary journey. Brace yourself for cosmic revelations and interstellar delights!
After an impressive 11 weeks from seed and 7 weeks of flowering, the time has come to witness the cosmic culmination of our efforts. I carefully hung the entire Cosmos F1 plant to dry, allowing the cosmic energy to infuse every inch of this botanical marvel. It's a sight to behold, with majestic branches reaching for the cosmos, reminiscent of a cosmic dancer frozen in time.
As our cosmic queen gracefully dries, her vibrant hues continue to amaze. The shades of green, intertwined with delicate hints of purple and gold, are a testament to her genetic splendor. It's as if she has absorbed the cosmic essence of the universe, transforming it into a visually stunning spectacle.
Now, let's talk about the cosmic power of CBD. Our pure CBD strain holds the key to a transformative experience. With minimal psychoactive effects, this cosmic treasure offers a realm of therapeutic benefits. It's like a cosmic massage for the mind and body, soothing and relaxing, allowing us to explore the depths of cosmic tranquility.
The decision to hang the entire plant for drying is a testament to our dedication to preserving the cosmic integrity of our harvest. By allowing the branches to hang freely, we encourage a slow and controlled drying process, ensuring that the cosmic essence remains intact. It's a ritual that honors the plant's journey, preserving its cosmic magic for us to enjoy.
As we eagerly await the cosmic transformation, let us express our gratitude to the celestial forces that have guided us on this cosmic odyssey. The cosmos has aligned to bring us the extraordinary Cosmos F1, a gift from the cosmic garden gods themselves. We extend our heartfelt appreciation to the cosmic harmony orchestrated by @James and Royal Queen Seeds.
In the coming days, our dried cosmic buds will be ready for the next stage of our journey. From cosmic concoctions to cosmic culinary delights, the possibilities are infinite. Imagine infusing the cosmic power of CBD into soothing teas, cosmic creams, or cosmic confections. The universe is our canvas, and with our cosmic harvest, we can create cosmic masterpieces.
As we bid farewell to our Cosmos F1, let us cherish the cosmic memories we've shared. The vibrant colors, the pure CBD power, and the cosmic connection we've established with the universe. May our future endeavors be as cosmic and awe-inspiring as this one.
Until we meet again, my cosmic friends, lets keep exploring the cosmic wonders, nurturing our cosmic gardens, and let the cosmic energy guide our cosmic creations. May our harvest be abundant, our cosmic experiences be enlightening, and our cosmic journey be filled with celestial blessings.
As always thank you all for stopping by and for supporting me on this journey, i am super passion about growing and fell blessed to have you all with me on


Likes
32
Share

@Chubbs
Follow
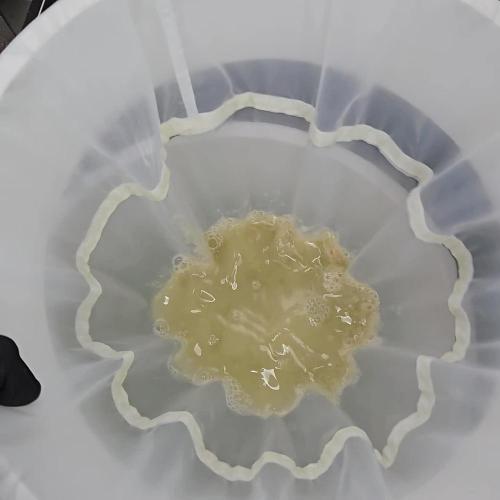
2025 Fastbuds GreenHouseGrow has come to an end. Its been an absolute roller coaster of a grow. So cool to watch them grow from sprouts to absolute giants around 8ft tall. They're a great and easy strain to grow and I could only imagine having them in bigger pots how much bigger they could get. I ended up harvesting them for fresh frozen and immediately put them into the deep freezer after trimming everything that didn't have trichs on it. Excited to do some bubble wash and make FreshFrozen Rosin/Hash. All in all highly recommended and Happy Growing.
Likes
8
Share


@jayizrollin
Follow
My plants voted, did yours???
Being lazy this week, no pics of TG2
TG1 looking great though🤤

Likes
48
Share


@Focus420
Follow
Začíná 9. týden květu celoroček 🌱👍
Den 92.
Kontrola trichomu autoflower
(sleep)20% jantar
(bcn critical xxl) mléčné
Den 93. Nastavena síť (Scrog)
Hnojeni celoročky -
ph 6.2
ec 2.4
Autoflowery proplach -
ph 5.6
ec 0.3
94.den
Nový fotografie🌱😎
95.den
Kontrola 👍👍
96.den hnojení
Celoročky - ph 5,9 ec 2,35
Autoflowery - ph 5,7 ec 0.35
97. den
Jedeme dále,přibylo video
98. den
Klid 🙃 mír a ticho 🌱😎


Likes
Comments
Share


@Papapeyote
Follow
Traspaso a nueva carpa, por el momento misma luz, para floracion de usara un sodio en cambio de la LED