Likes
Comments
Share
@Polygus
Follow
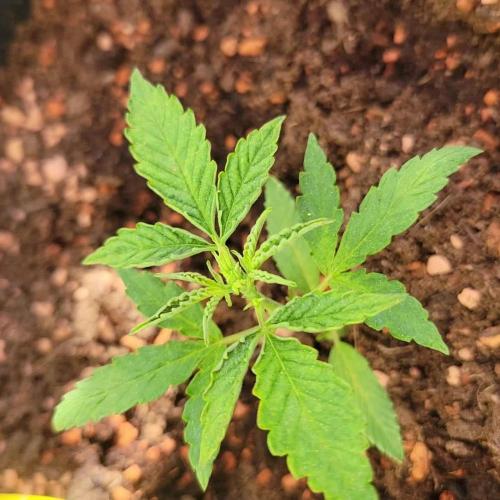
A big hello to all the cannabis growing gardeners...and all the other visitors that came across my grow journal. I'm a little bit late with starting this grow because the plants will finish around end of december or so, so i'm basically counting on a warm december :) This grow was supposed to start earlier, and I did germinate 11 seeds last month but only three of the lot sprouted out, it was totally my fault and i did abort that grow so we could start with a clean slate and at least four plants....so here we are ;) All three seeds popped after 36 hours in a glass of water, but thanks to my thick awkward fingers only two seedlings came out after planting in rockwool...my fingers are killers to most of my little sprouts :/ We were gifted Moby Dick seeds by Romy from Seeds Mafia to take part in the competition they are running. Thank you Seeds Mafia, for giving me the opportunity try out your stock. It's the first time we get to grow Seeds Mafia cultivar. https://seedsmafia.com/en/feminized-cannabis-seeds/moby-dick-feminized.html This whole grow's main sponsor is Spider Farmer and as such I added a video of unpacking one of the parcels I got from SF. Here are the links for people interested in the Spider Farmer products that are presented in the videos: https://www.spider-farmer.com/products/spider-farmer-30w-uv-led-grow-light-bar/ https://www.spider-farmer.com/products/spider-farmer-30x-60x-jewelers-loupe-magnifier-for-led-light/ A big thank you to Jessie and the whole Spider Farmer crew for supporting my effort to grow the best cannabis I can. Let's get this started already! Thank you for your visit, please leave a like and hope to see you beck here in about a week.
Likes
5
Share
@MrFriday
Follow
26.08.2024 1. RDWC: I run a DIY system made of 4 Buckets 17L+separated control/tank bucket (12L operational water per bucket used) fallponic plus underwater current. I don't know why I have made such system I just wanted to be sure that I have included every possible option. I'm not sure but maybe I'll upgrade it to rainponic it's not that hard of a job. I'm not using my 100L reservoir this run becose it needs replacement old one made a small flood in my garden. 2. TENT AC Infinity 5x5 3. Airpump Hailea ACO 388 D 70L/min. 4. Water chiller: hailea water chiller hc-150a. 5. LED GROW light Grand Master Level Tarantula voyager 1500W 2 chanel's plus controller (it will be my first run with this monster it just arrived). 6. INLINE FAN: AC Infinity cloudline S6 carbon filter. 7. CLIP FAN: AC infinity Cloudray S6 3 pcs. For low middle and over the LED air movement. 8. Humidifier AC INFINITY T3 (I don't need stronger one naturally the humidity here is around 65-70%) 9. TENT CONTROLLERS: controller 69 PROX2 10. Germination/humidity dom by AC infinity with germination lamps 40W Ionabeam S11 only for the first 2 weeks before VEG. DAY 1 Closed in a box hiden in a dark boiler room. Room temperature 25C EC 850 RH 90% Instruments used for measuring: AC Infinity Hydroponic Meter PRO AC infinity VPD thermometer DAY 2 5/6 seeds have start to crack open I guess tomorrow or the day after they will be all ready for the cubes. DAY 3 ROOM TEMPERATURE 26 C Relative Humidity 83% 5/6 seeds are showing signs of life. The 6th one is a little bit slower it's cracked as it can be seen on the picture but it refuses to show it's tale. I believe tomorrow it will be ready. On day 4 I'll put them in the "Root Riot" cubes and after that I'll just monitor the RH and RT until I see the sprouts. DAY4 ROOM TEMPERATURE 24.5 RH 94% 6/6 seeds have germinated so far. Today I'll move them in the Humidity dom where they will stay until they become seedlings and I'll keep them there until they are ready to be moved in the RDWC system and coco coir. In the video I have show my method of preparing the cubes for the seeds next update will be tomorrow probably only for temperature and humidity. DAY 5 ROOM TEMPERATURE 25-27. RH 89-95 I can't believe that I'm seeing first sprout today. Maybe this strain is one who can take a little push 🤣🤣🤣 I'll keep in mind and I'll se how much I can push it. Unfortunately I still don't have CO2 for veg and flower but I can try other different little tricks. I'm happy with this seeds obviously 42 Fast Buds are giving a really quality seeds. Let's see what kind of buds will come out of this seeds. I hope tomorrow everything will be sprout out and i will turn on the lamps. DAY 6 PPFD 120 ROOM TEMPERATURE 24.5 RH 92.1 It's day six 4/5 seeds are successfully germinated. Maybe the next two will pop out but for one of them I'm not so sure. Anyway I have one spare seed that I can pop out for the coco project plus I have one Papaya Cookies Auto for the fifth bucket so that's no problem. The seeds ar under the light AC Infinity Ionabeam S11 on level 3 equal to 115 ppfd plus the DOM extension. DAY 7 ROOM TEMPERATURE 25C RH 82% I have 4/6 successfully germinated seedlings. Tomorrow I'll open up the humidity dom a little bit. It's good to have spare seeds. Now I'll have to plant my spare peace of gorilla cookies and probably one Papaya Cookies Auto (gift) becose my plans were for 6 plants. Anyway this 4 soon will be transplanted in the RDWC flowering pot. Let's see what tomorrow have to say. DAY 8 ROOM TEMPERATURE 25C RH 82% Amazing root development, I wasn't expecting this kind of speed but obviously tomorrow I'll transplant them in the RDWC even before the VEG state. Maybe I'll keep them a few more days when the first set of leaves is all out. DAY9 ROOM TEMPERATURE 24.1 RH 58% Today is the last day in the humidity Dom. I delayed the move becose i wanted to have a longer stems and becose my fertilizers got lost in the depo so ill receive them tomorrow. We have very healthy baby's with a lot of tiny roots so it will be perfect to start then from day 10. DAY 10 ROOM TEMPERATURE 26-27C RH 70% EC 115 pH 7 This is the fastest seeds I ever see. I have never transferred seedlings in to RDWC so far, usually I make this procedure around day 17-20. While I was transferring them one of the seedlings accidently snapped a little bit but I hope it was not fatal enough and maybe it will survive, only the time will show, anyway I have another one in coco so I can always transfer it in to RDWC if needed. EC is only 115 for today becose of the little bit of ATHENA BALANCE I dropped in the water, so far the roots are not touching the water so i can add the fertilizers tomorrow while I'm fresh. DAY 11 Water Temperature 18C Room temperature 28C EC 120 pH 7 PPFD 200 RH 70% They look nice and healthy still not enough signs of roots for picture but so far the seedlings look fresh. One more day in the Formulex+tap water and they will go in the Athena by day 13. DAY 12 Water temperature 18C Room temperature 27C pH 7 PPFD 220 RH 70 AC 240 Everything is going g quick and perfect. So far this run is going smooth as never. I never had root development that quick as this with this seeds. I'm almost in love with them. After a quick summary with my previous runs I decided to double the AC before tomorrow when I'll change the water and I'll replace it with 6.0 pH RO water and the full athena program for the RDWC. So far so good let's see what the Athena nutrients will show after one week. DAY 13 RH 70 Room temperature 27-28 EC 290 pH 6.1 Water Temperature 20C PPFD 300 Light cicle 20/4 I couldn't resist to flip the fertilizer to athena. After all as soon as I teach em what its better. Full water change of the tank and new suplements. Formulex is amazing suplement for the first two weeks maybe it can carry most people to whole VEG if it's in soil or coco, but I want the real food in RDWC. So far all the plants have amazing small roots so that means the system work well. Let's see the progress tomorrow, but I beleave in the middle of the week this plants will be already in official VEG period. DAY 14 RH 70 Room temperature 26C EC 290 pH 6.0 Water temperature 19.5-20C PPFD 350-400 Light cicle 20/4 I needed a little bit more light. I don't know how to explain it but its a grower thing and now my seedlings are looking better than the morning. They were looking a little bit "dizzy" if I can use this terminology. So basically in perfect water temperature, perfect fertilizer level and good aeration, there was nothing left beside the light. As I'm saying you can't feed a lot if you don't have enough light. I added the spider farmer SF 1000 EVO over the water container, becose the big fixture is too far from them, but I can't put them under the Voyager, becose my previous grow is in the final week. So now they are on a separate light 🤣🤣 🤣 370-400 PPFD is a little bit much but I beleave they will manage it. After all the plan of this run is to reach 1000 PPFD in the final days. DAY 15 RH 70 Room temperature 26C EC 290 pH 6.0 Water temperature 19.5-20C PPFD 350-400 Light cicle 20/4 So far the progress is mainly on roots and some new leafes are coming out. Probably next set of leafes is going to be the first that will mark the veg stage. I have added a little bit of ATHENA clense today and by far notging ha e changed since yesterday. DAY 16 RH 70 Room temperature day 26C Room temperature night 23C EC 290 pH 6.1 Water temperature 19.5-20C PPFD 350-400 Light cicle 20/4 As I was expecting most of the job is pre-veg, what I mean is that the results we can see are mostly in root development and ohh boy this is a crazy root spike in just 24 hours. I don't know is it becose of the Athena or just the genetics of the seedling but Im really amazed. In just 11 days from first seedling until today and I'm seeing some crazy root development. I truly beleave that the next set of leaves will be marking the vegetative stage and then we can start the game. DAY 17 RH 55-60 Room temperature day 26C Room temperature night 21-23C EC 320 pH 6.18 Water temperature 19.5-20C PPFD 350-400 Light cicle 20/4 I decided to add a little bit more Athena Ca-mag. It feels like that my little ladies are struggling for it. I'll see the results tomorrow. DAY 17 RH 55-60 Room temperature day 26C Room temperature night 21-23C EC 320 pH 6.18 Water temperature 19.5-20C PPFD 350-400 Light cicle 20/4 I decided to add a little bit more Athena Ca-mag. It feels like that my little ladies are struggling for it. I'll see the results tomorrow. DAY 17 RH 55-60 Room temperature day 26C Room temperature night 21-23C EC 320 pH 6.18 Water temperature 19.5-20C PPFD 350-400 Light cicle 20/4 I decided to add a little bit more Athena Ca-mag. It feels like that my little ladies are struggling for it. I'll see the results tomorrow. DAY 18 RH 55-60 Room temperature day 26C Room temperature night 21-23C EC 320 pH 6.18 Water temperature 19.5-20C PPFD 350-400 Light cicle 20/4 Okay two more days and we will be in veg. It's Not like we are not in veg today I just want to keep the update from Sunday to Sunday. DAY 19 RH 55-60 Room temperature day 26C Room temperature night 21-23C EC 320 pH 6.18 Water temperature 19.5-20C PPFD 350-400 Light cicle 20/4 We are in veg tomorrow so today we change nothing. Tomorrow will be great day.
Likes
6
Share
She's finally gone into flower turn into a nice little bush and was a breeze to train I have started to do leaf stripping cause of environmental and cause of how fat the leaves are let's be honest a blurple light isn't the best light 🤣 but seriously this should be a lesson for me I like challenges we will see what we can yeild. Edit- been topped dressed on 1-10-24
Likes
12
Share
Likes
6
Share
@Borberad
Follow
​Verehrte Chronisten des grünen Treibens im Hause Borberad! Diesmal wagen wir uns an einen wahren Sprinter der feminisierten Cannabissorten: Cannabis indica L. var. Candy Cream Go Fast aus den geschätzten Händen der Genetiker von Kannabia Seeds. ​Bereiten euch auf eine weitere tiefgreifende und süße Untersuchung des pflanzlichen Wachstums vor. Unsere bewährte Methodik der fast täglichen Bilddokumentation und sporadischen Videoanalysen wird auch bei diesem Exemplar, wohlgebettet in unserer standardisierten Erdmischung zum Einsatz kommen. Wir werden Zeuge der Entwicklung einer Pflanze, deren Name bereits ein außergewöhnliches Aroma und damit ihre – sagen wir mal – 'süße Verführungskraft' verspricht. Verfolget mit uns, wie sich diese 'Zuckercreme' im Rekordtempo entfaltet und welche duftenden Herausforderungen uns Borberads bei ihrer Aufzucht erwarten. ​Detaillierte Sortenbeschreibung: Kannabia Seeds Candy Cream Go Fast ​Genetik: Candy Cream Go Fast ist das beeindruckende Resultat einer gezielten Kreuzung von Indica Cream und Auto Indica Cream. Diese zu 60 % indicadominante Melange besticht durch eine drastisch verkürzte Blütezeit (Fast-Version), ohne dabei auf die bewährten Charakteristika ihrer Cream-Familie zu verzichten. ​Größe: Im Innenbereich erwarten wir für die Candy Cream eine kompakte Wuchshöhe von etwa 80 bis 100 Zentimetern. Dies macht sie zu einer ausgezeichneten und leicht zu bändigenden Wahl für unsere Zeltlandschaften. ​Farbe: Die Farbpalette ist von satten Grüntönen dominiert, an denen sich im fortgeschrittenen Stadium äußerst dichte und harzige Blüten bilden. Ein wahrer Augenschmaus, der im Licht der LEDs oft so wirkt, als wäre er großzügig mit Puderzucker bestäubt. ​Geschmack: Der Name deutet es bereits an: Eine süße Symphonie! Das Geschmacksprofil ist eine cremige Mischung, die stark an Vanille und Karamell erinnert, sanft abgerundet mit fruchtigen Anklängen und feinen, erdigen Untertönen. Ein geradezu buttriges Geschmackserlebnis. ​Eigenarten: Diese Sorte ist ein wahrer Sprinter mit einer rasanten Blütezeit von lediglich 46 bis 49 Tagen. Mit einem THC-Gehalt von rund 20 % liefert sie ein sanftes, beruhigendes Body-High. Ihre hohe Resistenz gegenüber Feuchtigkeit und Schädlingen macht sie zu einer überaus robusten Kandidatin für unsere Aufzeichnungen. ​Rechtlicher Hinweis: "Abschließend sei wie immer angemerkt, dass dieses Growtagebuch die dokumentarische Begleitung eines privaten und legalen Anbauvorhabens im Rahmen der jeweils gültigen Gesetze darstellt. Wir bei Borberad distanzieren uns ausdrücklich von jeglichen illegalen Aktivitäten und betonen die Wichtigkeit der Einhaltung der lokalen Rechtsvorschriften bezüglich des Anbaus von Cannabis." ​Woche 0: Die Keimungsphase ​Das Keimen des VIP-Samens hat im Mars Hydro Anzuchtzelt begonnen. Tag 1 Entgegen unserer gewohnten Vorgehensweise nutzen wir kein Tauchbad mit 1% H202 zum Quellen der Samen sondern lassen den Samen vollständig im von Kannabia freundlicherweise zur Verfügung gestellten Sproutly Keimen. Tag 2 Nach 36h wurden der Sproutly das erste Mal geöffnet und zeigte gekeimte Samen mit ca 5mm langer, weißer und gesunder Wurzel. Also rein in die Vorbereiteten und zuvor temperierten Anzuchttöpfe, anstelle der in letzter Zeit üblichen Easyplugs. Tag3 Warten Tag 4 91 Stunden nach dem Start des Quellen waren die kleinen Keimlinge dann schon ohne Helmchen ins Licht gewachsen. Tag5. Die Keimblätter sind entfaltet und die ersten echten Blattpaare öffnen sich. Tag 6 Sie macht einen soliden Eindruck. Tag 7 ... und lässt sich etwas Zeit. ​Düngung & Messwerte: kein zusätzlicher Dünger notwendig. Fokus auf stabilen VPD von 0,8 kPa.
Likes
2
Share
@Bluemels
Follow
Tag 32: Bisschen sehr groß schon. Wird eng mit der Lampe... Tag 34: Höher bekomme ich die Lampe nicht. Abstand zur Lampe jetzt sind 30cm...
Likes
85
Share
Decima y ultima semana, solo aplico un riego con nutrientes y el resto con agua. Ha sido un cultivo muy divertido en el cual he aprendido mucho. Se ha formado una gran cola cargada de blanca resina y tiene un olor fuerte afrutado. 📅 Dia 64: Riego con nutrientes EC 1250, EC escurrida 1650. Comienza el lavado de raices... 📅 Dia 66: Riego con agua, EC escurrida 1200 📅 Dia 67: Riego con agua EC escurrida 450 📅 Dia 68: Riego con agua EC escurrida 380 📅 Dia 69: Riego final con agua EC 📅 Dia 70: meto a oscuras 48horas antes del corte. 📅 Dia 71: Mañana Día de corte.
Processing
Likes
2
Share
Que hay familia, yo aquí entre humos actualizo las misty gorilla auto, seamos sinceros, yo estoy algo decepcionado con el tamaño de la flor, no con el ejemplar ni la calidad solo la cantidad, y es que ahora pienso yo, las autos realmente merece la pena a sabiendo que si ciclo es parecido al de una feminizadas? 4 semanas crecimiento 8/9 floración? No no merecen la pena seamos realistas si queremos cultivar en interior lo mejor que podemos hacer es comprar semillas feminizadas y asegurar tu cultivo. Y dejar solo las autos para gente que no se puede permitir un indoor y tenga que cultivarlo en terraza y así cultivar todo el año . Ph regulado ya quite alimentación y limpie raíces, las e sacado a la terraza, desmontó Indoor me mudo y ampliamos zona de comfort. Hasta aquí es todo gente un saludo y muy buenos humos 💨💨💨
Likes
9
Share
@Loucifer
Follow
This plant is fucked because of me my dumb ass used to strong of a light on seedling stunted all my seedlings some are coming back not this black berry might pull it and start new it’s my fault not the breeders
Likes
42
Share
@Dr_Boom
Follow
This was a fun week. She continued to stretch and started to show some flower at the end of the week. I popsicled her to clean her up under the canopy. I'm trying to avoid getting a lot of popcorn when she finishes. I don't want anything under the trellis. She is really showing good growth, and will need some defoliation soon.
Likes
6
Share
Se acerca campaña de corte Las demás las seguimos cada 10 días con tes
Likes
5
Share
Plants are currently drying 2+ months later. And next project au79
Likes
4
Share
@Coopmc
Follow
Ya buddie got a cut of this to throw in with FruitWalker 50/50 I’ll be reversexig for pollen! Hell yes😍😍😍
Likes
14
Share
@PPFDaddy
Follow
Flowering week 8 is done for my girls. The week went pretty smoothly, except for one issue that’s getting more obvious as the buds gain weight. On at least the three Critical Orange Punch plants, the branches are starting to give up and lean wherever they feel like, so the tent is a bit “lived in” right now.I did my best to support everything without making it a whole engineering project, tying branches together and pulling them into better positions. A scrog net would’ve helped, but with the tent upgrade and how often I’ve needed to move plants out for checks, it just wasn’t practical this run.Aroma-wise, this round feels noticeably sweeter than my previous Critical Orange Punch run, except maybe the Special Kush. Buds are a bit smaller, but they’re making up for it with resin, color, and overall intensity. Special Kush might be the least productive, but that piney note with a touch of lemon is seriously addictive.Parameters are stable, humidity is slightly high at around 55% to 60%, temps around 23°, and I’m keeping feeds consistent with low EC like I’ve been doing the last three weeks. I’m expecting at least two more weeks to go.That’s it for this week. Tips and opinions are always welcome. Happy growing everyone!
Processing
Likes
6
Share
@jollychap
Follow
Greetings friends Allow me to introduce you to my first ever brand spanking new homemade self contained DWC hydroponic system. So for this small experimental cycle, I will be testing various nutritional additives and plant training techniques. I will be sure to record a daily log in order to optimize my progress. Please note I will not be including germination and drying time. Day 1 Mon, 16 July So after a few days germination and nurturing, the plants have been moved to their permanent home. I filled the reservoir with nutrients following the can a websites specific instructions. Day 2 Tue, 17 July I've noticed a small growth in height however, I had a small humidity dome which upon moving slightly damaged the leaves but I noticed some strange spots which may have been from the fertiliser. But I did follow the dosages exactly?? Day 4 Thurs, 18 July Note to self, maybe stick with clones seeing as you get straight into the vegging stage saving maybe a week or two. That and the fact they're free. Ok, so I had to completely empty all my reservoirs because I misinterpreted the CANNA websites feeding schedule. It said 0-3 weeks which I foolishly did not realise was post-germination/sapling. And also one of the smaller plants #3, actually fell over because it's roots still had not dug deep enough to feed on the reservoirs moisture. However, I almost literally saw it pop back up with a tad of rehydration. Note to self a good trick for future reference will be to fill the reservoir right up until it pretty much touches the net pot and then shrinks back down to that even 35L once I begin adding nutrients. Day 5 Fri, 18 July Ok, so I gathered a bit of Intel from my friendly neighbourhood hydroman. First off I can hold off buying the EC meter until next they enter the actual vegetative stage which apparently is between 3 to 5 internodes ( the space between nodes) until then I will be feeding them a fraction amount of veggie fertilizer and rhizotonic. Now, this swamp cooler thing has piqued my curiosity if I'm not mistaken dry ice converts to carbon dioxide which we all know plants love so, that means a swamp cooler can cool, raise humidity and increase co2? In the mean time, I was given a bag of homegrown co2 which I will photograph. This will also counter the high-temperature problems I have been having. Apparently, plants can withstand an additional 10 degrees with the addition of co2 that complemented by silica would prove to be invaluable in the summer. I will be purchasing a humidifier for my saplings soon and have decided to stick with weekly reservoirs, Peace out. Day 7 Sun, 21 July Note to self I think for my cycle if I used a short square shaped reservoirs and perhaps less litres next time with multiple net pots per reservoir and with clones I think that would greatly accelerate vegge time and thus shorter cycles in general Got myself a very good humidifier and added small amounts of vegge fertilizer to the none CANNA plants.
Likes
10
Share
Sehr viele Triebe die bereits stark austreiben. Freu mich auf diesen Pheno sehr, da ich ihn schon sehr lange auf der Warteliste habe. Sie wird heute auf 12/12 umgestellt.
Processing
Likes
7
Share
@Dralph87
Follow
RC#1 is in her last couple days. Main stem is starting to tilt with the weight of the buds 🤣 she was flushed yesturday for the final time with around 15 litres of water. Once the pot has dried out she will be swapped into my drying tent and left in darkness for 3 days before the chop. Feel like this day will never come lol. Very excited to try as this is my first ever grow. RC#2 is starting to swell up but I think she has another 2 weeks in her, she got stunted for a while during week 6-7 so may have set her back a little. Bud sites look great I'm expecting no less than 8oz between the 2 girls, just by what I've sized up already. Well shall see.... 18.03.20 (Day64) Rc#1 has been chopped. Only got a few pics but I'll take them next week once it's all weighed up. RC#2 is starting its flush this week as I think it's only has around a week or so left.
Likes
2
Share
Rastliny reagovali dobre, bez známeho stresu. Ďalšia zálievka bude čistou vodou, v nedeľu (19. 10.) plánujem opäť pohnojiť zvýšenú dávku Fish Mixu podľa odporúčaní BioBizzu na druhý týždeň. 🌱 2. týždeň / 13 deň – Hnojenie a zosilnenie svetla 💡 Nastavenie Svetlo: Vipar spectra PRO 1000 LED panel pri 80 % výkone Fotoperióda: 20/4 Teplota: 25 °C deň / 20 °C noc Vetranie: aktívne + cirkulačný ventilátor (jemný 10 pohyb stoniek.26 ) 2025) Dávka živín (ml/l) Zmes pre ryby 2 ml Bio Heaven 2 ml Acti Vera 2 ml CalMag 0,3 ml pH: ~6,3 Voda rovnomerne rozložená okolo každej rastliny (približne 300 ml na kvetináč). Substrát mierne vlhký, bez odtekania. 🌿 Poznámky k rastline Titan – Silná a kompaktná štruktúra, tmavozelené zdravé listy. Perfektne reaguje na terapiu svetla. LSD-25 – Krásna farba, symetrický rast, začína vykazovať mierne fialový odtieň – sľubné pre fázu kvitnutia. Gorilla Zkittlez – Vertikálne sa naťahuje o niečo rýchlejšie, je energická a šťastná. Žiadny stres ani nedostatok. 🔆 Pozorovania ✅ Rastliny vyzerajú veľmi zdravo, majú sviežu farbu a silné stonky. ✅ Intenzita svetla 80% zatiaľ úplne vyhovuje. ⚠️ Ak Gorilla alebo LSD dosiahnuť siahať vyššie, zvážte čoskoro mierny ohyb LST. 📅 Ďalšie kroky Ďalšie zavlažovanie: iba čistá voda Ďalšie kŕmenie: utorok–streda (28.–29. októbra) Date: 29.10.2025 💡 Light: 80% power, distance 50 cm Temp: 25–26°C | 💧 RH: 55–60%
Likes
5
Share
🌿 **Green-O-Matic Grow Week 9 Update: Nearing Harvest Time!** 🌱 Greetings, fellow growers! It's time for an exciting update on the progress of our Green-O-Matic journey as we reach Week 9 of the grow cycle. With anticipation building and buds swelling, let's dive into the latest developments: 🌟 **Bountiful Bud Development**: At Week 9, our Green-O-Matic beauties are truly showing their potential, with buds swelling and resin production kicking into high gear. The once-small flowers have transformed into dense, frosty nuggets, promising a bountiful harvest in the near future. Trichome production is in full swing, indicating peak cannabinoid potency and aromatic complexity. 📏 **Final Stretch of Growth**: As we enter the final stretch of the flowering phase, our focus shifts to maximizing bud development while ensuring optimal ripening conditions. With careful attention to environmental factors such as temperature, humidity, and airflow, we aim to create the perfect microclimate for our plants to thrive and reach their full potential. 🍃 **Leaf Senescence and Nutrient Management**: As expected in the late flowering stage, some leaves may begin to exhibit signs of senescence as the plant reallocates energy towards bud production. This natural process is perfectly normal and serves as a signal that the plant is nearing maturity. Meanwhile, our nutrient management strategy remains vigilant, providing the essential elements needed to support robust flowering without risking nutrient imbalances or deficiencies. 🔍 **Monitoring Trichome Maturity**: With harvest on the horizon, we're keeping a close eye on trichome development to determine the optimal time for harvest. Using a jeweler's loupe or digital microscope, we inspect trichomes for signs of maturity, aiming for a mix of cloudy and amber trichomes to achieve the desired balance of THC and CBD levels, as well as flavor and aroma profiles. 🌞 **Preparing for Harvest**: As we prepare for harvest day, our checklist includes gathering supplies such as trimming shears, drying racks, and storage containers, as well as ensuring a clean and sanitized workspace to maintain the integrity of our precious buds. Proper post-harvest care and curing techniques will be employed to preserve terpene profiles and enhance overall quality. In conclusion, Week 9 marks a pivotal moment in our Green-O-Matic grow journey, where patience and precision culminate in the imminent harvest of our prized buds. Stay tuned for the next update as we celebrate the culmination of months of dedicated cultivation with a bounty of premium-grade cannabis ready to be enjoyed and shared. Happy growing! 🌿✨ 🚫 **Addendum: Phenotype Bin Update** 🌱 In the spirit of transparency and continuous improvement, it's important to note that we've made the decision to bin one out of the three phenotypes due to poor development. Despite our best efforts and meticulous care, this particular phenotype failed to thrive and did not meet our quality standards. While it's always disappointing to part ways with a plant, this decision ensures that our resources and attention remain focused on nurturing the strongest and healthiest phenotypes to their fullest potential. By removing underperforming individuals, we can redirect our efforts towards optimizing the remaining plants for a successful harvest. Rest assured, this adjustment will not deter us from our commitment to excellence. We remain dedicated to the cultivation process, learning from each experience, and striving for the highest standards of quality and consistency in our cannabis cultivation journey. Thank you for your understanding and continued support as we navigate the complexities of plant development and refinement. Together, we'll continue to grow and evolve towards greater success in our cultivation endeavors. 🌿💪