


Likes
Comments
Share


Likes
15
Share


@d0cterstrain
Follow
awesome strain. lovely smells and flavors. best weed I've grown and some of the best I've smoked. even under terrible lighting. now on to a good grow light and planting some outdoors

Likes
2
Share


Likes
14
Share


@GRow_M8s
Follow
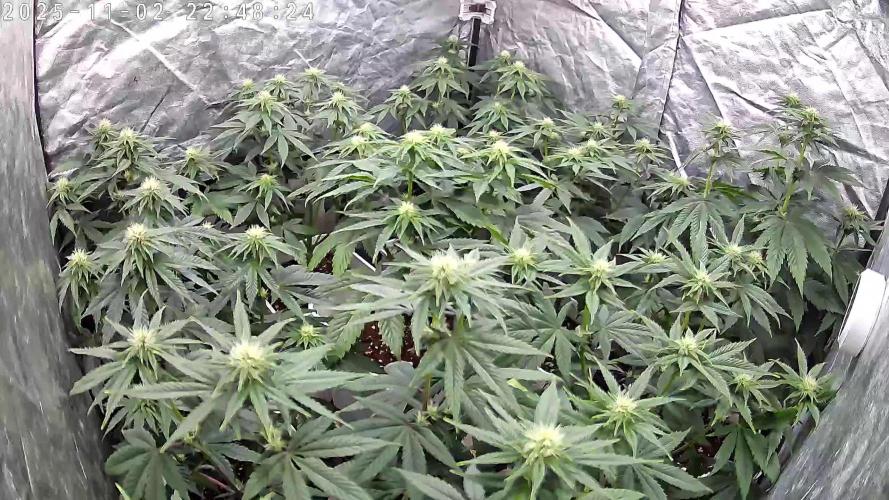
⚠️ We keep pushing the plants with 24/24h light schedule + increase nuts gradually.
ℹ️ Crystal meths (3p) and fast berries (3p) are the tallests plants in the tent, we decide to experiment with the Crystals so we will make, #1 topping (tallest plant), #2 supercroping and #3 nothing.
ℹ️ Girls scout cookies (2p) are the only plants in the tent that haven't trichomes yet (bloom) 😪.
- 38 till 🔚 -




Likes
9
Share


@Chucky324
Follow
Hello. This is the end of week 9 and the beginning of week 10 of veg.
Got them outside and repotted. They look much happier...
Look at the last pictures to see they have grown a few inches in a few days.
I put a heat sink in this year. 8 - 5 gallon containers were put under the table and are supposed to trap the heat and release it slowly.
You can see the white containers behind the plants under the middle of the table. I'll take them out when it gets warmer at night.
The soil is 5 gallons of SunShine Mix #4 ( 70% Moss) and 5 gallons of compost from my household composter. I mixed them together.
I surrounded the root ball with the SunShine Mix neutral ph soil, so the root ball doesn't get burnt by the hot soil.
The roots will grow into the mixed soil when they are ready.
Lots of light in there with the new window film I've installed.
Plants have a tangy smell to them.
OK. Be Great.
Chuck.


Likes
3
Share

@Bread_n_Buds
Follow
Our Zamnesia Critical Cheese Automatic has a distinct, predominantly sativa appearance. What a plant guys, I cleaned the ugly flowers very very well and I can really say that I am very happy with this plant. Swollen buds, well aligned and looks super healthy, can't wait to smoke this.
Techniques chosen: Here, we applied LST to a plant with short internodal spacing; it's not ideal, but we wanted to give it a try.
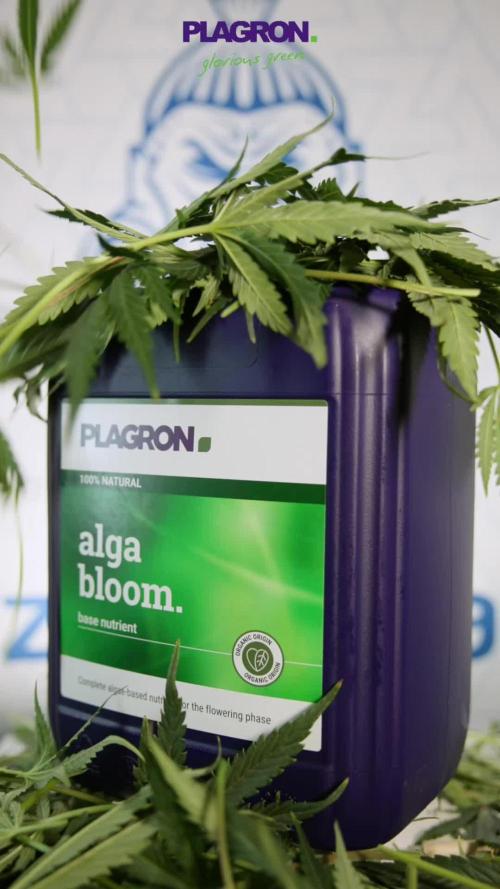
We're 100% organic and 1000% Plagron, as always.
The soil we've chosen is the recently released Plagron Bio LightMix, which will allow us to start flowering more smoothly and reliably, without the sudden changes that liquid fertilizers can cause. A week is more than enough, so don't overdo it.
We're in the final flowering stage and things are starting to get serious, so we're adding our legendary bloom booster Green Sensation and starting the late flowering phase.
- Green Sensation 1 ml/l
- Pure Zym 1 ml/l
- Silic Rock 1 ml/l
- CalMag Pro 1 ml/l
- Sugar Royal 1 ml/l
- Power Buds 1 ml/l
- Alga Bloom 0 ml/l Just booster and soon in flush
Choose your preferred style and calculate your results on the website:
www.plagron.com
Z - https://www.zamnesia.io/it/531-growshop
A great strain, not tall but very bushy! Give it a try!
Z - https://www.zamnesia.io/en/3334-zamnesia-seeds-critical-cheese-automatic-feminized.html
Z - Not content with what they already had in their hands, the expert breeders at Zamnesia Seeds wanted to embark on a journey into the world of autoflowering genetics, aiming to improve upon a great British classic... the Cheese cannabis strain. They crossed Critical with a high-quality Cheese specimen, enriched with a significant amount of Ruderalis. The result is an extremely potent, therapeutic, and easy-to-grow autoflowering version. This new, improved strain has been named Critical Cheese Automatic.
Critical Cheese Automatic embodies everything that made the original Cheese so famous, acclaimed, and loved around the world. We're, of course, talking about the Skunky flavors and pungent aromas this strain releases, not to mention the overwhelming effects it induces. Lovers of the original Cheese will surely appreciate this feminized reincarnation. Smoking Critical Cheese Automatic produces exceptionally potent sensations for an autoflowering strain. Its effects are quite strong and highly physical, both in intensity and duration. With these properties (or "body") in mind, it's no wonder many medical users are the first to want to get their hands on this "skunky" plant. Those suffering from chronic pain, inflammation, stress, anxiety, and migraines (to name just a few of the ailments it can alleviate) will notice their symptoms diminish, if not disappear completely, thanks to the potency of this strain. With this autoflowering "upgrade" of the Cheese strain, even novice growers can achieve excellent results. It's a vigorous plant, incredibly easy to grow, and requires little maintenance.
Commercial growers looking to generate income will appreciate Critical Cheese Automatic primarily for its life cycle: from germination to harvest in just 10 weeks. When grown properly, it can produce yields of 120-150g per plant. In addition to its excellent yields, Critical Cheese Automatic reaches a rather compact size (1 m), making it highly suitable for any type of grow. That said, Critical Cheese Automatic only thrives when grown outdoors in warm climates (like those of Spain or Italy).
So, in conclusion, whether you're a beginner, veteran, or commercial grower, Critical Cheese Automatic offers great satisfaction to everyone.
You know it, but I recommend it: here you'll find so many beautiful things, basically "all the best that nature has to offer."
Z - www.zamnesia.com
Z - www.zamnesia.com
Music //
www.radionula.com
+ Feng Shui Music

Likes
16
Share


@Comfrey
Follow
Blacky reacts quit well on my low stress training. It‘s raining and raining…🤨

Likes
15
Share


@Shizzlemanizzle
Follow
Topping was great ! Starting now with LST using a wire but gently don’t want to harm the plant they opened up pretty good 🙏🏽 I am increasing water by looks.

Processing
Likes
1
Share


@MrRaid
Follow
Think they ain't gonna stretch much now looks ok had to flush soil as she definitely dosent like alot of food light feeds for this strain maybe up It later on using very cheap led grow lights this setup is very cheap but it's for me to see the difference between a perfect setup to a budget setup still has most things she needs good airflow humidity is good can get hot as I didnt invest in ac but nothing over 28c most days they sit at 25c humidity 55% they growing quick even with no feed for 7 days this grow isn't at my home so only see these girls every 48 hours maybe 24 hours I'm feeling to check them day 35 and they stretched like crazy
Likes
22
Share


@Knert
Follow
D29: Pistils are clearly showing now. She's looking really good and vigorous. I did notice a (very) small number of brown pistils. Might be from being a little bit careless while doing LST and toching it with the iron wire, could that be? Or could there something else going on? Speaking of LST, from now on I'm going to let the main cola grow upward again. I kept her really low to give the lower branches enough space, and I think that's the case now. I also tucked away most of the fan leaves that were blocking the light of certain tops. I think I'm going to plant her out in full ground by the end of the week. Temperatures are supposed to be 20+°C then. Any thoughts about that?
D31: I decided to let it stay in its current pot, in order not to stress the roots right before flowering. She still keeps on growing every day, still at a surprisingly high pace. Also, I'm tucking away the fan leaves and other leave that are blocking the sunlight from the tops. Tomorrow it's watering time again, right before the start of week 6. Since I'm only watering her after the soil is almost dried out, I'm probably not watering her for another 5-6 days. My question now is what fertilisers I should be adding. There's already 60g of granular 6-3-3 fertiliser in it (added over the past two weeks), so I won't be adding any more of that anymore. I have phosphorous grains (6-16-0), and potassium grains (2-0-20) and I'm wondering if I should already add those potassium grains or just stick with phosphorous grains this time and add potassium grains next watering when it's (probably by then) just started flowering. Any advice?

Likes
Comments
Share


@BombBuds
Follow
Pflnazen wurden die Woche in 100% Coco umgetopft.
20l stofftöpfe
Eine Pflanze wurde aussortiert.
Mal schauen wie sie das umtopfen vertragen.
Likes
8
Share


@pzwags420
Follow
Started off week 6 off by adding 5ml of Flying Skull Z7 to reservoir and adjusted reservoir PH to 6.0. I've got the blumats nearly dialed in and keep making small adjustments every 24 hours. I am holding off a few days on the nutrients to see what the plant tells me. The clawing seems to have improved(combo of over watering and not getting runoff on hand watered nutrients I believe). When I apply nutrients going forward I will make sure there is plenty of runoff so I don't repeat the same mistakes. 😬 on day 2 I applied 1 gal of nutrients and watered until runoff. On day 3 I defoliated the bottom of my plants to improve the air flow. On day 6 I added 5ml of flying skull Z7 to the reservoir. I noticed a possible calcium deficiency on one plant so on day 7 I applied my 1 gal of nutrients with the addition of calmag and silica. Ive only used calmag once growing in coco and it burned my plants...so I assumed there was enough from my tap water and nutrients. I know this goes against all advice.. I think it finally caught up with me LOL.LIve and learn to buffer your coco. Next grow I will buy buffered coco and use a calmag product 😅 I defoliated the center of my plants to increase airflow and expose light deeper into the canopy.


Likes
28
Share


@Bongman
Follow
Week 8 of Flowering, pistils are turning brown. Will check tricolms next week. Since I am doing hydro, flushing can commence the final week.
*finally got my co2 meter to work so boosting co2 to 1000 ppm and increased light output but 20%. The rent increased 30% in humidity and raised 4 degrees F so manageable for sure.
Happy growing
BM
4TweentY
Likes
9
Share


@rolling_stoned
Follow
I completely changed the water and nutrients this week and added some Canna PK13/14. I have also added another MARS Hydro TW2000 light to the tent to try and get more light to the lower buds. Gave both plants a trim also for the same reason. I was concerned they were still not ready to harvest, but expert advice from FastBuds420 told me they probably needed a further 4 weeks. And I will give them an update and the information they requested. I think it's probably because I had the lights turned down to 25% during the veg stage and only at 50% for the early flowering stage; it was not till recently, about 3 weeks, I think the lights got turned up to 100%.
Likes
10
Share


@CanadianFillmore
Follow
Week 8 begins for Green Crack. She has a pungent smell that is a mix of fruit and chemical. Last week of feed before flushing.
Thanks for stopping by, tune in next week! 👽🌳🔥
