


Likes
Comments
Share


Likes
26
Share


@BudBoutique
Follow
Welcome to Bud Boutique Grow Diary - really appreciate all your love and support :)
Dont forget to check out my other current grows!
🗓️ This Week:
- Day 52: the end is near - fading out colors super beautiful
- Day 53: Trichomes check - looking super good almost all cloudy, a few amber and clear. perfect point to chop
- Day 54: this one is finished, let's chop them !! ✂️✂️✂️
- now its time to dry inside the tent at about 60%rh and less than 20°C/68°F trying to get it even lower for the next 10-14 days - complete darkness needed!!
Thank you for still staying with me 💚
___________________________________________
--- 🌱 Strain (Sponsor) ---
🏷️ Blue Cinderella 99 FF by MSNL
https://www.marijuana-seeds.nl/blue-cinderella-99-fast-flowering
--- 🥗 Nutrients and Feeding (sponsored by APTUS: APTUS Ambassador) ---
🍸 APTUS: full nutrient schedule extreme
-- Regulator, N-Boost, P-Boost, CaMg-Boost, K-Boost, Allin1 Liquid, Startbooster, Topbooster, Enzym+ every feeding
-- Fulvic-Blast, NutriSpray as Foliar each once a week
🔗 https://aptus-holland.com/
--- ♻️ Grow Control (Sponsor) ---
TROLMASTER: TENT-X + LM14 Light Adapter to dim/sunrise/sunset lights + Temp & rH Sensor all remote on App
🔗 https://www.trolmaster.eu/
--- 🚿 PetraGrow (Sponsor) ---
CannaFogger Foliar Spray
🔗 https://www.petratools.com/product/petragrow-cannafogger-atomizer-new-mini-fogger
--- 🏭 Grow Setup ---
💡LUMATEK Zeus Pro 600
* 🏠🌿 Indoor: Homebox 120x120x200cm (4x4)
* 📐🌀 PrimaKlima exhausting Fan 1180m3/h (running on 60-80%)
* 🌀 Can Light Filter 800m3/h & 1x Fanbox 1x Dyson fan for Air circulation
🔗 https://lumatek-lighting.com/zeus-600w-pro-29/
🔗 https://primaklima.com/de/shop/ventilatoren-de/ec-ventilatoren/pk160ec-tc/
🔗 https://canfilters.com/products/filters/
All Likes and comments are highly appreciated!!!
👨🌾 don't forget to check out my Instagram for daily educational content: @budboutiquee
- Bud Boutique

Likes
4
Share

@Hylex
Follow
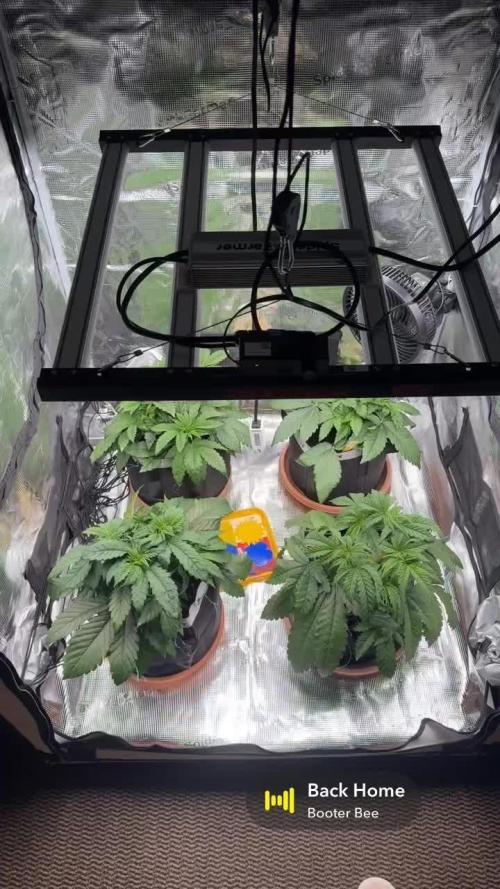
28.09 Neue Woche, neues Pech.
Ich denke das ich die neue dünge menge beim mischen verkackt habe naja passiert.
03.10 immer wieder Lst gemacht und wachsen lassen.


Likes
18
Share


@Farmergaz420
Follow
Pretty happy with the final results from this grow, both times I have done this strain though I have had different results, the plant structure is great to be fair so I don't actually think a lot of training is required with this one but its exciting to see how big they can go! I will defo go for a 3rd time on this strain in the future so will look forward to that but in the mean time I shall have some of fastbuds gelato potted up in the next week or 2 to start a new diary :)
Likes
8
Share


@skaterblasted
Follow
Chopped on day 133 - trichomes look swollen and ready - leaves faded out.
Cut this according to the biodynamic moon gardening calendar and the dates did seem to align with the plant aromatics being more noticeable.
Very excited to do the smoke report on this one - focusing on 60% humidity @ 60 degrees for 21 days to retain terpenes and quality.

Likes
21
Share


@darb35
Follow
Last week was a short one, decided to chop them on day 80.
Both plants weigh at 800g wet, hoping to get a bit over 100g dry.
They could probably go for another week to get fatter, but I was feeling ready looking at the trichomes.
Hope the dry slow, I can't get RH above 50% so hoping that won't be so bad.
Likes
2
Share

@HoneyBlunt42
Follow
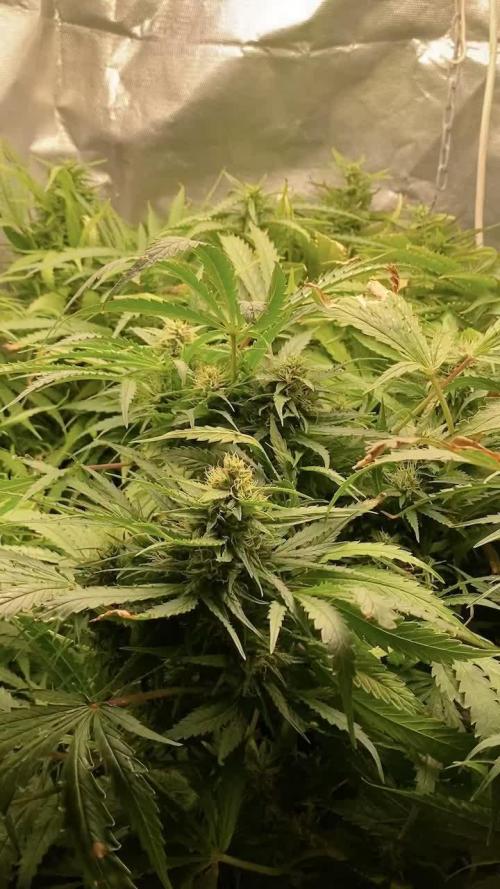
The buds are gradually swelling, and sugar has appeared. I water them daily with a solution containing CalMag and a pH of 6.5.
Every two weeks, I add a 1 g/l addition of Bio Enchancer. I noticed some pale leaves this week, so I gave them a small amount of a light solution of Hesi Bloom at 2.5 ml/l (half the amount used on the hydro).
At 15 weeks, the coco requires regular watering with an automatic waterer. Sometimes I manage to water two or three times a day, but more often I add a liter of the prepared solution to the pot once a day.

Likes
228
Share


@Still_Smoq
Follow
📆 Week 14, Harvest 11-20 January 2024
11 January - I made a determination to cut light power to 25%, and go to a 12/12 schedule, instead of turning light offs for 3 days. After a review of current philosophies and theories - I understand there may be a possibility that coldness, not light, could be more associated with a terpene and cannabinoid boost during this end process. So I will try something new. .
13 January - Harvest Day. When I opened the tent, the smell of fresh berries, sweet, ripe, heavy with a slight scent of pine filled the air. I cut branches and all shade leaves off, without damaging the sticky buds, and hung them to dry. The closet was at a low 35% RH (due to the 0-5 degree F temps outside) and 60 degrees F. It will remain here with circulation for about 5-7 days.
18 January - The buds were small enough and the closet RH staying staying 35%, it was ready to trim and jar up. This wasn’t too bad a process actually. The leaves flaked off prefectly leaving the bud in tact, so most of the trimming was done by hand using my fingertips, not clippers. A delicate process but fast once you get the hang of it. I’ve weighed and jared them up, along with a boveda 62% RH packet #8 in with each. Here they will stay and cure until their peak THC/terpene levels are reached at about 30-40 days, burped daily until a RH of 62% is reached and maintained.
📑 Product Review: Hybrid Indica Dominate
The outcome: 4.2 ounces/119 grams of quality bud in about 90 days. The developer says just under 65 days, this could be done, it would have to be manipulated somewhat. The buds appear large, compact in size, but not so dense, a true bush variety. They are however loaded with trichomes and covered in resin. There is an excessive amount of sugar leaves that make it more challenging for the beginner to know how to care for it in later stages, especially flower. This pheno definately turned purple.
✂️ Harvest on 13 January
🌊 Using reverse osmosis water with EC/TDS at 0
💡 Light power at 25%
That is it for this grow. Thanks for the look, read and stopping by.
Likes
3
Share


@French__flair
Follow
Suivre les conseils semaine 1.
Une fois que les plantes ont colonisées le pot de 1L, les rempoter dans des pots de 3L (qu'on va arroser avec 3L). Cela doit prendre 4 à 7 jours en moyenne.
Surveiller l'aspect des plantes, les pointes des feuilles. Observer le haut et le bas. La couleur de la plante doit être uniforme entre chaque partie sinon c'est qu'elle a un manque ou un excès. Le plus souvent étant donné les engrais complet que nous utilisons il s'agit d'un excès. Dans ce cas il suffira simplement de faire un arrosage à l'eau au lieu de l'engrais et de reprendre les engrais à plus faible dose.
Les tiges sont un bonne indicateur de la santé des plantes, hors génétique spécifique, elles doivent être verte et tendre, pas dur.
On continue la FIM et la taille de certaines feuilles qui peuvent être gênante.


Likes
90
Share


@CRiSPrGrow
Follow
I'm really digging the Chem OG, squat plants with those trademark thick thick thick indica leaves, clearly it's gonna be a heavy smoke lol Wasnt able to get the juices flowing this week, hopefully next week i'll get the smart protein into feed. Started training some of these, did two more defoliations (total of three light defos so far) ... and then flipped them 4 days ago. the f-ing landlord has been attempting to enter the lab according to my security cameras lol, motherfucker !!!! anyway i have to pack up the lab, hopefully i'll be able to complete the grow cycle , but for sure i'll have to move the grow op ... that's my problem, sure but it also means that i'll have to wait in order to set up my perpetual cycle... and of course i cant really take cuttings if i'm moving the lab... why must people be so curious? really wish there would be at least a bit more tolerance around this hobby just so i can sleep peacefully at night... in the mean time , I lowered my lights to 22cm, i heard from someone (forgot who) that it's a good thing to get the lights closer when you flip so that the plant gets that extra energy for the stretch. I'll let know how that works out ! Any comments or suggestions are welcome , veg is over so it's gonna get interesting - drop me a message if you want ! that's it 🚀

Likes
12
Share


@Jays_Not_Here_Man
Follow
The girls have survived another week ❤️ I did a light defoliation and have been monitoring the RH closely. We have had a very damp week here, and the RH kept climbing and had my fan working hard.
They are starting to plump up and fill in 😋. They have also started to slow their drinking habits, instead of watering every three days, it has moved to every 4 now. Just a couple of weeks left, I think I will be harvesting these over Christmas 🎄, and will have some great bud ready for the new year! 🎉🎊🍾


Processing
Likes
176
Share


@Teamdirtbag2
Follow
Yeah somthing is going on. Candida and Nightingale are not happy with there newts. Well if it continues I will flush them. Orinoco is doing great.


Likes
17
Share


@Sergio_721
Follow
So far it seems to be fine even if the high humidity worries me even if the temperatures are still high then they have stopped growing and will finally focus on the flowers and slowly we recover these small deficiencies
Likes
19
Share


@AutoDevilHQ
Follow
Just a phenomenal plant from start to finish.
For a first grow yielding 160g is just mind blowing.
Very easy to grow long veg period so windows of LST are large enough to have room for error. Lots of Defoliation needed and at its peak was drinking 6 Litres of water a day.
Likes
17
Share


@JuicyFruit
Follow
Day 69 - 15/11/19
Were finally here at harvest and im happy with the result :) i planned as much as i could and winged the rest :)
I collected lots of small, early harvest buds and left them to dry. kept a small bit for bongs and put all the really sticky trim in the freezer! gonna make cannabutter with it next week :)
I liked the strains i chose from RQS, they took every newbie mistake i threw at them :D ive learned so much and it shows in my other diaries :)
Il update this harvest a couple of times through this last week to show the effects of drying and curing, other than that thanks to all for helping and check out my other diaries to see how ive progressed :)
Update - 18/11/19
I dried the buds for a couple of days and wow they dry well :) smoked them in a bong and it got me over a rough few days.
I didnt see the point in curing this as i only got a couple grams. and to even get a couple of grams off a plant that had such a bad transplant just shows how resistant they are.
I loved this strain, the smell was funky and it was a joy to grow. Thank you RQS!

Likes
10
Share


@Reaper
Follow
day 15: flowers start to appear
day 16-17: temps go 24 celcius, i throw ice bottles in the res
day 25: insane stretch stops flowers fatten up, even crystals around the young budz.

Likes
69
Share


@nonick123
Follow
Cosecha
Reporte de Peso húmedo & Peso Seco de LemonPaya by FastBuds!
⚖️ Total peso húmedo 186
⚖️ Total peso seco TBD
💦Pérdida de H2O durante el proceso de secado TBD
🎨Colores
Un color verde claro brillante!
👃Olores
💐Floración Papaya (predominante) con un toque (potente) de delicioso limón
🏜️ Secado TBD
🍗 Curado TBD
🍽️Sabor
A definir cuando esté bien curada en el reporte de humo
Variedad
💪Resistencia
Resistente 9/10! - Floración detenida por 10 días por el bloqueo de nutrientes que se ha presentado en la mayoría de plantas de este ciclo.
Pero ella se recuperó muy bien y ha hecho unos cogollos densos al final de floración!
🏋️♂️Entrenamiento:
Se ha adaptado bien al topping (en 2 ocasiones), supercropping y LST!
Una crack!
🌱Vegetativo:
Un vegetativo sin incidencias, con una bonita estructura!
Ya en vegetativo al frotar las ramas, se desprendía olor a Papaya 😍
💐 Floración:
Cogollos muy densos a pesar del bloqueo de nutrientes que superó sin problemas en 10 días!
El olor a Papaya y fondo de limón es impresionante!
Genética:
Estupendo trabajo de breeding de FastBuds!
👨⚖️Conclusión:
Una cepa deliciosa a plantar una vez en la vida! Muy interesante el perfil de Papaya y Limón!
Likes
23
Share


@Wazowskid
Follow
I've stopped giving them fertiliser and did a root flushing 4 days ago. They are looking good, smaller buds of what could have been with the correct equipment and dedication but I can't complain. I don't have a magnifying glass so I'm basing myself on the pistils to know when to harvest. I think I'll give them one more week but everyone is welcome to give me advice, would love to receive feedback from more experienced people.