Likes
Comments
Share
Keeping my lady happy is a full-time job full of surprises, sometimes heavily exhausting long hours. I'm giving all my love to them. So thankfully, Respect and Love for my family for keeping me able to spend hours daily. 🌅🙏🤙 Unfortunately, grow diaries crash every time I update nutrients and photo 🤷
Likes
9
Share
@RedRooM
Follow
Unfortunately this will be the last week because the threat of the red spider has returned and I cannot afford to use other chemical remedies to eliminate it so I anticipate the harvest by a week even if looking at the trichomes I am not so far from full maturity, Too bad . !
Likes
38
Share
Utopia Haze is a rare heavily sativa dominant hybrid (90% sativa/10% indica) strain created through back crossing Brazilian Sativa strains. This tasty little bud took home 1st Place for Best Sativa in the 2008 High Times’ Cannabis Cup and for good reason – with its potent 18-22% average THC level and long lasting cerebral effects, Utopia Haze is one powerhouse smoke. The Utopia Haze high comes on soon after you finish your first toke, hitting you with a strong cerebral lift that infuses you with a sense of hazy relaxation. Type: Feminised/Photoperiod Cultivation: Indoor/Outdoor Flowering Time (days): 70-75 Indoor Yield (g): Up to 650 Feminised Outdoor Harvest Month: October Feminised Outdoor Harvest Month Week: 3rd-4th week Aroma: Citrus, Woody, Pungent, Mint Effect: Cerebral Lift, Hazy Relaxation, Sleepy Welcome Everyone to the Final Entry of my Utopia Haze Grow ! There is so much to discuss ! I have been extremely busy as of late trying to get this Harvest together, but i am happy to have it here for you now ! I Seriously under estimated the amount of time, help from others, and my own necessary skills to pull this off.. and i still kind of screwed it up lol ! But its worth noting i have never actually done this before and trying to document it during....was extremely hard. It is next to impossible to work an iPhone with rubber gloves on ! First I want to discuss everything step by step so before you jump straight into the comments on how the end product is so small in "quantity" Rest assured i am happy with its"quality"...and thats all that matters to me because Life is a journey not a destination! and i have learned so much from this grow that I couldn't be any happy even if i messed some things up :) But at the very least I hope you read through this entry in its entirety with an open mind and focus more on the process, rather than just the outcome! I ran out of Ice & i was only able to wash three times..(normally I've heard you should go sometimes 5-6 washes) Preparation is Key & things will be much better next round :) Photos 1-22 These are pretty self explanatory but for those of you just tuning in now.. this is what happens to a very happy plant when you don't have the necessary tools to monitor key components of growing cannabis.. Ph, as well as EC levels play a very key role in the outcome of your grow lol that being said I was just able to save this plant by purchasing both tools but that doesn't mean the plant didn't suffer because of the prior events.. This was a Huge reason behind me choosing to turn this harvest into what i would consider "Solventless Hash Rosin" from "Ice water extracted Bubble hash". Pictures 23 The idea here is the process of using "fresh Frozen Cannabis" this has been discussed many a time online on such sites as instagram and here on grow diaries as well.. I personally have Never tried the process so i decided to try it out and make a judgement for myself.. Video 24 The Cannabis has now been in the freezer for 72 hours making it very well frozen.. as you can tell i struggled getting it all into the 25u Screen Wash Bag. One thing of note i would do differently is i will de-stem my next batch as i also believe this played a part in the amount of plant matter that escaped through the sieves. Photo/Video's 25-28 The idea here is "ice water Seiving" & especially with the bags that I am using here that are only have screen material on the bottom portion of the bag it is very important to have spaces in-between the screens to allow the water to pass directly through the screens into the bottom bucket with the least amount of resistance.. because the hash is so extremely temperature dependant if it gets warm on the side of the bag.. it will stick there and not make it to the bottom to become use able product.. 29 You do not need to use as much Ice as i used here lol... the idea is to keep everything very cold..i certainly achieved that but at the sacrifice of using so much that i ended up grinding product and producing "contaminants" but in the end they are just plant matter that i would be smoking when i rolled up my joint either way so.. I'm not super disappointed.. But it should be noted that what you want to achieve here is a Layering effect where you have the wash bag between two small layers of ice while the "water current" washes the Trichomes away allowing them to be separated by the screens setup below :) Before Starting the machine you should allow some time (i.e.;10-12minutes pre soak to allow the product to become saturated) before the first cycle. By video 32 I have just ran out of ice lol.. Video 33-34 Here I have a tip for you.. to separate the screens that you sieve through.. cut 5 gallon buckets to stretch them across nice and tight.. it'll make scooping your Bubble that much easier ! i learned this from the many "Frenchy" videos I have watched :) Picture 35 Here in lays the problem for most people.. drying your hash without loosing vast amounts of "Terpenes" whilst also stay ever vigilant against mold ! Thanks to all those videos I've watched on youtube.. id like to think this was one of my most successful parts of this process.. Things to Note; Terpenes start to seriously evaporate at temperatures 68F or 20C you need to stay as cold as possible whilst bringing the Relative Humidity in the space down into the 40-30% to stay away from that nasty mold ! I used my cold storage room in the basement.. with a dehumidifier running to keep the space at 45% RH & staying at a constant 15c. All while spreading the hash as thin as possible across parchment paper, on top of the white screens with a fan moving air across both sides of the paper. Pictures 36-38 These are some macros i took in the middle of my drying session I fell in love with the colour. Yes i know the black spots are plant material but they will get caught when i bag the hash & squish the oil out. Thing to Note; at this stage it is important to ensure you 'micro plane" the hash down as fine as you can whilst staying weary of the temperature... any "chunks" will hold pockets of moisture.. that lead to potential problems..ie; mold ... Picture/Video 39-41 Successfully planed bubble hash ready to be bagged and Squished ! Picture 42 Ive decided to follow Pedro.. from Pedros Grow Room and double bag to be on the safe side so i don't have any blow outs. So thats One 25u bag inside one 160u bag ! :) Pictures 43 This is almost 3 grams of the bubble hash from above, already melting in the bag.. this is where i ran into trouble again lol things started getting to warm in the house and i was only able to get one of the three squish's i did on video :( things started getting sticky. Picture 44 This is basically just a photo of the equipment I'm using; 3x5 LowTemp Cage in the frame I built myself, with a 20Ton bottle jack. Something to note here is this is an older Lowtemp model with only a single heating zone which is which i have it closed here heating Both sides of the press :) As well as the importance of having adequate pressure on your plates.. my rig is very overkill for the size of hash bags..lol Video 45 Here is the lovely press video.. its didn't quite work the way i wanted either lol my directional folding wasn't quite tight enough for a big "drip" :) &the Press was set to 65°c Photo's 46-50 are pretty self explanatory :) I had a blow out.. but still managed to pull an 80% return from the hash once squished...& yes it tasted amazing :) Was it worth it in the end... that could be debated.. for some..i understand..its not your thing, but for those of us that are interested in making our own concentrates.. free from Solvents... I wouldn't make it any other way :) If even ONE of you reading this diary finds it helpful to reference for ANYTHING.....even if its "what not to do" ill consider it a success ! Thanks again for tagging along on this garden adventure.. its been one heck of a journey ! Much Love from B.C. Canada, Until Next time, Cariboo
Likes
121
Share
Continuing to use nutrients from 9 days ago. Mostly added back water to the tank to reduce the EC, as it was too high in my opinion. Going to try and milk another week out of the nutrients in the tank at the moment, as there are no obvious signs of deficiencies to note. As you can see, I have opted not to defoliate at all for this grow. So far I have only cut off two leaves just so I can get to my filler cap easily. I am doing a little supercropping here and there to level up the canopy. In just over a week they have grown from 51 cm to 93 cm. So a good 80% increase in height. An average of 2 inches of growth per day. If they grow similarly to my last crop, they should have just under 2 weeks stretching left to do. Happy new year!
Likes
22
Share
Alright, so here we are again! At the end of week 8 and this little lady ain't so little no more! Sheesh! She's a monster! And a mother lol to some beautiful clones, which we cut last week. Can't wait to see how they do in comparison to her. I did a little defol as well and will continue to do so as I wait for my young plants to veg. This is going to be the longest veg I've ever put a plant through so wish me luck. Thats why I'm loading her up with mag. She already has an abundance of Calcium...BAS does a really good job of loading their nutrients with it. I also gave her some Gaia rock dust and some LABS and JMS solution as a probiotic for the plant and it also brings more microbes to the living soil! Good stuff! Highly recommended! Nothing like homemade bacteria and microbes to give you that extra advantage 😉. Well thanks for stopping by. See ya next week.
Likes
6
Share
@Ninjabuds
Follow
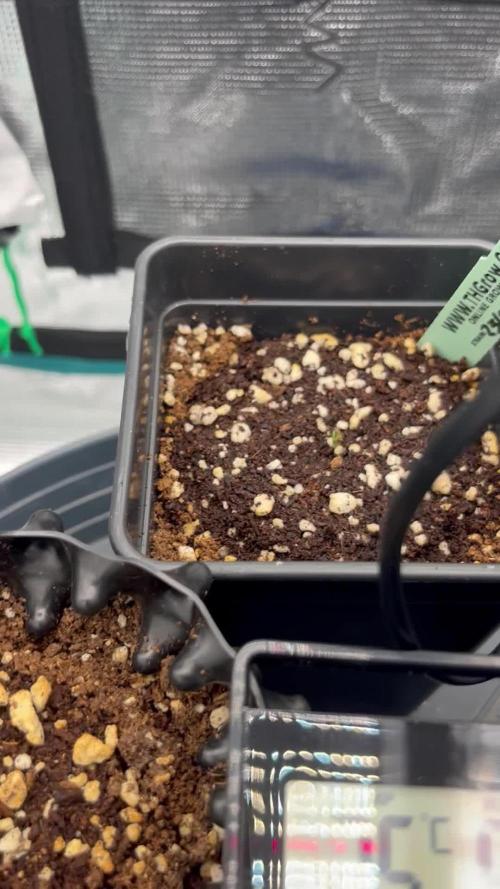
Permant marker the one seedling I could not be more happy with. It has a distinct different look to it than any other plant in the tent with strong growth going on. I'm sad about the other seedling thou the 1st set of leaves were kinda deformed and it has like a spiral thing going on where new growth comes from. Hopefully it comes back around, I always like seeing atleast 2 phenos of a strain I feel it gives you a better idea of what a strain is. It's looking like a good start to a week the plants are strong they are getting to the point I can let the dried dry out completely. I'm thinking by the end of this week the plants will be starting to be sold. Last week I put all the plants into my bigger 2x4 tent with my medicgrow mini sun 2 the 500w version. Only a few of the plants were ready for that light. Seems like the only plants that really have good resistance and have a strong start are the weedseedsexpress.com seeds. Shout out to weedseedsexpress.com for the strong plants. I ended up putting all the plants back into my 2x2 tent with the 55w amazon light it has alot more blue light in its spectrum. It's kinda weird b4 I switched the plants to the 2x4 tent they were getting 220umol under my amazon 55w led then when I put them under the 500w light 25% strength about 50in from plants and they were getting only about 195umol in that tent but it was stressing most the plants. I assume a larger light has more side lighting hitting the plants. I think when useing larger lights it's good to measure umols from the top but also coming from the sides. I think durring seedling stage they only need about 50% the umols coming from the side the plants as the top is receiving. When I put the plants back in the small tent about the same umols as they were getting b4 the switch and they were still a little stressed. So for a few days I put the small light at the top the tent giving them 100umols for a few hrs then 130umols the rest the day.
Likes
10
Share
10/5/24 - Purple Punch 👊 & Green Crack 💚 Girls got a top feed of 7.3 pH, and runoffs are strong 6.4. PPMs are a little lower last dunk on the GC, so we are going to bump up her feed a little, and reduce the feed on the Purple Punch.
Likes
60
Share
@Natrona
Follow
FBA2502 Week 4 April 20-26 Veg 4 Highlights of this week: I defoliated the large fan leaves from the main stems. After defoliating, I saw that plant #3 has a short, tight node structure like plant #1, so I pinned her down before she goes into flowering. Plants 2, 4, 5, and 6 are taller than plants 1 and 3. The larger plants 2, 4, 5, 6 show pre flowers with thinner new growth and hairs at the nodes. The leaves are wide and thick. Some have a slight blue tinge. This makes me think I’m over feeding. Apparently, the blended soil has enough nutrients for the autos, so I don’t need to feed right now. At the end of the week, I watered with ph 6.5 water with cal mag and recharge. Lights are 20” from tops of tall plants and 30 from 1& 3. My general thought for the future grows is to wait until the plant is bigger and see its structure before starting training. #1 has many branches coming into the middle. By beginning with pinning and keeping it at the ground, she will not achieve the stretch around the pot. I pinned #3 to push out the bud sites from being up against the main stem. It is easier to LST when there is more space between the nodes, so a bit of growth or stretch is required. Training to open the top is needed when the plant is short and tight. If you want to follow what's happening with my other two FBA2502s see my friend's @Susquihanna diary. 4/20 Hairs on 2, 4, 5, 6 and feeding Micro ½ tsp/gal Gro ½ tsp/gal Bloom ½ tsp/gal CalMag 1 tsp/gal at full strength 4/21 pics & video 4/22 water only ph6.5. I watered with plain water, it looks like over feeding and they are in are transitioning to flower. 4/24 Water with recharge ½ tsp/g & CalMag 1 tsp/g ph 6.5 pics & vid see blue tinges in leaves. Plants shot up, doubling in height again this week. #1 6”, # 2 10”, #3 7”, 1 14 “ 5 14” 6 13” Your likes and comments are appreciated. Thanks for stopping by. Growers love 💚🌿 💫Natrona💫
Likes
54
Share
So in the last couple of weeks I tried to make the night time temperature go down enough for them to turn color and they did - the sugar leaves turned a deep bluish green, really nice coloring! I harvested over a 2-day period. Day 1 I hand-plucked the sugar leaves off plants # 1, 2, & 3. Day 2 I hand-plucked plants 4 & 5, trimmed all of them and cut them down whole. I hung them to dry in my closet/former grow room with a boot tray of water with a towel for evaporation. My last grow was a disappointment in the end due to me not realizing how dry it is in the house (here in the living room it's 19% RH due to it being January in Canada and the hot water heating radiators are going full time). When they were dry enough, I did the final trimming, removing all the waste and dividing the buds into 2 classes: Top tier which are the nice tops of the big colas, and 2nd tier, which are the rest. I think I'll learn to make hash with the 223 grams of wet sugar leaves. I'll be adding more to this final entry in the coming days - this has been really tiring! Final numbers for 5 ShishkaBerry plants: Top tier buds (dried not cured) 372g 2nd tier buds (dried not cured) 150g Hand plucked sugar leaves (wet) 223g Waste (Sticks, stems, burnt leaf tips) 128g I'm basing my comments on the taste by the glove-hash I smoked - wow it's really good! I'm looking forward to next month when these buds will be ready to enjoy 😁 I'd like to thank all my new friends here and the other growers that have helped me along the way 😚 Finally, I left you with an outtake video from one of the defoliation sessions 😺 Stay tuned for updates... UPDATE 1: Today I might have made some tincture or something, not sure. I slow-roasted the dried but not cured previously hand plucked sugar leaves and crumbled them up and put them in a mason jar (51 grams 100% dry weight) and added a little bottle of Absolut Vodka (375 ml). I shook the mixture vigorously for a couple of minutes then placed it in a cool area of the house to sit for a few weeks before a first test - not totally sure what I'm doing here). UPDATE 2: Possibly made Rick Simpson Oil (RSO) out of the Alsolut vodka - ShishkaBerry mixture: I strained it so that there was no plant material, reduced it in a double boiler style, not sure what to do with the gooey stuff that's left as a result.
Likes
3
Share
I’m finally seeing the buds dense up, should be a good harvest in about 4-5 weeks!
Likes
34
Share
@Chubbs
Follow
Always been a favorite of mine this strain. It grows like a dream and smokes like a breath of fresh air. The terps are just mouthwatering and the smell intoxicating. I decided to harvest them this past week and hang them up to start the drying process. First time growing the RF3 version but definitely won't be the last. One I'd highly recommend for it's easy growing and beautiful flowers.
Likes
15
Share
~ FASTBUDS TESTER #2201 ~ Well friends, here we go on another 'canna-venture' together! The grow room has had a complete remodel and some upgrades done to it including brand spanking new 4x8 and 4x4 tents and a Trolmaster Hydro X controller along with a new Control Panel. This tester strain is one of six tester strains that FastBuds has graciously provided me with and I'm looking forward to seeing what this girl has to offer when she's grown to her full potential! One drawback of 'testers' is I have little to no information on it other than its number and that it's an autoflower... 🤪 But, it's ALWAYS a blast growing them for me because not knowing a lot allows me to just concentrate on the essentials: Light, Environment, Water, Nutrients and possibly a bit of LST... not complicated, just basics like keeping a constant temperature and RH in the tent at a level that gives a good VPD, watering when almost dry and maintaining proper light levels according to their stage of growth. ____________________________________________________________________________________________________________________________________________________________________________________________________________________________________________________________________________________________________________________________________________________________________________________________________________________________________________________ ~THE SETUP~ ~Initially seeds were lightly scuffed, then soaked for 3 hours in 78℉ distilled water after which they were transferred to moist paper towels laid out in a Jiffy Pellet plastic starter tray with lid. Underneath the tray was placed a Mars Hydro Heat Mat with Controller that was set to 78℉ where they stayed until their tap roots emerged. ~Planted into Jiffy Peat Pellets that were hydrated with distilled water warmed to 78℉ with a 7.0 ph. ~Once roots emerge from the Jiffy Pellet they're transferred to their fabric pots. ~Grown 100% organic in a 4g Gronest fabric pot and a 3g fabric pot by Wraxly filled with Mother Earth 70/30 Coco/Perlite medium and initially amended with Dr. Earth 4-4-4 / Earthworm Castings / Dr. Earth Flower Girl 3-9-4 and Coast of Maine Stonington Blend Organic Plant Food 5-2-4. ~19/5 light cycle for the entire run with supplemental UVA added during flower. Lights are controlled by a Trolmaster Hydro X controller set for a 15min Sunrise/Sunset simulation. ~Top dressing every 3-4 weeks with slow release dry amendments and Earthworm castings. ~Straight water ph'd @ 6.2-6.8 when needed and bi-weekly Compost Tea's. ____________________________________________________________________________________________________________________________________________________________________________________________________________________________________________________________________________________________________________________________________________________________________________________________________________________________________________________ Weekly Updates: 12/1- I soaked both seeds for 3 hours in 78℉ distilled water after which they were transferred to moist paper towels laid out in a Jiffy Pellet plastic starter tray with lid. Underneath the tray was placed a Vivosun Heat Mat with Controller that was set to 78℉ where they stayed until their tap roots emerged roughly 24 hours later. 12/3- Today the tap root on one of the seeds was about 1/4 to 3/8" so at 11 am I transferred it into a Jiffy Peat Pellet that was hydrated with distilled water warmed to 78℉ with a 7.0 ph using a tine off of a plastic fork as a 'mini trowel' to make a hole in the pellet and to gently cover the tap root, leaving only the seed head slightly exposed. This method accomplishes most of the initial work the seed has to do by eliminating having to orientate itself, push it's root down and head up. By 10pm the #1 seed had her cotyledon leaves opened ...calling the #2 a 'fail to germinate' and I'm not going to soak another... We'll let it ride with just one of this tester. 😉👍 12/5- Well this is Day ONE for the #1 FBT #2201! I'll keep her in the covered/heated Jiffy tray until I see her roots beginning to emerge from the peat pellet, then I'll transfer her gently into her 4g Gronest fabric pot from FastBuds. 12/7- Yesterday I checked her, she had roots starting to emerge from her pellet so tomorrow I'll transfer her into her 4g Gronest pot. 😎💚 Thank you for checking out my passion in life! Please visit as often as you wish and I hope you enjoy this journey as much as I know I will! Grow Strong! 💪😎🤙
Likes
32
Share
🍼Greenhouse Feeding BioGrow & BioBloom ⛺️MARSHYDRO The ⛺️ has a small door 🚪 on the sides which is useful for mid section groom room work. 🤩 ☀️ by VIPARSPECTRA (models: P2000 & XS 2000) 🌱 DUTCH HEADSHOP SEEDS: www.dutch-headshop.eu www.dutch-headshop.nl ONE STOP SHOP . 100% germination success on first try! with HUGE seed selection! . Very friendly customer service . Best bio-seed packaging . Sells other products @ best prices: . Nutrients . Vaporizers . Smoking accessories (grinders, cones) . CBD Tinctures . Resin Extracts . Boveda humidity packs . Ziplock bags . Other health supplements such as: . Lion’s Mane Organic Capsules . Hemp Seed coffee
Likes
13
Share
@Fatnastyz
Follow
Flower 9-23 Well pre-ish. Should be full flower any day. Watered with yucca, topped off. 9-26 Water yucca 750ml 9-28 water 600 ml yucca. slight defol 9-29 moisture was to 19% so watered around 1500-2k ml
Likes
39
Share
@valiotoro
Follow
Hello everyone week 2 has passed for this Cinderella Jack auto by Dutch Passion 😎 this plant is doing very well growing at fast pace and with a beautiful green colour on the leaves. Topping & LST for my girl next week 😎 wish you all happy growing!
Likes
Comments
Share
@GanjOS_OG
Follow
First week of Veg is done after the propagator tent. Clones looking good so far - getting healthy again. Startet LST.
Likes
6
Share
@Kardo
Follow
Ist sehr buschig und hat viele Triebe gefällt mir sehr
Likes
107
Share
Greetings, dear plant companions! Can you believe it? Week 17 has unfolded, and our journey with Purple Lemonade Fast Flower reaches its climax—a splendid harvest at day 69. As I stand here, reflecting on the wait and the wonder, let's delve into this momentous update. The Ultimate Waiting Game <3 Oh, the extra waiting time felt like a lifetime, didn't it? But you know what they say—the best things in life are worth waiting for. And let me tell you, this journey has been an ode to patience and a symphony of anticipation. A Marvel to Behold <3 Behold our Purple Lemonade in all her glory! If beauty could be bottled, she'd fill an entire garden. Her buds are a testament to love, care, and the dedication poured into this journey. It's like witnessing a masterpiece in horticultural art. The Trichome Revelation <3 As the days stretched, the trichomes prepared for their moment of glory. And what a sight it was! I took a sneak peek under the microscope, and oh my, the colors and trichome numbers are beyond imagination. It's like peeking into a secret universe of brilliance. A Full Cycle: The Journey Revisited <3 From seed to this awe-inspiring harvest, our journey has been a symphony of growth, learning, and beauty. Every week, we embraced new lessons, nurtured each phase, and reveled in the miracles of cultivation. The cycle is a testament to our connection with the plant world and the wonders it bestows. Time to Rest and Reflect <3 Now, our Purple Lemonade enters a period of rest on the drying rack. For about two weeks, she'll transform further, preparing for her final debut. It's a time of patience once again, as flavors deepen, aromas evolve, and magic intensifies. The Upcoming Full Report <3 In the near future, get ready for a comprehensive report on the fruits of this labor. We'll explore the buds, savor the tastes, bask in the effects, and celebrate the cycle as a whole. It's a chapter that encapsulates the essence of this cultivation journey. A Thank You to the Community <3 A heartfelt thank you to the @Fast_Buds team for crafting this botanical marvel. @aptus_holland, your support has been integral. And to @grow.diaries and the entire community, your camaraderie has fueled this journey. Cultivation, Celebration, Connection 💚🌿 As this chapter concludes, let's celebrate the culmination of growth, the dance of patience, and the connection we share with the natural world. From seed to harvest, we've written a story of love and green magic. Thank you for being part of this journey. Until we reconvene for the final chapter, let's continue to nurture, learn, and celebrate the beauty of plants. Genetics - Fast Buds Purple Lemonade FF Ligth - Lumatek ZEUS 465 COMPACT PRO 
Food - Aptus Holland #aptus #aptusplanttech #aptusgang #aptusfamily #aptustrueplantscience #inbalancewithnature #trueplantscience #fastbuds #dogdoctorofficial #growerslove With true love comes happiness <3 <3 <3 Always believe in your self and always do things expecting nothing and with an open heart , be a giver and the universe will give back to you in ways you could not even imagine so <3 <3 <3 
All info and full product details can be find in can find @ https://2fast4buds.com/ 

https://aptus-holland.com/
 
https://autopot.co.uk/ 

https://lumatek-lighting.com/ <3 <3 <3 Growers love to you all <3 <3 <3 " Arising from a cross between purple and citrus Cali genetics, Purple Lemonade FF (Fastflowering) offers a complex high made up of perfectly balanced cerebral and body effects that are ideal for daytime use. Expect an extremely enjoyable high that boosts your mood while deeply relaxing your whole body and getting rid of muscle pain. This meticulous cross produces up to 550 g/m2 of some of the most beautiful purple buds, with pinkish and reddish hues that will catch everyone’s attention. The beautiful purple buds are ready for harvest in 7-8 weeks and come hand-in-hand with unbelievably sugary citrus terps that are just as refreshing as a cold lemonade on a hot Summer day. It’s the ideal variety for the sweet-tooth stoner seeking strains that deliver both in quality and quantity of resin. Bud Description Purple Lemonade FF grows chunky, spade-shaped buds that boast a whole range of pinkish-purple hues with rich, dark orange pistils shooting out of every direction. This variety stands out for the, oftentimes, lilac trichomes that give them a gorgeous pink tint and make for outstanding purple concentrates. The buds give off a delicious tart lemon aroma that reveals a sweeter, more fruity scent as you break the buds open. Definitely a must for flavor chasers and those looking for pungent terpene profiles. Smoke Reports Purple Lemonade FF offers an effect that’s just as unique as the flavor. Expect a potent uplifting high that gives you that energy boost you need to get things done while 100% happy and stress-free. The effect gradually transforms into a wave that works its way along the limbs and through the muscles, deeply relaxing your body and putting you in the right mindset to go through a busy day with a huge smile on your face. This is an excellent all-day smoke as it not only increases energy but can also help combat chronic pain, migraine and stress. Plant Appearance This feminized photoperiod variety develops a thick and strong structure, growing a medium-sized main cola with multiple shorter side branches, typical of hybrid strains. Purple Lemonade FF develops fairly short internodal spacing with gorgeous purple buds growing stacked on top of each other, making it the perfect choice for growers of all levels looking to get lots and lots of top-shelf purple weed, as this variety can produce up to 550 g/m2 in a 7-8 week flower cycle. Grow Tips This is a super fast feminized photoperiod version that takes approximately 7-8 weeks to flower with a 5-week vegetation cycle,, this means you can have faster harvests by shortening the veg cycle or have a longer veg cycle for bigger yields. Purple Lemonade FF (Fastflowering) makes for a great candidate for growers of all levels as it’s a vigorous strain that will thrive with basic maintenance both indoors and outdoors. This is a resin powerhouse so make sure to have your trim bin close by as all the resinous sugar leaves will make for the most mouth-watering hash and extracts. Flavor Expect a long-lasting citrus zest that taste just like it smells. Purple Lemonade FF reeks of a delicious blend of sweet fruits and tart citrus that’ll make your mouth water. On the inhale, expect sour flavors that taste just like lemon candy with hints of orange and a really subtle earthy background. And on the exhale, the citrus flavors open up, giving place to a more sugary berry fruitiness that leaves your whole mouth tasting like an extremely sweet weed-infused lemonade.
Likes
69
Share
@nonick123
Follow
Día 115 (23/09) Riego con 250 / 500 ml H2O Día 116 (24/09) Riego con 500 / 1.000 ml H2O - Hace mucho calor! (31 ºC) LemonPaya empieza a formar nuevos pistilos a velocidad decente! Día 117 (25/09) Riego con 500 / 1.000 ml H2O - Hace mucho calor! (31 ºC) OnionOG #1 empieza a oler a tierra húmeda y champiñón 😍 Purple Punsh S1 está empezando a llenar los bordes de las hojas de abanico de una espesa capa de tricomas. Increíble! 💥 Día 118 (26/09) Riego con 500 / 1.000 ml H2O - Sigue haciendo muchísimo calor! Hoy hemos tenido un día con 37 ºC de máxima! Increíble la cantidad de tricomas que están formando Purple Punsh S1 & KS1! Las hojas está completamente perladas! 😍💥 Día 119 (27/09) Riego con 500 / 1.000 ml H2O Que calor! Seguimos con 32 ºC de máxima! Día 120 (28/09) Riego con 500 / 1.000 ml H2O OnionOG #1 muestra unos cogollos brutalmente densos y gruesos! I'm in love! Día 121 (29/09) Riego con 1 litro H2O pH 6,5 + Kelp Hidrolizado 0,3 g/L 💦Nutrients by Lurpe Solutions - www.lurpenaturalsolutions.com 🌱Substrate PRO-MIX HP BACILLUS + MYCORRHIZAE - www.pthorticulture.com/en/products/pro-mix-hp-biostimulant-plus-mycorrhizae
Likes
28
Share
@stevieb21
Follow
For the most part the girls did well other than the Durban Poisons getting some rapid purple leaf on both plants at the same time. One morning temps hit 15c due to an error with my new heater. Hoping that is what the cause is. Got tired of chasing fungus gnats so I decided to fight fire with fire and be a little proactive and release ladybugs and a few million nematodes 🧐🤓. Nematodes will become a weekly part of all growing in the future. As will ladybugs just to ensure they help keeps mites and gnats at bay. No obvious bug damage so far but I don’t want to jinx it as I have 3-4 weeks left on these 🤔🤔. Check it out at thebuglady.ca if you don’t want to use sprays! Till next week!