


Likes
Comments
Share



Likes
13
Share


@Oklahomasunrise
Follow
She's doing great! Just gotta keep up with Ipm.
I have been going between circadian sunrise and lost coast pest management.
Cannot wait to see this girl flower!
Likes
7
Share


@El_Bottanico
Follow
Week 8
Here came fall.
End of last week plant seemed hungry, the fade wasn't progressing as supposed so I gave her two nutes round with only water round in between them.
I used bottled feeding: biobizz biobloom + top max (2ml each per liter), ghe ripen (2ml per liter), solved micronutrients and calmag (not mixed, one time one the next the other, 1-0,5 ml per lt).
Solution EC was about 1,4, starting with 0,3 tap water.
She reacted well to the feeding in my opinion. now the fade is progressing more naturally.
I did observe that the plant under the less powerful COBS in the same tent are doing better then the ones under the sp250 wich has a higher par output, so I raised the light to 45-50cm from canopy. This had a positive effect on the plants imho. I'll stay a little bit further from the beginning in my next grow.
I took a sample under the microscope to take some tricho pictures, they look beautifully clouded but the buds still has to ripen some 50% more. Based on that I think we are arriving to an end in 10-15 days max.
Happy bottanic guys

Likes
10
Share


@chapothegrower
Follow
Everything good my plants are closer to the light now so they have better enviroment 😃 she get a mugwort tea to protect her from any bugs, demonic forces etc 😂

Likes
15
Share


@SmokingDwarf420
Follow
14/08/2023
Nothing special to mention at the beginning of this week, except my new heat/humidity detector, which is actually an old device I found. I came across it because my little one doesn't seem very reliable anymore(As you can see on a picture it say 69% while the other big one say 45%). Still no nutriments, just water with pH-. And I think I won't make any more changes until the final weeks, when I'll probably trim a maximum of leaves.
17/08/2023
I redid the LST for number 3, without knowing what I was doing, and I'm not sure if I did it right, but I'm pretty happy with the result. The canopy of #3 looks really good, even though the overall canopy is quite uneven. However, doing the LST on all 4 plants intimidated me way too much.
So I changed the position of each plant so that they wouldn't encroach too much on each other; I only have a space of 60cmx60cm.
Likes
49
Share


@masterofsmeagol
Follow
8/15 Yesterday the girls finally got some sun. They're flowering. Like crazy. I do need to do an application of BT once this rain stops. It just started up again. Went back over and things were dry. I decided to hold off watering until tomorrow when I feed.
8/16 Watered the 50 2 gallons, 10 1 gallon, and the rest about 1.5 gallons. I fed a pint to the ten, 2.5 pints to the 30 and 2.5 pints to the FIMMed bluecheese that looked hungry. This way I can tell if they can handle larger doses. I'd like to keep it as small and simple as possible. Gave me a fright this morning when a sheriff pulled in while I was feeding. He was on his way to a neighbors but it looked like he was just admiring things lol. I'm all legals there's no problem there. I put off spraying BT last night because dad had a couple ppl drinking and I didnt want to interact with them. Plus it was to early. The sun hadn't crested the barn yet. At least now u know what time to go spray. I'm finding some lady bugs and I killed my FIRST aphid of the season. I still have caterpillar holes in some leaves though so I might as well hit them with the BT (even though I actively hunt them). No one ever said growing cannabis is easy. Oh and my soil must be BANGING because I found some mushrooms growing in it and like a mycelium web which is awesome.
8/17 This was a quick morning due to an upcoming doctor's appointment. Removed some grass that had grown on the tar from spilt soil as it had diseases on it. I don't want that spreading to my plants. I have one blueberry cheese that I FIMed with four cola's that doesn't have as many leaves and has dropped a few leaves but looking at ot from the other side it doesnt look as open. I know that these girls are transitioning and this is the time I lose leaves. However some plants still seem totally green with no problems despite flowering. I'm wondering if it's a specific phenome thing. I also noticed that the caterpillars are still there and this morning would've been a great time to apply BT but I didn't have time and since I upped the feed I didnt want to do two things at once and have a problem and not know what it is.
8/18 Rained overnight. Plants were soaked. It's not raining now. Plants are definitely overwatered. I'm losing a few more leaves that are yellowing on the bottom interior of a couple plants. Some of it could be from the transition to flower ir the large amount of rain we've been getting. At least my drainage is really good. I need to pull the fence out and co soder cutting a pallet I. Half to better utilize space. I know I say this stuff all the time and I'm not sure it NEEDS to be done. What DOES need to be done sooner rather than later is to apply BT. I can see the damage from them. It's not bad but I want to avoid botrytis as much as possible so those pillars have got to go. Otherwise I've never had plants this healthy and it's been a real ahotty season. Boy those 10th planet's are all mice and green and healthy looking. I'm really looking forward to flowering these strains and see what they can do. I'm already greatly impressed with what I've experienced so far. UPDATE: Wasn't raining earlier then it Rained off and on but just a light steady rain that plants love but it's 3:30 now and it's pouring. Guess I won't be applying BT tonight. We need some sunshine but unfortunately I can't control the weather. Just sitting here thinking I was wondering about using Plant Doctor preventatively just due to the steady rain but I noticed mushrooms growing in my soil and since I haven't not9ced any type of fungal problem I'll revisit that idea another time. Polycarbonate roof or even some form clear plastic and a rough frame of pvc or extra lumber. Theoretically I believe I could move them all indoors for a little bit if need be but that would he a huge pain in the ass. Honestly I've got great drainage and my watering seems pretty good so I might be alright doing nothing. We shall see knock on wood.
8/19 Plants were soaked this A.M. I took a video and uploaded it (which takes forever). It's sunny though today and after the sun comes out after a period of rain the plants grow like crazy. Everything is flowering nicely. I think I can go to the end of October. I talked to a lady today that said she'd already harvested some of her peanut butter breath clones. It's my buddies mom and if you look back at one of my diaries NY mendo breath was done in September. These girls have a ways to go but the are explosively flowering which is good. It's easy to tell which strain is which. Pheno's vary but the flowers on the plants are easy to distinguish from one another. I've also never had plants stay this healthy green this long! Previously I'd have multiple pests, wpm and maybe septoria at this point. I think I've upped my game. Knock on wood. My worst problem now is worrying when to spray BT for the miner caterpillar problem. I have wasps, lady bugs and a shit ton of birds from the 3 bird feeders. I see them dart in and out of my cage. Chances are I'll spray BT tonight and take some pictures if it's nice out.
8/20 The sun is finally out. Bags are still heavy. Looks like it Rained again. I found caterpillar shit so I REALLY need to get that BT applied. I also saw minor damage to a budsite on a low hanging branch. Looks like those fucking earwigs bur I'm probably being paranoid. I also had to remove the rope that I was using to support "the big cheese" because with all this wind and rain it "rubbed" against the stem and caused an injury. I don't need that now anyway with the trellis up. Bids are developing rapidly and stacking up nicely. I have a couple plants that aren't as green as the others bit it may be do to all the rain we've been getting. I think I need to increase the volume of liquid i give my plants when I feed. Next feed I'll be doing at LEAST a quart. Due to my w8fes illness I haven't been able to spend as much time there as I should. No fungal stuff "YET". I have seen some leaves that show the plants have been over watered. Drainage is good though. I forgot to upload the video from this morning and it's uploading super slow so I'm gonna have to upload it tomorrow
8/21 Awesome. Went to town and left without going to my doctors appointment. Good job man. 👏 ANYWAY....My phone was dead when I went to town so I coukd only upload one video. I'll have to do the others later. I mixed up a batch of bt 1 tablespoon with half gallon of water (as that's what this hand mister holds. I went around the cage and sprayed every angle. Then I went to each individual plant and sprayed while spreaking the branches to make sure I got the interior. I used almost the entire half gallon so I'm hoping this will help. Bags were heavy but doesn't take them long to dry out. I'm wondering if the yellowing that is moving up (on the small purple punch and the one in the tote) is because they need more nutes, they're transitioning to flower and really stacking up or because they've been over watered with all this rain. Opinions are more than welcome. I'll check the girls tonight and if the are wet enough I'll feed and at a higher volume. If they aren't ill wait till they get their full water.
MY WIFE WAS HAVING AN "MEDICAL PROBLEM AND SO ON THE WAY TO THE DOCTORS I CHECKED THE PLANTS. THE 10TH PKAMETS WRRE DROOPING. I QUICKLY MIXED UP ENOUGH TO FEED EVERYTHING AT LEAST A GALLON AND THEN GAVE THE ONES THAT WERE THE WORST LIKE AN EXTRA HALF GALLON. JUST ENOUGH TILL WE GET OUT OF THE ER THEN I'LL GIVE THEM THE OTHER HALF OF WATER AND ILL FEED THEM. AT LEAST MY WIFE IS OK. UPDATE: Took my wife to the hospital. They did a shit ton of nothing which is par for the course. However, luckily for me (yeah right) I got back early enough to give the plants another half gallon of water each and then I fed increasing the volume to 2.5 pints (upping the big bloom to 3 tsps per gallon) but I ran out of feed on the last plant. I only mixed up two gallons and it was super dark so thar one container plant will need to be fed tomorrow I guess. This is masterofsmeagal signing off to fucking FINALLY get stoned!


Likes
3
Share

@PhinolaGreen
Follow
6. Woche
Der Streetch von der Pre Flower is in vollen Gange, sieht soweit gut aus obwohl ich auch hier mit Mg langsam Probleme bekomme.
Hab jetzt einfach mal große Geschütze aufgefahren und die Nährstoffzufuhr erhöht und Bittersalz extra angewendet zur Unterstützung des Leitungswassers 🤔😊
Likes
3
Share


@agustinnnv
Follow
Buena semana para todos!! Esta planta también surgió de un esqueje que intercambié. Al momento de recibirlo tenia 1 mes de vida y lo pasé a una maceta "Air Pots" de 10L. Tuvo 40 días de vegetación en esta maceta, se le hizo podas apicales y Supercrooping para regular su altura. Al día de la fecha (29/5) lleva 17 días florando. Está hermosa. Calculo que en 3 semanas más estará para corte. Saludos y buenos humos.

Processing
Likes
4
Share


@4F1M6
Follow
I started germination of 4 Gelat.Og beans on 29/12/2020. I pre moistened my rockwool cubes with ph balanced water to 6.4. Made sure the plugs were just damp and not soaked. Using a small wooden dowel I increased the size of the plugs pre made holes. Than I sowed my beans into the holes. Ripped off a small piece of rockwool and mulched it up. Lightly filled the holes in with the mulched rockwool. Than stuck the plugs into a misted humidity dome, to complete germination.
Shouldn't take anymore than 4-5 days to see some sprouts. Once I see some cotlydon leaves bursting to the surface. I will get the plugs planted into some 1 gallon pots. Plus get these ladies situated into their home. Cant wait!
Some background information on my experience with Gelat.Og. I've grown this one out several times and I'm just absolutely in love with these genetics. One of the best terp pallets I've came across. Extremely creamy and rich aroma with a kush kick... majestic!
She packs amazing bud structure and is a real branchy hauler. She packs a pretty large stretch, about 200% on average. Plus she has a bit longer of a flower time for a indica dominant... in my experience about 11 weeks.
She gets a strong demand for more phosphorus mid flower. A good spike with the pk booster and shes happy as Larry! Another Seedsman masterpiece right her! Amped to dive In to this grow.

Likes
1
Share


Likes
12
Share


@UnicornSparklehorn
Follow
She's doing great despite losing a whole branch. I feel growth slowed down a bit but I may be just paranoid. Soon she'll start her stretch. I hope she is tolerant to heat because I can't keep temperature below 30C.
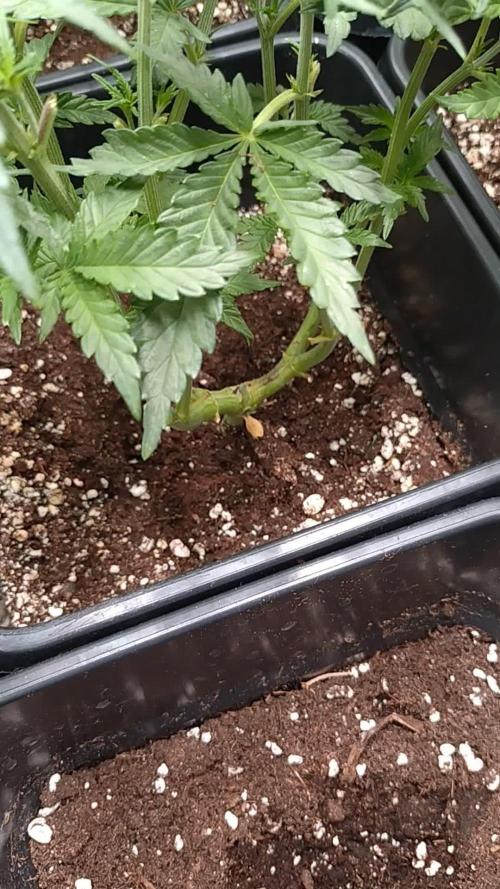
Adjusted her LST several times this week and the branches are in final position. She would start stretching soon. She's showing some calcium issues and my last plant almost didn't make it, so I gave her a decent dose cal-mag.

Likes
19
Share


@valiotoro
Follow
Hello everyone 😎
Week 5 of flower for the Banana Purple Punch auto from Fast Buds 🍌😈
She grew fast with a beautiful color,for the nutrient 4ml/L terra bloom & 1ml/L power buds & Green sensation 1ml/L from Plagron
Mars Hydro SP-6500 70%
Have a nice day 😋
Likes
2
Share


@Yuriboyka99
Follow
la resa è ottima, la resistenza di questa genetica altrettanto. Ho avuto problemi con le mosche bianche e nonostante ciò non hanno accusato molto lo stress.


Likes
37
Share


@Hawkbo
Follow
Everything is still alive thankfully and smells fuckin tremendous. The pictures were taken on day 49 or 50. I'll probly start flushing some of them over the next week the citradellic are lookin close. They kinda all look close even tho I expected some 70 dayers with the mostly sativa crosses but I gotta get in there and check the trichs.
Didnt get enough nug shots of this one, if your interested come back friday and I'll get some more on the next feed.
Likes
28
Share


@stevieb21
Follow
For the most part the girls did well other than the Durban Poisons getting some rapid purple leaf on both plants at the same time. One morning temps hit 15c due to an error with my new heater. Hoping that is what the cause is. Got tired of chasing fungus gnats so I decided to fight fire with fire and be a little proactive and release ladybugs and a few million nematodes 🧐🤓. Nematodes will become a weekly part of all growing in the future. As will ladybugs just to ensure they help keeps mites and gnats at bay. No obvious bug damage so far but I don’t want to jinx it as I have 3-4 weeks left on these 🤔🤔. Check it out at thebuglady.ca if you don’t want to use sprays! Till next week!
Likes
5
Share


@DawgHaus
Follow
Day 1: A large root can be seen at the bottom of each cell pot. Filled 3x 3 gallon pots with coco perlite 60/40 mix and transplanted each seedlings into its forever home. Not messing with micro-bacteria and all this time round as the nutes have everything that’s needed, fresh coco and a good feed will be more than enough for these girls. Watered them each with 100ml of water mixed with with a small amount of Velokelp and stuck a bag over each to lock in the humidity. Once the transplanting was over I setup a little DIY drip irrigation system with a 10L reservoir. Feeding schedule will be at 1/4 strength of advise dose as recommend by FastBuds and Remo Nutrients. Set up the timer for the lights and drip irrigation system to kick in tomorrow. The lights will change to 18/6 and drip irrigation will kick in just after lights on.
Day 2: Lights turned off for the first time after 24 hour light for the past few days. After 6 hours of darkness the seedling are looking healthy as fuck. The first true leaves are now developed and they’re all bright bright green. Drip irrigation timer did its thing for the first time today and I’m well happy with the result from my little DIY kit, hopefully all runs smoothly with it for the rest of the grow.
Day 3: The cotyledons have started praying upwards towards the light. The bags over the top of the plants have a good amount of condensation on the inside so I’ve cut a couple small holes in the top of each bag to let a little air in. Turned drip system off for a couple days to avoid over watering.
Day 4: Tiny second set of leaves can be seen in the centre of each plant. Made the air holes on bags bigger to get the ready for them to be removed. Drip system still turned off.
Day 5: Drip irrigation system is working as it should and environments holding up so all is good. Plants are looking good and seem fairly well rooted. Removed the bags from the top of each pot and turned on the humidifier and set it to 60%. Only thing left to do on this setup up is get some trays under the pots so they’re not sitting in puddles during the feeds.
Day 6: All of the plants first true leaves are praying up to the light and the second sets are starting to properly develop. Really happy with all the seedlings so far. When it comes to autos these seem like the business. Fans turned on today and drip irrigation set back on its timer. Found some old metal grilled shelves that have worked out perfect for trays for the irrigation.
Day 7: Second set of leaves are beginning to rise up, another week I reckon and I’ll look into hanging the MH bulb so these girls can explode. Very happy with these seeds so far. Gave them their first foliar spray with a 5ml of Velokelp and 5ml of Magnifical mixed into 1L of water. Turned the oscillating fan up a notch too as I’ve got it set up a fair distance away and I didn’t feel the breeze was catching them enough. Mixed up a new stronger feed this evening so it’s read for the droppers coming in tomorrow.


