


Likes
Comments
Share


@deFharo
Follow
Bienvenidos cultivadores de marihuana clandestinos, y también, a los que tienen la fortuna de no serlo!🖐️👨🌾 esta temporada cultivando leyendas sativas... todo por la causa!
Hoy, sin compasión, he cometido un crimen...
Hace unas horas, mirando mi jardín de la alegría, descubrí con asombro un polizón, un intruso libidinoso, un macho alfa en todo su esplendor, un invertido agazapado en la esquina.
Ha esperado 85 días para mostrar su verdadera cara, mis hembras todavía adolescentes corrían peligro, este sátiro, el gran fornicador disfrazado, el zorro en el gallinero, ha estado esperando su oportunidad, para dejar, sin consentimiento, su polen pervertido en mis chicas, todavía inocentes y puras.
Ah! rabia incontenible de ver a este macho infiltrado y traidor, lascivo conspirador inesperado, obsceno personaje al que inmediatamente desterré de la carpa de cultivo, era de noche, durmió al relente, solo, como un apestado, lejos de quien creyó ser su familia, había roto la Regla Sagrada con deshonesta lujuria: "Este jardín no es lugar para machos", la ley de esta carpa de cultivo es clara, quien la quebrante será ejecutado con mucho dolor y sus restos serán esparcidos en el Mulch de mis plantas hembra.
Al amanecer, delante de la carpa de cultivo profanada, convoqué al verdugo más desalmado, no le pedí misericordia, pregunté al reo por su último deseo, quiso fumar un porro de marihuana orgánica, yo fumé también, después me senté, se escucharon voces pidiendo clemencia, el verdugo hizo su trabajo magníficamente, el gran semental conspirador sufrió mucho mientras sus ramas eran separadas del tronco y arrojadas al suelo con bárbaro desdén. 😈
El lugar vacío dejado en la carpa de cultivo fue inmediatamente ocupado por 3M ▼ La gitanilla, una planta que va dar mucho que hablar y que abandona su carpa casera uniéndose al resto de las hembras, viene con una maceta de 7L, pero está dispuesta a competir al máximo nivel con su hermana y compañeras cultivadas en macetas de 11L… a jugar.
Ahora también mi pequeña carpa casera queda en exclusiva para las dos plantas hermanas y auto florecientes que estoy cultivando esta temporada.
Hoy he ajusticiado a un vicioso macho y he disfrutado mucho contándolo… me voy a hacer otro porro!
Hasta la próxima...
SALUDOS A TODOS!!
=================================
Info de la cepa Durban Poison: https://www.marijuana-seeds.nl/durban-poison-seeds
"Una planta sativa pura que nunca ha sido hibridada..." MSNL Seeds
- Genética: Variedad africana original x Skunk holandesa
- Sativa pura: 100%
- Tiempo de Floración - 8-10 Semanas
- Rendimiento masivo: hasta 600 g/m²
- THC Alto - Hasta 20%
==============

Likes
9
Share


@Xabii
Follow
The ORP probe is not calibrated and values are to be taken with a grain of salt.
Values are average of the day.
DATE - °C - RH% (Tent Temp/RH)
20240822 22.3 60.0
20240823 23.0 65.7
20240824 24.1 72.8
20240825 22.1 62.6
20240826 21.9 59.7
20240827 22.1 62.1
20240828 24.4 63.7
DATE - PH
20240822 6.22
20240823 6.26
20240824 6.18
20240825 6.22
20240826 6.13
20240827 6.07
20240828 6.15
DATE - ORP (mV)
20240822 -17
20240823 51
20240824 25
20240825 28
20240826 -4
20240827 35
20240828 27
DATE - EC(us/cm)
20240822 2162
20240823 2157
20240824 2266
20240825 2151
20240826 2178
20240827 2257
20240828 2375
DATE - CF
20240822 21.62
20240823 21.57
20240824 22.66
20240825 21.51
20240826 21.78
20240827 22.57
20240828 23.75
DATE - °C (Reservoir)
20240822 20.6
20240823 20.8
20240824 21.9
20240825 20.3
20240826 20.0
20240827 20.4
20240828 21.9

Likes
23
Share

@therealgrowmie
Follow
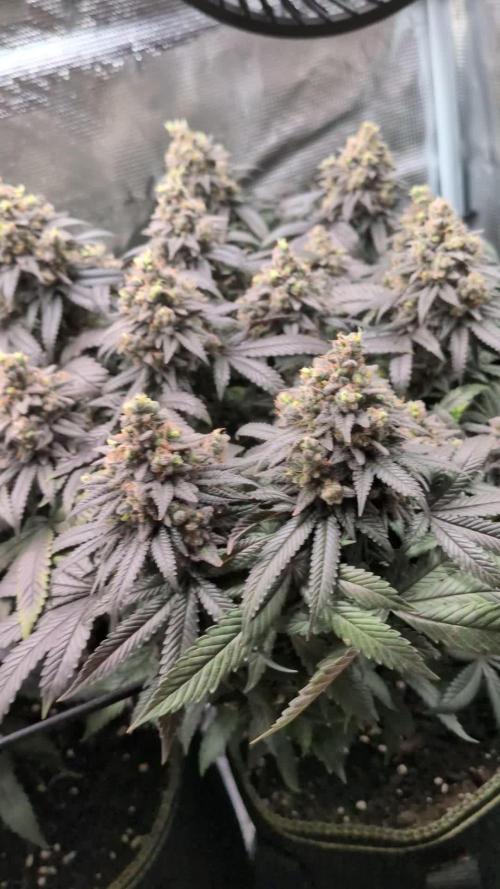
The finish line is finally in sight and these girls are looking absolutely coated right now ❄️
Buds have swollen hard over the last days, colors got deeper, and the trichomes are stacking beautifully across every surface. The tent smells louder every single time I open it 😅
Checking the trichomes closely now shows mostly cloudy heads with the first ambers starting to appear here and there. Exactly the kind of progression I was hoping for. The fade is settling in naturally, leaves are darkening and fading out, while the buds keep pushing resin production to the max.
At this point it’s mostly patience and letting them finish gracefully. No more chasing growth — just maintaining stable conditions and watching them ripen day by day. If everything keeps going like this, next week will officially be chopping time ✂️🌱
Honestly really happy with how this run turned out. The canopy stayed even, buds packed on serious frost, and the colors on these flowers are just insane. Definitely one of those grows where opening the tent instantly makes the whole effort worth it.
📊 Stats so far:
💧 Watering: Every third day
🌡️ Temp: 26–28°C
💦 Humidity: 65% RH
📈 VPD: ~1.18 kPa
💡 Light: ~700 PPFD
Likes
2
Share


@BakingBaked
Follow
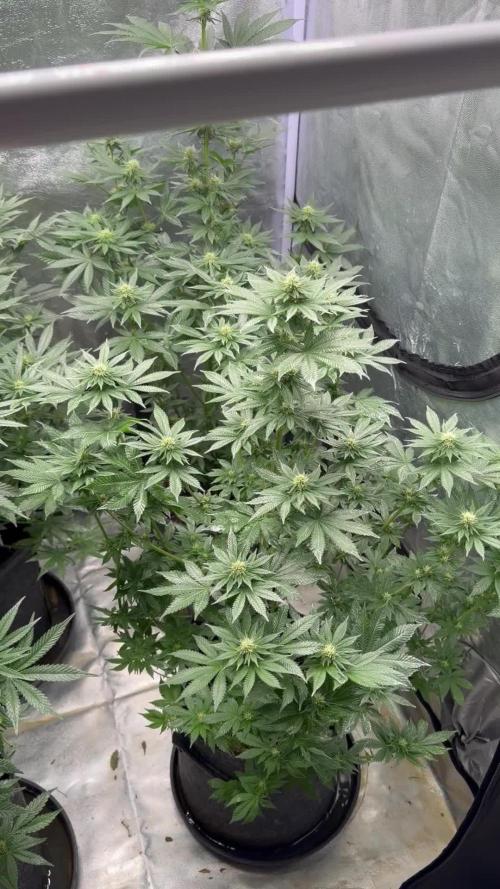
This week was all about letting her recover from the cloning. Sadly most clones I took did not made it. Just 2 survived my inexperience hands.
The good news is that miss Daisy it's doing so well I may be able to give it another try before flipping to flower. I have no rush for this harvest so will probably give it a try.
After the cloning and some extra pruning she recovered in no time. The roots look good, just wish the nutrients did not stained them, that way would be easier to sight any root rot if present.
🗓️ Day - 28
⏰ Hour - 8:30 am / 10:00 pm
🌬️Air Temp. - 74 / 77
💦Humidity - % 50 / 54
⛽️ TDC (ppm) - 630 / 650
⚱️Reservoir Tmp. - 73 / 72
⚗️PH - 6.1 / 6.1
🌿 Looks perky and happy after pruning. She’s is recovering very well. Her roots are showing new white hairs so seams she’s liking the higher nutrients levels.
🗓️ Day - 29
⏰ Hour - 9:00 am /
🌬️Air Temp. - 76 /
💦Humidity - % 54 /
⛽️ TDC (ppm) - 680 /
⚱️Reservoir Tmp. - 73 /
⚗️ PH - 6.1 / 6.1
📝 Added 4 Gallons of tap water starting feed for week #5 with higher nutrient concentration so ppm should stay around 600. Also added 10 ml of hydrogen peroxide to the reservoir.
🗓️ Day - 30
⏰ Hour - 8:00 am /
🌬️Air Temp. - 76 /
💦Humidity - % 54 /
⛽️ TDC (ppm) - 680 /
⚱️Reservoir Tmp. - 73 /
⚗️PH - 6.2 /
🌿 Bouncing back very well and has nice new roots coming out.
🗓️ Day - 31
⏰ Hour - 8:15 am / 9:00 pm
🌬️Air Temp. - 75 / 76
💦Humidity - % 61 / 60
⛽️ TDC (ppm) - 680 / 710
⚱️Reservoir Tmp. - 72 / 73
⚗️PH - 6.2 / 6.2
🌱 Two clones left of Sour Diesel show small signs of root development. Other samples did not made it.
🗓️ Day - 32
⏰ Hour - 8:10 am / 11:30 pm
🌬️Air Temp. - 75 / 76
💦Humidity - % 61 / 57
⛽️ TDC (ppm) - 710 / 740
⚱️Reservoir Tmp. - 72 / 72
⚗️PH - 6.2 / 6.2
🗓️ Day - 33
⏰ Hour - 8:10 am / 11:00 pm
🌬️Air Temp. - 73 / 74
💦Humidity - % 49 /
⛽️ TDC (ppm) - 770 / 800
⚱️Reservoir Tmp. - 72 / 72
⚗️PH - 6.2 / 6.2
🗓️ Day - 34
⏰ Hour - 7:30 am / 10:00 pm
🌬️Air Temp. - 74 / 74
💦Humidity - % 52 / 53
⛽️ TDC (ppm) - 820 / 880
⚱️Reservoir Tmp. - 72 / 72
⚗️PH - 6.2 / 6.2
🗓️ Day - 35
⏰ Hour - 7:30 am / 9:00 pm
🌬️Air Temp. - 73 / 74
💦Humidity - % 55 / 52
⛽️ TDC (ppm) - 910 / 960
⚱️Reservoir Tmp. - 71 / 71
⚗️PH - 6.1 / 6.1




Likes
59
Share

@Tower84
Follow
🇩🇪 Cherry Limeade Doja - Wochenkommentar
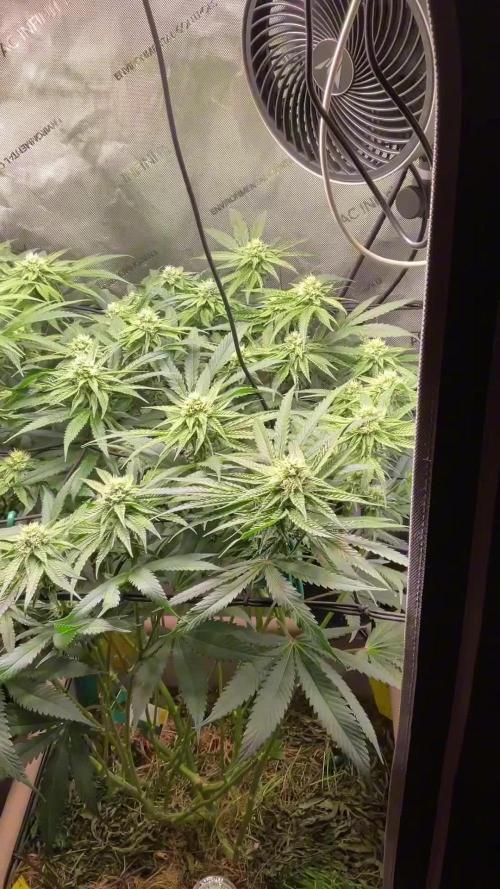
Die Cherry Limeade von Doja entwickelt sich weiterhin hervorragend 🌱. Die Blütenentwicklung schreitet sichtbar voran, die Pflanze ist kerngesund und ihr Stoffwechsel läuft aktuell auf Hochtouren 💚.
Nach dem Lollipoppen ist der Wasserverbrauch zunächst erwartungsgemäß etwas zurückgegangen 💧. Nach ungefähr vier Tagen hat sie dann aber wieder deutlich zugelegt und mittlerweile trinkt die Cherry Limeade etwa 3 Liter pro Tag 🚰. Gleichzeitig beginnen die Buds langsam sichtbar anzuschwellen 🌸 – genau das, worauf ich gewartet habe.
Mängel oder Krankheiten sind weiterhin keine zu erkennen 👌. Lediglich ein kleiner Schönheitsfehler bleibt: Beim Scroggen ist mir bereits letzte Woche auf der linken Seite ein Main Bud abgebrochen 😬. Dadurch fehlt vorne links leider ein Trieb, aber ansonsten hat sie den kleinen Rückschlag sehr gut verkraftet.
Eigentlich müsste ich momentan gar nicht viel an der Pflanze machen 😎. Trotzdem ertappe ich mich dabei, wie ich mehrmals täglich nach meiner kleinen Schönheit schaue, einfach um sicherzugehen, dass es ihr gut geht ❤️. Jetzt beginnt schließlich die Phase, in der man am liebsten jede kleine Veränderung beobachten möchte.
Auch der Geruch wird zunehmend intensiver 👃. Aktuell duftet sie herrlich spritzig, frisch und limettig – genau die Richtung, die ich mir von der Cherry Limeade erhofft hatte.
An den Parametern habe ich diese Woche nichts verändert ⚙️. Einige der Main Buds bekommen inzwischen etwas weniger als 1000 PPFD, im Durchschnitt liegt die Lichtintensität aber weiterhin bei etwa 900 PPFD ☀️. Solange die Pflanze so gesund und vital aussieht, sehe ich keinen Grund, momentan etwas am Setup zu verändern.
Jetzt heißt es eigentlich nur noch: zuschauen, genießen und den Buds beim Anschwellen zusehen 🌸👀. Ich bin gespannt, wie sich die Cherry Limeade in den nächsten Wochen noch entwickelt 🚀.
📊 Parameter der letzten Woche:
💡 Licht: 900 PPFD / DLI 39 (12/12, Stufe 6, 40 cm Abstand)
🌡️ Temperatur: 28 °C
💧 Luftfeuchtigkeit: 67 %
📈 VPD: 1,2 kPa
🌿 CO₂: Ø 740 ppm
💦 Bodenfeuchtigkeit: 120 mbar
🇬🇧 Cherry Limeade Doja – Weekly Update
The Cherry Limeade by Doja continues to develop exceptionally well 🌱. Flower development is progressing nicely, the plant is perfectly healthy, and her metabolism is running at full speed right now 💚.
After the lollipopping, her water consumption understandably dropped for a while 💧. After about four days, however, it increased significantly again, and she is now drinking around 3 liters per day 🚰. At the same time, the buds are slowly starting to swell 🌸 – exactly what I’ve been waiting for.
There are still absolutely no signs of nutrient deficiencies or disease 👌. The only small imperfection is unfortunately still visible: I accidentally broke one of the main buds on the left side while scrogging last week 😬. That’s why there’s a small gap at the front left, but apart from that, she handled the setback extremely well.
Technically, there isn’t really much I need to do at the moment 😎. Still, I find myself checking on my little beauty several times a day, just to make sure she’s doing well ❤️. This is the stage where you simply want to watch every little change.
The smell is also getting noticeably stronger 👃. Right now she has a wonderfully fresh, zesty lime aroma – exactly what I was hoping for from this Cherry Limeade.
I haven’t changed any of the environmental parameters this week ⚙️. Some of the main buds are now receiving slightly less than 1000 PPFD, while the average light intensity remains around 900 PPFD ☀️. As long as the plant continues to look this healthy and vigorous, I don’t see any reason to change the setup right now.
So for now, there’s really only one thing left to do: sit back, enjoy the process, and watch those buds swell 🌸👀. I’m very curious to see how much the Cherry Limeade will develop over the next few weeks 🚀.
📊 Parameters from last week:
💡 Light: 900 PPFD / DLI 39 (12/12, Level 6, 40 cm distance)
🌡️ Temperature: 28 °C
💧 Humidity: 67%
📈 VPD: 1.2 kPa
🌿 CO₂: Avg. 740 ppm
💦 Soil moisture: 120 mbar

Likes
36
Share


@Regenwurm
Follow
Eine Ständige Entlaubung in dieser Woche um den Trieben Licht zu geben.
Tage der Keimungsphase = 7 Tage.
Tage in Wachstum = 21 Tage
Tage in der Blüte = 14 Tage
Wachstum h Woche 2 Blüte = 6 cm
2 mal in dieser Woche mit Purolyt Mischung 1:25 besprüht
Lichtstärke: 90 %
PPFD: ca. 850 umol
Lichtabstand: 40 cm
Std Tag/Nacht: 18/12
Temperatur Tag: ca. 25 Grad
RLF Tag: 60%
Temperatur Nacht: 21 Grad
RLF Nacht: ca. 60 %
VPD Wert: ca. 0,9
PH Wert Wasser/Düngelösung: 6,3
EC Wert: nicht gemessen
Ventilator Oszillation: Stufe 1
Befeuchter: an
Entfeuchter: aus
Zusätzlicher Entfeuchter: 0 Stk. außerhalb vom Zelt im Raum
Bewässerung: 2* bewässert 1 l/Pflanze mit Dünger mit den o.g. Mengen
2 * pures Wasser mit 1 l/Pflanze
Purolyt Besprühung: 2 mal
Besprühung Fastplantspray : 1 mal
Controlling: Grow Control
Dünger: Greenbuzz Nutrients
Licht: Pro Emit Vollspektrum
Abluft: EC Carbon Active 750 m3
Danke an Zamnesia für die Seeds, den sonstigen Merch und natürlich das Vertrauen in die Kooperation
https://www.zamnesia.com/de/10681-zamnesia-seeds-pineapple-express-f1-automatic.html
Danke auch an Mia von GB:
https://greenbuzznutrients.com/de/
Ihr bekommt 25 % Rabatt bei der Nutzung des Codes auf der GB Homepage
https://greenbuzzliquids.com/de/shop/
Code: GD42025
(Mindestbestellwert 75€)

Likes
14
Share


@Smile_gan
Follow
This week
BCN start flowering stage.
Pineapple found little bit white hair on node that sign of female on a little plant size.
I decision to feed Flower Fuel and Myco+ to both BCN plant.
For Pineapple still feed same last week Fish hormone and Myco+
At this point i turn on 2x 100W LM301B again. So, Totally wattage increased to 440W


Likes
9
Share


@Hashsmokinslasher
Follow
Some of the buds/ leafs were starting to turn brown. It seems like it was a bit past it's prime, I harvested on day 60 of flower. The strain was 56-63 days Jack Herer by pHenos Nursery. The trichoms looked ready, I did have some issues that I've noted in previous weeks but it smells amazing and I can't wait for it to finish drying and curing!
Likes
20
Share


@Inhomerhizome
Follow
Pretty happy with the grow and the harvest, the drying went well also!
Each grow highlights changes for the next and this has been no different! I'll be making more training adjustments in the next runs to try and refine the vertical scrog and get to the point where it's a wall 1 bud thick! I know it will get there in the end it's just like relearning how to do a horizontal scrog! I just need to predict the way the plant will respond when the light is from the sides! Bravery and brutality during pruning I think is the key! 😂✌️💚
Likes
65
Share


@Tonino
Follow
smooth smoke and durga mata are the ones that suffered the least from the light problem we're just a little bit behind schedule but I have started flushing still have no Amber Trichomes but we're coming close



Likes
91
Share


@GERGrowDesigns
Follow
Welcome Everyone,
You been just Invited to Take a Seat at the :
-Designers Club -
Special Thanks to John for hopping through my Messages to Join The SSSC/DP Photo Contest
So my part was to Create the "Designers Club".
Its a New Created Fast Version Strain from a Cooperation Between SuperSativaSeedClub and DutchPassion. The Club will Carry 3 of these Phenos .
Information we have About this Strain :
Fast Version B – Indica-Dominant (90%) | 7 weeks flowering | Fruity, Peppery, Sweet
The Project will be Supported from Narcos Nutriets to give the Strain the Perfect lifespan it could Deserve .
Light used for The Contest Grow :
Tenty Pro x4 200w in a space of
60x60 Homebox Ambiente Tent.
Quickly Reminder , this Diarie will be a Time Eater . If you Enjoy what you see just show it with Some Thoughts and Thumbs in the Weeks . I will Appreciate that.
Enough Talk from me , just Enjoy youre Seats and be a part of The Designers Club .
Good Luck to Everybody and Keep up Growing !
Likes
3
Share

@NyBushDr
Follow
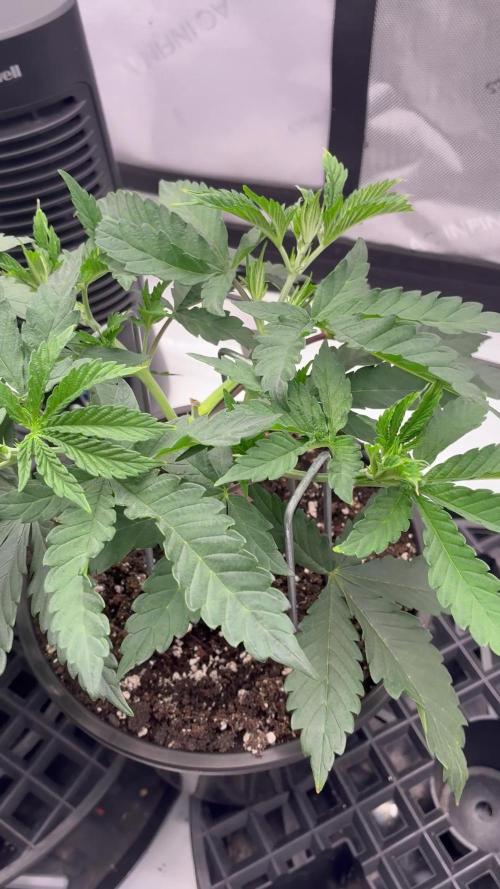
Good morning, weekly update time! We just finished up week 3 of veg as we land on day22 now. I noticed these ladies like it a little cooler as anything over 80 gives me some tacoing 🌮! I dropped lights on temp to 79 and have humidity at 70, I slowly changed vpd from .9 to 1 over the week ! The girls recovered from mainlining quickly and needed their first training, because of that I started using silica to harden up those trained mains! From here on out I’ll give fish shit and silica every other watering. The ladies got their bi weekly top dress of 1/4 cup worm castings to keep all that natural goodness working into the soil and down to the roots. I’m very happy with the way the run has progressed !
Likes
11
Share


@Dreadnug
Follow
Growing fast - have the start of 16 cola locations and starting to work some of them back towards the middle of the plant. Lots of training - noticing that the ground cover is a bit too aggressive and getting in the way of light distribution so having to trim that back quite a bit. Also its making it hard for the training ties to stay in the ground.
Weekly nutes continue with same mix above.


Likes
9
Share


@Highclass
Follow
Day 43: 500ml + 2ml/l atazyme + 2ml/l top candy
Day 45: 600ml + 3ml/l biogrow + 2ml/l biobloom
#4* is in a biiger pot (11L) and shes getting out of control, biig branches coming out from the bottom, i love her structure.
Day 47: 600 ml. + 1ml/l calmag
Day 49: 800 ml + 2ml/l top candy + 2ml/l atazyme
Minor defoliation
Likes
27
Share


@Smokepurple137
Follow
All plants are starting to flower and doing great. Starting bloom feed 20/12/20. I'll update 3 or 4 times this week.
Likes
10
Share


@Sadhus
Follow
Sa pousse tranquillement, toujours pas de signe de fleurs chez les boutures en 12/12 , quelques nouvelles bouture qui racines et la mère prête a envoyé plein de petits
#khalifa genetics
#madamegrow
#trolmaster
