
Likes
Comments
Share

@DeepRootsGrowTrees
Follow
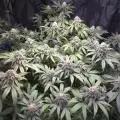
KICKASS AUTO by KANNABIA
Week #8 May 21st-28th
Week # Flower
This week she continues to fill in her where it counts her bud sites are getting thick and her trichomes are like sugar dust and she getting a nice little arouma about her. She's got evenly spaced bud sites that run down the stem she's in a AC INFINTY 3 gallon cloth pot feeding her nuts twice a week until run off then water every other day. Thank you for stopping by!! Stay Growing!!
Kannabia.com Kickass Auto


Likes
126
Share


@WhiteWidow
Follow
turn the volume up coz i named them individually as i was moving my camera..
They all healthy and developing very nice, grape from dinafem and strawberry from spliff seeds are the ones that branched out mostly and are fastest in the garden..
Defoliating every 3 4 days, dont want to cause too much stress but still want to keep those branches exposed 💪


Likes
2
Share


@MoMedicalAlchemist
Follow
Day 32 flower update Emerald Harvest nutes everything looks great...they're fattening up this week...they're all 60-70 day flower times as recommended by the breeders

Likes
37
Share


@masterofsmeagol
Follow
8/19 Rained again last night. No damage but medium is drenched. The 9lb kush I've been struggling with seems to be improving. I spent a lot of time on her yesterday and at least an hour this morning defoliating and pruning her. New growth and flowers look promising. I'm cautiously optimistic. I defoliated what needed it. I needcto qpplyvorganocide again. I can see random signs of septoria leaf spot. I really have been off my fame lately. I'm back on it now. This week the garden will be rearranged and I'll pull that big GDP back and better support the blueberry for flower. That NYCSA is a beast. It's resilient as all hell and just continues getting bigger and fuller. Despite pr9blems in the garden this girl seems absolutely fine. At least I don't have that defeated feeling anymore. I've got flowers on a few different plants. I'll try to get a couple pictures. I may take rapacaps advice and add a cheap plastic roof for later flower. I'm not sure if the explosive flower growth is due to the liquid kool bloom but I think I'm going to switch back to tiger bloom as it works better with the other nutes. I'll jeep this updated but I've got work to do.
8/20 Well it Rained again last night. This is getting discouraging. Now my other 9lb kush has the bottom branch all droopy like there's a borer or something. Realistically with the temp swings and the weather I think it's a firm of root rot or pythiym damage which isn't good. I posted pictures of the stalks and would be grateful if anyone has any advice. I'm go8ng back down to look again for a borer hole but i didn't see one. What it looks like to me is that the petroleum jelly I put on the stalks (to battle ear wigs) seems to keep them moist or something inviting mold or fungus. I'm kind of at a loss. I don't really know where to go from here. I don't know if I should just replant the severely damaged plant away from the rest of the grow, bag it and get rid of it or leave it be and hope for the best. I certainly don't want anything spreading. I'm getting tigerbloom today as my plants still need to eat and I'm nervous about the liquid kool bloom. It's probably fine but still. I'll update after I put in more work and research more today. Any advice helps. UPDATE: No borer holes. The stalk looks fucking horrible. It's supposed to rain today. I'm going to give it one more day then I'll amputate that branch and get rid of the other plant if I don't see an improvement. Perhaps I'll plant it in the ground. Don't really know what to do. Family bar b que today so my options are limited.
8/21 FED TWO GALLONS TO THE GARDEN. ONLY USED .5TSP/GAL OF LIQUID KOOL BLOOM. Did not feed dieing plant. Back to super hot weather 80° at 9am. Did a lot of research last night. I also went to several commercial growers and asked advice. What I came up with was a fusarium infection of pythiym infection
(Crown rot). I looked at all my stalks and they all have bark and are darker where I applied the petroleum jelly. I'm also NEVER using DE again. It fucking ridiculous amounts of water. Everyone swears by it bit it's not going in my garden again. Since use I can just watch water sit right on the GD soil. I tried to get some examples of what I'm talking about with the stems. I amputated that lowest bottom branch I trained (which was huge). I didn't have time to dispose of the other plant before my wife's doctor's appointment. I'll update when I go back over. I'm sure this won't help and may hurt but I used Bee Safe 3 in 1 on the wound and around the stalks of the plants I saw discoloration on. I didn't touch the NYCSA even though I see some discoloration. I may just be seeing things. That plant I'd super healthy and I don't want to risk losing it. It doesn't seem to have the stem rot like the others. At least I'm not the only one having problems. I hears some pretty bad stories. Still. I'm heart broken. I'll keep this updated after I go back over. FUCK. I MAY just go back to indoor. UPDATE: Got back from the appointment and the rest of the plant was all droopy just like the other 9lb kush (and the branch amputated). I wondered about that because other branches looked worse. I got the totally dead 9lb kush out and found some root rot. AFTER wheeling the bag out I found earwigs and other insects where the bag had been. Awesome. I used h202 to try to wipe down anything that looked Fingal in the stem. It sucks because it seems like that liquid kool bloom pushed them over the edge into flower. Cotton balls where there was nothing. So that's both my 9lb kush plants and the largest plant of the year the GDP that have all bit the dust. If you grow cannabis you know how I'm feeling. I KEEP TRY8NGVTO UPLOAD THE MINUTE VIDEO I TOOK BUT I CLICK ON SOMETHING ELSE AND IT DISAPPEARS. WIFI SLOW. HAVE TO WAIT FOR 5G
8/22 What do I say? Fusarium? Pythium? Stem rot? I'm going to have to get a tent to do some indoor to get the medicine I need for me and my wife. I took the last 9lb kush out and disposed of it. Well it's still in the bag. I'm hoping maybe it might come out of it (beyond hope and far away from the others (but I'm going to toss it today). This blows so hard. Flowers are just starting to develop. I like the liquid kool bloom. It seems to make flowers explode when there was none before. At least on the plants I have left. Actually even the dieing ones started flowering. I'm really concerned considering that one plant (at least) has septoria and every plant has that petroleum jelly on it. Cautio to people that use that. It seems thats where the rot started or is. In spots I spread the petroleum jelly. Anyway my NYCSA has the smallest amount of "funky looking stuff on the stem" so I'm hoping it will make it. Cotton balls starting to appear. If I lose the whole fucking crop I'm gonna go ape shit. UPDATE: Spoke with a few others and did more research. I removed my braces on the bottom of all the plants. It looks like the pjelly and the brace allowed for some type of contaminate. Other growers think I'm being too bleak. They think things will turn out okay. They are more knowledgeable about cannabis than me but I'm with these particular plants everyday. They're probably right and my anxiety is just getting g to me. It's scary seeing a healthy plant completely die in such a short time. After removing the other 9lb kush I could easily see extreme rootbound roots still too the size of the 1 gallon they came in. The bag was PACKED FULL of tight roots so they definitely made it down. The plant however just fell over when I pushed it. I had roughed it up a big before. Anyway I'm praying to the cannabis gods to not take what I have left.
8/23 Fucking pouring again. This sucks. I've gotten loads of advice and made another friend on here. I forgot my phone so I couldn't take pictures this morning. My spirits are up a little seeing that others are at least attempting to help. I'm headed to the grow shop after a night of research to grab supplies to battle this. I'll update later. EDIT: I picked up plant doctor at the grow shop. It was 50% off and I couldn't find anything with trichodermia. However, I've heard good things about this plant doctor. It's systemic and can be used as a root drench and a foliar spray. BIGGEST selling point for me is that it SPECIFICALLY lists fusarium, grey mold. Pythiym crown rot, black mold and all kinds of other shit. The thing that sucks is it's raining and it's not supposed to stop for a few days. That's going to make application more difficult. Oh well. I think I may do a root drench on the one plant that has a wilted bottom branch. I'll keep this updated. Thank you everyone who reached out. Especially growing grannies and my commercial buddy who is always here for me. However he has no experience with this so I'm kinda on my own here. EDIT: I couldn't find trichodermia and I don't have time to wait around and order. I found plant doctor which literally lists it treats all the possibly pathogens my issue could be. Even has a section for medical Marijuana. I did a root drench on the plant up front in the middle AND I did a foliar spray. Might as well get the septoria too. It's systemic but it gets in faster through the leaves I guess. It started sprinkling and I want to test this stuff out before I go ham with it. I did give some to the to other plants bit left my best AND THE TWO SMALLER ONES alone for now. I'm not seeing those issues on the NYCSA and I don't want to risk damaging it. I chose tge root drench as it's raining and the instructions for fusarium WAS a root drench. Thank you all for your help. I will close out tge question once I know it's figured out. Wish me luck. DID A SHORT VIDEO BUT WIFI IS SUPER SLOW SO I NEED TO WAIT TO UPLOAD IT. Went back over. Finished foliar spraying the other two and left the NYCSA and two Littles alone. Hopefully this works. I did I short video. Who knows if it uploads. UPDATE: Went back over and finished foliar spraying. Took a bunch of pictures and did a video but it didn't upload. I'm hoping this will do it. Plants actually look good. And they're flowering nicely! It's too bad I had to do a foliar bug this us supposed to combat PM and septoria as well.
8/24 It Rained last night but hasn't Rained today yet. It's supposed to and uts overcast. I'm really considering putting a roof on my grow (like rapacap suggested) for flower to decrease mold chances. Plants looked happy. I saw no negative effects from the Plant Doctor. I even sprayed a branch of the NYCSA and the stem and a little around tge roots. I finally feel like I can take a breath. I've been working so hard and worrying about losing g everything. I may have been able to save that 9lbkush but I don't think bit was worth taking the chance. The sun is peaking out now. My buddy at the grow shop called and set a side general hydroponics armor si 0-0-4 silica supplement cause it was 90% off. I pad like a buck sixty lol. I'll incorporate that next feed or water. Whatever comes first but it will be good to get it in the regimen. I was worried plant doctor might hurt but the girls seemed to kike it and I went ham on the worst plant. I mixed according to medical Marijuana guidelines on the label
(Theres another label on the internet, it's not on this one, it's at the very bottom and just recommdations from commercial growers. I hope this stuff works. Things look better already though. That liquid kool bloom is the bees knees. That's making flowers pop up like crazy! I think I'll stick with it. I was going to use beastie bloom and cha ching later on (and still might) but I hate the lockout bullshit. I've done a bunch of videos but most don't get uploaded as i forget to upload when I leave and wifi is slow here. Anyway at least I've got a few good ones left and pleating the words of my commercial poll buddy, "barring anything catastrophic you should be fine. I know your anxiety gets the better of you sometimes." Couldn't be a truer statement. I'm still getting a tent and doing indoor though. I'm going to need to.
8/25 Did some slight defoliation. I think today I'm going to reorganize my grow space. Things are looking better though. Plants look healthier. Flower is on and they are going to beat hell. I'm glad I took a cutting from NY 9lb kush. I also took one from the NYCSA. THose are tge little ones. The 9lb kush is flowering pretty good. Too bad it's just on a 3 gal. The NYCSA us in a 10 gal grow bag though and is doing amazing. I still see septoria on the leaves. I'm sure I'll need to reapply plant doctor but thus far I'm impressed. Things LOOK better. I don't even remember the last time I watered. It Rained last night. Looks sunny today. I'm going to feed tomorrow. I want the soil to dry out though. We usually don't get consistent rain like this. It's a first for me. I'll update later if I get stuff done.still wondering if I should amputate that wilted branch or give it a bit. It's still attached right now. I'll get some sealant and do some more research.


Likes
30
Share


@bioaccessory
Follow
Hey!
This time the start turned out to be successful, which I am very pleased with. In this cycle I will have two plants - CBD Crack in the neighborhood, I already had a report on this strain, so this time all the attention is on Hulk 💪😍
By the end of the week, I planted mycorrhiza, this time of our Ukrainian production, and will look at the result.
Glory to Ukraine! 🇺🇦
Stay connected and take care of yourself! 🙏

Likes
14
Share


@ConspiracyFly
Follow
It is in bloom growing each day, I did defoliation the first day of the week and a little more training the LST
The first two days of the week I sprayed both plants with BAC Foliar Spray just before lights out....
Every day I put CO2 pellets in a glass of water while the lights are on.


Likes
11
Share


@Weedganja420
Follow
Estoy muy contento de haber elegido esta depa, tuve un pequeño percance con la alimentación ya que no asimila tantos fertilizantes pero lo pide corregir a tiempo. Me ha encantado los colores en sus últimas semanas de floración, sus flores tienen un potente olor y sabor.. estoy muy contento con el resultado, no me pensaría en tenerla otra vez.

Likes
98
Share


@DogDoctorOfficial
Follow
Her green still not were i want so i am keeping the nutrispray for a few days more at least until i like the colors better, apart from that she is growing great actually, wen looking at last week defoliation and now , i mean lol
Sorry so short update i will keep updating among this week <3 <3 <3
Decided to connect my spider-farmer to increase my PPFD, i love this MARSHYDRO TSW2000 but in my humble opinion a 4x4 needs a bit more PPFD Power wen in flower mode bringing up my average PPFD to 1000 umol/m2/s lets see if she likes the idea or not.
And like i suspected she did like more light and the color is changing bringing her green colors back to normal, did a leaf inspection just in case and posted some photos of my under leaf microscopic view, all good by the way lol , with this meaning that next week i will provably stop Nutrispray since i don't like so very much to apply any type of foliar during flower.
And As i suspected i have an bug infection lol freaking trips found them way in to my closets, them a i dont know if mites, but i have something in this closet that webs and i cant find it RRR, i guess its part of the game, just been long long long time since i encounter any situations like this, and that is why its happening, i got way to comfortable and lazy on my IPM.
This is one of the reasons why is so important to checking in a microscopic way under leafs etc
Im ordering a bunch of beneficial insects , traps etc and going in from all sides lol non so ever she is looking great, not the best color leafs i know , but she is moving fast and furious .
I will keep you all posted as for what i am doing and how i will deal with this situation so stay tuned since this can go one way or the other lol <3 <3 <3
As always thank you all for stoping by, for checking my journey , for the love support and for it all, i am blessed and humble with you all.
Just a reminder , all i grow is medicine for myself, for me and for my best friend with is me nothing to sell, so don’t even ask.
All info and full product details can be find in can find @
https://ganjafarmer.com
https://aptus-holland.com/
https://marshydro.eu/
#aptus #aptusplanttech #aptusgang #aptusfamily #aptustrueplantscience #inbalancewithnature #trueplantscience #Ganjafarmer #growerslove
With true love comes happiness 💚🙏 Always believe in your self and always do things expecting
nothing and with an open heart , be a giver and the universe will give back to you in ways you could not even imagine so 💚💚💚
More info and updates @
https://growdiaries.com/grower/dogdoctor
https://instagram.com/dogdoctorofficial
https://youtube.com/channel/UCR7ta4DKLFMg2xxTMr2cpIg
💚💚💚Growers love to you all 💚💚💚

Likes
141
Share


@Anonymous_2022
Follow
Thanks for stopping by.. Please hit the like button if you like what you see and ill be sure to check you out too Growmies 🌱
Week 7 of flower .. things are stinky and sticky 😂
Added a PK booster and using Problem Solver by Bio Bav an organic feed for an extra boost due to the recent deficiency..
Trichomes are a mixture between cloudy and clear so i will be keeping an eye on the over the next week or so…
Temps 21 - 27 ✅
Humidity 45 - 60 ✅
Thanks for all the likes and support guys means a lot being fairly new on the scene 💚

Likes
189
Share


@InspireMe
Follow
Day 51: So today is my usual watering day but decided that I can do it in the evening instead of the morning. How wrong I was, blue dream at the back was deeply unhappy with that idea. I came to water and shed dropped like crazy. The other BD was ready eventhough she wasnt due until tomorrow, I feel as though I may have gotten a little complacent with the 3 day water. I'll be checking after 2 days now as I dont even bother to lift the pots to check. All back to normal after watering. (Watered plain PH 6.3 water)
Photos arent quite as good tonight as I was rushing as my phone was going to die. Will get some better ones today
Lastly, a big thanks to marshydro for sending me the tsw-2000! Girls are looking awesome under it 😏👌 Super easy to install, I've left at the same hight and set the brightness to about 50%. Using my cheap light measure it's a little more than what they were getting before. I'm getting a much better coverage with the tsw-2000 than what I had with the 2x viparspectra P1000s. I'm really happy with the light already, I'm sure the girls are going to love it just as much as I 😝.
Day 52: all is good! Girls aren't dropping an hour before lights out so I have increased the light to 65%. Really good sign, maybe they like the mars light spectrum a little more than the VS.
Checked on weight of the pot today, still feels real heavy.. I'll be shocked if I need to water tomorrow, maybe it was just a one off as it has been a little warm. We shall see tomorrow!
Day 55: the older blue dream is showing a pretty heavy P deficiency. This is likely due to my laziness.. I've been feeding her the same as the others even though she looked like she could take some more nutes. Fed them all today
4L ph 6.4 530ppm
1ml/L big bud & bloom B
0.5ml/L b52
0.25ml/L cal mag
Bads are starting to put on weight and pistils are browning a little roughly 30-40% are browning. Getting closer to harvest 😁
Day 58: watered 4L plain Ph 6.4 (All)
Small defoliation of all 3 plants, increasing light penetration and airflow to the bud sites. Pistils are mostly brown, I'm going to start the flush and keep an eye on the trichomes! Time to get out the microscope for the next update 😁
Thanks for stopping by! 🙂👍
Likes
116
Share


@Kitties_and_Colas
Follow
~_~_~_~_~_~_~_~_~_~_~_~_~_~_~_~_~_~_~_~_~_~_~_~_~_~_~_~_~_~_~_~_~_~_~_~_~_~_~_~_~_~_~_~_~_~_~_~_~_~_~_~_~_~_~_~_~_~_~_~_~_~_~_~_~_~_~_~_~_~_~_~_~_~_~_~_~_~_~_~_~_~_~_
10/14/21
😻 Everything looks great!! It's not often that our seedlings pray like this, they couldn't be happier under this MarsHydro..we should of noted last week that all seeds were placed immediately in their final pot (we do transplant autos sometimes, this was more for convenience) ..being a new light we're a little iffy on distance but 24 inches has them pointing skyward (we're keeping a close eye for any buring)..we typically do 18/6 for all autoflowers but thought we'd try 20/4 for a change..we'll update again midweek..thanks for reading if you made it this far and happy harvests everyone!! ❤️💡🌱😽💨
⚡Mars Hydro/SP-3000⚡ Specifications ⚙️:
Diodes: Samsung LM301B / Osram 660nm (960 total!)
Driver: Meanwell 300watt 🔌 (300W±5% @AC120V-277V)
PPF: 824umol/S ☢️
PPE: 2.8 µmol/j 〰️〰️
Lifespan: >50k hrs ⌛
Veg Coverage: 3 x 5 ft 🌱
Flowering Coverage: 2 x 4 ft 🌼
Weight: 10.1 lbs (4.6kg)
-Uses an aluminum heatsink (no fan) and the driver can be removed to be placed outside the tent 🌡️⬇️
-IP65 waterproof ratings, tolerant to high humidity grow environments 💦 ..
-Up to 30 of these lights can be daisy-chained together and controlled from a single light! 💡~💡~💡~💡~💡
~_~_~_~_~_~_~_~_~_~_~_~_~_~_~_~_~_~_~_~_~_~_~_~_~_~_~_~_~_~_~_~_~_~_~_~_~_~_~_~_~_~_~_~_~_~_~_~_~_~_~_~_~_~_~_~_~_~_~_~_~_~_~_~_~_~_~_~_~_~_~_~_~_~_~_~_~_~_~_~_~_~_~_

Processing
Likes
3
Share


@CommanderCannabis
Follow
Straight forward week. Light, water, CO2 then repeat. Julie's color looks fine and she has a nice stalk with some thick sub branches. Hopefully i will get a good canopy out of her since the tie down stakes I was using to pin her down couldn't hold her down anymore. I traded out the 1200W COB LED for a smaller 1000W COB LED in order to bring the temp down. Air is about 5 degrees cooler if i keep the door to the batcave open.

Likes
8
Share


@WalterWhyte
Follow
Too small box :(
Must out one of pot
In next grow buy bigger box :) :)
Can someone tell me something about HydroMars 450W LED ??


Likes
18
Share


@Lorenzo96
Follow
3rd week of Veg
Day 18 26/02
I'm very happy how they are growing so far they look healthy so lets keep it this way 😁
Today I gave them nutrients, I mixed the nutes in 8ltr bucket of water, had to be a dose of 16ml of each nutrient and gave 2 cups to each plant.
Excited to see how they will go this week, all good so far.
Day 21 01/03
Its been 3 days after their feeding, they are growing day by day strong and healthy :)
I used LST on some of the auto's, some of them are still not ready for LST, by the end of this week they should be.
For the Mimosa Evo I used Topping technique on their 3rd node.
Also gave them water with PH 6.5 about 3 to 4 cups each
Day 24 04/03
Another 3 days past and they are rapidly growing. Mimosa Evo has been 3 days since there topping and they are already showing signs of recovery.
Today I used LST on all of the auto's. The critical kush auto that I used LST on them 3 days ago are doing very good, I also cut the fan leaf that blocks the light from the bottom stems and now they are stretching for the light 😌
I gave them their nutrients today same dose as before I haven't raised it yet, probably next feeding I will.
Likes
25
Share


@Ferenc
Follow
I had to take a big decision. I know it is not good it is way too hot in the tent but needed to remove from my garden because of some reasons.
Firstly, illegal which is fine but I do not want to take a risk for 3 g of harvest. She should start flowering in autumn when less sun and weather is basically shitty here in London it is okay to grow but when starts flowering.... so I planted an auto and saw that it wont yiled good so I was thinking what will happend to my Zkittlez in autumn when mush less sun and weather is going down. So realised I can have a 2-3 m plant but it ain't gonna flower just a bit. Soni decided to put under artificial light but it is summer my plants are suffering in the tent. Inhave no choice I will try to manage maximum I will cut back. Hopefully all goes ok.
Day 86: Fucked up she was totally wilt I removed all the leaves basically the stalk left only..... she will be okay
Likes
54
Share


@Hou_Stone
Follow
I'm happy for a first time, I obviously made a lot of mistakes but above all I learned a lot 👌😎
Likes
16
Share


@hydro78
Follow
This week it started to grow nicely, lots of blooming areas) the amount of irrigation also increases at the same time. Come on grow up girl!🤙
Likes
19
Share


@GoldenWeedGrower
Follow
Legend
Timestamp: 📅
EC - pH: ⚗️
Temp - Hum: 🌡️
Water: 🌊
Food: 🍗
pH Correction: 💧
Actions: 💼
Thoughts: 🧠
Events: 🚀
Media: 🎬
D: DAY, G: GERMINATION, V: VEGETATIVE, B: BLOOMING, R: RIPENING, D: DRYING, C: CURING
________________________________
📅 D08/V01 - 23/11/23
⚗️ EC: 0.5 pH: 6
🌡️ T: 24 °C H: 80%
🍗 Grow A-B
💧
💼
🧠 I'm still hoping, but I'm pessimistic now
🚀
🎬
________________________________
📅 D09/V02 - 24/11/23
⚗️ EC: 1 pH: 6
🌡️ T: 21 °C H: 76%
🌊
🍗
💧
💼 I put a support to hold the big one
🧠
🚀 I talked with Marina from Pure Instinto, she's very kindly and she has already sent to me the seeds not sprouted. Many thanks to Marina for the perfect customer care. 5 stars to Pure Instinto.
🎬
________________________________
📅 D10/V03 - 25/11/23
⚗️ EC: 1 pH: 5.8
🌡️ T: 21 °C H: 76%
🌊
🍗
💧
💼 Humidifier out. Collar on the big one.
🧠 Little weird the leafes of the little one
🚀 With the support the big one is going better
🎬
________________________________
📅 D11/V04 - 26/11/23
⚗️ EC: 1 pH: 5.8
🌡️ T: 21 °C H: 55%
🌊
🍗
💧
💼 I left the support, now she can grow free. Collar on the little one: I named her "Nicole"
🧠 Little weird the little one leafes
🚀
🎬 6 pics of Nicole and the other girl that will be used to produce clones. Added Timelapse video
_______________________________
📅 D12/V05 - 27/11/23
⚗️ EC: 0.9 pH: 5.5
🌡️ T: 21 °C H: 50%
🌊 Added 1L
🍗
💧
💼 Lowered EC
🧠
🚀
🎬
________________________________
📅 D13/V06 - 28/11/23
⚗️ EC: 1 pH: 5.5
🌡️ T: 21 °C H: 50%v
🌊 Added 2L
🍗
💧
💼
🧠 Lowered EC until 0.8
🚀
🎬 Added Timelapse video
________________________________
📅 D14/V07 - 29/11/23
⚗️ EC: 0.8 pH: 5.4
🌡️ T: 23 °C H: 40%
🌊 Added 4L
🍗 CalMag -Grow A-B
💧
💼
🧠
🚀
🎬

Likes
13
Share


@Tazard
Follow
She grew very slowly I vegged her for a long time. I finally got her big enough where if she doubled in size I would have a nice plant, well she stretched almost none whatsoever. However, for the small size I was expecting about 56g instead I got 98! What a pleasant surprise to see all the lower buds fully developed and ripe!
