Likes
7
Share
@TINO14
Follow
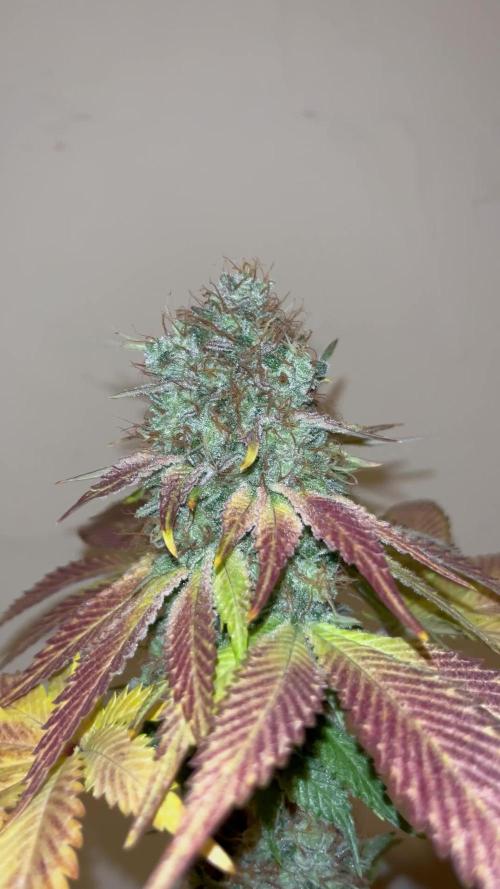
AΓΊn falta ... La paciencia es una virtud pero ,con estos buds cristalinos πŸ˜…. Fenotipos sativas 2 Fenotipos indico 1 Al parecer el fenotipo indico ya decidiΓ³ dar a conocer su fruto finalizado pero pasan los dΓ­as y noto nuevos tricomas y cΓ‘lizes , es como si hubiera vuelto a desarrollar buds hay pistilos obscuros y resinosos y otros tiernos y nuevos. El dΓ­a 30 de marzo empieza su sΓ©ptima semana de floracion SegΓΊn en catΓ‘logo su floracion va desde 7 semanas a 9 pero sus tricomas dicen que les de algunos dΓ­as extra.
Likes
24
Share
Servus Moin! Die Chemical Candy hat ein richtig leckeren Geruch bekommen. Die Buds sehen auch deutlich kompakter gewachsen aus, als bei den anderen auf dem Balkon.
Likes
4
Share
πŸ’™ Project Blue Tent – Week 6 Blue Waffle F1 – Pheno B (Folder 13B) Hello everyone, and welcome back to another chapter of Project Blue Tent. If you're joining the adventure for the first time, welcome! This project follows four individual Blue Waffle F1 plants from Zamnesia, all growing inside exactly the same environment, under the same lighting, receiving the same nutrition and following the same training schedule. Everything is identical. The only difference is the seed itself. That's what makes this project so interesting. Watching genetically stable F1 plants develop their own subtle personalities while removing as many environmental variables as possible allows us to really appreciate both their consistency and their individuality. Today we're checking in with Plant B. ──────────────────────── 🌱 Week Six – Building the Canopy Another fantastic week has passed inside the Blue Tent, and Plant B continues proving why I'm becoming such a fan of these Blue Waffle F1 genetics. After installing the SCROG net last week, the objective has completely changed. We're no longer trying to grow taller plants. Now we're growing sideways. Since tightening the SCROG net, all four plants are sitting at roughly the same heightβ€”around 60 cmβ€”as the branches are continuously guided beneath the screen instead of being allowed to grow vertically. Every day I spend a few minutes gently tucking the tallest branches back underneath the net. As soon as one shoot rises above the canopy, it's carefully guided into the next square, allowing another branch to catch up. It's a slow process. But it's also one of the most satisfying parts of growing. The reward comes later, when every flowering site receives nearly identical light intensity across the entire canopy. Plant B has responded beautifully. She's steadily filling her section of the tent and showing exactly the kind of structure I was hoping for. ──────────────────────── 🌿 A Stable F1 Showing Her Strength One thing becoming increasingly obvious is just how stable these F1 genetics really are. Although each plant has its own small personality, all four sisters are developing remarkably similarly. The structure... The vigour... The colour... The response to feeding... Everything is wonderfully consistent. Plant B has maintained her compact, organised architecture while expanding nicely across the screen. The rich green colour has fully returned after increasing the nutrient strength a couple of weeks ago, and the new growth is healthy, vibrant and full of energy. Looking across the tent now, it's honestly difficult not to smile. The girls simply look happy. ──────────────────────── 🌑️ Blue Tent Environment The environment has remained very stable once again despite the summer heat outside. This week's average conditions were: β€’ Day Temperature: 30Β°C β€’ Night Temperature: 25Β°C β€’ Relative Humidity: 58% β€’ pH: 5.8 β€’ EC: 1.92 mS/cm β€’ COβ‚‚: approximately 450 ppm β€’ Light Schedule: 18/6 β€’ Irrigation: 1.2 litres per plant per day The warm nights are something I'll be keeping an eye on once flowering begins, as higher night temperatures can encourage a little extra stretch during the first weeks after the flip. That's tomorrow's problem though. Today our only objective is filling every square of that SCROG. ──────────────────────── πŸ₯₯ Feeding & Irrigation Nothing changes this week because the plants have given me absolutely no reason to change anything. The feeding schedule remains: β€’ Plagron Hydro A β€” 1.9 ml/L β€’ Plagron Hydro B β€” 1.9 ml/L β€’ Plagron Hydro Roots β€” 1 ml/L With only small pH adjustments whenever required. Some growers may look at an EC of 1.92 and think it's relatively high. My plants disagree. Their colour is rich. The leaves are praying. Growth is vigorous. The stems continue thickening every day. Plants don't care what feeding chart someone else follows. They care whether their own needs are being met. These girls have made their opinion very clear. ──────────────────────── πŸ’§ Drip Irrigation & Automatic Drainage The Mars Hydro drip irrigation system continues making life wonderfully easy. Each plant receives approximately 1.2 litres of nutrient solution every day, delivered slowly and evenly through individual drippers positioned above each grow bag. Once the nutrient solution has passed through the coco, the runoff is automatically collected and removed by the drainage system installed beneath the pots. Together these two systems create an incredibly consistent root environment while removing much of the daily workload that normally comes with coco growing. Instead of carrying watering cans... I get to spend my time watching plants. That's a trade I'll happily make every day. ──────────────────────── πŸ› The Caterpillar Who Chose The Wrong Plant Every garden eventually reminds us that nature always finds a way. This week, Plant B became the only sister to receive an unexpected visitor. Somehow a tiny caterpillar managed to hitchhike its way from my vegetable garden into the Blue Tent and decided that Plant B's beautiful leaves looked particularly delicious. I have to admit... She must have looked especially healthy if even the caterpillar couldn't resist having a taste! Fortunately, regular daily inspections meant the damage was caught almost immediately. The caterpillar was removed by hand, the affected leaves were carefully trimmed away, and the problem never had an opportunity to develop into anything more serious. It also served as a perfect reminder that no matter how careful we areβ€”and I always shower, change clothes and enter the grow room as clean as possibleβ€”nature can still surprise us from time to time. Clean habits reduce risk. Regular observation eliminates it. ──────────────────────── πŸ›‘οΈ Integrated Pest Management Following the discovery, the entire tent received a thorough IPM (Integrated Pest Management) inspection. IPM isn't about waiting until pests become a problem. It's about combining good hygiene, regular inspections and preventative practices so problems are found while they're still tiny. As an additional precaution, I also used the Future of Grow UVC LED bar. Used correctly, UVC light can help reduce unwanted spores and microorganisms that may have entered the grow room, making it another useful preventative tool within an overall IPM strategy. It's important to mention that UVC should always be handled carefully. Direct exposure can damage both plants and skin, so eye protection and proper safety procedures are essential whenever using this type of equipment. Thankfully... One hungry caterpillar became nothing more than a short interruption to an otherwise fantastic week. ──────────────────────── 🌿 Plant B Herself Plant B continues becoming one of the easiest plants to train inside the tent. Her branches remain flexible, her internodal spacing is excellent and she seems perfectly happy being guided beneath the SCROG every single day. She's not racing ahead. She's building a beautifully organised framework that should become an outstanding flowering canopy once the time comes. Every week she seems a little fuller. Every week she looks a little stronger. And every week these Blue Waffle genetics impress me a little more. ──────────────────────── πŸ‘€ Looking Ahead If everything continues progressing at this pace, I expect the screen to be almost completely filled by next week. Once that happens, the next major milestone will be a final clean-up and defoliation before flipping the Blue Tent into flower. Until then the routine stays wonderfully simple. Guide the branches. Maintain the environment. Keep the roots happy. Trust the process. Nature already knows what she's doing. We're simply helping her do it a little more efficiently. ──────────────────────── πŸ’™ Thank You A huge thank you to Zamnesia for making Project Blue Tent possible, from these incredibly stable Blue Waffle F1 genetics to the complete ecosystem surrounding this grow. A heartfelt thank you to Plagron for providing the Premium Coco Growbags together with the Hydro nutrient line that continues producing beautiful, healthy growth week after week. A special thank you to Mars Hydro for the automatic drip irrigation and drainage system that has transformed daily watering into an almost effortless routine. A huge thank you as well to Future of Grow for the UVC LED bar, which has now become another valuable tool in my preventative IPM routine. Thank you to GrowDiaries for providing this amazing platform where growers from around the world can learn from one another, share experiences and document our journeys. And finally... Thank you to every single one of you following Project Blue Tent. Whether you've been here since germination, recently joined the adventure, leave comments every week or simply enjoy looking through the photos, your support genuinely means the world to me. Hopefully next week the screen will be completely filled, we'll perform our final defoliation and begin preparing these beautiful ladies for the next exciting chapter... Flowering. Until next week... Growers Love, happy growing, and I'll see you all soon. πŸŒ±πŸ’™
Likes
Comments
Share
Plants are sometimes like kids: you don't see them for a while and they shock you. Now I see them every day, but looking back at how they were two weeks ago, I'm shocked. Nowadays, and probably thanks to Plagron, the plants are growing incredibly. Our Georgia Pie #2 had a great 5-week vegetative period and then went into flower. The result? It's nice and big, but once cleaned up, I hope it will give us beautiful flowers. We're now between the second and third flowering period, and it's very beautiful. Let's hope it finishes swelling properly and looks as it should. We're in an 11-liter square plastic pot, which is a classic for me. Techniques chosen: the plant was left to grow and simply cleaned. We're 100% organic and 1000% Plagron, as always. The soil we've chosen is the recently launched Plagron Bio LightMix, which will allow us to get our growing process off to a smoother and more reliable start, without the sudden changes that liquid fertilizers can cause. A week is more than enough, so let's not overdo it. We're in the early stages of flowering, but we're well-equipped with fertilizers and additives. We added: - Pure Zym 1 ml/l (3rd flowering last week) - Silic Rock 1 ml/l - CalMag Pro 1 ml/l - Sugar Royal 1 ml/l - Alga Bloom 4 ml/l - Power Buds 1 ml/l Once a week as a foliar spray: (until the first two weeks of flowering) - Vita Race 5 ml/l Choose your favorite style and calculate your results on the website: www.plagron.com Our new 720W Spider King lamp from Vanguard Hydroponics is now at 80% Z - https://www.zamnesia.io/en/531-growshop I can almost hear Ray Charles singing...Georgiaaa, try it. Z - https://www.zamnesia.io/en/11085-zamnesia-seeds-georgia-pie.html Z - Spice up your grow with this delicious US hybrid. Originally created in San Francisco, Zamnesia breeders worked hard to trace and stabilize the Gelatti x Kush Mints lineage that gave rise to the original Georgia Pie. The result? A 50/50 indica/sativa hybrid that grows beautifully both indoors and outdoors, quickly producing dense buds with deliciously sweet terpenes and a potent effect. Combining the genetics of two fantastic parent strains (Gelatti and Kush Mints), Georgia Pie is both productive and easy to grow. During the vegetative stage, plants grow vigorously, developing moderately spaced internodes and fairly broad fan leaves. Expect noticeable stretch when it transitions to flowering: mature plants can reach 130cm indoors and up to 200cm outdoors, with numerous side branches that will develop large buds. Thanks to its exuberant leaf growth, Georgia Pie responds very well to regular pruning, defoliation, and training. These interventions will open up the plant's canopy, exposing even the lower buds to light. Indoors, Georgia Pie typically requires 8–10 weeks of flowering to produce up to 500g/mΒ², while outdoor plants are generally ready to harvest around mid-October, producing up to 500g/plant. You know it but I recommend it, here you will find many beautiful things basically "all the best that nature has to offer" Z - www.zamnesia.com Music // www.radionula.com + Feng Shui Music + Frequencies 432 Hz
Likes
25
Share
I’ve changed to a 12/12 light cycle, removed a few big fan leaves, and tied 2 of the plants tops down..
Likes
22
Share
These ladies are stacking up and getting frosty! Fastbuds always gets so frosty! They are growing fast and easy. Thank you for the opportunity fast buds! I will add more pictures as grow diaries shuts down each time I try to upload. It's a pain.
Likes
7
Share
@hooolian
Follow
30/12/21: final week of veg - the plants have responded better to the increased intake fan speed lowering the temperature overall. no more yellowing leaves. been on a dose of 0.5 bio bloom to prepare for flower. I have switched the lighting schedule today as they enter flower. the plants are responding well to the nutrients and the light - with tall stems and the topped kolas have sprouted well. I have added a carbon dioxide bag to increase CO2 intake.
Likes
6
Share
Likes
6
Share
@Bluemels
Follow
Tag 53: So gut sieht die Cookie Gelato nicht aus. Sie sollte in diesem Alter erheblich grâßer sein 😱 . Ich vermute das zum Temperatur stress vor 2 Wochen noch eine überwÀsserung kam 😱 😨 Ich habe es zu gut gemeint, eigentlich AnfÀnger Fehler. Ich habe zu lange mit der Ballbrause schlückchenweise gegossen. Das habe ich sonst nicht getan, ich wollte es dieses mal besonders richtig machen 😡 zudem habe ich manchmal stessbeding nicht tief genug geschaut ob die Erde schon weit genug getrocknet war 😱 Ich hoffe es gelingt mir noch eine brauchbare Pflanze aus ihr zu machen 😬 Was soll ich sagen, ich habe den Grow abgebrochen, es schien mir nicht sinnvoll weiter auf Besserung zu warten. Ich starte mit neuen Samen.
Likes
16
Share
@m1ndgames
Follow
Week 1 of Flower - at least i was able to sex them. One was male so i did the needful. The ladies are starting to flower now...
Likes
3
Share
Not much water just a drizzle and she seems to be doing better this week. She is only about 10 cm but she looks like she’s co
Likes
42
Share
@Gabarram
Follow
25/11 Day 73 already and starting another week (week 4 since I changed the photoperiod); budlets are not completely formed but still look like more of preflowers. She continues to stretch, she's growing 4-5 cm per day, a complete beast. I think she could be stretching more before the aspect of the preflowe/budlets cahnge much. Comparatively with the pictures of other Grinspoon's growers, the flowering stage is going on very slowly...well I thought the same when she was at vegetative stage, I saw everybody's Grinspoon specimen was much bigger and much sooner than the one of mine, but in the end her growth has been so big that I 'd have liked better she hadn't grown that much. She's entirely taken over the grow room! The light spectrum I use does not promote much stretching per se, as I've seen it on many other hybrid strains in the last two and a half years since I have this system. It's a 80cm*80cm*160 cm grow box (Darkbox) and so far I think the environment for the plant is, in general, let's say fine (except perhaps the hottest days of summer and the coldest days of winter). Humidity is a little high, becuase my place is humid and I don't specailly control it but I'd guess it is roughly 60% HR throughout the year. Being that said, I blame this stretching entirely to her genes and yes, my lack of caution to have prevented all this enormous growth from happening. Really I didn't want to regret later, of not having the size of the plant I wanted and also for not knowing how much she would stretch (I wouldn't have thought this much) I let her grow more than I should have. But one learns from his mistakes and by growing new strains, every strain has different phenos and one never knows which is destined to one's plant. The fertigation solution is now 0.5 mL/L Pro-Silicate; 1,3 mL/L Cal-Max; 0,4 g/L Flower Power Bloom fertilizer at pH 6.1-6.2, EC is 1.35 mS/cm and I raised the fertigation volume to 6L keeping the frequency. Day 74 (26(11) she keeps on stretching, I'm seeing another way to raise the lights the maximum I can, I see the budlets forming more definitely so I don't think she'll be stretching much longer, perhaps and luckily this week she stops doing it. Meantime all I can do is keeping the tallest shoots out of the line of the led lights to prevent bleaching of the leaves or the budlets being burnt. God help me with this. I'll post some pics tomorrow if I have more time. My plants do take more than 60% of my free time at home (but I <3 growing marijuana). Day 75 (27/11) I used a few hooks from the bathtub's curtain to hold the growlights and managed to raise them a precious distance. Day 76 (28/11/2019) i jumped off the bed to assess the sitaution and evertyhing was normal, a big blade burned it tip for proximity to a led light, but the bud tips seem no to be damaged -yet-because of the strong lights/heat. One fertigation (inflow EC 1.35 mS/cm. EC run off 1,5 mS/cm) "en dan ben ik klaar met haar". Day 77 29-11-2019 she keeps growing tall and she's become something almost unmanageable. A couple of shoots have surpassed the lights. If only they won't be burned πŸ™ Day 78 (30/11) She seems to be stopping growing. When I saw her I realised extraction fan was gone, fortunately being Saturday I could find a replacement soon. I find that run off pH is 5.3 (collected at the last portion the run-off, 2nd fertigation of the day. Isn't it a little too acidic to leave this issue untreated? Day 79 (01/12) after a reply from @knut at cocoforcannabis.com I am advised not to take in consideration runoff pH but to take care of pH in and EC "in", as for the runoff, just checking EC, because pH varies for the interaction between nutrients and is of zero interest, so I was told. The extractor is working fine and it is a lot more silent than the older one. Last for today, I'd say I'm happy she seems to have completed the stretching phase, although there are a few shoots at scarce centimeters from the ceiling of the box as a consequence. The other shoots are fine, at a reasonably good position from the lights. It was very hard times with these last weeks and the damned stretching. If I had to evaluate the growing difficulty of this strain, I'd say "quite hard" because she's pretty much unmanageable at the stretching phase, unless proper caution measures be taken before it's too late. Day 80 (2/12/2019) To end week 12 (4th week flowering) I see it seems that stretching phase is over so I can breath again. She still may be growing one or two centimeters, that I dunno for sure, but judging from the accelerated rate of stretching I have seen since the last two weeks, it appears that she won't get taller. She's almost tocuhed the ceiling :/ I see a slight swelling of the baby buds, like the calixes that are starting to form.
Likes
16
Share
Germinating 3 Purple Kush Feminised seeds. filtered water in glass, also add 3/5 drops of hydrogen peroxide, stir water well before adding the seeds, and stir again after adding seeds to water. I will leave it for 24 hours The seed coat softens by soaking your seeds in a hydrogen peroxide solution, allowing the seeds to absorb more oxygen. This results in increased germination speed Hopefully all 3 seeds will germinate by tomorrow? Seeds popped today:-)transferred 3 Purple Kush seeds in to small pots 10/09/23 3 Purple Kush seeds, 1 seed in each small pot. Each Pot is Half filled with lite mix compost and Half filled with Vermiculite , watered planting medium before sowing seeds 2cm deep in planting medium. The seed will push through the vermiculite easley with very little effort, in effect increasing higher successful germination rate, the compost will offer the first tap root an immediate lite nutrient supply. Placed 3 pots on top of a Propagation heating mat for correct germination temperature, position in a shaded place, and keep out of direct sunlight. This may seem like a lot of effort? and it is, but it will be highly beneficial by increasing a higher germination rate and higher amount of seeds will germinate from using this method :-) especially if your seeds were expensive. 11/09/23 no sprouts above the vermiculite yet, i will check it again tomorrow. Today 2 Purple Kush Germinate and rise above the vermiculite 3 days after sowing. Purple Kush is going ok, it could be growing faster, unfortunately i can't upload new photos because there is a problem in the GD system, they are doing there best to fix this problem as soon as possible. GMO Cookies where started 16/09/23 filtered water in glass, also add 3/5 drops of hydrogen peroxide, stir water well before adding the seeds, and stir again after adding seeds to water. 3 seeds sprouted, but only 2 survived, it become to hot and one GMO Cookie sprout died. I have now started another strain (Party Monster) 19/09/23 filtered water in glass, also add 3/5 drops of hydrogen peroxide, stir water well before adding the seeds, and stir again after adding seeds to water. I will leave it for 24 hours, 5 seeds of Party Monster have sprouted and are under the same 100W LED grow light. GMO Cookies have all come up above the vermiculite and are now positioned under a 100W LED, there is a small clip on fan blowing and circulating the air. This is my second attempt to grow GMO Cookies from 3 feminised seeds, i messed up on the first 3 seeds, i put them under a 250 Watt LED and it fried them, my folt. Growing from germinating seeds is a very delicate situation, your environment temperature needs good control. 2 Party Monster seedlings are looking good, coming along well under the 100W LED light. 3 GMO Cookies are looking good also under the 100W LED light. Plus i have now started soaking in glass of water 03/10/23, 5 Strawberry Yields fem seeds aka Strawberry Fields. filtered water in glass, also add 3/5 drops of hydrogen peroxide, stir water well before adding the seeds, and stir again after adding seeds to water. I will leave it for 24 hours. The seed coat softens by soaking your seeds in a hydrogen peroxide solution, allowing the seeds to absorb more oxygen. This results in increased germination speed Hopefully all 5 seeds will germinate by tomorrow? The 3 GMO Cookies fem seedlings are coming along well, keeping them under the hood of a propagator, i have many mixed seedlings under the same hood, to keep seedlings protected from this relentless Spanish heat. 5 Strawberry Yields fem seeds have all sprouted and are above vermiculite, keeping them under the hood of a propagator, i have many mixed seedlings under the same hood, to keep seedlings protected from this relentless Spanish heat. Also positioned also under the 100W LED light, indoor temp 29 degrees humidity 65%, still to hot for seedlings to be directly under lights due to high temp in the room. 3 Strawberry Yields sprouts are doing well, gave 2 seedlings away, no space for all 5 plants, coming along well under the 100W LED light. 27 degrees humidity 55% good growing conditions Super Lemon Haze I began soaking 13 feminised seeds SLH since 27/10, after 24 hours soaking 11 seeds opened in filtered water in glass, also added 3/5 drops of hydrogen peroxide, stir water well before adding the seeds, and stir again after adding seeds to water. The seed coat softens by soaking your seeds in a hydrogen peroxide solution, allowing the seeds to absorb more oxygen. This results in increased germination speed! 1 Super Lemon Haze fem seed planted in a 2 ltr pot 28/10, this is the only plant i will keep for flowering. The Pot is Half filled with lite mix compost, and the rest of the pot is half filled to the top with Vermiculite , watered planting medium thoroughly soaking it before sowing seeds 2cm deep in vermiculite. The seed will push through the vermiculite easley with very little effort, in effect encouraging a higher successful germination rate, the compost will offer the first tap root an immediate lite nutrient supply. And i planted the 11 remaining popped SLH seeds in the brown round pot, this is just to see how many will rise above the vermiculite from the 13 SLH fems seeds soaked on 27/10. I will give these away to a friend. Both pots have been placed on a propagating heating mat for consistent and ideal germination temperature until all seeds have risen above the vermiculite. Once my 1 fem seed has germinated! i will cover the pot with a transparen plastic bag and place the pot 20cm below a 100W LED light. Super Lemon Haze feminised seeds Seeds sourced from Satdica Bulk Seeds Soaked seeds 27/10 planted up on 28/10, 12 out of 13 seeds have transformed in to 12 healthy little seedlings. 11 seedlings will be given away to a friend, and i will keep the one seedling you see already planted up in a black 2 ltr size pot. Now positioned under my 100W LED light, distance 15cm above seedlings. Light cycle 24 hours. Keeping them covered with propagating hood for a few days longer to allow seedlings to become better established before removing the hood. The vents on hood are fully open to allow seedling to slowly become accustomed to the outside vege room space. Gelato Cookies 3 Feminised seeds Satdica Bulk Seeds Popped 3 Gelato Cookies Feminised seeds today 06/11 filtered water or bottled water in a glass, also add 3/5 drops of hydrogen peroxide, stir water well before adding the seeds, and stir again after adding seeds to water. I will leave it for 24 hours The seed coat softens by soaking your seeds in a hydrogen peroxide solution, allowing the seeds to absorb more oxygen. After placing on propagating heating mat for 24 hours. This resulted in increased germination speed! and today i can see little white taproot tails protruding out from the seed husk πŸ‘Œ 3 Gelato Cookies seeds, 1 seed in each small pot. Each Pot is Half filled with lite mix compost and Half filled with Vermiculite , watered planting medium before sowing seeds 2cm deep in planting medium. Spoon your seeds into it's planting medium, do not touch with fingers, spoon it in with half spoon of water and a seed, place the seed in the center 2cm deep in the planting medium, water it in again very lightly to help the seed settle into a comfortable position before leaving it to rest covered on your heating mat. The seed will push through the vermiculite easley with very little effort, in effect increasing higher successful germination rate, the compost will offer the first tap root an immediate lite nutrient supply. Watered and fed them in with Plagron Terra Grow 5ml to a ltr of water, i may have added too much, perhaps 2/3ml to a ltr of water would have been enough? placed 3 pots on top of a Propagation heating mat for correct germination temperature, position in a shaded place, and keep out of direct sunlight. This may seem like a lot of effort? and it is, but it will be highly beneficial by increasing a higher germination rate and higher amount of seeds will germinate from using this method :) especially if your seeds were expensive. 3 Gelato Cookies have come through the vermiculite, 09/11 and now they are positioned under my 100W LED grow light. I didn't expect all 3 seeds to pop, because 1 seed looked like perhaps not viable, because i only keep the bad looking seeds for myself and keep the best seeds for customers. I am keeping them covered with transparent plastic bags for a few days to protect them in case it's to hot in the 24/7 grow room which is 24 degrees, this is probably an ok temp for them? but i'd rather not run the risk. Romulan Feminised seeds Germinating 3 Romulan Feminised seeds 26/11 filtered water in glass, also add 3/5 drops of hydrogen peroxide, stir water well before adding the seeds, and stir again after adding seeds to water. I will leave it for 24 hours The seed coat softens by soaking your seeds in a hydrogen peroxide solution, allowing the seeds to absorb more oxygen. This results in increased germination speed Hopefully all 3 seeds will germinate by tomorrow? 27/11
Likes
7
Share
Stunning looking ladies, beautiful stretch, this ladies are ready to give their best in flower, I'm starting to feel a very pungent smell on the bud sides and some resin production so far, let's see how this ladies keep developing, this is a really good strain, I expect top quality flowrs from this couple of girls! Stay tuned everybody! β€οΈπŸ’›πŸ’š
Likes
4
Share
@Bncgrower
Follow
Everything's going great here, another week is won! πŸ’ͺπŸ’ͺπŸ’ͺ
Likes
2
Share
Ganja Farmer Seeds Caramel Auto In @highpoweredorganics new ISLAND-BLEND. Fed water soluble powders. AQUA-MARINE Grow Formula 5.1.4 paired with OCEAN-POTION and RHIZO-MOJO in dechlorinated water. Alternating ANTI-MATTER & DARK-MATTER feds weekly. Foliar fed GREEN-SUPREME daily Following High Powered Organics Island-Blend Feed Guide. https://www.highpoweredorganics.com/ Happy growing friends πŸ‡¦πŸ‡ΊπŸ‡¦πŸ‡ΊπŸ‡¦πŸ‡Ί
Likes
6
Share