Likes
Comments
Share
@AsNoriu
Follow
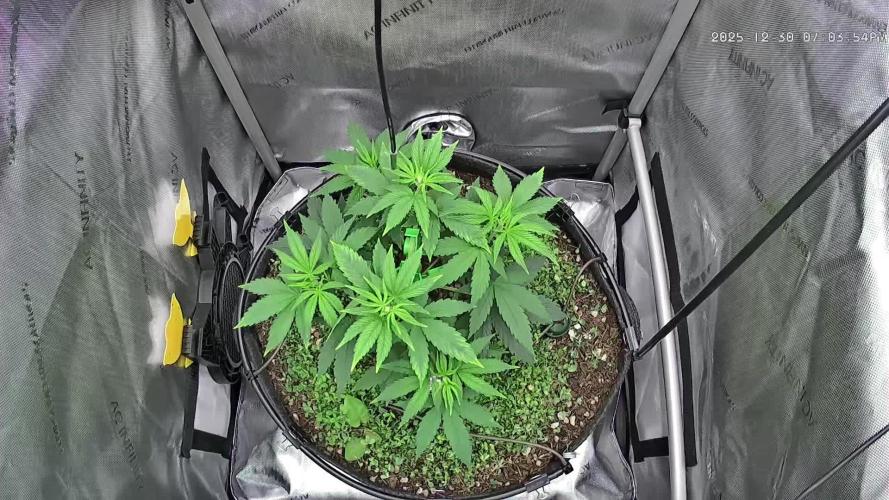
Day 71. Biggest by size, but maybe not by overall weight of harvest ;)))) she is most hungry and lost foliage... This girl definetly makes me regret, that i didn't use any nutes ... Smell is weakish, worst from all 3 . Mars TS1000 did a great job to her during veg, but now she spends time under my quantum board. Took most damaged leaves away. 3.5 liters of water goes in. Day 76. 3.5 liters in. Lower part is far from maturity, she needs like 3 weeks still i think. Getting some funky colours ... Happy Growing !!!
Likes
92
Share
Week 9 - First Week of Flowering 🌸 The dark period has ended, and these ladies came back into the light fully energized and ready for action! It’s just the first week of flower, and they’re all praying, stretching, and absolutely thriving—filling up every inch of the tent. This grow space is officially packed from wall to wall, with each plant competing for its share of light and showing off some of the biggest, healthiest leaves I’ve seen yet! 🌱 A few strategic plucks here and there have kept airflow smooth and light penetration balanced. Those big leaves? They’re a sign of happy, healthy growth. Large leaves help the plant capture maximum light energy, essential during this stage, especially as they start focusing on developing those flowers. When plants grow huge, vibrant leaves like these, it means they’re well-nourished and content in their environment—a true testament to the well-balanced conditions we’ve got going in the tent! Flowering Parameters 🌡️ Room Environment: • Temperature: 26.7°C • Humidity: 63.3% • CO2: 960 ppm • VPD: 1.29 kPa (prime zone for flowering health!) Lighting: • Light Intensity: 835 PPFD (ideal for boosting flower growth) • Solution: pH 5.96, TDS 460 ppm, temp 21.1°C • Medium: Moisture: 100%, TDS: 520 ppm, Temp: 21.6°C Carbon Filter Installation & Smell Management 🌬️🌱 With the transition to flower, the scent profile is already starting to kick in—crazy for the first week, right? 🌸 To keep everything fresh and under wraps, I’ve set up a carbon filter system. Here’s how it’s working: I’ve connected the filter to my Aerofan, which pulls air directly from the tent. This air is cleaned by the filter and released into the main room, where it then passes through another filter before exiting my space. This dual-filter setup means no scent escapes into the wild, keeping things stealthy and the grow room a peaceful, scent-contained environment. Perfect for anyone concerned about keeping their home free from that telltale aroma! 🕶️🌬️ Enhanced Lighting with Emerson Effect 🌞 This week, I’ve introduced an extra 15 minutes of red light at the beginning and end of each light cycle. Why? Well, this red boost taps into the Emerson effect, enhancing photosynthesis efficiency, especially during the flowering stage. By stimulating a little extra wake-up and wind-down light, we’re mimicking the natural sunrise and sunset experience for these plants, which can help reduce flowering time. Not only does it encourage smoother transitions into day and night, but in theory, it’ll help these ladies finish a bit faster, while giving them a little nudge to build more substantial, quality flowers. 🌇 Nutrient Adjustments 🌱 Now that we’re in flower, I’ve swapped out the Start Booster for P-Boost and TopBooster to specifically support flowering needs. Here’s why: • P-Boost brings in additional phosphorus, vital for energy transfer and cell division as the plant channels more resources into budding sites. • TopBooster supports the flowering phase by improving flower quality and density, helping to build those big, aromatic buds we’re after. These changes bring the nutrient mix in line with what’s most beneficial at this stage. All this precise dialing in is easy to manage thanks to the TrolMaster system. From pH to nutrient scheduling, the TrolMaster ecosystem and ThinkGrow LEDs have been the ultimate teammates in this grow journey, giving me real-time data, fine control, and peace of mind. 💯 (Not introducing UV light just yet, but stay tuned as that’s coming soon for an added boost!) Looking Forward 🌟 Next week, we’ll be upping the reds, giving us an even greater chance of activating those flowering signals for a smoother, faster transition through the cycle. I’ll keep tweaking and fine-tuning every parameter to make sure these ladies get exactly what they need to thrive. Big thanks to the TrolMaster system for keeping everything in balance and optimized, along with the supportive Grow Fam following this journey! Your enthusiasm, advice, and support are a huge part of this grow’s success. Keep following for more updates, and stay tuned for what’s next! 🌿✨ P.S. Deep Dive: TrolMaster’s MBS-S8 CO₂ Sensor & Smoke Detector 🚨 The MBS-S8 CO₂ Sensor from TrolMaster is a powerhouse for growers, especially when it comes to optimizing plant growth and efficiency in a controlled environment. This sensor continuously monitors CO₂ levels and integrates directly with the TrolMaster ecosystem, giving you real-time data on CO₂ concentration. Ideal levels of CO₂ can significantly boost growth and yield during certain stages, so understanding and managing CO₂ is key. With the MBS-S8, I can control CO₂ levels precisely, keeping them within the optimal range for photosynthesis. This sensor is a game-changer because it adjusts CO₂ delivery automatically, giving plants exactly what they need without any extra monitoring from me. Meanwhile, TrolMaster’s Smoke Detector is an essential safety device, especially in spaces with electrical equipment, lights, and heat-generating components. This detector can be set up to alert me instantly via the TrolMaster app if any smoke is detected, allowing me to respond immediately to any potential issues. Fires and smoke are rare in controlled grow setups but having this safety measure provides peace of mind and lets me focus on the plants without constant worry. It’s an incredible tool for any grower prioritizing safety and proactive monitoring. Discount Codes so you can save big on your next check out 💚💚💚 Kannabia - DOGDOCTOR 30% off SeedsmanSeeds - DOGDOCTOR 10% off CannaKan- DOGDOCTOR 15% off terpyz.eu - DOCTOR 15% off The Neutralizer - PORKIT5-DOG 15% off As always thank you all for stopping by, for the love and for it all , this journey of mine wold just not be the same without you guys, the love and support is very much appreciated and i fell honored and so joyful with you all in my life 🙏
 With true love comes happiness 💚🙏 Always believe in your self and always do things expecting nothing and with an open heart , be a giver and the universe will give back to you in ways you could not even imagine so 💚 Friendly reminder all you see here is pure research and for educational purposes only Growers Love to you all 💚💚💚
Likes
5
Share
@Nvchods3
Follow
esta semana se le realizo lavado de raiz con 22 lt de agua. amarre dos de las plantas a una guia ya que el peso las estaba tirando hacia un costado. quda poco para la tan esperada cosecha
Likes
7
Share
Grew very fast - typical for Sweet Seeds - and really nice dense buds. Looking forward to vaping this :)
Likes
13
Share
@NewMan
Follow
Holky vypadají zdravě, zálivka stále 4.5l každý třetí den, ph 6.2 ,ec 2.6.Dnes dostaly poslední "velkou" zálivku, teď už budu jen snižovat , Athena půjde na půlku, calmag vyřadím úplně a Green Sensation nechám 1ml/l . Tenhle týden je chci trochu prostříhat a už se asi jen kochat a čekat , tak ať se daří 🖖
Likes
12
Share
Off to the races after the first week of veg. And the girls are looking good. They had about 24-48 hours of transplant shock but have since turned over and look perky. They never fully transitioned and all of em look like they’re turning back around. Definitely starting to see some pheno variation on one of the indicas (F6) - trademark from the Skywalker 100%. A light bluish/purpleish hue on the fan leaves. We’ll see what happens over the next week then probably just pick a day and flip. We don’t need em huge - just big enough to show off dem buds. On the hardware side of this grow, the mods to the dutchy system look to be working well. It just makes plant management easier with a full trough drain as opposed to individual drainage holes. Really, the system isn’t a concern for the most part. It’s proven time and time again how manageable a recirc system can truly be. Scaling down to smaller pots and more plants has also been a revelation of sorts around here. We used to grow monsters and now the aim is strictly proportional yields across a wider array of genetics. Been a great trip so far🤟. Couple more boring weeks of veg. And as soon as the breeding tent is cleaned up and pollen free - it’s go for blast-off👍. Background This cycle of clones represents all the potential of this F1 line of WalkerBerry OG. Bred by myself over the last couple of years. This genetic shows excellent hybrid vigour, incredibly stable nutrition requirements to date and an eclectic mix of long and short internodal spacing bu specimen. We know we have indica and sativa dominant traits spread evenly across the 6 available clones. Now it’s just a matter of seeing them run out under controlled and pollen free conditions. We’ve labelled each plant and it’s resulting seed accordingly. Once we get to the F2 run, we’ll hopefully be able to isolate down to 2-3 phenos if the bud is any good. From there, who knows. It’d be great to get to a finished, stable generation that would be fem worthy but that could be a very long way off. For now - we’ll focus on this line and see where it goes🤞🤞.
Likes
37
Share
@Roberts
Follow
This is a mix I made of Sour dieseland Northern lights. It is a tiny Potter for the contest. It grew great till it got infected late with dudding disease. I have stepped up my sanitation now. Still was a hard, and neat grow. Thank you Mars Hydro. 🤜🏻🤛🏻🌱🌱🌱 Thank you grow diaries community for the 👇likes👇, follows, comments, and subscriptions on my YouTube channel👇. ❄️🌱🍻 Happy Growing 🌱🌱🌱 https://youtube.com/channel/UCAhN7yRzWLpcaRHhMIQ7X4g
Likes
4
Share
First Time Grower Here - Jenny sprouted six days after I planted her. I used 3-gallon fabric buckets and FOX Farm ocean floor soil. Six days later her little sister sprouted. So this grow dairy will follow two young Dreamberry's on their way to get rolled up and smoked up. At the end of week 1, both Jenny and Jasmin are doing great. 7/5/20 Jenny = 7 days Jasmine = 1 day Jasmine sprouted on the 4th of July... beautiful. Sorry, no pics yet. -RH
Likes
28
Share
**** I will try my best to reduce tempatures gradually for the last 2-3 weeks . Plant should react well to this and feel the end of it’s season comming. Trichomes/Thc should develop better by doing this. **** Day 85. ( 45 days in flower ). Leaves we’re really dark, I was using Canna Boost heavily in the last feedings and They we’re getting full nutes for weeks. I decided to feed them 4.5 - 5 L Ph 5.9 water. Made sure to have 15-20% runoff. Their is 3 different strains and 8 plants. I will give them another 15-25 days depending on the plant and strain, before they are chopped and harvested ( Most of them have brown pistols but trichomes are not milky ) Day 86. Letting them do their thing , day tempature is at 26-27 C , night at 19-20 C Day 87. Some nutrient burn on one of the Jack Herrers. Going to give her another feeding of Water to flush her out with 15-20% runoff. The other 7 are going to get full feeding with potassium and Rezin; trying to gain some weight for their last 10-15 days before I start flushing them for with water for a week. Day 88. Fed 4 L - 4.5 L of PH water with 15-20% runoff to 1 of 8 plants. ( 1 of the Jack Herrer had nute burn ) ppm on runoff was 450. Fed 4 L - 4.5 L to 7 of 8 plants of full lineup +Rezin +potassium. Supported with some sticks the branches that are getting too heavy. Pistils that hadn’t turned brown are starting to but trichomes aren’t cloudy not amber yet. The 2 Diesel plants are taking time and are behind compared to the 6 others. Day 89. ( 49days flower ) All looking good , I was able to reach 24 C day and 19 C night with 45% Humidity. 1 of the 4 Jack Herrer is showing Amber dark trichomes 20%. She is going to be fed PH water from now on. Day 90. 1 of 4 Jack Herrer was fed PH water. The 7 other plants were fed full line, extra heavy ammount, with boost +potassium +rezin. This Will be their last feeding of nutrients before i start flushing them with Water +Rezin +canazym. day 91. Things are looking good. Fed them a really heavy Nutrient Dose yesterday and they are taking it well. Leaves are dark green, they keep putting on weight but trichomes are saying 10-14 days.
Likes
8
Share
Les branches de Purple shine sont assez épaisse même un peu trop, le LST est vraiment galère à faire pour l'instant je vais encore attendre un peu qu'elle se développe plus et j'envisage peu être de supercropped les 4 branches principal une fois plus développé afin de former la base(a voir les prochain jours 🤔) Le 1/05 rempotage de Purple Shine, elle a bien colonisé son air pot 1l passage en 4L géotextile dans un supersoil composé de (lombricompost,guano verre, sang et corne de boeuf sèché, phosphate naturel, zéolite, sel Epsom+ mycorhizines) et terreau covercrop Le 3/5 début du LST , pose de clip lst pour former les 4 branches principal, petit accident lors de la pose des clips un apex c'est bien cassé et ne tien que sur 1mm. Je fait une tentative pour essayer de le sauver mais je doute de résultat 😥. Le 4/5 perte de l'apex accidenté 😮‍💨😥 ce matin la branche avait les feuilles flétrie et la tige recroqueviller, fini pour elle le sauvetage a été un échec😥. Le 5/5 on se relève de cette déception et envisage quelques changements dans le programme pour que cette connerie deviennent profitable😉. Nouvelle taille des apex, on passe à 6 pousse maintenant je laisse un temps de repos à purple shine avant une nouvelle taille je prévoyais 8 apex et au final j'en aurai 12😉🔥. PS: même s'il t'arrive une couille, baisse pas les bras et relève toi, arrange toi pour que cette galère te soit profitable😉🔥
Likes
3
Share
Likes
5
Share
Plant did great. The final product looks great and smells good too. Very easy going grow with great results.
Likes
6
Share
@ggiolla
Follow
so far fully satisfied. the plant looks strong and a nice color. the first hairs are noticed. I notice signs of some parasites on the leaves, up to now I have only found about 2-3 small spiders clearly visible to the naked eye, and perhaps some other specimens of whiteflies. I accept advice on how to prevent an infestation in the best way.
Likes
83
Share
Gracias al equipo de Fast Buds 420 por la donación de las semillas y poder inscribirme en el concurso del año. Creada a partir de la genética de la Girl Scout Cookies y la Gorilla Glue #4, seleccionadas a mano y en combinación con nuestra famosa Gorilla Cookies Auto, esta variedad lleva todos los mejores atributos de sus padres al más alto nivel. Este híbrido maravillosamente equilibrado prospera en el interior y en el exterior, y en todo tipo de climas, a la vez que es superresistente a los bichos y las plagas. Es una productora masiva que ofrece a los cultivadores de todos los niveles rendimientos de hasta 650 g/m² de cogollos de primera calidad que no decepcionan en absoluto. Siendo una de las versiones más potentes de esta genética, la Gorilla Cookies FF (Fastflowering) presume de un enorme porcentaje de 29 % de THC que se traduce en montones de resina y terps sabrosos que hacen las mejores extracciones. Es la elección perfecta para los cultivadores de hachís que buscan cepas de gran potencia que produzcan sabores y aromas excepcionales. Consigue aquí tus semillas 😁🌻🚀: https://2fast4buds.com/es/seeds/gorilla-cookies-fast-flowering
Likes
14
Share
So as I said before this plant grew deformed and irregular from the start and was the only seed to germinate out of all 3. I wasn't sure if she was going to make it! But she pushed through and produced a beautiful, sticky, smelly plant that started to smell early on as sweet mango that developed into musky, earthy tropical fruits... Incredible smell! Will update dry report in a week or two! 20.12 So all is dry now and placed in jar to cure. 38g of dried bud in the end, not massive yield but didn't expect too much. The smoke is gorgeous even before curing it is mouth watering and delicious, makes me super energetic for like 30/50 minutes and then boom I'm locked down, happy but motionless.
Likes
30
Share
@BC_Green
Follow
It has been another amazing week of the plants growing. I have been watching as the Fruity Freak leaves become progressively more fern-like, and ornamental as a result! Based on my Banizzle grows, I knew I needed to understand plant nutrients in a more meaningful way if I wanted these plants to thrive. So, I decided to get a soil test (see Ref. 1 below on how to perform a test) to understand what nutrients my plants needed. The report I received advised that I needed to add 200 lbs/acre of nitrogen, 150 lbs/acre of phosphorus, and 190 lbs/acre of potassium (see picture labeled Pic.1 (FYI you can't see these images unless you login to growdiaries)). I then researched what to do with my results (Ref. 2 helped), and I figured out that my nutrient needs of 200-150-190 fall close to a 2-1-2 ratio. I then looked at different types of organic fertilizers (see Ref. 3 and Ref. 4) and considered that I already had a 3-10-5 fertilizer (Vermibloom) on hand. I discovered Dr Earth’s Alfalfa Meal is 2-1-2 and includes beneficial bacteria and mycorrhizae (to promote healthy plant growth and disease resistance). However, I knew I would be low on nitrogen if I only used those two fertilizers. Therefore, I decided to buy some blood meal (12-0-0). I also liked that blood meal is more fast acting while the other two are more moderate. I hunted around for a solid fertilizer calculator and found an amazing tool from the University of Georgia Extension (Ref. 5). I entered all three fertilizers into the calculator, and it kicked out the exact amount of each fertilizer I needed to apply to 1 square foot (see Pic. 2). As I am using 10-gallon fabric pots (that can hold 1.5 cubic feet, but I put stone on the bottom and there’s space left at the top) I decided to use the one square foot application rate as I can always add more later, but I can’t take it away. Not only did I want to understand the nutrients I needed, but I also wanted to understand the structure of the soil (as it was not included in my test results). North Dakota State University has a nice page that discusses this (Ref. 6), and I performed a soil ribbon test (see Video 1) based on this information. I determined my soil to be medium textured (which is great), but I have seen occasional water pooling on the surface, suggesting that it may be more of a medium-fine. This means adding peat moss, coco coir, or other amendments might improve drainage (and plant hydration) and allow for roots to grow more easily. In the long run, I plan to use compost to enhance the soil structure and nutrients. I filled the bottom of my 10-gallon fabric pots with a ½” of pea stone to allow for drainage (Pic. 3). I then partially filled two 5-gallon buckets with topsoil from near where I will plant (but not in an area the roots will reach). I used a digital scale to measure the amount of fertilizers recommended by the calculator (Pic. 4, 5, and 6) and added it to one of the 5-gallon buckets (see Pic. 7). I mixed the fertilizers into the soil as evenly as possible (Pic. 8 and 9). I then poured a two-inch layer of non-fertilized soil, then peat moss, and then fertilized soil (in a roughly 2:1:1 ratio) and blended them together. I repeated this until the pot was full (getting additional soil as needed), and then I repeated the process for the other three pots. I set the filled fabric pots in my garage (Pic. 10) for two days to allow any upset bugs to flee into my garage instead of my house. I then moved the pots (wrapping them in a contractor garbage bag to prevent making a mess) into the room with the grow light. I placed a board on top of the fabric pots to insulate the plants (in their smaller pots) from the cold soil (Pic. 11). Once the soil in the fabric pots reaches room temperature, I will transplant. (Ref. 1) This video shows the method I used to take a soil sample. I didn’t have a field to test, so I took four samples from the area where I will eventually plant outdoors and blended them together. I then mailed my soil sample off to the lab, and about a week later, I received an email with a PDF of my results (included with my pictures this week). https://www.youtube.com/watch?v=N9AwxmFxBwg&t=8s (Ref. 2) This video from the University of Minnesota Extension (many universities have agriculture extensions that can assist you with soil testing and growing information for your area) discusses what to do with your soil testing results: https://youtu.be/HYrkcfE62Pg (Ref. 3) This is a nice article that discusses organic fertilizer solutions: https://www.grow-it-organically.com/npk-fertilizer.html (Ref. 4) This article lists the NPK values of many organic fertilizer solutions: https://www.epicgardening.com/organic-fertilizers/ (Ref. 5) Many websites tout a fertilizer calculator…but this one is hands down the best I have found. If you scroll down to the bottom, you can enter any fertilizer type you want (and the cost, if you want). It will give you the exact blend of multiple fertilizers to solve your nutrient deficiencies (I included a snapshot of the solution I used in my pictures). https://aesl.ces.uga.edu/soil/fertcalc/ (Ref. 6) This is an excellent article that discusses how to evaluate your soil: https://www.ndsu.edu/agriculture/extension/publications/evaluating-preparing-and-amending-lawn-and-garden-soil
Likes
10
Share
Loud hashy, pepper, sulfur, rotten fruit, lemon, and Skittles terps. The landraces got nice structure, terps and yield but resin is lacking. I think that's normal. Gonna have to cross these a few times till I find something great that is worth it.