


Likes
Comments
Share


@Finsfan
Follow
I did a heavy defoliation with the green crack for the first time.. the first 3 pics are pre- and the last 3 pics are post-defoliation.
Definitely better air flow now as well as more "tops" being seen.
Tomorrow going to do the durban.. update w more pics then.

Likes
54
Share


@GarciasGarden
Follow
PINK KOSHER#1 (keep in mind I have 2 other kosher)
I Am super happy with the outcome on this one ! the bright red /orange hairs on top of the light green/ purple frosty nugs really gave it great bag appeal. I ended up getting 4 OZ!! Out is this 1 plant! I was not expecting to get that much off of only one❤️ The smell on this plant is like cookies mixed with a jolly rancher... idk it’s just bomb / The taste is Of super deep Kush With a hint of caramel/ The effects will make you want to create your own dance while watching spongebob and laughing at the most stupid shit ! SORRY IVE BEEN SLACKING MY PHONE BROKE AND I JUST FIXED IT!!


Likes
7
Share


@Salokin
Follow
Hi Growmies,
Can’t really see any swelling anymore and therefore started to flush her. PPM‘s are already down to 100 and will change the reservoir two more times during week 12 to try and bring it down to 0, followed by two days of darkness and harvest. This plant is saving my overall yield of this box, as the Mazaar has performed subpar, probably because she was sharing the box. The afghan, however delivered in terms of production, as promised by ganja farmer seeds.


Likes
34
Share


@RFarm21
Follow
REGAS: 21 e 25 janeiro so com agua.
À espera que o solo seque para colher.

Likes
90
Share


@1Right_Angle
Follow
23rd of July
- Attempting to let the soil get “dry”. See what Mother N has to say about that. Day 3 w/no rain ! The Soil is still very moist
- Last fed on the 20th
- Foliar Spray in the a.m. just to tease
- boy does the audio sound bad on the phones Video !!
Kinda historic, sorryboutthat
24th,
- added some Epsom Salts to todays feed, magnesium and sulfate for the Soil. GOOD READING AVAILABLE...
- went ahead and fed on day 5, iffy weather all around. GO
- only 2 gallons used
25th,
- killer day finally after more rain lst nite
- re-positioned two questionable side-branches, down low and in front. Whole plant is open. Not a leaf to remove. Anybody thats done this style of grow, let me know if theres a hole in the program.
*** smoked some of the Beaver Seeds; Maui Wowie Autoflower that I recently grew, you know, while tending the plant today… well laugh at the fact that the 15% thc of the famous dope truly kicks Butt; seriously good weed
- “next” Meal posted above, beginning the transition to bloom nutrients !
- activity at the Bud-sites is picking-up
26th,
- amended the plant base w/ 2 cups of liquid phish-poop lol
- next proper meal posted above ~eta 30th or 31st
- anxious to get the Bloom nutes in & running
29th
- big, long, burp, after sliding 3 gallons of “transition-food” into Jack
- Meal is posted above with no Molasses today; TDS 1400ppm
- started a MONTHLY inclusion of dissolved Epsom Salts. I will be including it in Foliar applications as well, w/ Fulvic Acid.
Likes
15
Share


@SmokingTiki
Follow
The weather was better this week and the plant grew well :) It clearly tilts towards the window to catch the light.
Day 13 picture is missing because I was not at home.

Likes
70
Share


@FoTwenny
Follow
••••••••••••••••••••••••••
Oct 1 - Oct. 7
Week 5 of 12/12
••••••••••••••••••••••••••
WEEKLY SUMMARY:
••••••••••••••••••••••••••••••••••••••••••••••••••••••••••••••
🙋♀️Fo' Twenny here!🙋♀️
We're back with another update on our 🍌🍌 FAT BANANA AUTO cultivar bred by ROYAL QUEEN SEEDS! It's week 5 and she is already looking and smelling amazing! She just seems to get frostier ❄️ by the day and her aroma just keeps getting stronger. I love the terps this girl is throwing out! This week we will lighten up the feeds substantially and get her moving towards harvest. Let's growwww!
📝 Side Note 📝
Irealized my BlueLab Conductivity Meter has the option to switch to EC. Since EC is the most accurate way to measure the nutrient concentration in a solution, I will now be measuring and reporting EC readings rather than PPM.
Any advice, suggestions, or constructive criticisms are always welcome.
Now, for the weekly break down!
••••••••••••••••••••••••••••••••••••••••••••••••••••••••••••••
THIS WEEK'S BREAK DOWN
••••••••••••••••••••••••••••••••••••••••••••••••••••••••••••••
9/30 - Day 52 & Day 28 of BLOOM
°°°°°°°°°°°°°°°°°°°°°°°°°°°°°°°°°°°°°°°°°°°°°
📸 PHOTOSHOOT! 📸
🎥 FILMING! 🎥
••••••••••••••••••••••••••••••••••••••••••••••••••••••••••••••
10/2 - Day 54 & Day 30 of BLOOM
°°°°°°°°°°°°°°°°°°°°°°°°°°°°°°°°°°°°°°°°°°°°°
🚿FEED DAY!🚿
- She received approximately 12 oz of nutrient solution. I mixed 6 gallons of solution for all the plants I have running in this SOG. 12 oz of that was then measured and fed to this cultivar. This week I used some gallon bottles filled with water and frozen to lower temps in the reservoir. She was followed up with another 12 oz of water ph adjusted to 6.4
👩🔬NUTRIENT SOLUTION👩🔬
⬇️Mixing Rundown⬇️
- The solution starts with 6 gal tap H2O through two kdf filters mixed in a 36 gallon reservoir. The solution is applied via wand sprayer powered by a submersible pump attached to a garden hose. Nutrients and additives are added to the reservoir in the order listed below and thoroughly mixed using a plastic stir spoon. The reservoir is oxygenated by four 4 inch air stones.
Start pH: 7.8
Start EC 1.0
TEMP: 69°F
.75 tsp/gal - Fox Farm BIG Bloom
.5 Tsp/gal - Fox Farm Tiger Bloom
.75 tsp/gal - Fox Farm BEMBÉ
.0625 tsp/gal - Fox Farm Cha-Ching
Our target pH is in the range of 6.0- 6.6 prior to adding any microbial innocclants. pH already in range, no adjustments needed.
pH: 6.5 (No adjustments needed)
EC: 1.5
TEMP: 60 °F
Mammoth P.
.6 ML/gal
••••••••••••••••••••••••••••••••••••••••••••••••••••••••••••••
10/6 - Day 58 & Day 34 of BLOOM
°°°°°°°°°°°°°°°°°°°°°°°°°°°°°°°°°°°°°°°°°°°°°
- She received approximately 36 oz of nutrient solution. I mixed 15 gallons of solution. 36 oz of that was then measured and fed to this cultivar. This week I used bottles filled with water and frozen to lower temps in the reservoir.
👩🔬NUTRIENT SOLUTION👩🔬
⬇️Mixing Rundown⬇️
- The solution starts with 15 gallons of tap H2O run through two kdf filters and mixed in a 36 gallon reservoir. The solution is applied via wand sprayer powered by a submersible pump attached to a garden hose. Nutrients and additives are added to the reservoir in the order listed below and thoroughly mixed using a plastic stir spoon. The reservoir is oxygenated by four 4 inch air stones.
🚿FEED DAY!🚿
Start pH: 7.7
Start EC 1.0
TEMP: 67°F
2 tsp/gal - BudSwell
Our target pH is in the range of 6.0- 6.6 prior to adding any microbial innocclants.
Adjusted pH to 6.3 using General Hydroponics pH Down
.75 tsp/gal - Mycos WP
1 tsp/gal - Recharge
.6 ml/gal - Mammoth P
pH: 6.2
EC: 1.4
Temp: 67° F
••••••••••••••••••••••••••••••••••••••••••••••••••••••••••••••
SUPPLIES & EQUIPMENT
CURRENTLY IN USE:
••••••••••••••••••••••••••••••••••••••••••••••••••••••••••••••
• A/C: Whynter ARC-14S 14,000 BTU Dual Hose Portable Air Conditioner
• TENT: VIVOSUN 48"x24"x60" Mylar Hydroponic Grow Tent with Observation Window & Floor Tray
• POTS: Black 8"tall Active Aqua brand 6" x 6" one gallon square pots/Black 12" tall Active Aqua brand12" x 12" 3.4 gallon square pots
• VEG/AUTOFLOWER INTAKE FAN: None (PASSIVE)
VEG/AUTOFLOWER EXHAUST FAN : VIVOSUN 6 Inch 390 CFM Inline Duct Fan with Variable Speed Controller
• BLOOM INTAKE FAN: VIVOSUN 6 Inch 390 CFM Inline Duct Fan with Variable Speed Controller
• VEG/AUTOFLOWER EXHAUST FAN : VIVOSUN 6 Inch 390 CFM Inline Duct Fan with Variable Speed Controller
• BLOOM EXHAUST FAN: AC Infinity CLOUDLINE T8, Quiet 8” Inline Duct Fan with Temperature Humidity Controller - Ventilation Exhaust Fan
• VEG/AUTOFLOWER AIR MOVEMENT: 6-Inch Lasko FBA 2004W 2-Speed Clip Fan
• BLOOM AIR MOVEMENT: One Honeywell TurboForce Air Circulator Fan Black, HT-900 and Three 6-Inch Lasko FBA 2004W 2-Speed Clip Fans
• Bluelab PENPH pH Pen Fully Waterproof Pocket Tester
• Bluelab PENCON Conductivity Pen Fully Waterproof Pocket Tester
• Kolder Multi-Purpose Liquid and Dry Measuring Cup, 16-Ounce
• Fox Farm Measuring Spoons
• WATER TREATMENT: Tap H2O run through two AQUACREST Garden Hose Water Filters to remove chlorine and chloramine.
– COMING SOON: Hydro-Logic 31023 1000-GPD Evolution RO1000 High Flow RO System, White (HL31023).
• WATER APPLICATION: I use 2 different watering systems. The pump sprayer is typically used in early veg, between feeds, or for lighter feeds. Most feeds are usually run through the pump and reservoir because it's faster and easier when dealing with larger volume feeds.
– 2 GALLON LAWN & GARDEN PUMP PRESURE SPRAYER. * I removed the spray head due to clogs and it's just faster.
– Superior Pump 91250 Utility Pump, 1/4 HP in a heavy duty 27 gallon Tote attatched to a 10 foot garden hose to an Orbit Underground 56246 Green Thumb 9-Pattern Telescoping Wand.
– Aeration of the reservoir is accomplished using a General Hydroponics HGC728040 Dual Diaphragm Air Pump 320 GPH 4 Outlet attached with standard aquarium air hose to four 4-Inch Air Stone Disc Bubble Diffusers.
• VEG/AUTOFLOWER LIGHTING: 320w MosterBoard V4-PLUS powered by a MEANWELL 320H-48AB DRIVER. There are three V4-PLUS boards prewired and mounted on a 935x195x10mm black heatsink. Dimmer, UV Switch, and IR Switch included. Each board contains two hundred fifty two 3000k lm301h diodes + twelve Osram 660nm diodes plus 4 separately switchable LG UV 395nm diodes and 4 separately switchable Osram IR 730nm diodes.
• BLOOM LIGHTING: Two custom mounted lighting units: Each mount has one 480w MEANWELL 480H-48B driver and one 240w MEANWELL 240H-48AB powering 6 KingBright Quantum Boards. Each board contains two hundred fifty two 3500k lm301h diodes + twelve CREE XP-E2 660nm diodes plus four separately switchable CREE XP-E2 730nm diodes and four LG UV 395nm diodes. Hanging between the two mounts are two additional quantum boards with two hundred fifty two 3000k lm301h diodes + twelve 660nm diodes plus four constant power 730nm IR diodes and four 395nm UV diodes. That's a total of 1680w of quantum board power in our 96" x 48" bloom tent.
⚠️ ALL DRIVERS MOUNTED REMOTELY IN AN AIR COOLED BOX INSTALLED BETWEEN THE FILTER AND EXHAUST FAN ⚠️
• SLMOTO Universal Oil Drain Pan, 2 Gallon (8 Liter) Capacity ABS Low Profile Oil Drain Pan w/Spout Fit for Motorcycles
• Modified Botanicare Low Tide LT Black Tray - 4' x 4' - Modification: Cutaway at corners and used flex-seal tape to create a new edge that will be soft to fit between tent supports. She is supported by 6 Standard Cored Concrete Blocks (Common: 4-in x 8-in x 16-in; Actual: 3.625-in x 7.625-in x 15.625-in). ⚠️THIS TRAY WILL NOT FIT BETWEEN SUPPORTS IN A 48" x 48" or 48" x 96" TENT WITHOUT MAKING MODIFICATIONS TO THE TRAY!⚠️
• Blue Sticky Pads
• Yellow Sticky Pads
••••••••••••••••••••••••••••••••••••••••••••••••••••••••••••••
SOIL MIX DETAILS:
••••••••••••••••••••••••••••••••••••••••••••••••••••••••••••••
All components were mixed into a 50 gallon tote that is kept in a warm environment to help innocculate to promote a vast and diverse microbial life in the rhizosphere. Once mixed, add 32-64oz water once every 7-14 days as needed. The goal is to keep the soil moisten without oversaturating.
2 Part - Royal Gold Tupur
INGREDIENTS: Coco fiber, aged forest materials, perlite, and basalt
1 Part - Fox Farms Ocean Forest
INGREDIENTS: Aged forest products, sphagnum peat moss, earthworm castings, bat guano, fish emulsion, and crab meal.
1 Part - Roots Organics
INGREDIENTS: Perlite, Coco Fiber, Peat Moss, Composted Forest Material, Pumice, Worm Castings, Bat Guano, Soybean Meal, Alfalfa Meal, Fishbone Meal, Kelp Meal, and Greensand. Also contains beneficial mycorrhizal fungi: Funneliformis mosseae, Rhizophagus intraradices, Septoglomus desertícola
.5 Part - Wiggle Worm Soil Builder Pure Earthworm Castings
.5 Part - Ancient Forest Humus
.5 Part - Coarse Grade Perlite
Inocculated by mixing 1 cup of Extreme Gardening Mycos
Watered with pH 6.5 h2O
1 Tsp/gal - Real Grower's Recharge
1 tsp/gal - Hi-Brix Molasses
2 tsp/gal - Fox Farms Kangaroots
••••••••••••••••••••••••••••••••••••••••••••••••••••••••••••••
Want to see more cultivars I have growing❓
Please, be sure to check out my other diaries & give me a follow! 👍👍
🙏Thank you for stopping by my garden!🙏
Peace, ☮️✌️
Love, 💚🤟
& Frosty Nugs! ❄️🌲
Happy farmin' my friends! ☺️🌱
- Fo' Twenny 👩🌾🏻
Likes
118
Share


@GERGrowDesigns
Follow
Welcome to Week 7 or Flower Week 3 //Media From Day 38 - 49 of Fast Version B Strain:
-Designers Club -
Special Thanks to John for hopping through my Messages to Join The SSSC/DP Photo
The Project will be Supported by Narcos Seeds to give the Strain the Perfect lifespan it could Deserve .
Light used for The Contest Grow :
Tenty Pro x4 200w in a space of
60x60 Homebox Ambiente Tent.
Were only Starting with 2 Plants from Fast Version B . One didnt worked well .
Both Topped Early at Day 9 as Project and Time Deadline from Contest .
Everything Doing Well ive done some Mainlining and Defoliation over the days .One Growed a little bit special at the topping .
Switched to Flower 12/12 today on Day 28 .
Installed Scrog System at Day 29
Nutriets used/using now in Week :
-Narcos Root Stim
-Narcos Bloom Stim
-Narcos Hydro A+B
-Narcos Magic Boost
-Narcos Narcozyme
-Narcos PK 13/14
Enough Talk from me , just Enjoy youre Seats and be a part of The Designers Club .
Good Luck to Everybody and Keep up Growing !
Likes
4
Share


@UnUlver
Follow
Собственно все, харвест! Отмучались. Свет новый хорошо себя показал, я доволен. Боты, расскажите на последок, где вы зарабатываете по 200 баксов в день?
Всем успехов и мира.


Likes
21
Share


@cadur
Follow
Good growth and upward spurt in full swing with the pre-flower sites lengthening. No more LST now.
Water consumption is about a litre a day.
But.....a couple of leaves have some brown spots!!!!! Arghhhhhh. Perhaps the base soils nutrients were dying off? Who knows, started flower nutrients at a 1/4 strength. Fingers crossed no more brown spots.
Likes
6
Share
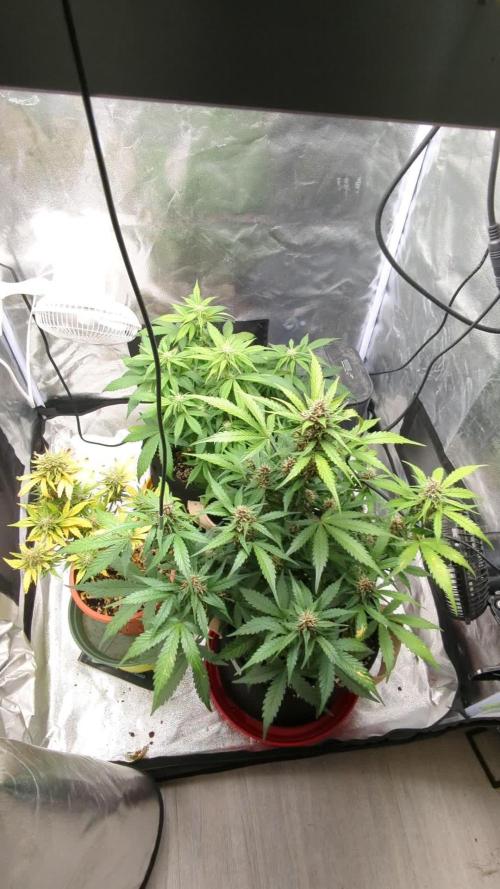

@20SYL
Follow
Une des plantes va mal, je pense que le petit pot ne lui convient pas. J'ai observé au microscope les trichomes, ils commencent à devenir bien laiteux avec quelques ambrés, je vais la récolter d'ici 2 semaines avant que sont état s'empire.
Les deux autres vont très bien, l'une d'entre elle commence à sentir fort, et prendre une couleur de plus en plus violette. Je reste attentif car je vois des signes de carences en calcium, magnésium et en potassium.
La dernière entre dans sa troisième semaine de floraison, elle se porte bien !

Processing
Likes
166
Share


@iMeus
Follow
Hello again my friends! I uploaded longer vids this time for the Vlogs, you don't have to watch em they're there for ya if you're interested :)
~Update~
To start off the girls look great, I'm excited that I'm back where I was when my "First Grow" failed. What's interesting to me is seeing the big difference in the SSH, the 2 previous girls I had were veracious growers, 3 1/2 days of germination and they had a tap root longer than an inch! This one is not so aggressive and has stronger sativa genetics, thin not phat. The others have been doing well, no pest yet which I'll be doing a bleach wipe down of my side of the garage to reduce the chances of an invasion.
~Note~
I'll be updating later this week with a short vid showing the progress. If you happen to watch my longer vlogs let me know what you think down in the comments, I appreciate the feedback ya'll provide. Have a blessed day, much love
Meus <3
~Update 9-19-18 [Mainline]~
So things went well, I'm looking forward to seeing if the clones take. Check out the vid if you wanna see my first attempt at mainlining! The next update will be Tuesday, see ya then!


Likes
113
Share


@PEAKYPLANTERS
Follow
the growth of my girls is slowed down, due to the techniques of hst ..... in return my tops are becoming dense and robust.
we will see some beautiful ones
see you around friends

Likes
83
Share


@MrJones
Follow
These ladies were heavy yielding - just wish the PK booster did not stunt them, I feel they could have even been larger, the buds are sweet and sticky, they smell amazing, they are hard and resinous - they have a beautiful mix of dark and light shades of green with bright orange hairs, very pretty, my friends are already in love with this weed, hits you like a Sativa and as the high lingers mellows like an Indica, I can't, wait to grow this again! The is an urban legend that occasionally a purple strain emerges, and when it does the outcome is legendary, just another reason to try this strain!
Likes
3
Share


@Mismatas
Follow
APROXIMADAMENTE CUARTA SEMANA EMPEZAMOS POR PRIMERA VEZ NUESTRO LST Y UNA LIGERA PODA DE BAJOS.
SEGUIMOS CON EL CABLE DE CALOR PUESTO Y TAMBIÉN AÑADIMOS UN CALEFACTOR PARA MINIMIZAR LAS BAJAS TEMPERATURAS

Likes
9
Share


@Rizik86
Follow
Day 29 - Checked PPM 720. Water always seems to be low from here on. The plant uses so much daily. Late night PPM check 450.
Day 30 - Checked PPM 420. ***WHITE HAIRS ARE SHOWING*** Added 10 mL of CalMag Micro Grow and Bloom. Added 5 mL of each additive plus BIG BUD AND NIRVANA. I dont have bud ignitor and bud factor x or i would have added them as well. PPM is 1,600. Plant is 17 inches tall. Light is 12 inches away from top of plant. PAR/PPFD is around 600 at the tops of the plant. DLI is around 30.
Day 31 - Checked PPM 1,080. Plant is 18 inches tall and 24 inches wide. I had to expand the grow area to accommodate the plant.
Day 32 - Checked PPM 895. Water is low. Raised the light as some of the leaves was taco shaped. Light is now 18 inches above the plant. Plant is 19 inches tall.
Day 33 - Checked PPM 570. Water is low. Added 5 mL of CalMag Micro Grow and Bloom. PPM is 720. Plant is 22 inches tall.
Day 34 - Checked PPM 620. Plant is 23 inches tall. Added 5 mL of CalMag Micro Grow and Bloom. Added 2 mL of each additive. PPM is 1,020.
Day 35 - Checked PPM 700. Plant is 25 inches tall. Roots are as thick as a pencil. The rootball is massive!.
Likes
12
Share


@AtomicOrgy
Follow
She's getting bigger, the colas are beautiful, but the lower buds are small. Are they going to grow more? How many more weeks to come? Honestly, I'm afraid the yield is going to be small. The way I consume cannabis, 50 grams aren't enough for a month...
Likes
12
Share


@QueenBZA
Follow
Purple Merkle from President Seeds has finished up. Stinky, dense and dark. Amnesia Haze is getting dank and frosty, continuing to stack up on trichomes and her residue can only be explained as gorilla glue quality i.e. sticky as hell! Purple Kush, Fruity Pebbles and Wedding Cake are veging still waiting for the Hindu Kush Auto to flip to flower.


