


Likes
Comments
Share



Likes
8
Share


@peterfly98
Follow
Day51: flowers are getting bigger, leaves tips are still under control. The environment is getting hotter and hotter due to the heatwave but the plants are holding on.
Day55: i was not home for 3 days but the plants were fine, just thirsty, hot and with some gnats due to being closed for so long.


Likes
6
Share


@Stickygreens420
Follow
8/26/2023 Day 53 veg: Did a heavy defoliation today, along with some lollipoping. Also, chopped the cover crop again, then cut it up and mixed with 1 cup of BuildASoil Craft Blend, 1/2 cup of Clackmas Coot Gnarly Barley, and 4 cups of BuildAFlower, to make a top dress. Before top dressing I sprinkled 1/2 tsp OptiVeg around the base of the plant, then added the top dress. Finally, I sprinkled the top of the soil with Growing Organic Kashi Blend. Then I mixed up some filtered water with Jay Plantspeaker Quillaja, BuildASoil Big 6, BuildABloom, Rootwise Mycrobe Complete and Bio-Phos, Fermented Comfrey Extract, and Thrive Yah-Whey. I watered the top of the soil just enough to get the topdress moist. Finally, I added the plastic cover the the earthbox. I will do one more topdress once I'm in the early stages of flower, but plan to mainly use the subirrigation from here on out. Also took a few clones today.
8/29/2023: she is just starting to hit the screen. The reservoir still has water in it, so not much more to report.
8/30/2023: the reservoir was dry today, so I filled it with water at a 6.4 ph. Also mixed in some calmag, silica, and some Yah-Whey Thrive.
9/1/2023: just tucking under the screen trying to spead things out a bit more before flipping to flower.

Likes
32
Share


@BarrieGrower
Follow
Took some plants out of the flower room and rearranged the rest of them. Unfortunately the Critical Mass is still on the edge of the light. The good part it is doing great!
Did a bit of defoliation during the week and as much as I tried to be careful, my hands were covered in sticky tric's. They smelled great.
Buds are building great and looking frosty. I was a bit surprised by all the sticky buds, however I really did not know what to expect with a CBD strain.
Stopped with the nutrients and from here on in just tap water. Hoping with just water for the next few weeks they will flush out by themselves.
Five weeks of flower complete and another three left.
Thanks for looking,
Cheers!

Likes
20
Share

@GREENPHOENIX6262
Follow
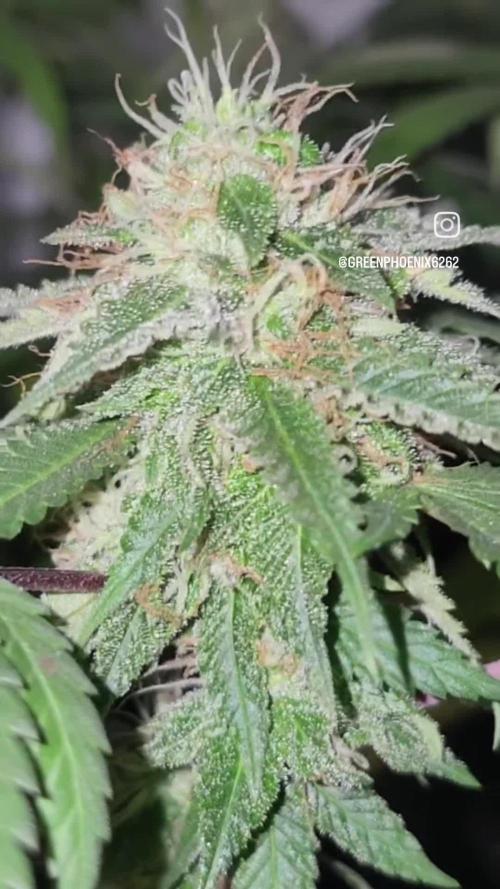
05/30 - (C) - As we closer to harvest all 8 ladies are running at full capacity with 0 issues - I will be increasing their nute feeds to 3 times a day and will be using more phosphate, potassium and Cane Molasses on the heavy feeds and Silica, Flower fuel, kelp and bloom for supplement feeds. The aroma from these girls is amazing, they have balanced notes of citrus, lavender and earthy notes. Follow my IG:Greenphoenix6262 for more content😎😎😎
*Disclosure* I will no longer be using the identifiers (M) or (C) to designate submission titles since the mother has been cut down everything moving forward will be for the clones*
06/03 - The babies are doing great, almost ready for harvest - I began a frozen water feed program 2 weeks ago and since then I have seen a definite increase in trichome production and cola structure - My feed system is a 2 days process consisting of tea blend for 24hrs and then from fridge to freezer for another 24 hours then feeding the plants while the nutrient feed is about 32-35 degrees (Right as the solution begins to create thin layers of ice). This cycle is repeated every 4 days with a clean water feed in between - For the 8 - 1 gallon clones I am processing about 3 gallons of nutrient feed. So far so good. 😎😎😎😎😎😎😎😎
06/06 - All the babies are rocking out accordingly - There are o signs of any deficiencies throughout all 8 clones - I will begin the pre-harvest process next week - In the meantime they will be on the regular program and frozen water feed schedule as stated on the previous update. The entry will close out this week.


Likes
12
Share


@Mamoi
Follow
Hi! How are you? I don't have much to say, she's healthy and every day that passed their flowers are getting bigger and bigger. Also I notice a new productions of pistils in every bud.


Likes
31
Share


@Mrs_Larimar
Follow
2024-05-15
No big thing to report,
The Planties doing well, established in the new Pot-
I placed them in the youngsters room,
so they will get stronger light, and gettting more solid structure.
BREEDER INFO
Tangerine Snow F1 Fast Feminised is a 75% sativa, four-way cross of (Boost x Tangelo) with (Lavender x Power Plant).
This Fast F1 hybrid is bred from Cali genetics and boasts great citrus terps, high resin production for extracts,
high levels of THC, very good yields and excellent mould resistance.
Tangerine Snow F1 Fast can be grown indoors as well as outdoors. Indoor flowering times are between 8 - 10 weeks
while harvest time in northern latitudes is during September while in the southern hemisphere growers will be harvesting during March.
Recommended climate regions are hot, dry, humid and warm. These are tall, semi-branched plants that grow in excess of 200cm
and display a high degree of vigour with very good uniformity.
In common with many other heavily sativa-dominant strains, Tangerine Snow F1 Fast offers excellent resistance to mould
as well as to plant pests and diseases. The combination of citrus terps and plenty of resin makes thi
a very good extract strain with the 'washing' method delivering very good yields of hash.
The citrus terpene profile is reminiscent of mandarins and tangerines and also has sweet candy notes.
THC production has been lab-verified at a strong 24% while CBD is low. The effect is uplifting and energising,
perfect for use during the day and early evening.
Likes
1
Share


@Growing2Give
Follow
This was an easy week with flushing the 2 B Blunt and Wreck'd Nuts so that I can take them both down. The Wreck'd Nuts just did not recover well from the lock out issues it was facing. It all came out of nowhere and got kind of serious even with a solid flush. That strain is a bit more picky with the nutrient balance than the others were. Leaving the Sex Melon and Rainbow Candy for next week. They still have some beefing up to do.


Likes
6
Share


@Hommero75
Follow
End of week 4 for GG4 Sherbet FF and it seems that this week was good for her. She is bouncing back little by little from her issues. She stretching slowly she is taking her time and that is ok with me. She just got fed some Goldleaf feterlizer and I did some defoliating on her to remove some of the bad leaves.. let's see how week 5 goes.
Likes
31
Share


@BigBadLion
Follow
Hey all! 👋
This week is when most of my plants deficiencies started to show, specially on Matcha 😢so to try to fix this problem I decided to use Revive from Advanced Nutrients on both plants (there were some slight indications that Pistachio might be suffering from some of these issues as well) and since last time it worked amazingly well I just decided to do it... and it seems it did its magic! The changes started to become more obvious near the end of the week when finally Matcha started to grow, so I'm happy!
Also, since Pistachio is growing well I decided to do some LST on her as well and she took it without problems 😍
I also believe this issue is a mix of nitrogen deficiency and magnesium (mostly this) and I suppose that's because of the heat that's inside the tent and because I'm feeding my plants with bottled water (different brand) that's probably low on that mineral. In my previous grow I used to add tap water to the mix but the water where I used to live was better so I fear that I might end doing more harm than good if I use this water to feed the plants 😵if the issues continues tho I'll get a bottle of Cal Mag and see if things improve.
Also, this week's timelapse is long! I barely moved the plants and thanks to that I managed to make a long video. I hope you'll all enjoy it 😁
Thanks for reading! ;)

Likes
18
Share


@GutterHoe
Follow
She's hitting flower so not much more growth after the burst. Fingers crossed she gets a bit more height.
No need to top her so letting her run free. Started voodoo juice two feedings ago.
Likes
3
Share


@Reaper
Follow
This is a cross between Critical (zamnesia seeds) and Girl scout coockies.
i will veg and flower the best clone

Likes
1
Share


@Capt_Chungus
Follow
My first grow has turned in to a science project.
Switched from AN pH perfect Grow/Micro/Bloom to AN pH Connesseur, still giving 50% dose. Had rain Monday maybe, didn't water for 3 days, hit her up last night with the Connesseur and just a tad of Big Bud, looks really good this morning. Yesterday I had mini buds with white pistils, that's why the Big Bud. Everything else is normal- watering 32 oz of water/nutrients at night, MAYBE mist the top soil but haven't really needed it. Will most likely switch to AN Connesseur bloom next week. Very satisfied!
(copypasta from my SG journal, same same).

Likes
6
Share

@For2itous
Follow
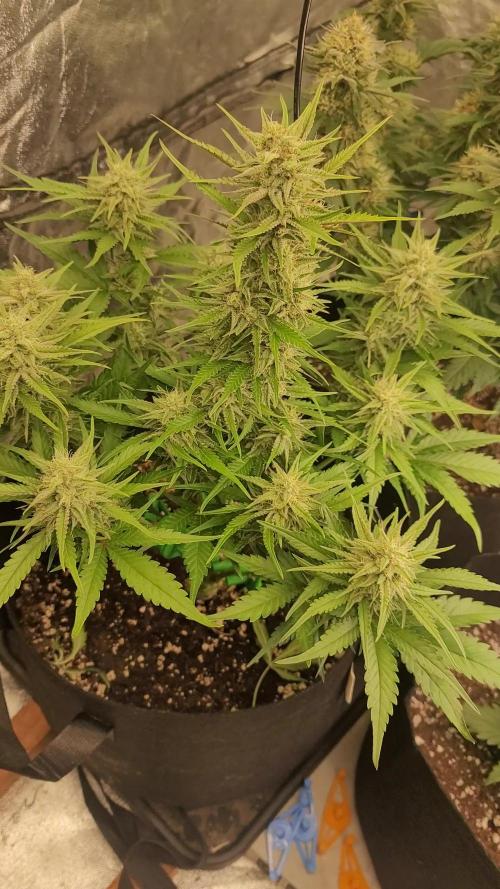
Just trying to bend some branches and defoliate some bud blocking leaves. Getting close to starting a flush as she should be done in around 2 weeks. The tropical fruity funk is really some unique and great smelling can't wait to see how the buds fatten up. Happy growing 🌴


Likes
167
Share


@PapaNugs
Follow
An exciting week here training this girl. Was spacing her out throughout the week using the low stress ties. You can see all of them pulling her out. Idk what to do with the middle ones. I've tried those before but they kinda stunt for me.
Watering every other day right now. And I know, I've gotta defoliate her. I'll do that when I lollipop mid week. Having said that, there won't be much this run as I trained while in flower.
At 100% power
Here are the lights details:
Medic Grow Mini Sun-2 150W LED
Model: MN150-022
Spectrum mode: V1
Efficacy: 2.8 umol/J
Thanks for stopping by!
You can find the light on Grow Diaries:
https://growdiaries.com/grow-lights/medic-grow/mini-sun-2-150-watts
You can find the light on Medic Grow's website:
https://medicgrow.com/
