


Likes
Comments
Share


@1guy2plants
Follow
Lots of LST this week, and as always, from the moment I turned on the autopots, they start flying. The recover on the topping and fimming is finally over, from now on I'll just give them another week and flip. the jungle is coming

Processing
Likes
10
Share

@CrackinBeans
Follow
Well I'm a bit upset last week I ended up dropping my ph meter in a tank of nutes I was mixing and by the time I got it out the meter was junk. I was planning on flushing the crystal but had to wait another week for the meter.
I suppose the good thing to take from this was I found out why I was having issues with my plants. When the new ph meter came in I went to check my run off and my nutes that I had all ready mixed up. It turns out that my meter i had been using this whole grow was off by about -2-2.5 so this whole time I had been feeding the plants at around 3ph smfh. I cant believe they look how they do knowing what went on this whole time.
Fastbuds crystal meth is 3days into flush and i will be cutting it down this weekend most likely.
Mephisto hubbabubbasmelloscope is smelling like sweet sweet candy and is thick in resin
Bighead seeds freeze berry/ blueberry crumble has a dank pungent stank to it and also is frosty but larrfy
Big bomb is still growing thick and have bud sites everywhere
Now I'm ready for the next batch and ready to get dialed in!


Likes
26
Share


@HowtoBubatz
Follow
This week, my cannabis plant is showing some signs of thirst. Unfortunately, I had to cut back on watering due to a small infestation of fungus gnats.
To combat the problem, I decided to apply nematodes. Hopefully, they will take care of the larvae in the soil.
Despite the reduced watering, the plant still looks strong and healthy overall. The buds are continuing to develop nicely.🌱🌱
I'm really curious to see how things progress in the coming weeks, especially now that the pest issue is being addressed.💚
Be excited for the coming weeks 💚🌱🌱

Likes
4
Share

@ebone4206
Follow
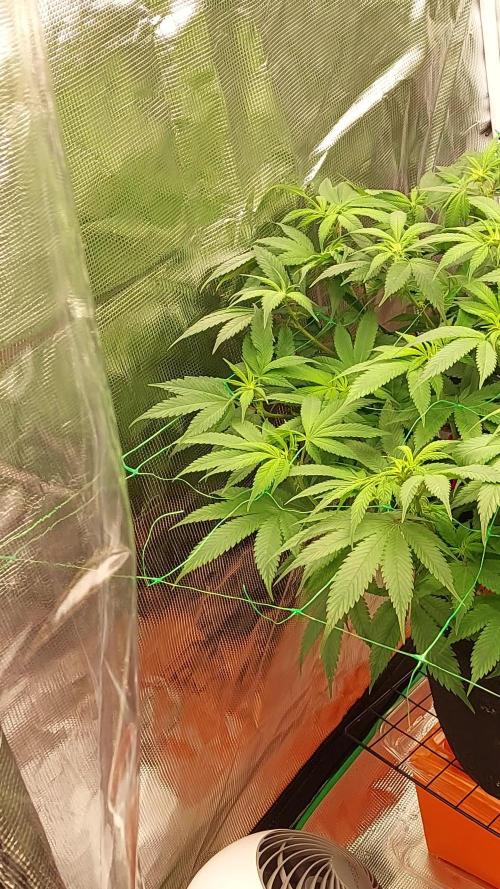
Omg, the timer for the light wasn't going off and on at the same time and caused me to have less daylight and more when I thought I fixed it. Found out day 9 of flower. Unsure if this will speed up or slow things down. Doesnt seem to be rewching much like i thought. Just took a couple leafs off that I could not tuck anymore.


Likes
22
Share


@DeepRootsGrowTrees
Follow
GSC BY KANNABIA
WEEK #18 March 15th-22nd
Week #8 Flower
This week she is looking good. Buds continue to gain weight with a tight bud structure that is covered with trichomes.

Likes
9
Share


@Dehxa
Follow
Great experience which grat taste on second grow even with obstacles made by myself 😅😂 love that taste!

Likes
4
Share


@Filiaes
Follow
26.05
Cleaned the Tank and changed the water. Beside that nothing special to say about that grow - everything is just beautiful and developing super well.
27.05
Removed some more Fanleaves to provide the lower buds with more light.
It's the middle of the blooming stage, since they should be ready within 70-80 days and are actually in day 32 after the light schedule was changed.


Likes
14
Share


@Leeyum
Follow
She was a pleasure to cut. Beautiful trim. So far pure berries and gas. I'll update on the smoke report once she's cured. I had a mini toke sesh earlier and it was definitely LSD. Definitely turning on some different visual/auditory receptors. It was nice and long and happy. She's only going to continue to get better. The buds are kind of fluffy but I find that all the purples I've grown turn out like that. The greens tend to produce much more weight/density. I'm not one to harp on density. I'm more about the flavor/effect.
Likes
7
Share


@Dmv_kush
Follow
Topped 4 times and LST..
We will also hst when the buds start getting fat
Likes
Comments
Share


@n1mbu5
Follow
OK guys I've shut them down to 4hrs light a day for 2 days now. They have really filled out those buds and are looking extra sugary.
I have been watering with 140ppm water at 6.2-7 pH with flawless finish for 6 days now.
I have just given them probably the last watering will leave them for another 3-5 days on 4hr schedule before turning lights off for 2 days and then harvesting.
Next diary will be the harvest!! I hope nothing goes tits up from here😂

Likes
14
Share


@9LittleGrow
Follow
Flowering week - 5
91 Octane - the biggest one is so satisfying in three babies and waiting to see bigger buds in next following weeks.
Banana Daddy- this one has so many tall pistals but her buds need to grow bigger. Hope to see better results
Sugar Cane - the smallest one starts making her bud form and looking forward to see some bigger and tight buds.
First time season grower
If something wrong included you guys can advise me everything.
Happy Grow


Likes
13
Share


@Drawer
Follow
A sad week, I found bud rot and had to take my plants out and do a big check and remove all dense underdeveloped growth.
It will be a pretty big hit on the yield I guess but the most important thing is learning and that I did.
The bud rot could spread due to my RH being 65/70 at nights and it used to be +80 before, + bad airflow.
I got new fans in the tent and my dehumidifier was ordered already but its not in yet.
On the other side, the plants are looking pretty damn good, they smell amazing
and 3 of the 4 plants is getting a very dense nug structure.

Likes
Comments
Share

@smoking_hills9
Follow
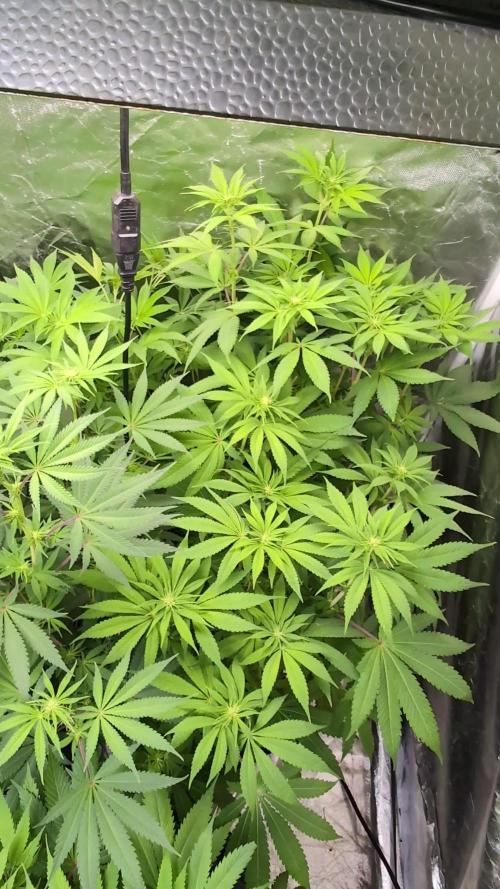
Plants are doing great, but very annoying slow fase of preflower. That's why I do mostly auto. Let's c maybe this harvest will change my mind. Start using spirulina powder as natural PGR.


Likes
Comments
Share


@KannaGrowing
Follow
Esta semana, poca cosa a añadir, tan solo que continuamos como la semana pasada.
Riegos alternos entre abono y agua, según tabla de fertilización de JUJU Royal by BioBizz.
Hemos aumentado la potencia de extracción para evitar olores.
Likes
13
Share

@eldruida_lamota
Follow
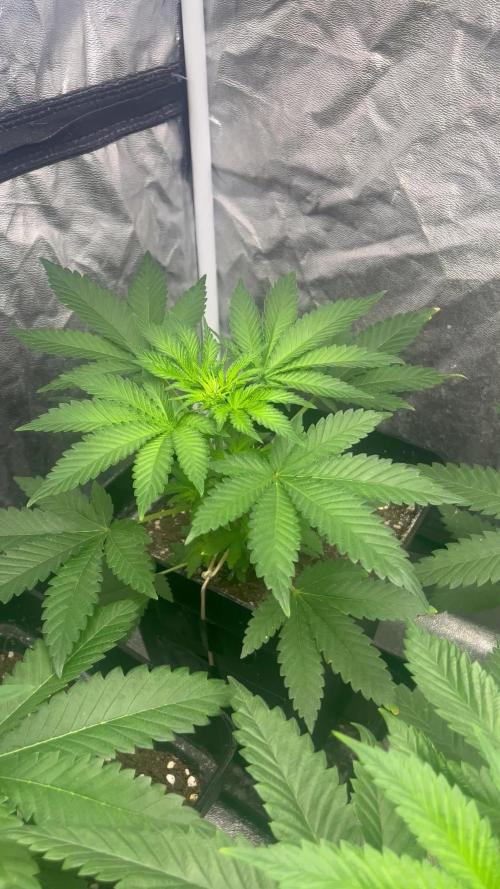
Actualizamos familia, con la sexta semana de vida de estas Zoap Rose de Kannabia Seeds.
Como se aprecia bien hay pocos cambios, a mayores practicar LST, tienen un color bien verde sin carencias y se ve que están sanas, las plantas están en macetas de 7 Litros definitivamente, con tierra top crop, con una altura similar a 30 cms y ya se ven pila anchas.
Como los anteriores cultivos tuve visitantes(trips) estoy rociando aceite de neem y jabón potásico 1 vez a la semana, añadí también tiras de color azul / amarillo para prevenir y controlar mejor el tema plagas.
El riego que aplicamos son 500ml de agua cada 48 horas y el ph se controla en 6.2, la temperatura la tenemos entre 23/26 grados y la humedad ronda el 55% gracias al humidificador.
Añadimos 0.5ml por litro de Tetra 9 vía foliar a todas las plantas.
El ciclo lo cambiamos ya a 12h de luz/ 12h de oscuridad, el mismo día que escribo esto, el foco está al 60% de potencia.
- os dejo por aquí un CÓDIGO: Eldruida
Descuento para la tienda de MARS HYDRO.
https://www.mars-hydro.com
- los nutrientes directamente desde https://agrobeta.com/agrobetatiendaonline/36-abonos-canamo
• Estoy muy agradecido por el aprecio y la acogida a todos los que me seguís, tanto a seguidores como a marcas que apoyan todos estos proyectos, aquí seguiremos cultivando y aportando nuestro pequeño grano de arena a este gran sector.
Hasta aquí todo, Buenos humos 💨💨💨




Likes
4
Share


@420rollweek
Follow
Seeds directly In coco jiffy
Bruce banner seed spend more time then other 2 to get out...
Likes
5
Share


@ReddDwarfBear45
Follow
The grow is going great for my first time however I have made a lot of mistakes up to this point but the Gurlz are still thriving.