


Likes
Comments
Share


Likes
15
Share


@BlackDragon22
Follow
Settimana andata bene.. Di recupero diciamo.. Stabilizzato ec e ppm a 1010, ora sembrano nutrirsi bene, si vedono i risultati dopo 7 giorni.. Ora con una giusta alimentazione che non sbaglierò più, sono sicuro che le prossime saranno ancora meglio, oltre ad effettuare più Lst e defogliazione! La st 1 piccola ma puzza tantissimo, la 2 😱 tante cime! Non vedo l'ora che si addensi tutto! 🤤 spero vi piacciano! Se avete consigli fatevi sentire!


Likes
2
Share


@DaddyPrime2
Follow
This clone was neglected so badly. The dispensary got them from had no idea on how to take care of plants. I wanted to take them all to give them better homes. The leaves were so thin that they felt like paper. I've never felt a plant like this one felt. I will make her beautiful. She's exploding with new root
Likes
27
Share


@MoneyMorris
Follow
Not much has really changed this week from last week. They are starting to swell up a bit more. Next week I think will be the time to start flushing them.

Likes
20
Share


@thainguyen
Follow
The plant really started going off at this point, I also did some LST and it appears to have helped promote the growth of the other branches. Also gave the plant a half dosage of Fox Farms Grow Big at 10 ml/g every other watering for now. The weather kinda dipped a bit this week, this brought it down to the low 70's at many points often but I brought the plant inside for this thanksgiving weekend. Very excited about the next steps!

Likes
21
Share


@PeterSage
Follow
hi guys, so situation: i guess we are 2 week from the cut, if the weather keep this sunny and warm September.
update on the plant: first of all I'm pretty disappointed of the size of the colas, very very small, not nearly as thick as I would imagined. Since I've been growing a lot of autos recently I had more big colas with them than with this fem, just disappointing.
so now the problem is: why are the colas not that dense? yes, I had a problem with K (deficiency) at the start of flowering, but was in early stages, and i quickly added K to the solution.
my guesses:
-I used product of the line biobizz, the try pack, and I think they were just not good enough for a feminized plant, because the pH was right all the time so i don't think it was a block.
-didn't topped my plant, I know its a way to enhance the production, but I was curious to see the normal growth of the plant.
-grown in pot, maybe wrong pot? too hot in the summer?
-wrong substrate? (I mixed three different types, adding compost and manure, beside perlite and vermiculite of course)
-bad climate/genetics? (this year was heavy hot but a lot of rainy days too, often in spring)
the quality seems fine, nice smell and very sticky on the hand but very very small buds :(
the last week an invasion of borer, I hate those fuckers, it's impossibile to control them, as soon as I stopped the foliar application of neem/aloe they arrived, really annoying.

Likes
2
Share


@SSKNFbyHAZE
Follow
Hi Growmies~!
What This Post is About
Today, I'll be recording how to cultivate soil microbes at home.
These microbes offer numerous benefits, and they are simple to make.
How I Came Up with This Technique
Since 2014, I’ve tried synthetic growing methods like DWC. While they gave quick results, I often ran into issues with consistency.
Nutrients would expire during breaks, meaning I had to keep buying new bottles.
I strongly felt I needed a change.
A couple of years ago, after taking a break, I started to research and switched to organic growing.
At first, it felt overwhelming with all the steps and prep work, but I saw real potential.
After experimenting with different methods, I came across Korean Natural Farming (KNF) and JADAM, introduced by Mr. Cho.
His simple, ultra low-cost techniques inspired me. They focus on letting nature do the work.
While growing,
I noticed that synthetic nutrient bottles were expensive, especially when trying to complete a full nutrient set.
Organic growing may require more attention and can be costly when investing in organic materials.
Preparing the soil in advance and top dressing with dry nutrients every other week - just these two methods were consuming space, time, and money.
Indoor farming is unnatural, while organic farming is a natural approach.
I had to bring these ideas together, but organic farming often seems geared toward large plots like farms.
Incorporating organic techniques into my indoor garden requires a lot of effort and careful calculations.
So this is one of my techniques for keeping my plants happy:
supporting their daily needs helps them snap out of deficiencies quickly, allowing them to grow consistently.
It took me a while to adapt this technique for indoor use.
I hope this helps, guys!
Supplies Needed
- Potatoes: Provide nutrients and food for the microbes.
- Sea Salt: Stimulates microbial activity and controls harmful organisms.
- Dechlorinated Water: Allows the microbes to grow and multiply.
- Compost, leaf mold, or worm castings: Contains natural microorganisms that are key for this process.
How to Make (1 gallon)
1 cooked potato (about 2 golf ball-sized)
1 pinch of sea salt
2 tablespoons compost or worm castings
1 gallon dechlorinated water
1. Mix Ingredients: In a clean container, fill it with the dechlorinated water, dissolve the sea salt, and add the compost along with the mashed potato.
2. Ferment: Optionally cover the container and let it sit at room temperature for 24-48 hours.
3. Strain (Optional): After fermentation, you can strain the solution if you prefer a clearer liquid.
Note: Watch the timelapse video to see how the microbes activate!
**WARNING**
Wear gloves if possible and/or avoid contact with open wounds
How to Use
IMPORTANT: Always dilute the solution before applying it to plants.
- Use when bubbles form a "pizza shape" on the surface.
- Dilute 5-10 ml per liter of water for bi-weekly feeding. (Test a small batch first to find the best rate for your setup.)
- Once the bubbles disappear, the microbes are likely inactive. You can either mix the rest with water as fertilizer or discard it.
Pros
Promotes Plant Growth
- Usually fixes deficiencies in as little as 6 to 72 hours.
- Improves nutrient absorption, and helps plants thrive.
Boosts Plant Immunity
- Works as IPM: Can be used as foliar sprays (no staining on leaves).
- Lowers the risk of powdery mildew and other diseases.
- Helps the soil ecosystem with beneficial organisms like predatory mites and springtails.
- Naturally reduces pest pressure (Less risk of fungus gnats and other pests).
Improves Soil Health & Supports Composting
- Quickly breaks down organic matter and nutrients.
- Makes growing organically in small containers, like 1-gallon pots, easy.
- Over time, soil becomes softer and richer, even in small pots.
Cost-Effective, Sustainable & Eco-Friendly
- No need for complex equipment like pH pens, air pumps, or other tools.
- Reduces the need for CalMag, N-P-K, or micronutrient supplements (just add a little bit of sea salt to every watering).
- No sugar sources needed in the soil.
- Works for all types of plants—houseplants, exotics, ornamentals, and crops.
Cons
- Limited shelf life; the solution will develop an unpleasant odor after a certain period.
1 Corinthians 10:26
Likes
9
Share


@Psychopat_od_vedle
Follow
Ahoj tak tu máme 57 den květů.Holky vypadají skvěle jsem spokojený.zapach velice kvalitní 😂Žena nasrana soused už ani nezdraví zase 😂 jinak brzo bude sekec jen už čekám na jantara pořád žádný 🤔
Likes
16
Share


@BudsBanditUK
Follow
Well she is the star of the tent. Her purple colour is amazing, her sickly sweet smell is amazing. She has not given me any problems at all during this grow. Maybe a week left and I cant wait.
Likes
13
Share


@Lfuego22
Follow
Day 18 veg from clone
Water temp 69.6
Ph 5.9
Ppm 724
Ec 1.6
Room temp 66.8
Light temp 74.4
Humid in room 48
Over light 42
Day 19. Full flush.
PT 1
Start ppm of RO (filtered/nestle) 146
Ph 7+
Final ppm 880
Ph 5.9/6.0
Temp 70°
Room humidity 50%
Light 45%
Light heat 73.0
Room heat 68/70 depending on if heater on or off
Likes
54
Share


@TheBudWhisperer
Follow
Medium:
Look, I love coco/soil, organic/synthetic just as much as anyone. I’ve never really hated on any particular method and each has its uses depending upon the environment. That being said.... hydro is likely to be the predominant indoor method for us going forward. It ticks all the boxes that the average hobby grower is looking for. Maintenance is generally pretty easy, while I’ve found myself monitoring ph and tds more frequently, I’m still only mixing nutes once a week instead of three. The hassle factor is crazy mitigated here: 1:. From a sustainability perspective, nute consumption is wayyyy down, saving more dolla bills y’all!
Added bonus is that veg. Growth rates are just insanely fast. Easily a 2 week savings in time pre-flower🤟😎😳.
It is a little bit of a tricky medium but once you dial in the ratios - smooth sail’n the whole grow. I can focus on training/maintenance instead of feeding🤟🤟.
If there’s a drawback to DWC it would be that I’d have concerns about leaving it for more than a couple days when she’s in full flower. They just drink so much that It’s a constant top off. All told, far and away the most effective and economical medium we’ve used😎.
Method 🎚️🎚️🎚️🎚️
Under this COB light system, the best method to date has definitely been a mainline. It’s got so much canopy penetration that we’re pulling down 16” long colas packed with well developed buds. The mainline training didn’t take long in DWC - roughly 4 weeks of veg. And she was ready for the flip. We only extended it a further 2 weeks to keep pace with another grow in the same space. Otherwise, I would’ve cut the veg. Time back to 4 weeks which would’ve made the behemoth of a root ball a little more manageable. We also iceballed the res. With frozen water bottles twice a day throughout the grow. Just to keep temps down and avoid any potential issues. Whether or not there’s a better, more efficient way to get these kinds of results remains to be seen. We’re still trying to strike that balance between faster veg. Times and maximized yields. If anything, I wouldn’t be at all surprised if the hermie issue at the end had something to do with the root ball binding on itself due to size. The true culprit was an unanticipated light leak but still - The ball could’ve been 2/3 the size and likely have produced similar results🤷♂️. I’m giving the method a slim 4 because it was a great success but too long a veg.
Yield/Harvest🌴🌴🌴🌴
Regardless of the final number, we had hoped that the yield would’ve been bigger. She’s a beauty of a plant but didn’t really puff out as much as we were hoping for. At least not a mainline on a 6 week veg. At 5.125oz we’re obviously not complaining and the colours in late flower were some of the best ever seen😎👌😎👌. What she did yield was frosty, dense and surprisingly stinky AF. I see no discernible difference in the quality of the terp. Profile vs. Any of our previous organic soil grows. For those who tout this as an advantage in soil media, I say get urself a bucket and a bubbler, then we’ll talk. Hydro is just straight up awesome: 1:. 4 palm trees on the yield - any haul north of 5oz is a great addition to the cellar: 1:😎: 1:😎.
Props - many thanks as always to the gd folks who made the platform available for us all. Big pound to all those at the boof party. Got a bunch of outdoor and couple clones to tend to now. Hopefully be see’n all you peeps around. Thanks for stopp’n in👊.

Likes
18
Share


@Changman
Follow
It has gone well and the tap roots have revealed themselves, lets see what the next week holds.

Likes
2
Share

@GREENPHOENIX6262
Follow
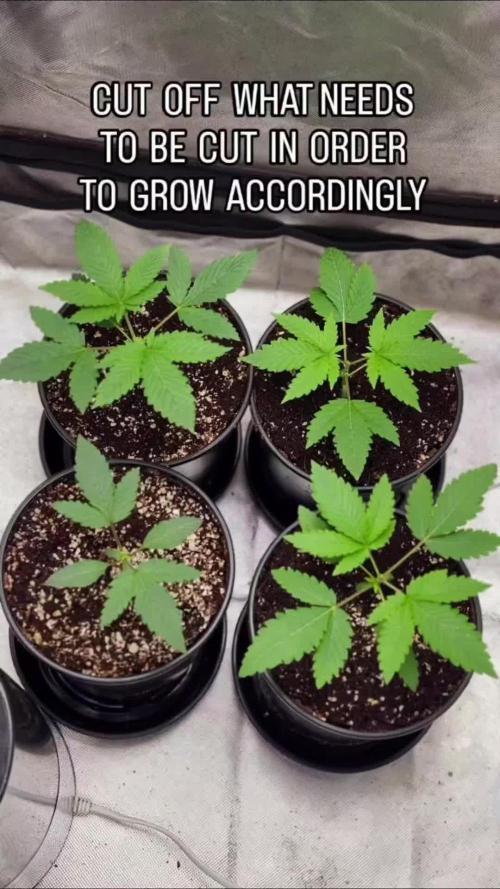
08/09 - 19 days since gerrm (True week 2 Veg) - They are all at nearly identical numbers for EC/PPM/PH and height 4inchs - i began micro-dosing the 4 ladies with they above - I will increase the dosage in about 2 weeks - The plan is to Veg for about a month and a half then flipping into flip - harvest target date mid October. Stay tunned - Peace and Bud...😎😎😎😎😎😎😎😎😎😎😎😎😎😎
08/12 - All 4 of the ladies are rocking out - Minimized the dry back to stabilize the vpd a bit and equalize the PPM's/EC - I am currently running very high humidity and temps (80%+ Humidity - 78+ temps) - Running the exhaust in low for 19hrs s then off for 5hrs to maintain high humidity and avoid over saturation - Keeping the dry back to no less then 60 - 65% this will enable me to keep moisture in the substrate without running the risk of "Root rot". Stay tunned - Peace and Bud😎😎😎😎😎😎😎😎😎😎😎😎😎😎
08/14 - Coming up on weeks end on a good note - All 4 ladies are nearly identical across the board, from growth to PPM run off numbers - They are a little smaller then I would want them to be but still rocking solid for sure - The plan will remain the same, High Temps/ High humidity for another 4 maybe 5 weeks. 😎😎😎😎😎😎😎😎😎😎😎😎


Likes
62
Share


@Wicked_Stix
Follow
The gutter hoe grow show powered by the viparspectra XS2000 is moving along. A couple of the plants started showing some nitrogen deficiency early in the week after the water change so I gave them a little maxigro. I'm not sure if the roots are running out of room or what is going on but the nutrient does aren't as efficient in this gutter compared to the dutch buckets. I suprecropped the crescendo to keep it even with the other plants. The cookies has strange looking buds on top. Not many pistils popping on it. Other than that the show will go on.....

Likes
4
Share

@420DeepGrow
Follow
📆 Semana 4:
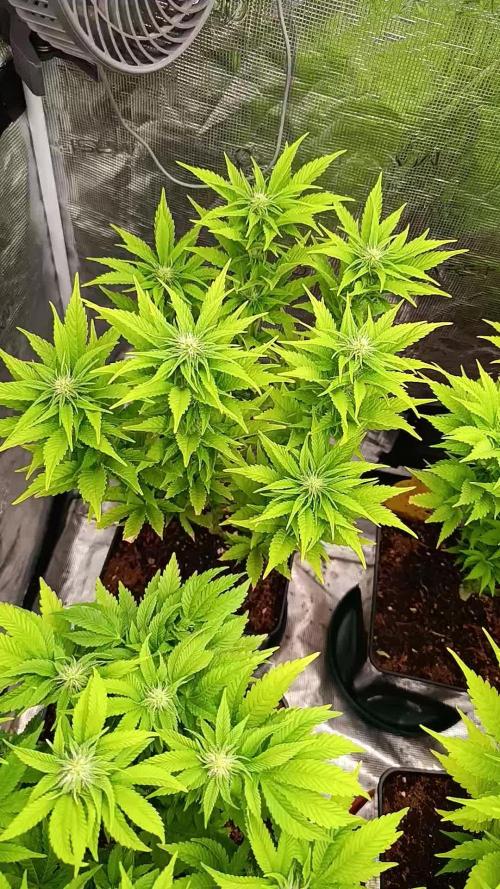
Con el pH del coco terminando de ajustarse y el entorno radicular ya plenamente equilibrado, la planta consolida su floración funcional. El estiramiento se detiene y los puntos florales se compactan en las puntas, con mayor densidad de pistilos y estructura ya fijada.
Los riegos siguen acompasando la demanda sin acumulaciones, manteniendo EC estable y favoreciendo una absorción limpia. La respuesta aérea se mantiene óptima: hojas firmes, color uniforme y una expresión aromática cítrica más intensa y definida.
Semana de afirmación floral y estabilidad radicular tras el ajuste del medio.
Seguimos creciendo fuerte 💪!


Likes
15
Share


@DRO420
Follow
Just repotted these clones ... They have amazing roots... Looking very healthy

Likes
11
Share


@AvoidantGrower
Follow
Day 21 - 710 Diesel Auto
This plant is a fast grower. The 4 lower nodes are stretching out into branches and in a few days I’ll pin them down with 6” garden staples. All new growth looks free of burns so I’m going to start feeding again. I'm learning I don't need to keep my humidifier on 24/7 so I just run it when needed and I keep my exhaust fan off to retain high humidity. My grow tent is a little warm but I think it's worth it for the high humidity while in early growth.
Technique: Topped her on day 18 with no issues.
Light: Platinum LED P300 set to veg mode @ 20" above plant providing about ~28,000 LUX
Watering/Nutrients: plain RO water
Environment: 4x2 Grow Tent. Temps low of 68 - high of 91 with RH of 80%
Soil: ~6 gallons of Foxfarm Ocean Forest w/ 4 extra quarts of perlite added.
If you see anywhere that you think I can improve please drop a comment – thanks for reading
