


Likes
Comments
Share


@MrOgchemist
Follow
Quick kush is called quick for a reason 👌, nice big indica leaves starting to grow and stretch pretty fast, i had to re pot one of the girls so one of them might look a bit sad but she will get better (its the salts)
Flushing and Buffering-
I am personally using Canna Coco Coir,mix with one brick of plagron coco coir(had one left).
1. Why you Should buffer your Coco. Lets get to reading! (Its Worth it for those that dont know about it)
There are cation exchange sites in coco that will interfere with nutrition until they are buffered. The cation exchange sites in coco naturally come loaded with sodium (Na) and potassium (K) cations. However, the Na and the K are only weakly held to the exchange sites. In the presence of calcium (Ca) or magnesium (Mg), the sites will release their Na or K cations and lock onto the Ca or Mg. These processes are known as “cation exchanges”.
Buffering coco is accomplished by soaking it in Ca and Mg. This allows the cation exchanges to take place prior to adding plants. Simply soak your coco in a solution of Cal/Mag water and the exchange sites will release their K and Na cations and lock onto the Ca and Mg. When the cation exchange sites bond with Ca and Mg rather than Na and K, it is “buffered”. The bonds that hold the Ca and Mg to the sites are very strong and cation exchange will largely stop. This means that all of the nutrients that you add to the water will be available to the plant at the ratios that you provide them.
2. Alot of growers Grow in Unbuffered coco coir and its a big mistake guys, I myself was a "victim"😬of unbuffered coco and it does cause alot of problems... now i am going to try and fix them!
-----GROWING IN UNBUFFERED COCO---
Many growers are unaware of the need to buffer the coco and they try to grow plants in unbuffered coco. In unbuffered coco, the cation exchange sites will strip the nutrient solution of the Ca and Mg and replace those cations with Na and K. This creates a sub-optimal Nutrient Element Ratio (NER) and renders Ca and Mg unavailable to the plant.
Failing to buffer the coco is why so many growers suffer calcium deficiencies in coco grows. Manufacturers of prepared coco products try to exploit these problems and convince growers that only their proprietary products are suitable for growing. However, it is actually very simple to properly buffer your coco yourself. This tutorial walks you through the process and provides all the information you need to turn even the cheapest brick of dehydrated coco into a superior growing medium.
I hope i Helped out someone who didnt know about this link on how to Buffer your Coco Coir is Here https://www.youtube.com/watch?v=OQi8AMMIyyA&t=18s
14/02/2019- I Decided tp raise up the amout of nutes and im giving them 1,5 ml per L so 15 ml's for 10 L / 2 Gallons of water


Likes
5
Share

@ibbzy
Follow
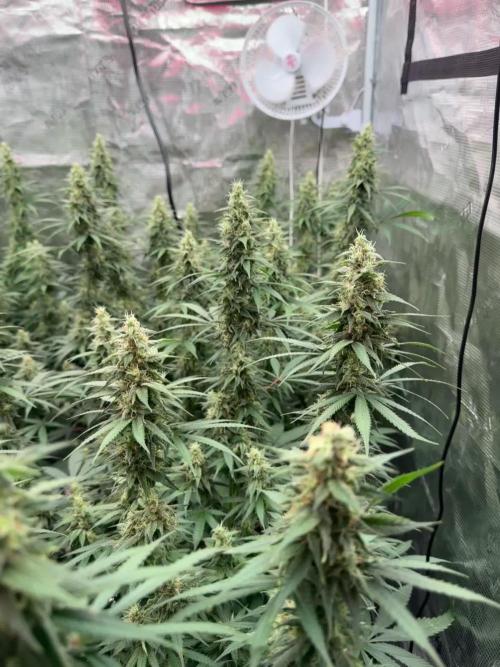
Jesus! Smells like pineapples and some sort of exotic juice. Amazing. Definitely coming from the purple afghani lineage side
They’re chugging along nicely, will switch to the 10/14 next week and see if that helps with the ripening phase.
Sticky as hell, just brushing against them will feel like glue on your skin. Sticky, frosty and stinky!

Likes
20
Share


@ukterpdoc
Follow
LST DONE TODAY NEARLY ALL OF THEM 2 JUST SEEM POINTLESS TO PULL AROUND BUT

Likes
10
Share


@WakeAndBake
Follow
I can't wait to try this big 😍 buds they smell nice and I'm pretty sure that the taste will be nice

Likes
2
Share


@Greenbean15
Follow
Send help... the Pineapple Express has taken over the tent... she’s massive at 44-45” tall currently... stretch slowed down but she’s past the light at this point and even light angled doesn’t hit the very top of the main colas just yet. (Back left of tent)
White widow looking great for the lollipopping method I used on her(front left of the tent)
White widow 2 growing well, got a nice dose of ferts this week based on her light coloration(front middle)
Berry white growing slowly still, tent is more suited for sativa dominant strains but this one gives the tent a bit more variety. (Middle back of tent)
Purple trainwreck 2 growing like a beast this go round, she’s taking up half the tent almost by herself and filling in a 1.5x2 foot area in nicely. (Far right of tent)
Purple trainwreck 1 bulking up extremely well, buds are nice and sticky, density is great so far on these buds. Hoping for another 14-20 days. Started her flush after giving her one more dose of nutes last week. Spotted first ambers on the trichomes... she’s only on day 45 of flower but the trichomes are already beginning to turn amber. I still suspect this strain to be semi-auto(has rudelaris genetics somewhere) and additional growing of this plant has simply increased this theory. The plant did have pistils when put into flower(18/6 lighting) but was a clone of a previous plant. She did reveg in 18/6 lighting and was cut from a flowering plant. I believe she had already transitioned into flowering since the plant had started opening pistils up again before being placed in 12/12. I believe she was a week or two into flower at the start of 12/12.

Likes
5
Share

@psychonaut420
Follow
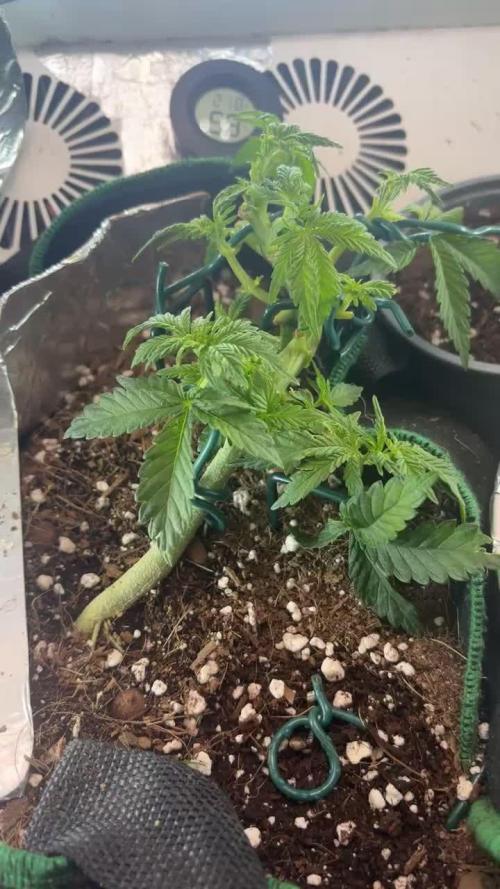
Decided ima leave her in vegataive stage till she recovers some more from the lst/hst been using cannacure to help with the mystery pests and deformed leaves have been seeing her start to regenerate and new growth is visible thinking week 7 or 8 till I switch her to 12/12 light schedule to flower bit streaching side branches and smaller side branches off the side branches are forming


Likes
15
Share


@Shizzlemanizzle
Follow
Day 43
Watered them with feeding but a bit less than in Chart. Ppm is still high but because I got bio-fertilizer I think it should be okay 👍🏽. I also set the light from stage 7 to stage 9 so far the plants seem to like it. Will give an update on day 45.
Day 50
Trying to fix the overfeeding. looked good
Day 53
Still a bit overfed. Reducing the feed. I’m trying water without minerals next and will see how it is going.

Likes
4
Share


@adam_pawloski87
Follow
@twenty20mendocino Ateam R&D Update! Let’s Go Week 3 , day 17 of Veg!! Another great week it’s been , the babies are building a looking super healthy ! Sometime this week we will eventually top em a few times so you don’t want to miss next week’s update ! Y’all have an amazing productive week , peace love a positive vibes to all y’all Cheers an Enjoy 😶🌫️💨💨💨💨🤙🏻 Let’s Go A-Team!!!

Likes
29
Share


@yvet_te
Follow
Getting reeeeal close! Milky and a couple amber trichomes. Going to harvest this week. Chopping down these trees for Christmas lol.

Likes
200
Share


@Ferenc
Follow
Day 58, 7th of November 2020:
The 6th day since the lamp switched to be 12/12.
I raised up the nutrition intake as it can be seen above only the BioBizz family 2ml/l and removed some LST because the plants remain in shape or just set a bit but nothing significant....
They look good and strech is on the way.....
These Original Sensible ones are having really nice smell :)
Nothing really to report there is crazy 2-3 weeks from now ;)


Likes
24
Share


@TerpTurtle
Follow
Took some clones, Transplanted into 25 gallon pots, Flipping to flower




Likes
237
Share


@1Right_Angle
Follow
Aug 29th
- week 8 for Machupi’s Lady
- week 6 for Russian Tzar Bomba
- week 5 for LSD
- week 4 for the rest (as mentioned, I prepped all plants a few days early for Flower; amendments n meals, week 4 is legit
- sending a bug photo (above) to the question people
- Plants fed nutrients as above; PurpsBerry fed OVERDRIVE instead of Rezin
Sept 4th
- last day of week 4 flower for most of the Plants. Except for Machupi’s Lady, LSD, Russian Tzar Bomba they are a few weeks ahead of schedule.
- machupi gets inspected this aft, it might be time…
- amending the soil of these remaining plants today
- both Congo #3 x Bangi Haze and the Russian Tzar Bomba get a visit tomorrow. Some DeFol, some Food, (they were soil amended earlier this week)
and some definite love and scrutiny are in store. It’ll end up on next weeks report, but thats whats scheduled.
- Russian Tzar Bomba is down to the final few… She gets spoiled tomo !!!


Likes
25
Share


@Spike_KCanG
Follow
A couple of problems arose with my two newest grows so I thoroughly checked the compost pot and looked if the worms were okay.
After harvesting the GDP, I wanted to throw out her soil. It had been used two runs and I have no place to reuse it outside. Did my best and sifted through the dirt looking for her worms. Found only six 😔. Four adults and two adolescents who were just getting their red color in.
This was not a good sign. The worms were obviously not reproducing enough to keep up a colony, and that was most likely due to the soil ph. Don't have the instrument to measure it, but as my ph meter was broke the past two weeks.... 😅😅 Time to check in on the Vermicompost and see if they are still 'grinding'.
-----------------------------------
April 17
Last picture I have of her soil structure.
-----------------------------------
April 23
Took that thing apart!!
It must have took 3 hours to sift through all the soil, rip up bark coco and what not. sift out the worms and keep them moist, but it was finished.
I don't know how many worms there are but it's a good handful. About the same amount I put in there in the beginning. There were also perhaps 20 or so eggs that caught my eye. These are good signs!
After the manhandled soil was put into an other pot, I drowned her with 12L of dechlorinated tapwater (thanks to Envi Chlorine Clear!!).
BioDown to 6.3 ph + 0.2g/L Microbes.
I don't know how many liters of water ran off, but that soil is definitely at 6.3 now...
.. and the sewage pipes might be clogged 😅😇😂
Let the pot set to dry, at a tilt. Changed position every 5 minutes or so, about 2 hours long. Hopefully all the excess water is out!
Introduced the Army of Wiggles to their new accommodations and said good night.
There are probably still remnants of BioBizz nutrients in the soil, and I'm too lazy to flush again. Won't start her on the new microbial food until I'm sure the Living take hold of this environment. Coming from a possible 7.5 down to 6.3ph might be an adjustment.
I'll check the topsoil in a week or so and see how the Living are getting along.
-----------------------------------
Thanks for stopping by 👊
See you with the next update!
Likes
33
Share


@TeknoRanger
Follow
🌱 Sour Apple⠀⠀⠀
🌸 flowering 9 weeks⠀⠀⠀⠀⠀⠀
💚 70% Indica, 30% Sativa⠀⠀⠀⠀⠀
💣up to 27% THC⠀⠀⠀⠀
👅Apple, lemon⠀⠀⠀
⚖️ 550g/m²⠀
Sour Apple was created by an intersection of the original Sour Diesel and a Pure Kush. It is an indica dominant hybrid with a combination of both indica and sativa effects. It has an delicious intense taste of sour apples and lemon and a gigantic potency.
The rockhard buds are covered in a thick layer of milky white trichomes and are packed with sweet resin. Users describe the high of the sour Apple as a strong mental shift, a uplifting head high that leaves you motivated and focused with a sense of overwhelming euphoria and social tendencies. This is followed by a slow fade into an intensely overwhelming couch-lock. Sour Apple sends her 27% of THC stright to your mind to kick you in other psychedelic spheres. We proudly present this unique goddess to all the growers in the world.
GROWING SOUR APPLE
When growing indoors it is a good idea using screen of green or sea of green methods. You can expect big yields of 500g or more per squae meter indoors, 700g per plant outdoors. The flowering time is 9-11 weeks. Indoors, Sour Apple is a vigorous grower with many side stems which can be trimmed to keep the plant in bounds. Indoors, the plants grow between 1,00-1,50 m depending on the introduction of the flowering phase, outdoors Sour Apple can reach four metres of hight.
MEDICAL USE
Because of its strong effects Sour Apple is an ideal strain for treating patients who suffer from conditions such as chronic stress or anxiety, chronic pain due to injury or illness, and sleep disorders (insomnia and sleep apnea). In low doses it is daytime suitable for medical applications, at higher doses, it is the ideal weed for medication at the evening.

Likes
3
Share


@High_Grade_Dadli
Follow
2 of dem from the 2nd set don't seem to catch dem self yet🤷🏾♂️ but the rest are taking off....those from the 1st set still ain't transplanted and they are pushing hard ties ain't holding dem back. 2 that where transplanted previously jus tryin to get dem a good size n send dem on a breeding project for the beginning of the
Most of new cutting have visible root

Likes
17
Share


@Allien_Grow
Follow
2 days ago moved in 18 L Smart pot ( final desdination) from 10 L Pot, after two days, I'll make LST for "new side branches" ✌️🥇
First Grow is Going well i guess ✌️✌️ Thanks Humboldt for the quality!
Girl's Power 🥇💪👩🌾🏻🌱💚

Likes
4
Share


@HowtoBubatz
Follow
My Strawberry Gorilla Automatic from Fast Buds is now in its third week of flowering, and I couldn’t be happier with how she’s progressing.
She looks incredibly healthy, with vibrant green leaves and strong branches. The stretch phase is nearly over, and she has developed a solid structure with a well-defined main cola.🌱
One of the most exciting changes this week is the first appearance of trichomes on the main bud. Under the light, they’re starting to sparkle, hinting at the resin production that’s about to take off.
The buds are forming nicely, and I can already smell a faint but promising aroma developing.
So far, she’s responding well to the nutrients and environment, with no signs of deficiencies or stress. If she keeps going at this pace, she’s going to be a real beast by harvest time.😊