Processing
Likes
Comments
Share
@
Follow
Likes
8
Share
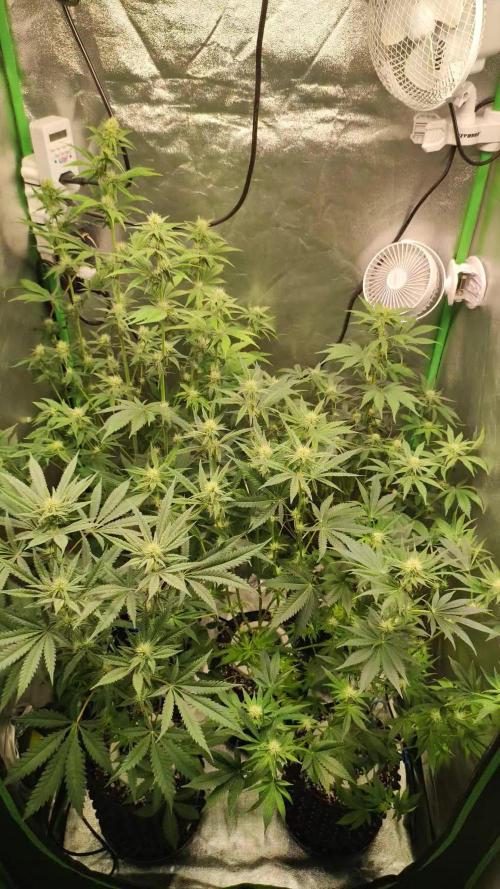
Skywalker OG — Legends of the 12/12 Galaxy Week 8 from seed | Week 3 Flower Another week in the jungle with our Skywalker OG girls growing under 12/12 from seed, and the room is looking healthy, vibrant, and full of life. For anyone joining the diary now, here is a quick recap of the journey so far. These plants were grown 12/12 directly from seed, a style I enjoy exploring because it allows the plant to express its structure naturally while keeping the cycle compact and efficient. After the early development stages and a recent defoliation session last week, the girls are now entering a beautiful phase where the canopy starts filling again. And as often happens after a good cleanup… it already looks like no defoliation ever happened. The Skywalkers are doing exactly what they do best: growing bushy, strong, and lush green. The canopy is filling fast, and by the looks of it, we may have another light defoliation session coming soon to maintain airflow and light penetration deeper into the plant. ⸻ Environmental Conditions At this stage the room is running slightly on the aggressive side, but with strong airflow and air exchange we are keeping things stable. Current room parameters Temperature: ~28°C Relative Humidity: ~70% (slowly reducing) Airflow: Strong circulation + active air exchange Yes, these numbers are slightly higher than the textbook recommendations, but the key here is air movement and gas exchange. With strong airflow inside the canopy and constant air renewal, the plants remain comfortable and actively transpiring. Still, over the coming weeks we will gradually reduce humidity and slightly lower temperature as the flowers begin to develop further. ⸻ Light Intensity PPFD in the room varies depending on plant size and position. Most of the Skywalker OG plants are receiving between: 800 – 1300 PPFD There is also one wild card in the room pushing 1800–2000 PPFD, but that plant belongs to another genetic experiment and not to the Skywalker OG group. For the Skywalkers, the current light intensity is pushing vigorous growth without visible stress, which is exactly what we want at this stage. ⸻ Feeding Strategy The girls are clearly eating well right now. Current nutrient EC: 2.4 Runoff EC (substrate): ~0.9 This tells us the plants are actively taking nutrients from the medium. As long as the plants continue eating and the runoff remains stable, the recipe stays the same. If feeding slows or runoff EC starts climbing, we adjust accordingly. For now, the system is balanced and working. ⸻ Current Nutrient Recipe The current feeding program includes: CalMag Pro Terra Bloom Power Buds Green Sensation Pure Zym Sugar Royal Vita race is available as a foliar spray, but at this stage of flowering I prefer not spraying the plants unless absolutely necessary. Keeping flowers dry helps avoid unnecessary risks. ⸻ Why We Transitioned From Power Roots to Power Buds Early in the cycle the focus was on root development, which is why we used Power Roots. Now that the plants are established and entering full flower development, the focus shifts toward flower initiation and early bud formation. This is where Power Buds comes into play. It helps stimulate the plant’s natural hormonal signals related to flower site formation and bud development, encouraging the plant to direct more energy toward the reproductive stage. ⸻ Why We Added Green Sensation Green Sensation is introduced at this stage to support: • bud development • terpene production • overall flower density • plant metabolism during bloom It acts as a metabolic booster, helping plants maintain energy while building flowers. The idea is not to push plants aggressively, but to support their natural flowering process. ⸻ Mixing Order — Why It Matters The order in which nutrients are mixed is often overlooked, but it is important for solution stability. The mixing process always starts with CalMag. CalMag is added first until the base EC reaches approximately 0.7. This establishes a stable mineral foundation for the rest of the solution. After that we add: 1️⃣ Base nutrient (Terra Bloom) 2️⃣ Flower additives 3️⃣ Enzymes and metabolic boosters Adding nutrients in the proper order helps prevent chemical precipitation and nutrient instability, keeping the solution balanced and fully available for the plant. In other words: Chemistry matters. ⸻ What to Expect Next Over the coming weeks we expect to see: • more vertical stretch slowing down • flower sites stacking • increased aroma development • stronger nutrient demand The main focus will be maintaining airflow, light penetration, and environmental balance as the canopy thickens. If the jungle keeps expanding at this pace, another selective defoliation may happen soon to keep the plants breathing comfortably. ⸻ Final Thoughts For now the room feels alive and balanced. The Skywalker OG girls are healthy, green, and moving steadily into the flowering phase. It is always a pleasure to watch the jungle slowly organize itself as the plants begin their real work. ⸻ Thank You A big thank you to everyone following this diary. To the OG supporters, the new growers, the curious readers, the critics, the silent observers, and the GrowDiaries community as a whole. Whether you comment often or simply watch quietly from the background, you are all part of this journey. And of course, gratitude to the partners supporting this work. The jungle keeps growing — one week at a time. 🌿 📡 Please stay tuned they can try and take us down but we never quit https://www.youtube.com/@DOGDOGTHEDOCTOR NEW 🙏 Thank you for your patience and continued support. FOR DISCOUNT CODES AND MORE JUST FOLLOW THE LINK https://website.beacons.ai/dogdoctorofficial 📲 Don’t forget to Subscribe and follow me on Instagram and YouTube @DogDoctorOfficial for exclusive content, real-time updates, and behind-the-scenes magic. We’ve got so much more coming, including transplanting and all the amazing techniques that go along with it. You won’t want to miss it. GrowDiaries Journal: https://growdiaries.com/grower/dogdoctorofficial Instagram: https://www.instagram.com/dogdoctorofficial/ YouTube: https://www.youtube.com/@dogdoctorofficial Deleted by Youtube Vimeo : https://vimeo.com/dogdoctorofficial Under construction stay tuned ⸻ Explore the Gear that Powers My Grow If you’re curious about the tech I’m using, check out these links: 🔆 Lighting & Environmental Control • Future of Grow — Advanced LED lighting technology https://www.futureofgrow.com/ DISCOUNT CODE: DOG20 • Lumiflora — Under-canopy LED lighting https://lumiflorade.com/ • TrollMaster — Environmental controllers and automation gear (past collaboration) ⸻ Genetics • Zamnesia Seeds — Genetics used in this project https://www.zamnesia.com/ ⸻ 🌱 Soil, Substrates, Boosters & Root Support • Plagron — Substrates, bio mixes, and supportive products https://plagron.com/en/ ⸻ 🎒 Storage, Curing & Preservation • Grove Bags — Curing and storage solutions https://grovebags.com/ ⸻ 📸 Photography Equipment & Tools (Not sponsors, but part of my creative toolkit) • Sony A6700 • Sony full-frame macro lens + few more • Stacking photography workflow - learning • iPhone (for behind-the-scenes shots) We’ve got much more coming as we move through the grow cycles. Trust me, you won’t want to miss the next steps, let’s push the boundaries of indoor horticulture together! As always, this is shared for educational purposes, aiming to spread understanding and appreciation for this plant. Let’s celebrate it responsibly and continue to learn and grow together. With true love comes happiness. Always believe in yourself, and always do things expecting nothing and with an open heart. Be a giver, and the universe will give back in ways you could never imagine. 💚 Growers love to all 💚 📸 P.S. – The Eye Behind the Lens All photos in this diary (for now — except for the ones showing the camera, which I took with an iPhone) are taken with a Sony A6700 paired with a Sony full-frame macro lens and a few more. Photography is part of the story — it’s how we share the fine textures, the glow, and the quiet details that words can’t always capture. I’ve also started experimenting with photo stacking — a technique where multiple images, each taken at a slightly different focus point, are layered together to create one perfectly sharp image from front to back. It’s not digital enhancement or AI; it’s pure photography — a way to reveal the plant’s beauty in microscopic depth, from trichome to petal. You’ll even see a few shots of "ghost me" capturing the shots — camera, lens, setup — because every grow deserves not just to be cultivated, but documented like art. FOR DISCOUNT CODES AND MORE JUST FOLLOW THE LINK https://website.beacons.ai/dogdoctorofficial NEW DISCORD - Official Server Invite Link : https://discord.gg/ksjAkA5T74
Likes
Comments
Share
@Budhunter
Follow
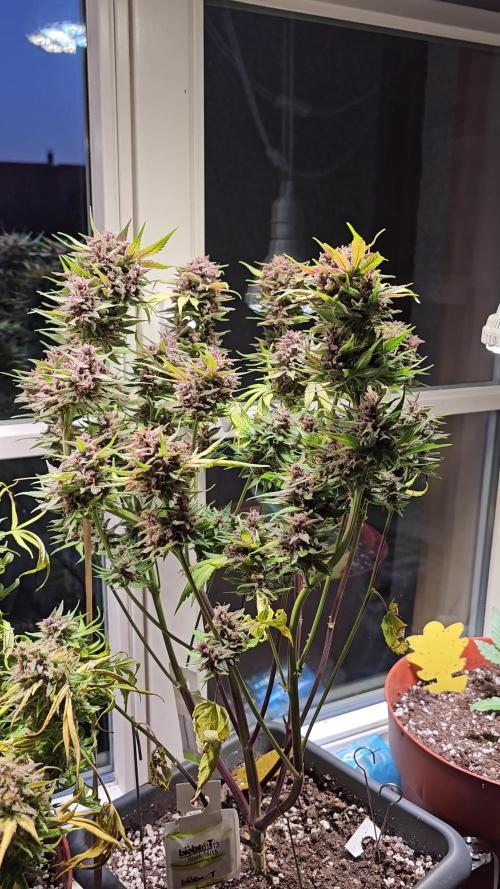
Week 2 Flowering - day 13 of flower - day 69 of life Lemon Tree is growing amazingly. I hope it doesn’t hit the light 🤣 We are facing a heatwave where I live plant is drinking nearly 6 liters of water each 2 days. I beg she is liking the heat 😅 I hope it will fat up and get that delicious taste and flavour 🤤 Let’s go 🙏🏼🙌🏼✨
Likes
8
Share
Venga familia que ya viene la cosecha de estas F.U.H. de Seedstockers, que ganas que tenia ya de darles tijeretazo. Que variedad , me encantó cultivarla , sacaron unas flores bien resinosas y alucinantes. Las flores aparte son muy pegajosas. a sido una genética con la que disfruté bastante, fue muy fácil cultivarla. Y a la vez es medio resistente, teniendo trips desde la 4/5 semana incontrolable salieron bastante bien. Agrobeta: https://www.agrobeta.com/agrobetatiendaonline/36-abonos-canamo Mars hydro: Code discount: Eldruida https://www.mars-hydro.com/ Hasta aquí es todo , espero que lo disfrutéis, buenos humos 💨💨.
Likes
8
Share
Tras 10 años cultivando en hidro con arlita (Dutch pot) nos pasamos al RDWC de fabricación propia. El sistema cuenta con 8 cubos para plantas y un deposito externo de almacenaje y trabajo, donde esta alojada la bomba de agua que impulsa a un enfriador y luego se reparte entre las macetas. Todo ese agua se recoge y vuelve al tanque por un tubo de 30mm de diámetro. El deposito cuenta con medidor continuo de EC y regulador PH con bomba dosificadora, Ambos de la marca Milwaukee El sistema cuenta con una bomba de aire de 8 salidas con piedras difusoras para cada una de las macetas. A ver que tal sale mi primer cultivo en este sistema. 💪
Likes
20
Share
@RakonGrow
Follow
Harter ritt diese Dame , alles viel zu schwer das es gleich umknickte beim defolieren . Hab mal ein getrockneten Bud aus der mitte genommen und Trichom analyse (Videos und Bilder) gemacht . ja viel klar wenig milchig und einige rot . Ergo , zuviel Licht an der Spitze (abstand zum licht viel zu gering) und im Boden zu kalt ist keine gute Kombination . dry + trimm after 4 Days result in 120g Cannabis F1 Wurlz price 1.08€ / 1g , Total Tent : 200W on 1m² with total 280g = 1.4g/W
Likes
10
Share
Vamos familia, actualizamos la segunda semana de floración de estas Lemon Cherry Runtz de FastBuds. La temperatura que estuvo entre los 24-26 grados y humedad dentro de los rangos correctos. En cuanto a las plantas las veo verde sano, estiraron bien y ensancharon bastante también. Se nota que los nutrientes de la marca Agrobeta cubre todas las necesidades de cada ejemplar. Las flores empezaron a formarse, por el momento todo correcto, os dejé también alguna novedad y un cambio en la sala, agradecer al equipo de Mars hydro por el nuevo TSW2000. (los últimos 5 años cultive solo con los leds de esta marca)los cuales probé, TS600, TS1000, TS3000, TSL2000. Llevaba 10 años trabajando en sodio y fue un salto de gigantes cambiar a los Leds, jamás me arrepentiré de ese cambio. - os dejo por aquí un CÓDIGO: Eldruida Descuento para la tienda de MARS HYDRO. https://www.mars-hydro.com Hasta aquí todo, Buenos humos 💨💨💨
Likes
21
Share
@GRow_M8s
Follow
- Drying for 3 days, the 2 airports-plants chopped and dried in the dehumidifier and the other 2 hanged upside down as they were. - Humidity -> 40-50% and temps -> 21-24C°.
Likes
4
Share
1st try at LST I ripped a huge fan leaf off. 2nd try I think I got it right. Other than that I just check water levels, PPM and pH, then adjust as needed. These girls are a little short and bushy...pause....so I backed the light off a bit and noticed them climbing. I also messed up and bought a wave maker to move water but didn't realize it'd rip my roots. This didn't matter because the roots 50x growth within a day or two. During mid week 3 I upgraded the air pump and air stones after failing with the wave maker. I upgrade to a 2"x4" air stone and a nice 20w 475gph air pump. I believe this helped with growth tremendously because the girls are taking off 🚀 Also, water change! With the water change I bumped the PPM up, plants haven't responded negatively but I think I will back it down to about 700-750 since they seem to be taking in more water (pH rising, PPM rising).
Likes
6
Share
@Moss420
Follow
Plants in the main tent are coming along well since correcting the light intensity and run-off ppm, the one on the left is filling out now, so is the one in the middle just much slower. Not sure if I will let that one cook longer or just pull it with the rest... will see how she looks in a week. The plant on the right I spread out to take up almost half of the tent (I didn't want the spindler taking up unnecessary space) - her nugs are real nice - some foxtails and bleaching on the taller ones but for the most part looking good. Plant on the left has filled out a lot more despite its weirder more "wiry" bud structure - does't look as nice as the good plants but definitely better than the spindly plant in the middle. Big Mumma is still killing it - wondering if its getting close to flush time for her as it looks like some of her tricomes are starting to brown...
Likes
19
Share
@Chi_K24
Follow
Alright folks! We are running on aprox Day30 into the grow! The tallest plant almost stands up 18+ inches! Shes growing good, I do have one plant that is being all funny and its showing me excessive signs of nutes. Added Calmag feeding @ 3mL/Gal and watered each plant about 2L each. Pots were dryish, been 8 days since the last watering. (i think its a bit too long for airpots, but plants seem to be ok) This week just adjusted some of the LST ties so the plant can stretch a bit. Also did a very light defoliation (removing dead leaves) and allot of tucking. I replaced the Vivosun Osc Fan due to a reddit post i saw of one being burnt to a crisp, replaced them with the HoneyWell turbo force fans. So far so good. Also moved one of the main fans to the side of the tent trying to setup a cross draft air circ. I have also noticed that the plant is now in pre-flowering and some very nice aromas coming from the plant. (green/Citrus/Sweet) notes. It quite pleasant to be in the tent! :)
Likes
11
Share
Lowered bloom nutrient to 16 mL per gallon and hydroplex to 4 mL per gallon. EC now 2.3
Likes
2
Share
Semaine 6 – Transition Floraison : Pistils et Défis Nutritionnels Jour 35–41 (17 avril – 23 mai) La semaine 6 marque officiellement l’entrée en floraison. Gorilla Cookies a ouvert le bal avec ses premiers pistils la semaine passée, suivie par Toof Decay. Les autres génétiques (Mephisto’s Wedding, Hubbabubbasmelloscope) montrent des signes avant-coureurs de floraison. L’environnement reste stable : 24–25°C, RH 62–64%, VPD 1.17–1.21 kPa, conditions proches de l’idéal. Nutrition et PPM Transition vers Bud Ignitor (1 ml/L) et maintien du GMB 1:1:1 à 1.5 ml/L. Cal/Mag augmenté à 2 ml/L. = ~570–610 ppm réels. Problèmes identifiés Carence en Cal/Mag sur Hubbabubbasmelloscope et Gorilla Cookies (chlorose interveinal, feuillage jaune). Traitement direct : 2–3 ml/L Cal/Mag appliqué par pot. Réaction positive après 3–4 jours. Observation critique : les 4 plants en AutoPot (AQUAValve 5.0) montrent 2x moins de vigueur que les 3 plants en bases AC Infinity avec les pots en tissus. Hypothèse : le système AQUAValve maintient le substrat trop humide en continu, tandis que les bases AC Infinity crée une meilleure oxygénation. Aussi, c'est seulement sur les auto pots que j'ai observé des carences, peut-être dû à un blocage nutritionnel. À évaluer pour les futures canopées. Lumière et PPFD IF500 (500w) + Mars Hydro 500w maintiennent 660–700 µmol. Pas de stress lumineux, feuillage bien coloré (sauf carence identifiée). Statut réservoir 47L, 15L pots coco 100%. Consommation d’eau stable. Changement complet prévu mi-floraison. Prochaine semaine : suivi de la carence corrigée, ajustement graduel du calendrier nutritionnel Advanced Nutrients pour la phase de développement floral. Tent: 4x8 Gorilla | AC Infinity 69 Pro + Pulse One | 20/4 | 7 plants autoflower | Jour 35 COMPTE RENDU TECHNIQUE — RUN INTÉRIEURE #1 2026 Problème AutoPot et Solution Date du diagnostic :24 mai 2026 (Jour 37) Système : AutoPot 4-pot, AQUAValve 5.0, réservoir 47L Génétiques affectées : Hubbabubbasmelloscope (1), Gorilla Cookies (1) PROBLÈME IDENTIFIÉ Symptômes observés - Décoloration inter-nervures (jaunissement) sur feuilles supérieures - Diagnostic initial : carence en calcium/magnésium (Cal/Mag) - Plantes : Hubbabubbasmelloscope #1 & #2, Gorilla Cookies Prélèvement d’eau au fond des pots AutoPot(jour 37) a révélé : - pH : 6.8(hors cible 5.8–6.2 pour coco) - Eau stagnante depuis activation AutoPot (jour 17 = 20 jours) Analyse de la stagnation 1. Timing AutoPot précoce→ Plantes jeunes, consommation faible 2. Eau restante dans les pots → Contact prolongé avec air dômes 3. Air dômes + coco neuve → Oxydation progressive, dérive pH vers alcalin 5. pH 6.8 en coco→ Blocage d’absorption de Cal/Mg (disponibilité réduite de 40–50%) Résultat : Symptômes de carence alors que les nutriments étaient présents = blocage nutritionnel, pas déficience réelle SOLUTION APPLIQUÉE Étape 1 : Correction immédiate (24 mai) - Prélèvement eau au fond des 4 pots AutoPot - Pompage progressif jusqu’à pH 5.8 - Volume pompé : ~1-2 L par pot (estimation) - Nouveau pH : 5.8 stabilisé Étape 2 : Traitement localisé (jours 20–24) - Application directe Cal/Mag : 2–3 ml/Lpar pot (non-réservoir) Top wathering - Appliqué sur : Hubbabubbasmelloscope Mephisto, Gorilla Cookies Fast Bud - Méthode : versement manuel aux racines - Fréquence : 2 applications espacées de 3–4 jours Étape 3 : Maintenance réservoir - PPM réservoir principal : maintenu 400–420 ppm (Hanna HI98301, scale 500) - Note calibration : Vrai PPM = lecture × 1.4 = ~560–588 ppm - Cal/Mag réservoir : maintenu à 2 ml/L - pH réservoir : vérification quotidienne post-correction Étape 4 : Surveillance continue - Routine hebdomadaire établie : Prélèvement fond pots, vérif pH - Objectif : Détecter remontée pH avant accumulation - Seuil intervention : pH 6.2 = pompage correctif RÉSULTATS & OBSERVATIONS Court terme (5–7 jours post-correction) - Pistillage accéléré visible sur Gorilla Cookies (confirmé jour 37) - Décoloration n’a pas progressé → blocage levé - Plants Mephisto’s Wedding : vigueur stable (10% affectés) - Toof Decay : vigueur stable (10% affectés) Comparaison système Observation importante : Plants en bases tissu AC Infinity (manual feed via bleed valve) montraient plus de vigueur que plants AutoPot - Raison probable : Cycle humide/sec régulier vs eau stationnaire - Implication : AutoPot inadapté pour timing de croissance lente initiale LEÇONS APPRISES Sur le système AutoPot 1. Activation tardive recommandée→ Jour 25–30, pas jour 17 1. Monitoring pH hebdo obligatoire → Coco + air dômes = dérive pH naturelle 1. Eau stagnante = problème→ Même avec nutriments corrects, pH alcalin = blocage Sur la coco neuve - Nécessite ajustement pH plus fréquent en début - Se stabilise après 3–4 semaines d’utilisation - Minéraux s’accumulent lentement → nettoyage hebdo bénéfique Choix système pour Run #3 AutoPot déclassé pour prochaines runs - Passage à : 8× bases AC Infinity + 8× flottes automatiques individuelles - Avantage : drainage régulier, pas de stagnation, PPM/pH plus stables - Setup réel : coco/Bio-Urbain, 5 gallons, 75L réservoir centralisé DONNÉES COMPLÈTES CONCLUSION Problème :Eau stagnante + pH alcalin = blocage nutritionnel (pas déficience) Solution : Correction pH + Cal/Mag localisé + routine hebdo de monitoring Statut : Résolu, plants en rétablissement, early flower progression normale Impact rendement : Minimal — correction avant dégâts sévères
Likes
27
Share
Day 56 Flowering: Hi growmies. I hope we are all well and still sane during this madness. Here we are at the harvest window for the Glueberry now and she is certainly up for it now. Her buds are stinky and sticky with the right amount of ripened pistils to cover around 60-70% of her structure. The next few days I will be using the microscope to keep watch on the trichromes for their sweet spot over the next few days. Shebhas been an easy grow but I wish I had stripped her lower scrub out early on in flower now. She didnt look recovered enough to strip out at the time but her leaf and scrub are filling the pots interiors so I need to keep on the air flow checking to avoid any budrot issues. Mimosa Lemon is everywhere!! She has been such a productive plant from the beginning. Her bud structures are very , very loose and I am dreading the dry and trim that will be awkward as to what to take off. while there are a lot of flowers , they are so loosely structured that it is very deceptive on appearances. Her Limonene is honking from her now and I can see her Lemon tag being so appropriate. The potency is becoming obvious by smell alone and her tacky feel at the slightest touch is a great sign too. I did quite a brutal defol and strip out very early in flower but she still threw so many mains out . This is one of the most productive flowering plants I have grown to date . I don't expect the yield to show this in totals but for bud growth and vigour , she has no rival so far. Another week for her at least but seeing the new pistils kicking out , it could be possibly 2 more. Let's see what the next few days bring for them. be safe and sane folks.
Likes
8
Share
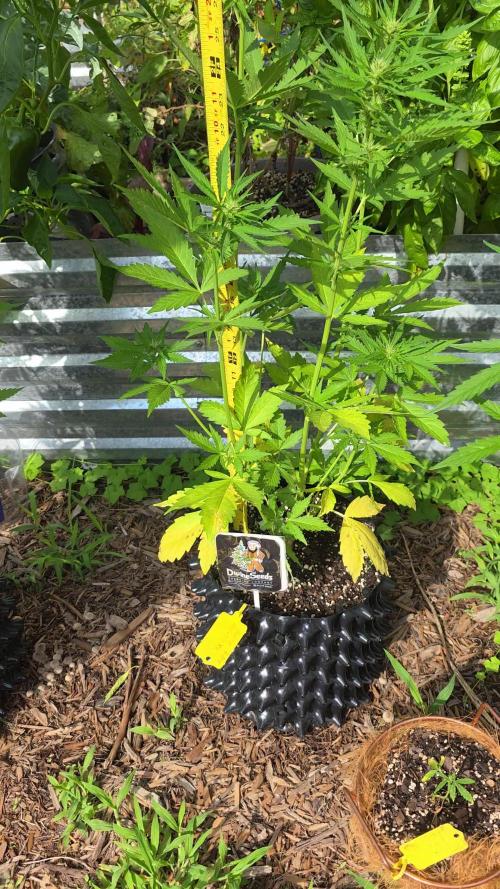
64 days after i planted her seed directly in a pot outside 😱the reaper came, i hung her upside down for 6days then cut her &put her on a net to dry some more While cutting I found some little catterpillars about 5 guess that were the eggs that I found on some of the plants last week.☺️ After a few days drying on the net i weighed it:53,6gr The taste is great I'm very happy with the result catterpillars included☺️
Likes
45
Share
Coming into week 4 transplanted into 5gal fabric pots. 3 plants are doing great really starting to hit there spurt. The one that topped over is starting to make a comeback. Only about 3 inches right now. Started adding 8-5-5 npk from local shop Started lst the little one just to see what happens Follow me on 📸ig @beantowngrow
Likes
2
Share
@TTerpz
Follow
Buds starting to form!!!! Day 2 of week 8 4/3/25 UPDATE: Flushed with Fox farm sledgehammer ph’d at 6.8 Soils were low at 5.8 4/5/25 update: fed with nutes 4/7/25: watered with plain water ph’d at 6.5 4/8/25: did a slight heavy defoliation to get ready for week 9!
Likes
24
Share
COLOMBIAN JACK by KANNABIA Week #15 Overall Week #4 Flower This week this lady is starting grow her buds hopefully the topping and trimming helps her focus her energy and she produces some great buds!! She's getting a nice aroma to her as well!! Stay Growing!! kannabia.com COLOMBIAN JACK