Likes
Comments
Share
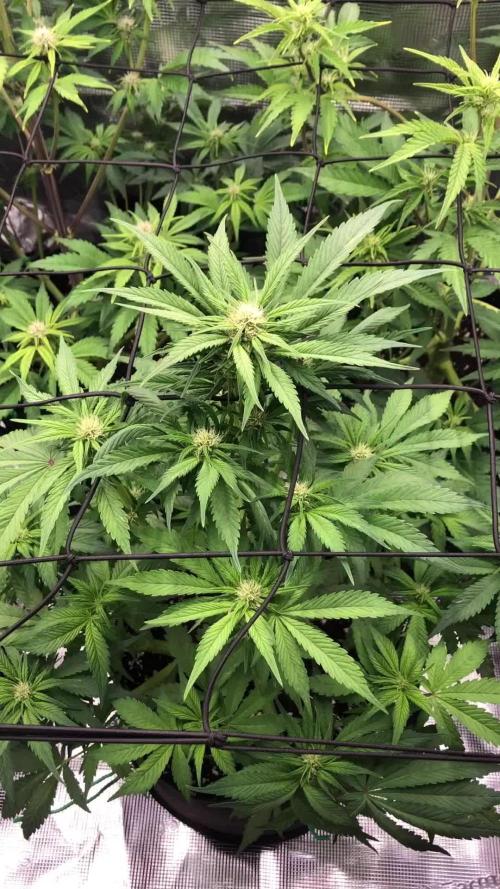
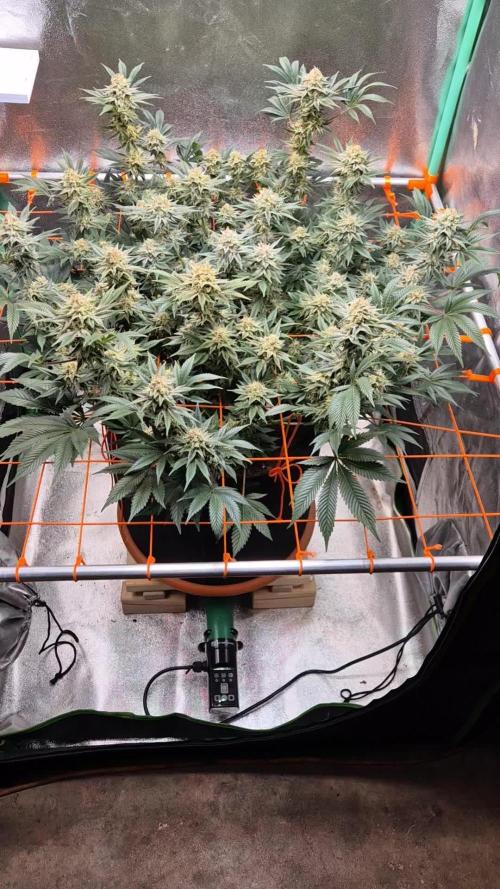
A little confusing but i put my other to pineapple and the Hulkberry in this tent and send it into flower 2 days ago (14.3.2023) I believe the plants might have a nitrogen deficency but we are on it. All in all lookin good Now we have 2x TSL 2000 (300W) = 600W/120cm*90cm Plants: 2x Big Hulkberry (one topped early, one topped late) 2x Critical Kush (second largest plants) 2x SuperSilverHaze ( pretty small both plants) 2x Pineapple Kush (Had it rough) 1x Pinapple Kush (very small plant, 2l fabric pot..)
Likes
21
Share
Before starting this harvest chapter, I want to apologize once again for not uploading everything directly into the official harvest and smoke review tabs. GrowDiaries has been struggling a little with very large uploads lately, and with the amount of photos, videos and information involved in this Ghost Train Haze harvest, I decided to split everything into multiple parts to make sure nothing gets lost or broken during upload. And honestly… this plant deserves the full story. So welcome to Part 1 of the Ghost Train Haze harvest. 🌱✨ Before talking about harvest itself, let’s do a quick recap of how we even arrived here. This was another 12/12-from-seed run. No traditional vegging. Very little manipulation. Minimal training. Mostly just letting the plants naturally express themselves while guiding environment, airflow, watering and light intensity carefully around them. Instead of forcing the plants into a shape, the goal here was to let them grow naturally into the PPFD and into the environment themselves. And wow… Ghost Train Haze really showed personality during this run. Most of the attention naturally went toward the massive main plant everybody keeps seeing in the photos — the giant colorful spear covered in fading reds, dark purples and swollen flowers — but there were multiple plants in this room, and in this harvest report we’ll finally start talking about all of them and the different directions they took after harvest. By Week 14, the room looked absolutely incredible. The fading on these plants became something special. Deep reds. Dark purples. Almost black tones in some areas. Golden fading leaves. Heavy trichome coverage. Color spreading through the sugar leaves and surrounding flower tissue. One of those harvests where the plants almost stop looking real. And underneath all those colors: extremely heavy flowers. Dense. Massive. Sharp aromas. Long spears everywhere. The branches became so heavy during late flower that support was absolutely necessary. Yo-yos were holding branches constantly, helping prevent collapse under the weight of the flowers. And the moment the supports came out during harvest… everything opened and leaned downward immediately under its own weight. That alone says a lot about the size and density of these flowers. There are photos in this report where I’m holding entire plants, and honestly, seeing them outside the tent really puts scale into perspective. It’s one of those plants that instantly makes you imagine how unbelievably huge she could become outdoors in native soil with unrestricted root space. Harvest day finally arrived, and from there the project split into two different paths. Some plants were harvested whole and hung for traditional drying. Others were fully broken down, every single flower removed from the branches, vacuum sealed into bags and immediately frozen for ice-water extraction work. And this is where things start becoming really interesting. Because this report is not only about harvesting flower. It’s also about exploring different post-harvest directions and understanding why growers process material differently depending on their goals. The flowers selected for traditional drying will continue their journey in Part 2, where we’ll focus much more deeply on drying conditions, moisture management, branch snapping, trimming and curing. But for now… let’s talk about the frozen material and ice-water extraction. ❄️ After harvesting, the flowers destined for washing were separated carefully and placed into vacuum bags before going into the freezer. Freezing fresh material helps preserve volatile compounds, terpene expression and trichome integrity while preparing the flowers for ice-water extraction. And no — this is not simply “throwing weed into ice.” There’s actual science and technique behind this process. Before washing, the frozen material is combined with ice and extremely cold water, ideally close to 0°C. The goal is to make the trichome heads brittle enough to detach cleanly while keeping unwanted plant contamination as low as possible. At the same time, the flowers need time to fully soak and rehydrate slightly before agitation starts. This helps reduce excessive breakage of plant material during washing. And then comes the wash itself. The bubble washer machine agitates the mixture gently, allowing trichome heads to separate naturally from the plant material and suspend inside the cold water. From there, the water passes through a series of filtration bags with different micron sizes. 25 micron. 45 micron. 73 micron. 90 micron. 120 micron. 160 micron. 220 micron. Each size captures different grades and sizes of resin heads and contaminants. We are not using every single bag configuration during this run, and we’ll go much deeper into grading, collection quality, drying and final results later in the series. But since this report already includes videos and photos of the process itself, I thought this was the perfect moment to explain what ice-water extraction actually is — and what it is not. This process is not about adding anything. It’s about separating what the plant already naturally created. Water. Ice. Agitation. Filtration. Patience. That’s it. And honestly… watching these resin-covered flowers moving inside ice water almost feels hypnotic. The harvest itself may be finished… but the real post-harvest journey is only beginning now. This report will continue in the next update very soon because there is simply too much material, too many photos and too much information to fit properly into a single upload without risking GrowDiaries crashing or losing content again. Part 2 will continue deeper into: the drying process, environmental control, trimming, flower handling, and the continuation of both post-harvest paths. And eventually, Part 3 will close the circle with curing, smoke review, flavors, extraction reflections, effects and final thoughts. As always, thank you to everybody following this journey. To Zamnesia for the genetics. To Plagron for the nutrition. To all the gear keeping this room alive day after day. To GrowDiaries itself. To the community. To the longtime followers and OGs. To the new people arriving every day. To the curious ones. To the silent supporters. To the lovers. To the skeptics. To the haters. To everyone who stopped by, even for a moment. Thank you for being here. 🌱 Part 2 coming very soon. ✨ 📡 DELETED @ 1K Please stay tuned.we never quit https://www.youtube.com/@TheDogDoctorOfficial NEW 🙏 Thank you for your patience and continued support. FOR DISCOUNT CODES AND MORE JUST FOLLOW THE LINK https://website.beacons.ai/dogdoctorofficial 📲 Don’t forget to Subscribe and follow me on Instagram and YouTube @DogDoctorOfficial for exclusive content, real-time updates, and behind-the-scenes magic. We’ve got so much more coming, including transplanting and all the amazing techniques that go along with it. You won’t want to miss it. GrowDiaries Journal: https://growdiaries.com/grower/dogdoctorofficial Instagram: https://www.instagram.com/dogdoctorofficial/ YouTube: https://www.youtube.com/@dogdoctorofficial Deleted by Youtube - https://www.youtube.com/@TheDogDoctorOfficial NEW Vimeo : https://vimeo.com/dogdoctorofficial Under construction stay tuned ⸻ Explore the Gear that Powers My Grow If you’re curious about the tech I’m using, check out these links: 🔆 Lighting & Environmental Control • Future of Grow — Advanced LED lighting technology https://www.futureofgrow.com/ DISCOUNT CODE: DOG20 • Lumiflora — Under-canopy LED lighting https://lumiflorade.com/ • TrollMaster — Environmental controllers and automation gear (past collaboration) ⸻ Genetics • Zamnesia Seeds — Genetics used in this project https://www.zamnesia.com/ ⸻ 🌱 Soil, Substrates, Boosters & Root Support • Plagron — Substrates, bio mixes, and supportive products https://plagron.com/en/ ⸻ 🎒 Storage, Curing & Preservation • Grove Bags — Curing and storage solutions https://grovebags.com/ ⸻ 📸 Photography Equipment & Tools (Not sponsors, but part of my creative toolkit) • Sony A6700 • Sony full-frame macro lens + few more • Stacking photography workflow - learning • iPhone (for behind-the-scenes shots) We’ve got much more coming as we move through the grow cycles. Trust me, you won’t want to miss the next steps, let’s push the boundaries of indoor horticulture together! As always, this is shared for educational purposes, aiming to spread understanding and appreciation for this plant. Let’s celebrate it responsibly and continue to learn and grow together. With true love comes happiness. Always believe in yourself, and always do things expecting nothing and with an open heart. Be a giver, and the universe will give back in ways you could never imagine. 💚 Growers love to all 💚 📸 P.S. – The Eye Behind the Lens All photos in this diary (for now — except for the ones showing the camera, which I took with an iPhone) are taken with a Sony A6700 paired with a Sony full-frame macro lens and a few more. Photography is part of the story — it’s how we share the fine textures, the glow, and the quiet details that words can’t always capture. I’ve also started experimenting with photo stacking — a technique where multiple images, each taken at a slightly different focus point, are layered together to create one perfectly sharp image from front to back. It’s not digital enhancement or AI; it’s pure photography — a way to reveal the plant’s beauty in microscopic depth, from trichome to petal. You’ll even see a few shots of "ghost me" capturing the shots — camera, lens, setup — because every grow deserves not just to be cultivated, but documented like art. FOR DISCOUNT CODES AND MORE JUST FOLLOW THE LINK https://website.beacons.ai/dogdoctorofficial NEW DISCORD - Official Server Invite Link : https://discord.gg/ksjAkA5T74
Likes
1
Share
Aug 13th transplant day Using Gai Greens Organics 4-4-4 with worm castings and mykos for root structure Aug 15th Start of LST
Likes
5
Share
. 🌱 : removed the center bud (13,7g wet) on day 84 to prevent bud rot an for a test smoke of course ;-) 💧 : 4l day 82, 4l day 84 💡 : Dli: 45 mol/m²/d 🤔 :
Likes
15
Share
I am surprised this girl has little to no smell.
Likes
Comments
Share
The plants are a bit sluggish. I overfed them with Cal-Mag and they stopped taking in other nutrients. Amnesia and Purple Queen had spots on their leaves and were pale. I watered them twice with Bio Grow pH 5.8 and they were back in action after 3 days. I have no complaints about the auto. They have started flowering.
Likes
1
Share
It was my bigger plant) Very good resistance during all season! I want to try it in soil) The buds have turned out dense and crystal with good taste)0
Likes
25
Share
Day 106 16/10/24 Wednesday (Start of week) No watering today. But picture and video update 📸 💚 to start the week off 🤩 - just noticed I missed out Auto Kabul... I'll add her tomorrow. Day 107 17/10/24 Thursday De-chlorinated tap water pH 6 with flawless finish today Day 108 18/10/24 Friday I have moved them!! Now in the cleaned down 1.2m x 80cm. Under 660w to finish this week off 💚 Day 109 19/10/24 Saturday De-chlorinated tap water with flawless finish pH 6. Only 300ml Day 110 20/10/24 Sunday Another de-chlorinated tap water with flawless finish pH 6. Day 111 21/10/24 Monday De-chlorinated tap water and flawless finish ph 6 again. Again 300ml. Will upload pictures and videos tonight ✌️💚 Day 112 22/10/24 Tuesday (End of Week) Edit: Changed my mind, doing one last flush with de-chlorinated tap water and flawless finish pH 6. She can finish the week then go dark🌑 mode wednesday morning 😁✌️
Likes
4
Share
@trigs
Follow
She is starting to stretch into flower here, and this is where my notes stopped on 7/14/2023 until 8/13/2023. Switched to 24hrs to try to get some more growth out of her. Absolutely explosive growth and I am in shock. Been training her down with those LST clips and gently bending branches/the main cola.
Likes
6
Share
Despite her flaws due to my own fault she was giving me a real cheese smell but now the wedding cake comes through and sweetens it up. She smells amazing
Likes
18
Share
I’ve got some curling going on. Have been trying to get temp humidity stable so I got a humidity controller and now run lights on timer 6 hrs off. Also my humidity gauge I used to set in the middle of the tent but I now put directly in the pot behind the plant and different readings. It’s one of those cheap humidity temp gauges that comes with led lights. Just need to get this curling thing down. 1 of the plants shows no curl so maybe it’s the fox farm soil is too hot. Or maybe that 1plant got better plant coverage, I’ve since adjusted the fan and may get another one.
Likes
16
Share
Primera semana de floración de las Blueberry Cheese de Zambeza seeds, como el resto están fantásticas, tienen un buen color, no están para nada enclenques, tienen una buena vegetación y buenos laterales. Al igual de 3 germinaron 3 pero una salió deforme y fue retirada así que de estas 2 aprovecharemos para valorar bien la variedad y hacernos a la idea de cómo es la genética en general. No paso nada niñas haya de lo habitual, todo va sobre ruedas. Agrobeta: https://www.agrobeta.com/agrobetatiendaonline/36-abonos-canamo Mars hydro: Code discount: EL420 https://www.mars-hydro.com/ Las maximas de temperatura no superan los 26 grados y las mínimas no bajan 19, así que no me puedo quejar. Los niveles de humedad también son los correctos van entre 50%/60%de humedad relativa. Por supuesto el Ph lo estamos dejando alrededor de 6. Hasta aquí es todo poco más la verdad, solo deciros que buenos humos 💨💨💨y nos vemos este finde en SPANNABIS.
Likes
8
Share
Week5 March 1st day 30 I transplanted one( the one with no broken branch) inti the 7gal today watered and did some LST I really hope it adapts to its new home I’ve never transplanted before I used extreme garden MYCOS hope it works also moved the light up a bit and plan on going 100% once I transplant the other one March 2nd transplanted the other one (broken branch one) my shop didn’t have 3.0😔😔😔😔😔😔😔 so i used DNC Great Lakes water only soil hopefully this works and I mixed some 3.0 I had left from the other pot cross fingers for nice transition to its new home March 5 been three days since transplant can’t really tell if they adapted to there new homes yet some sings of stretching since transplant I’ve never transplanted before and I’m not sure if they need water or not so imma chill let them go for couple more days then I’ll water scared to over water them right now since I transplanted them don’t want to over stress them other one in 3.0 seems little droopy to me compared to the one in Great Lakes but Great Lakes soil seems bit dry sooooo idk I’m going keep an eye on them
Likes
32
Share
@AsNoriu
Follow
Day 78. Only 5 left from first wave and 3 will fall at the begining of next week. Two biggest Mimosas looks like on week 5 or so and I hope to finish them before June. Such a difference in one strain ... But they will be huge ! Last Smoothie is still pumping, Purple punch started to fade, hope small Mimosa will join fade army too . Nothing to add, just pure water, watch out for nanners and bud rot daily ... I added Mars SP150 and SP3000 to the mix, now it's 1400W in dA hOuSe !!! ;))))) Happy Growing !!!
Likes
4
Share
🌸 Week 1 Flower – Super Silver Haze (Zamnesia Seeds) Grower: Dog Doctor Strain: Super Silver Haze Phenotypes: SSH #1 & SSH #2 Tent: 8x8 Shared Grow Space Lighting: Future Of Grow – Black Series 600W LED Control System: TrolMaster Hydro-X Watering: Hand Watering Pot Size: 11L Fabric Pots Medium: Super Soil with Aptus Holland amendments CO₂: ~700 ppm Day Temp: 31°C Night Temp: 25°C Humidity: 50% Soil Temp: 25°C Water pH: 6.1 Water EC: 0.6 Runoff EC: ~2.0 Water Temp: 18.5°C PPFD: 760–780 µmol/m²/s ⸻ 🌿 Early Flower Surprise Week 1 of flower… and I swear these girls are moving like they’re already in week 2. Pistils are out, floral sites are forming, and the stretch is starting with elegance. It’s possible they slipped into pre-flower during late veg without me catching it, they were so stable, compact, and lush that I might have missed the subtle signals. Either way, they’ve entered bloom with full confidence. Both phenos are incredibly similar in structure and size, making them a joy to manage. They’re compact yet big, stacking nodes tightly while still filling space. The leaf color is deep and uniform, the formation is textbook Haze, and the inner node spacing is perfectly balanced for light penetration. ⸻ 💧 Feed & Water Adjustments We’ve tweaked the recipe this week, retiring Aptus Start Booster and introducing Aptus Top Booster at 0.25 ml/L. Current Feed (per L): • Aptus Regulator – 0.15 ml • Aptus CalMag Boost – 0.25 ml • Aptus Top Booster – 0.25 ml The soil is already enriched with slow-release Aptus pellets, which explains why EC in solution is lower (0.6) while the medium’s own EC is holding steady at ~2.0. They’re drinking well, 1.5–2 L per day — with irrigation happening around 25% dryness in the pots. ⸻ 🌡️ Environmental Conditions & Upcoming Changes The room is running hotter than ideal at 31°C daytime, 25°C night. RH is stable at 50%. CO₂ sits comfortably at ~700 ppm. A dedicated AC unit is on its way and should be installed next week, which will help dial temperatures closer to the sweet spot for flowering. Soil temperature is at 25°C, supporting strong root activity, while PPFD at the canopy sits between 760–780 µmol/m²/s depending on plant position. We monitor these numbers carefully to keep photosynthesis at optimal efficiency without stressing the plants. ⸻ ⚙️ Why We Measure Everything • PPFD: Ensures plants receive the right light intensity for maximum photosynthetic activity during each stage. Too low = underpowered; too high = light stress. • Soil Dryness: Prevents both overwatering and underwatering, protecting root health and microbial balance in living soil. • Soil EC: Tells us nutrient availability inside the medium, helping us adjust feed without guessing. • CO₂: Works in harmony with light intensity and temperature to push growth rates without causing metabolic stress. ⸻ 👑 Remembering the Queen Super Silver Haze isn’t just another cultivar, she’s an old school heavyweight, a cup-winning legend with a long legacy. Growing her feels like growing history. There’s nostalgia here for me, a personal connection to the magic this plant has delivered over decades. My hope is to see her express that classic SSH magic, the electric haze high, the silver sheen on the colas, and the unmistakable aroma that once ruled the cups. ⸻ 📸 Studio Shots & Natural Growth Of course, I couldn’t resist taking them to the studio this week. Under the lens, they shine, vibrant greens, symmetrical structures, healthy posture. No training yet, letting them express themselves naturally as they settle into flower. Next week, I expect to see stronger pistil development, initial stacking, and perhaps the first hints of stretch acceleration. ⸻ 🔮 What’s Next? • AC unit installation for tighter climate control • Continued monitoring of PPFD and EC • Watching for early resin development • Tracking stretch patterns for possible support netting These queens are just starting to show what they’re capable of. The road to the crown begins here. 🌿👑 💚 Dog Doctor 📣 Thank you for following the Super Silver Haze journey! We share every step so growers can learn, compare, and enjoy the process. 📲 Don’t forget to Subscribe and follow me on Instagram and YouTube @DogDoctorOfficial for exclusive content, real-time updates, and behind-the-scenes magic. We’ve got so much more coming, including transplanting and all the amazing techniques that go along with it. You won’t want to miss it. • GrowDiaries Journal: https://growdiaries.com/grower/dogdoctorofficial • Instagram: https://www.instagram.com/dogdoctorofficial/ • YouTube: https://www.youtube.com/@dogdoctorofficial There’s a new series blooming—and it’s more than just plants. It’s about process, patience, and paying attention. ⸻ Explore the Gear that Powers My Grow If you’re curious about the tech I’m using, check out these links: • Genetics, gear, nutrients, and more – Zamnesia: https://www.zamnesia.com/ • Environmental control & automation – TrolMaster: https://www.trolmaster.eu/ • Advanced LED lighting – Future of Grow: https://www.futureofgrow.com/ • Root and growth nutrition – Aptus Holland: https://aptus-holland.com/ • Nutrient systems & boosters – Plagron: https://plagron.com/en/ • Soil & substrate excellence – PRO-MIX BX: https://www.pthorticulture.com/en-us/products/pro-mix-bx-mycorrhizae • Curing and storage – Grove Bags: https://grovebags.com/ ⸻ We’ve got much more coming as we move through the grow cycles. Trust me, you won’t want to miss the next steps, let’s push the boundaries of indoor horticulture together! As always, this is shared for educational purposes, aiming to spread understanding and appreciation for this plant. Let’s celebrate it responsibly and continue to learn and grow together. With true love comes happiness. Always believe in yourself, and always do things expecting nothing and with an open heart. Be a giver, and the universe will give back in ways you could never imagine. 💚 Growers love to all 💚
Likes
24
Share
Hey everyone 😊. Welcome to the last week 😃. She looks beautiful :-) Her buds, the smell, everything is just right 😍. I can't wait to try it for the first time in a few weeks 😄. It will be harvested in the next 2-3 days. There will also be another update during the drying process before the final harvest update comes 😃. I wish you lots of fun with the update, stay healthy and let it grow 😎 You can buy this Strain at : www.Zamnesia.com Type: Runtz ☝️🏼 Genetics: Zkittlez x Gelato 👍 Vega lamp: 2 x Todogrow Led Quantum Board 100 W 💡 Bloom Lamp : 2 x Todogrow Led Cxb 3590 COB 3500 K 205 W 💡💡☝️🏼 Soil : Canna Bio ☝️🏼 Nutrients : Canna Bio ☝️🏼🌱 Water: Osmosis water mixed with normal water (24 hours stale that the chlorine evaporates) to 0.2 EC. Add Cal / Mag to 0.4 Ec Ph with Organic Ph - to 6.0 - 6.3
Processing
Likes
20
Share
Hmm, now the peat and coco are looking quite different. The coco plants have thicker stems, but they also look like they could still use a bit higher EC. On day 14 I watered the peat plants and did some defoliating, that's what you can see in the pictures. There's not a whole lot to see yet, but I really like this plant already. I'm having positive experience with coco. the peat plants got 1.7 EC water with 2.2-2.7 EC runoff (1100-1350 ppm), 6,5 ph The coco plants got 2.0 EC water with 1.4-1.7 EC runoff (700-850 ppm), 5.5 ph as per the recommendation by plagron
Likes
76
Share
@BB_UK
Follow
Took a while to get there but OMG little note quick! So I started her in a 1 litre pot and stuck her on top of a 1.5L Pepsi bottle with the top chopped off! And she yielded heavily for that amount of soil a whopping! 224.63 wet weight so can’t wait to see what she holds dry because them buds were like boulders! So dense! I will be back to document her dry weight and then a couple of weeks later with the update on the smoke report! But I know it’s going to be so loud! She has deep pungent aromas like gassy and sweet! She’s going to be a powerhouse! She was a little over as today a banana developed but that just tells me “well done” timing just right! She’s a little long for my taste of auto but I do suggest anyone grow her she’s amazing! In the end!