


Likes
Comments
Share


@KronicAquaponic
Follow
So, after seeing the N deficiency and feeding it some protein, I noticed after all this time there were no new roots forming in the sencond zone in the hydroton, so I thought maybe I forgot to drill holes to let the roots through. Turns out when I was moving things around, only the very bottom of the basket was in the water, so the hydroton was mostly dry and the roots were drying up before getting to the water. So this week I made a new carrier for the pot to sit further down in the water and this should remedy future N deficiency as the roots will be getting the nutes from the aquaponic system. Plant still looks great, started LST this week to help fill the width of the screen. Will be moving into the tent after my widow gets harvested.

Likes
14
Share


@Christmas
Follow
Big thanks to @James from the Royal Queen Seeds team for this stuff! Definitely one of my favorite strains.

Likes
27
Share


@valiotoro
Follow
Pheno 1 dark purple : On the nose, it reveals a sharp burst of fresh lemon, layered with a powerful eucalyptus aroma that’s both invigorating and camphorous. A truly refreshing and vibrant terpene profile😈🍋
Pheno 2 Green : this one is a real surprise! If I close my eyes, it’s like Nutella! It’s as if you’ve just walked into a kitchen where hazelnuts have been freshly roasted 🤤🌰
Pheno 3 light purple : It’s a mix of the first two with a hint of amarena cherry at the end🍒🍧

Likes
21
Share


@cadur
Follow
Doing the LST thing. Need to get branches further apart than I did for my last grow..always nervous of snapping a branch!


Likes
18
Share


@TheCannaProphet
Follow
~ FASTBUDS TESTER #2206 ~
Well friends, here we go on another 'canna-venture' together!
The grow room has had a complete remodel and some upgrades done to it including brand spanking new 4x8 and 4x4 tents and a Trolmaster Hydro X controller along with a new Control Panel.
This tester strain is one of six tester strains that FastBuds has graciously provided me with and I'm looking forward to seeing what this girl has to offer when she's grown to her full potential!
One drawback of 'testers' is I have little to no information on it other than its number and that it's an autoflower... 🤪 But, it's ALWAYS a blast growing them for me because not knowing a lot allows me to just concentrate on the essentials: Light, Environment, Water, Nutrients and possibly a bit of LST... not complicated, just basics like keeping a constant temperature and RH in the tent at a level that gives a good VPD, watering when almost dry and maintaining proper light levels according to their stage of growth.
____________________________________________________________________________________________________________________________________________________________________________________________________________________________________________________________________________________________________________________________________________________________________________________________________________________________________________________
~THE SETUP~
~Initially seeds were lightly scuffed, then soaked for 3 hours in 78℉ distilled water after which they were transferred to moist paper towels laid out in a Jiffy Pellet plastic starter tray with lid. Underneath the tray was placed a Vivosun Heat Mat with Controller that was set to 78℉ where they stayed until their tap roots emerged.
~Planted into Jiffy Peat Pellets that were hydrated with distilled water warmed to 78℉ with a 7.0 ph.
~Once roots emerge from the Jiffy Pellet they're transferred to their fabric pots.
~Grown 100% organic in a 4g Gronest fabric pot and a 3g fabric pot by Wraxly filled with Mother Earth 70/30 Coco/Perlite medium and initially amended with Dr. Earth 4-4-4 / Earthworm Castings / Dr. Earth Flower Girl 3-9-4 and Coast of Maine Stonington Blend Organic Plant Food 5-2-4.
~19/5 light cycle for the entire run with supplemental UVA added during flower. Lights are controlled by a Trolmaster Hydro X controller set for a 15min Sunrise/Sunset simulation.
~Top dressing every 3-4 weeks with slow release dry amendments and Earthworm castings.
~Straight water ph'd @ 6.2-6.8 when needed and bi-weekly Compost Tea's.
____________________________________________________________________________________________________________________________________________________________________________________________________________________________________________________________________________________________________________________________________________________________________________________________________________________________________________________
Weekly Updates:
12/1- I soaked both seeds for 3 hours in 78℉ distilled water after which they were transferred to moist paper towels laid out in a Jiffy Pellet plastic starter tray with lid. Underneath the tray was placed a Vivosun Heat Mat with Controller that was set to 78℉ where they stayed until their tap roots emerged roughly 24 hours later.
12/3- Today their tap roots were about 1/2 to 3/4" so at 11 am I transferred them into Jiffy Peat Pellets that were hydrated with distilled water warmed to 78℉ with a 7.0 ph using a tine off of a plastic fork as a 'mini trowel' to make a hole in the pellet and to gently cover the tap root, leaving only the seed head slightly exposed. This method accomplishes most of the initial work the seed has to do by eliminating having to orientate itself, push it's root down and head up. By 10pm the #1 seed had her cotyledon leaves opened and the #2 isn't far behind!
12/5- Well this is Day ONE for the #2 FBT #2206 and the second day for her sister! I'll keep them in the covered/heated Jiffy tray until I see their roots beginning to emerge from the peat pellet, then I'll transfer them gently into their respective fabric pots. The #1 will be going into the 4g Gronest pot from FastBuds and the #2 will reside in a 3g pot by Wraxly, which I'm trying out for the first time.
12/7- Yesterday I checked the #1 tester and she had roots starting to emerge from her pellet so I transferred her into her 4g Gronest pot. After making a hole in the medium for the peat pellet, I coated the entire surface with Xtreme Gardening Mycos then placed the pellet in the hole and planted her in. Lastly, I watered her in with about 4oz of de-chlorinated water with 3ml/g of FishShit added which was then ph'd to 6.4 @ 75℉ after which I placed a humidome over her for 24hrs to ensure that the humidity stays constant.
The #2 tester is doing great and I'm confident that she should be ready to transfer into her fabric pot in the next couple of days!
😎💚 Thank you for checking out my passion in life! Please visit as often as you wish and I hope you enjoy this journey as much as I know I will! Grow Strong! 💪😎🤙
Likes
14
Share


@Wenz004
Follow
So week 10 starting
No 1 (Titan F1)...only synthetic grow...started 2 weeks later in separate tent due to some probs...now see week 7
currently feeding eith the complete hesi starter pack and since one week additionally with Plagron sugar royal, green sensation and power buds
No 2 (Cookies gelato) in living soil from florganics...until week 8 only feeded with water....since week 9 additionaly with the three Plagron products as menioned af No1
No 3 (Titan F1) also pure living soil plus water experiment but due to weakness also added the same three Plagron products since middle of week 8
No 4 (Cookies gelato) organic soil light mix from biobizz plus 30% coco...feeded with the biobizz nutrients series...nothing else
Tent with No 2, No 3 and No 4 is small...60 x 60 cm ( 2x2)...my goal is 200 gram dry
Tent with No 1 is only 40 x 40 cm...here I have expectation 50 - 100 gram dry...let see
Processing
Likes
14
Share


@ParadiseGrower
Follow
Enjoy the new photo light, very realistic colour💪
🍭This little girl have now godzilla in her main branch . Has developed very dense and sticky flowers.I start to watering her for flush out fertilizer. ;-)🍭
Likes
Comments
Share

@mihixd
Follow
108 grams DRY WEIGHT. The option for dry weight isnt there weirdly enough.
Nice dense nuggies, the scrog in last few weeks definitely helped the plant carry all that weight.
Personally don't like the effect but I grow for fun, my moms the one smoking it😂. She uses it for sleep and CG is perfect for that, got me yawning at 9pm
Likes
5
Share


@Nemessis
Follow
1 of the glookies had fallen off, lack of ventilation I think. She feels better since I moved the fan and the air circulates better. First fertilizer intake for my babies this week 🤗


Likes
14
Share


@Phurlax
Follow
Took 2 days to germinate
Day 1: planted in soil 1/4 inch deep or so.
Day 2: Had to replant because the root was growing horizontally just below the surface after doing so the stem turned a purplish color.
Day 3: starting 3rd set of leafs also set out water to raise humidity in the tent.
Day 4: looming good nothing new
Day 5: looking good regularly misting, definitely growing but I think she's focusing on her roots.
Day 6: looking great going to give her a good watering probably about .75 gallon
Likes
11
Share


@Young_agronomist
Follow
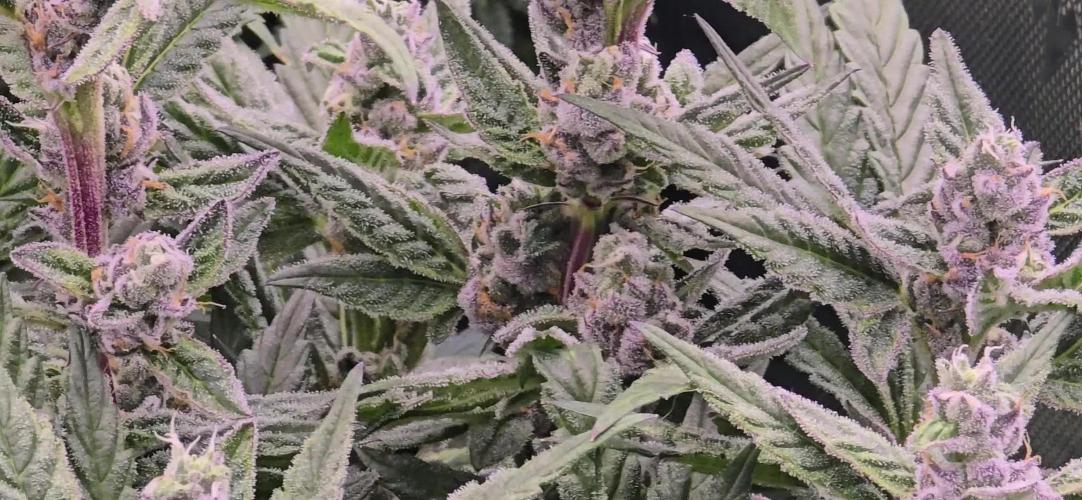
27.07.23-отлично реагирует на тренировки и ростки очень пушистым кустом !
Увеличиваю ппм до 850 и пш 6.0
Растение очень счастливо .
Провожу флаш каждые три дня во избежание засола .
Плохо переносит большие обьемы еды
Эта девочка продолжает почти и очень кустится ! Получает 900 ппм и 6 пш.
30.07.23 -срезал пару больших листьев и освободил пространство для новых побегов и лучшей аэрации . Стресса девочка не испытала
31.07.23-росте очень быстро , акукуратно снимаю большое листья 🍁
Выгладит здорово (только очень кустистый )




Likes
3
Share


@m99smith
Follow
Week 8 for Mango Merengue, week 7 for Afghan Hash, and week 6 for Sour Diesel.
I'm taking down Pheno #1 of the Mango Merengue today, it was faster to mature then Pheno #2 & #3. Pheno #2 & #3 have around 1-2 weeks left of flower.
Mango Merengue - Small to Medium buds, strong Gassy/Melon smell, and packed with trichomes, average flowering time 8-9 weeks.
Afghan Hash Plant- Medium buds, packed with trichomes, and has a Sweet/Earty smell. Average flowering time 8-9 weeks.
Sour Diesel - Medium to Large buds, also packed with trichomes, really close bud formation, smells Gassy/Sweet. Average flowering time 10 weeks.


Likes
24
Share


@BillMonroe
Follow
==== UPDATE 31-10-18 ====
Weight after 4 weeks: 137 grams from one plant! I am so happy :). 123 grams of grade A bud, 14 grams of great quality larf.
My last grow had about 130 grams from 4 plants. Only two thirds of it was good bud. Autoflowers, never again!
This plant never got bigger than the 70*70 tent it grew up in, so I used 0.5m² .
315w CMH started during week 3 of flower.
Thanks again to Zambeza for a monster yielding plant.
========================
It's been quite a ride. The plant was harvested at the end of week 11.
This plant survived spider mites, maybe thanks to the predatory mites, and environment actions.
A slow start in the first few weeks but it turned out quite beautiful. I will update with weights later... if you are interested, leave a comment and I will notify
Thank you very much for following my diary, and for all the kind support and advice.
The "flavor report" is based off some trim hash, which was truly an A
smoke. I can't recommend Critical XXL enough! Thanks to Zambeza for this great experience. I will probably never grow autoflowers again.
My next diary, flowering 100% under CMH, will start soon!
00

Likes
1
Share

@Elron_mc_Bong
Follow
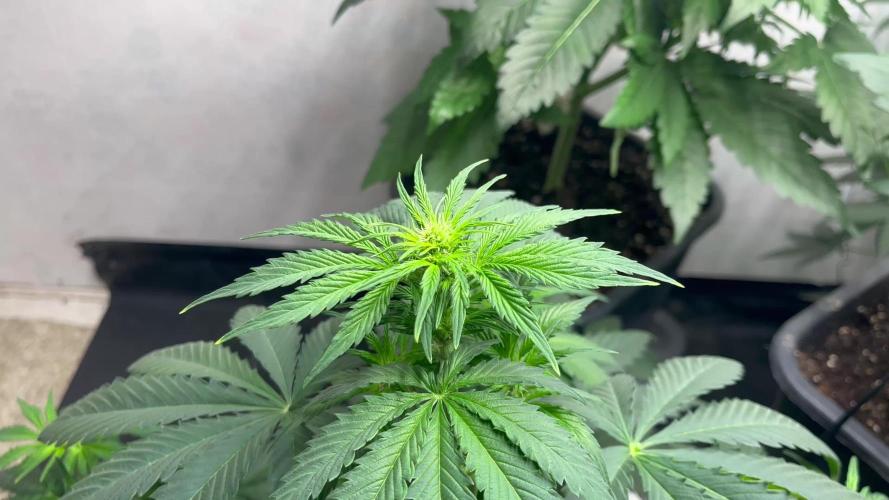
Woche 6 – Stretch des Todes & Kontrolle behalten
Diese Woche hatte es richtig in sich. Der Stretch ist komplett eskaliert – vor allem bei der Blueberry und der GMO. Beide haben in nur einer Woche rund +40 cm hingelegt. Direkt dahinter kommt die Hyperion, die ebenfalls ordentlich Gas gibt.
Runtz und Purple Punch bleiben dagegen ihrem Stil treu: kompakt, buschig und kontrollierbar – perfekter Kontrast im Raum.
Trotz des starken Wachstums konnte ich das Canopy sauber ausgleichen. Alle Pflanzen stehen jetzt auf einer Höhe und laufen stabil bei etwa 40 cm Abstand zur Lampe, was aktuell perfekt funktioniert.
Beim Gießen zeigen sich klare Unterschiede:
Die Blueberry ist weiterhin extrem durstig und zieht den Topf schnell leer, während Purple Punch deutlich weniger braucht. Das Handling der 15L Töpfe läuft inzwischen richtig präzise.
Untenrum habe ich weiter aufgeräumt, damit die Energie gezielt in die Tops geht. Die Struktur ist jetzt schön luftig und fokussiert auf die Hauptbuds.
👉 Fazit:
Massiver Stretch, saubere Kontrolle und eine sehr homogene Fläche – genau so soll’s in der Blüte aussehen
