
Likes
Comments
Share


@Wrongholn519
Follow
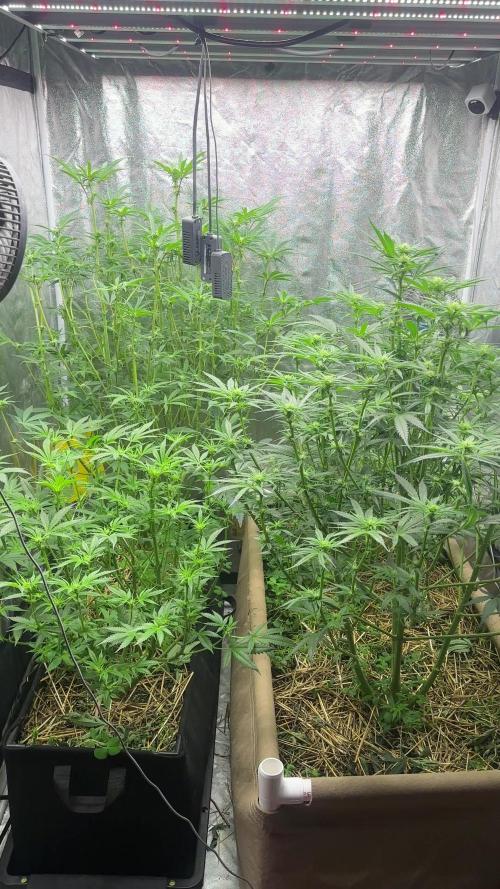
I've started decreasing my CO2 dosage as I have reduced my nitrogen load.
I'm going to slowly keep removing any unnecessary vegetation.
I have turned off my space heater at night to get colder temperatures.
I started feeding extremely heroic doses of calmag (Rooted Leaf 0-0-0 CalMag plus)
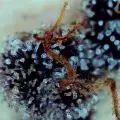
These buds are extreeeemely dense and covered in trichomes with a really gassy smell. Some pistils are starting to change colour to a deep amber.

Likes
9
Share


@SlickCityOrganics
Follow
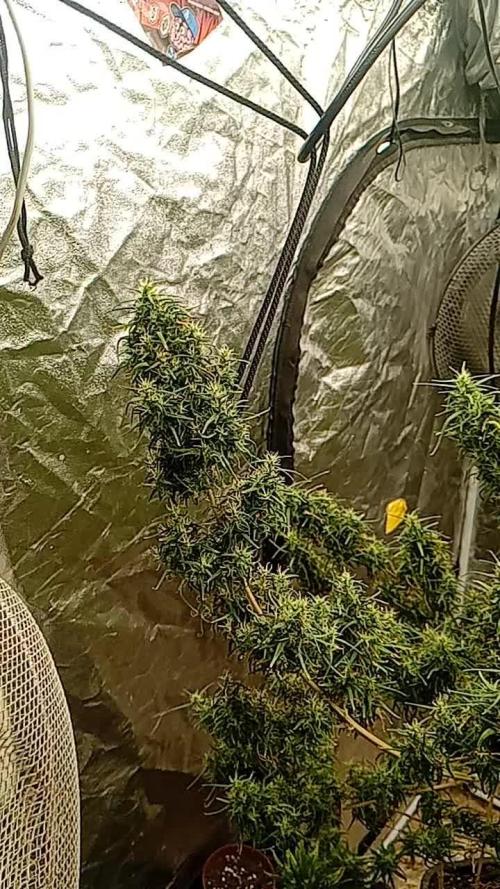
Black Strap and Peach Crescendo getting close. I see they will get cut way before the Fat Bastard. Fat Bastard must have a long flowering period. But branch structure is thick. I will get a heavy yield from it. Peach Crescendo has so much frost on it. Ethos fkn rocks! Black Strap smells like baked cookies and gas.


Likes
4
Share


@TheIceCreamParlour
Follow
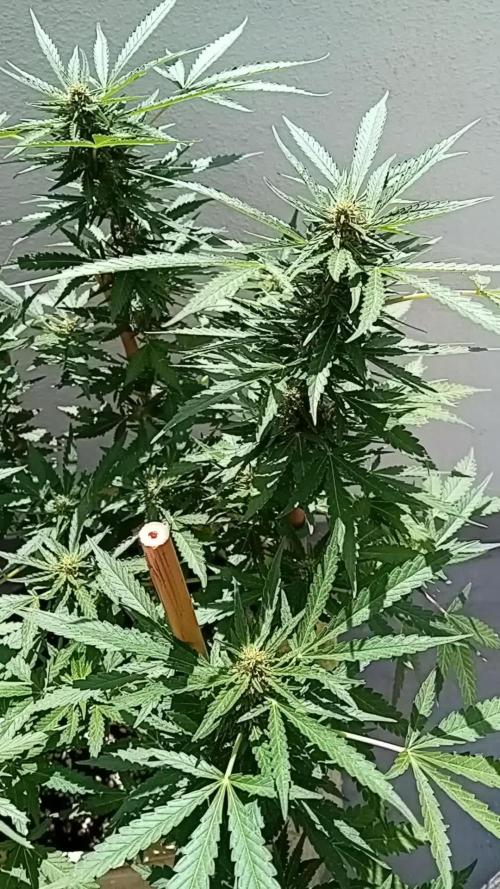
1 month and counting for my little Cream Cookies. Shes flying along considering i havent topped her. I've just plucked 2 or 3 of the biggest and oldest fan leaves off so that new growth can have it's fair share of light. Other than that shes powering along. Drinking 6 litres of water every 3rd day. A little over fed as shes just getting the same nutes as my other plants in the tent.
I'm letting her ride out and not putting too much effort into her. Mainly because I'm focusing on my other plants this time round but also because I'd like to see what she can do without any special treatment. I'm hoping for another weeks veg and then flower to keep on schedule with the Pinapple and Six Shooters she is sharing the tent with.

Likes
18
Share


@Leonweed10
Follow
Todas an alcanzado buena altura entre 35 a 40 cms..muy parejas..sera la última vista de ellas en crecimiento.
Mañana se cambiará el fotoperiodo y empezaremos la floración.

Likes
6
Share


@Aleks555
Follow
42FAST Buds - Gorilla Cookies Auto - 67 days
The buds are getting bigger and bigger, coated with sugary trichomes. While the trichomes are still clear, we couldn’t resist trying a small bud from the lower branches, and we’re pleased with the results! But it’s still a bit early, so we’ll wait for full maturity before harvesting.
Exciting times ahead—stay tuned for more updates!
Likes
8
Share
@Growverse420
Follow
Another week of flower down. The babies have really been stretching. Hopefully the stretch is slowing and they’ll start stacking soon, because they have been CLIMBING toward that light. Hahaha Happy growing, everyone!

Likes
92
Share


@Roberts
Follow
Apple Fritter is off and going now. Is a little behind the others. She is growing good, and roots forming nicely. She is in a New Level Hydro 5 gallon bucket, and under the Spider Farmer SE5000 at 80 percent. She will be topped in a few days from now. Thank you Spider Farmer, New Level hydro, and Amsterdam Marijuana seeds AMS. 💪❄️🌱🤜🤛
https://amsterdammarijuanaseeds.com
SE5000
https://amzn.to/3qFpAML
Spider Farmer Official Website Links:
US&Worldwide: https://www.spider-farmer.com
UK: https://spiderfarmer.co.uk
CA: https://spiderfarmer.ca
EU: https://spiderfarmer.eu
AU: https://spiderfarmer.com.au
Coupon Code: saveurcash
Thank you grow diaries community for the 👇likes👇, follows, comments, and subscriptions on my YouTube channel👇. ❄️🌱🍻 Happy Growing 🌱🌱🌱
https://youtube.com/channel/UCAhN7yRzWLpcaRHhMIQ7X4g
www.newlevelhydro.com
www.hygrozyme.com

Likes
8
Share


@johnnybuds
Follow
Las plantas asimilaron bien el calcio y siguieron adelante, se realizó un trasplante en el día 20, de 300cc a 5lts airpot con solo coco, ahora solo queda esperar a empezar el lst💪💪💪

Likes
18
Share


@lino06000
Follow
06/08/22 1 er jour de la 7eme semaine hormis la chaleur tout va bien, elle font en moyenne entre 80 et 100 cm et consomme 500ml jour sachant que je met le même programme de nutrition a tous le monde.la weedding glue étant la plus homogène elle ont le même gabarit et poussent a l'identique jolie a voir maintenant qu'elle se densifie.la weeding cheesse cake quand a elle sur les 3 une a eu un peu de mal a démarre la floraison mais elle et repartis comme Usan Bolt .sinon rien a redire ma préférée. maintenant la gorilla cookie que dire a part du bien costaud ,belle ,résistante, pas haute, pour l'instant cet elle qui a les plus beau et gros fruits hâte de voir la semaine défile.😁
09/08/22
je viens de passer a l'eau pour rincer je préfère lui mettre une semaine de plus de rinçage que ce que l'on ma préconiser, malgré les grosses grosses chaleur elles ont bien tenus merci @fastbud.
elles sont vraiment résistantes car j ai eu des pousser de quelques heures a 39% malgré cela elles évoluent bien la défoliation c'est faite plus naturellement que par moi la cheese cake et formidable pour les petits espace car peu de végétale .l'odeur commence a être plutôt forte et je trouve que cela fais une jolie foret en vu général, pour une 465w je trouve que ma lumatek zeus 465 pro 2.9 m'offre une belle culture pour l'instant la fin approche doucement.
12/08/22 demain derniers jours de la 7 em semaines elles ont pris des couleurs et un coup de chaud 40% hier soir je m'estime vraiment chanceux de ce que sa donne pour ma 1 er culture .
la semaine prochaine il pleut les température baisse magnifique


Likes
2
Share

@MaltaHerbman
Follow
Day 1 of the 4th week in flowering time to start pk 13 14.
So far had spray neem oil 2x a week at night and happy with results plants looks enjoy the plagron nutrients and our sun.

Likes
Comments
Share


@Cannussy
Follow
6/21/25
She started week 3 and was ready to top for the first time. Her stem reached over 3mm and look at those big ass fan leaves of her. Holy molly. Never going back to soil. For everyone who wants to try dwc or hydro, do it bc there is nothing to fear! Ph is stable between 5.7 -5.9 I only intervene when it would suddenly drop under or over by a lot. Otherwise I just go by how the plants are looking and growing.
6/23/25
She is recovering very well. Starting to smell a little already, thats when you know its gonna be some good stuff. If I dont fuck up that is 🙃
Likes
Comments
Share


@DawgPoundFarms
Follow
Nice color changes on MF Roy #4 this pheno has been interesting from start to finish! Excited to see what the upcoming harvest and dry/cure has in store!


Likes
24
Share


@OGOZHigh
Follow
Update : 09.06
Da das Wetter hier im Norden nicht so mit spielt, machen sie langsam Fortschritte.
Wir machen das beste Draus ✌️
Likes
10
Share


@Drtomb
Follow
Started the final week of nutrients. Then ill be switching to flawless finish and pure water the last week.
The Inzanes have a pheno that is just oozing thc glands.
Likes
4
Share


@GREENPHOENIX6262
Follow
12/30 - Transplant will be completed by the end of the day - still running high humidity and high temps - Increased Myco/Silica/Nitro feeds - Heavy LST coming week . 😎😎😎😎😎😎😎😎
01/01 - First update of the year - if you are reading this, peace and prosperity to you and yours - Did not get a chance to transplant just yet, looking to transplant by the end of the week - So far this mother has been rocking out just fine - looking to pluck clones by mid Jan - Had a little PH burn on the tips - flushed for PH balance correction.

Likes
8
Share


@Lukeskywalker
Follow
Nice growing, the yield to time ratio is weaker than in the case of automatic strains, maybe it is also due to some stressful factors. but the power is huuuge. Sticky fingers ☀️😉😄 thanks to all teachers

Processing
Likes
23
Share


@SativaSteve88
Follow
Another week down few more to go can't wait!! First ever attempt of growing my own so really impatient to see the final results now and get to the finish line, that said all has went well upto now other than the size they reached haha, really started putting on weight now it seems and they smell lovely, excited to see the buds fatten and progress over these last few weeks up until harvest now, started 5 liberty haze also they are just coming upto 3 weeks now so check that diary out to, any comments info tips for the final stages appreciated

Likes
45
Share


@masterofsmeagol
Follow
6/12 Thunderstorms turned to sun
Plants are growing substantially. The ones that were damaged from the sun have pulled out of it. I checked the fim I did on a gmo that later burned and it has five tops! I took a couple videos bur I'll have to wait until tomorrow to upload them. Despite the weather severity and inconsistencies I'm in a really good spot. I'll upload the two videos tomorrow when I'm in a better area. Wifi is far to slow.
6/13 Rained yesterday before turning to hot sun. Supposed to be in the 90s today. Due to the rain and storms we've been having I hacebt had to water. Soil is still moist. Plants seem to be growing at a great pace. With all this rain they've gotten a hearty dose of the nutes in my soul mix and then when the sun comes out and they bask for a few hours they look considerable bigger. Another storm coming up but other than that weather is good. Plants are happy and doing well.
6/14 Plants are loving this hot weather. Rainy then it will clear up and be sunny. All plants have recovered from the shock of the weather and are growing like crazy. Ice started some lsting. I haven't even had to water.
6/15 Medium is still damp. I don't think we'll get much rain the next few days but we've gotten a lot lately. I'll continue playing it by ear. The water lasts much longer with the smaller plants in lather containers. Later in the summer I could be watering daily. If there is no rain I'll allow the bags to dry out and I'll water them. I may start them on a small nutrient schedule like the fox farm organic one you use for the entirety. I've hesitated though because my soil is chock full of nutrients and they show no sighs of deficiencies. I'll keep an eye on it. They look great though.
9/16 Watered after church. 3 1/2 gallons so approximately a half gallon each. Iys been really hot and i dont see rain in the forecast. Also broke the gmo that I fimmed right at a topping point. It wasnt wilted, and I ran and grabbed duct tape and fixed it. I've had good luck in the past this way. Hopfully I will this time as well. Still sucks though
9/17 The plant that split at the V that I taped up seems to be doing just fine. Looks just like the other top next to it. Thank God. Things seem to be going well. I'm wondering if I should start giving nutrients but I don't see any deficiencies and I know this soil mix lasts pretty much through veg without showing signs of deficiencies. I think it might be a case of "if it's not broke don't fix it." I'll look back on diaries and I'll do some research.
9/18 It's overcast but it's been in the upper 80's. I checked the plants around 11 and they looked good. They'll need water but I'm holding off until the morning. The plant I broke at the crook shows no signs of wilting or any negative effects. I assume it will come back stronger. I was thinking about watering tonight but at 12 there was still a little moisture. They will be fine until morning. Plants seem bigger every day.

Likes
17
Share


@ButterfliesLittleFarm
Follow
Hello Diary.
It has completed its sixth week of flowering, a total of 9 weeks since Purple Punch sprouted.
As you can see in the photos, the plants look beautiful, the flowers are large and hard, full of trichomes. I believe the yield will be better than I had hoped. The smell is very intense.
I would also say that Purple Punch is quite resistant, along with them, as you know on "Farm", there is also one plant Watermelon Auto that has suffered a lot due to over-feeding, which cannot be said for Purple Punch.
The treatment they receive is the same.
Watering is every three days, I regulate or lower the p.H of water to values between 6.1 and 6.5. And I do that with every preparation of water for irrigation.
I stopped adding any additives the previous week so they get clean water.
Let’s take a look at the review of the week.
26/03/2021 - Day 59.
Watering. p.H. water I regulated to 6.4
Temp / Humidity on the farm - 25 degrees and 32% humidity.
29/03/2021 - Day 62.
Watering. p.H - 6.3
Temp / Humidity on the farm - 25 degrees and 36% humidity.
30/03/2021 - Day 63.
Photography. This time I didn't photograph them on a black background, I didn't want to stress them too much, I'll take detailed photos for the end anyway.
That’s it for this week, without much excitement, I’m patiently waiting for the harvest. See you soon.
