


Likes
5
Share

@Kominest
Follow
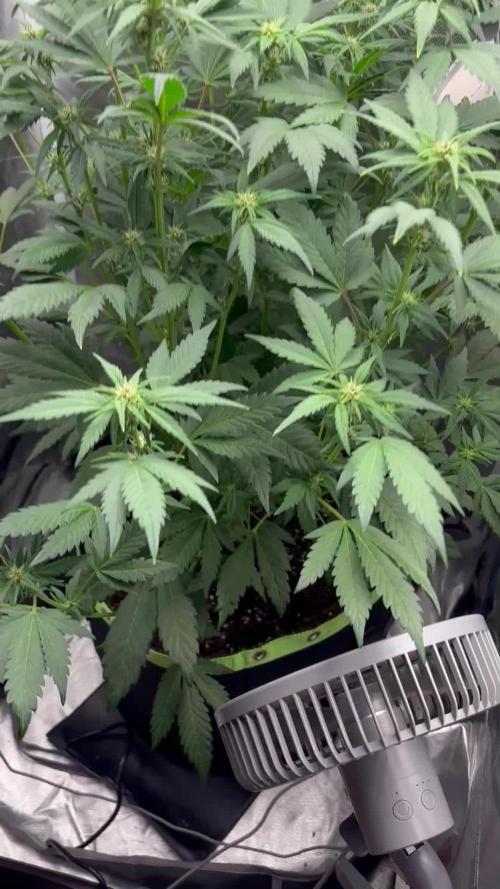
Dli around 45
She’s stretching hard and starts to purple slowly . Will follow up with more later

Likes
Comments
Share

@hassehujasse
Follow
Lets work it out. Max Co2-Light-Feeding. Does Auto can become Photoperiodic?!!! Yield?! Quility?!
Lets try to build up HULKAll topping are done. Now just time to build up nice colas


Likes
9
Share


@Rckeh
Follow
Day 87 - Feeding day today. Removed Acti_Vera completely. She´s really starting to look mature. Tomorrow ill check trichomes. Also slightly defoliated dying leafs and to get more light at lower buds. They´re also developing well.
Day 90 - Still see some clear trichomes. Will keep the plan i had in mind, ill feed her one more time and start flushing at the end of this week. This beast is really getting beautifull, love this fruity hashy blueberry aroma. Fingers really get sticky.
Day 91 - Last feeding today.
Day 93 - She´s really getting mature, so today i will start flushing. At the end of next week i´ll harvest. Flushed 3L of pH´d water (around 6)


Likes
2
Share


@eldruida_lamota
Follow
Que pasa familia, vamos con la quinta semana de floración de estas Orange Sherbet Fast Flowering, de FastBuds.
Agradezco a Agrobeta todos los kits obtenidos de ellos 🙏.
Vamos al lío, El ph se controla en 6.2 , la temperatura la tenemos entre 22/24 grados y la humedad ronda el 50%, añadimos ya varios productos de la gama de Agrobeta.
Las próximas semanas veremos cómo avanzan.
Agrobeta:
https://www.agrobeta.com/agrobetatiendaonline/36-abonos-canamo
Hasta aquí todo, Buenos humos 💨💨💨


Processing
Likes
14
Share


@Fullmeltalchemist
Follow
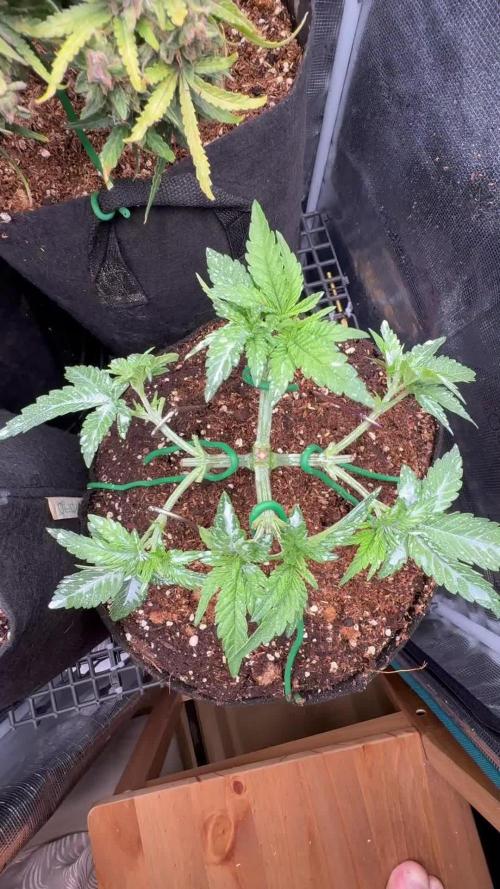
D22 - 10.4 - All the plants recovered well from topping and I'm just letting them put out new grow for the next weekish. We might come across some opportunity to LST this week 😀👍
D26 - 10.8 - I've been learning a lot. At this point, even though I snapped a branch 😤😪😂 I'm super happy. I managed to save the snapped branch with duck tape. It lost a fan leaf but I think she'll be ready to train again in a wee. All my other training is going well. I've figured out how I like to hook my lst anchors etc. Whole lot of fun watching them adapt and grow.
D28 - 10.10 - Heck, we have had a massive heat wave! 😤😫😣 I've been managing temps as best I can, but it has crept up to 33C near the soil the past couple days. I'm sad I already stored my window A/C but trying to keep the vibes good 🙏👍
Likes
27
Share


@adam_pawloski87
Follow
What a great week it’s been!today is day 65 from seed!! One of the Forbiddin Runtz got it’s last feeding on Friday and will get flushed for 2 weeks and will be ready for dry and cure! The rest will still remain getting same dose of nutes the rest of this week and most likely into the next! This batch felt like it went so quick ! Hope you all enjoy an watch out for next week !
Likes
7
Share


@Isle_of_Weed
Follow
Day 64 and the start of WEEK 10
These green crack autos go on automatic gear and need very little maintenance. Checking Trichomes every couple of days and it seems they will be going further.
Day 66
Still building up bud .... waiting for the right day to harvest these green babes
Day 68
Took out 90% of their fan leaves in preparation for harvest. Some Amber trichomes visible so they are nearly there 😍
Likes
1
Share

@GrahamTheGrower
Follow
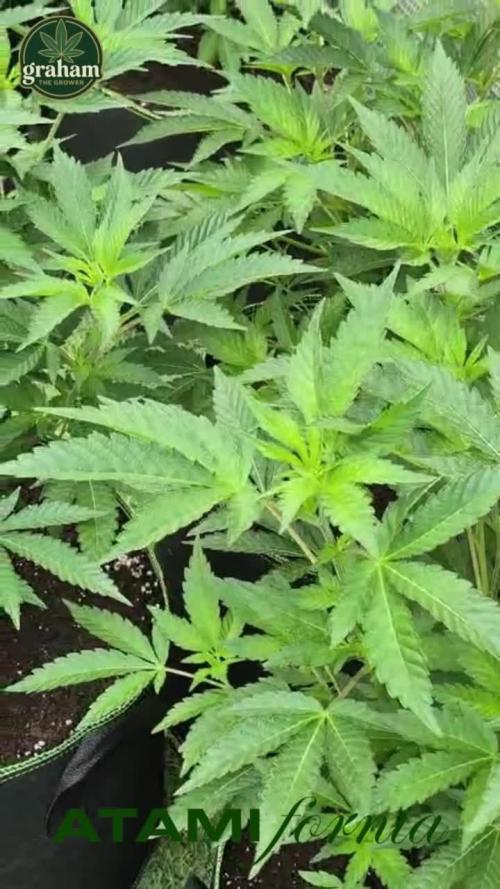
Week 7 in the Atamifornia greenhouse – they're really stretching for the light now, barely getting any sun these days. That's the gamble with outdoor grows. Plants are still healthy and pest-free though, so it's time to flip them to flower with just a light trim.

Likes
23
Share


@HideAndFly420
Follow
Day 50 (22 of flowering ) flowering is really bloom ing now, i’m playing a little with lamp distance cause is a 100 watt non dimmerable so i hope to increase light to bud, they need now.
Now she really needs a lot of feed. I give 1 lt every2 days.
Day 51 (23 o flowering ), another 1 lt full.
Now she’s eating 1 lt every 48 hours, and when she need it anyway. But she need à lot more thème before.
Day 53 I had to supercrop this branch that was too close to the heat ventilation. I hope it will save the branch and increase maybe that bud.
Today another 1 lt of feeding, and I think that from the end of this week is going to need more.
Let’s go!


Likes
34
Share


Likes
13
Share


@Roberts
Follow
FBA2505 is in the mist of bulking. She has about 2 weeks left. She has some nice purple colas on her. She has a piney, sweet, citrus smell. This plant has been through hell. From root rot to a bad ph pen was my latest discovery. She is turning out good for the issues I had. Thank you Fast Buds, Medic Grow, and Athena. 🤜🏻🤛🏻🌱🌱🌱
Thank you grow diaries community for the 👇likes👇, follows, comments, and subscriptions on my YouTube channel👇.
❄️🌱🍻 Happy Growing 🌱🌱🌱
https://youtube.com/channel/UCAhN7yRzWLpcaRHhMIQ7X4g.
Likes
3
Share


Likes
20
Share


@CanadianFillmore
Follow
Start of week 4, day 22. The girls grew tremendously during the last week, very nice branch growth, internodes and overall plant size. No trimming this feeding, just removed 2-3 dying leaves from the lowest branches. One of the girls is clearly shorter than the others, I think I will keep her in veg after this week and flip the other two to flower.


Likes
11
Share


@Kirsten
Follow
18.1.25:
Gorilla 🦍 Cookies 🍪 is firmly in week 2.
The plant is looking very good, sturdy.
I have been feeding with about 200 ml of dechlorinated water PH'd to 6.3 with the following nutrients;-
♡ 4ml Biobizz Bio-Grow
♡ 4ml Biobizz Fish Mix
♡ 2ml Cal-Mag and
♡ 1/4 g sprinkling of Ecothrive Biosys.
Trying to give the extra boost of Nitrogen to keep vigorous growth, and maintaining the nice lush green 💚 Cal-Mag was used from the beginning of this week.
Thanks for checking out my diary 🍃 ✌️