Likes
Comments
Share
@RunWithIt
Follow
Things are looking good going into the fifth week from seed. Topped and did a minor defoliation last week and now they've recovered. They're also now in their final pots.
Likes
62
Share
@Chucky324
Follow
Hello. I've harvested the Mega Mouth. WOW!!! I'm very impressed with this strain. Over 1.5 k for 5 plants. and it was finished by Aug 20 with the tents help. I'm trying some new (for me) categories to add to my report. Plant Stretch (PS) 1 to 5- 1 is hardly any stretch. Bud Mutation (BM) 1 to 5- 1 is a beautiful normal bud- 5 is big weird growths like foxtails. Trim- How easy or hard it was to trim up 1- you blow on the branch and hang it up. 5- Is very hard to trim takes a long time. About- Best guess on the THC % (I've been smoking a long time) Resin- 1 is super slippery 5- is very sticky like Gorilla Glue. Size of Buds (SOB) 1- is very small 5- is the biggest buds Dense- 1- is the lightest or fluffiest 5- is the rock hard buds your bud buster has trouble busting up. Plant #1 Wet Trim 1647 g PS. 3.5 BM 3.5 Trim 4 About 21% Resin 4 SoB 4 Dense 4 Finished Dry Weight 289.5 g or 10.33 oz. Plant #2 Wet trim 1606 g PS 3,5 BM 3.9 Trim 4 About 22% Resin 3 SoB 4.7 Dense 4.3 Finished Dry Weight- 302 g or 10.78 oz. Plant #3 Wet Trim 1635 g PS 3.7 BM 3 Trim 2.8 About 20% Resin 2.8 SoB 3.7 Dense 4.5 Finished Dry Weight- 314 g or 11.21 oz. Plant #4 Wet Trim 1753 g PS 2.5 BM 2.5 Trim 3 About 22% Resin 4 Falls off easily- Clumpy Dense 2.5 Final Dry Weight- 343.5 g or 12.26 oz. Plant #5- Wet Trim 1787 g PS 3.5 BM 3.7 Trim 3 About 24% Resin 2.5 Dense 2.5 Finished Dry Weight- 355.5 g or 12.69 oz. The taste is sweet and smooth to go down with a nice balanced buzz. There was some pests around. I found thrips damage in veg and got some Spinosad to take care of that. Saw some fungus gnats around but they didn't do much damage. Easy to grow and trim. This is a recommended strain. Chuck.
Likes
12
Share
@Hawkbo
Follow
Soaked 7.27 for 36ishhrs, into paper towel for 12 hrs then into a solo cup with greentree garden supply pro ultra (coco/perlite). First feed was a diluted leftover feed from my other auto youngins. Basically about 1 ml/g of grow, 7ml/g humid acid, 1ml/g more roots, 1ml/g orca, cannazyme, hydroguard and a sprinkle of living organics in the nutes and on the top of the coco. Usually the ppm will be higher than I want it so I just dilute with r/o water until I'm down to 200-250. It makes it so I cant be accurate on ratios so that's why I'm tellin ya, but it's how I always do it no matter what nutes I use. This is from the same seed pack I grew out 3 years ago so let's see if these have some longevity.
Likes
34
Share
@ertaverd
Follow
ENGLISH BELOW ESP: Estas dos mangos fueron preciosas de cultivar. Cogieron un tono azulado y algunos pétalos se volvieron de un color rosa muy fuerte. No fue difícil de cultivar aunque la empezara en octubre, tuvo la visita de algunas orugas pero no causaron casi ningún daño. -Empecé el cultivo en octubre, esto y la falta de luz hizo que mis plantas no llegaran a la altura deseada, no tuvieron todo el sol que necesitaban y se espigaron. Les hice un corte FIM a una planta y apical a la otra, lo cual hizo que las puntas desarrollaran una forma curiosa. - El producto final son 23,3 gramos de cogollos no demasiado prietos pero muy resinosos y con unos colores preciosos. - El sabor es algo difícil de definir. En el sabor no he encontrado el coco, pero sí las frutas tropicales, mango y cítrico. Y me parece haber saboreado algo de hierbas. Es un sabor agradable aunque solo lo haya curado durante tres semanas. -El colocón es indico, pero empieza como algo cerebral y se va extendiendo por el cuerpo pero sin dejarte k.o. A mí me ha convencido, he disfrutado cultivándola, la recomiendo a quien esté pensando en probarla These mangos are amazingly gorgeous. They took a bluish tone and some petals turned a very strong pink color. It was not difficult to grow considering that I planted it a little late, I only had the visit of some caterpillars. There are some pics of one of them. -I started cultivation in October, this and the lack of light caused my plants not to reach the desired height, they did not have all the sun they needed and they sprouted. I made a FIM cut to one plant and apical to the other, which caused the tips to develop a curious shape. - The final product is 23.3 grams of buds not too tight but very resinous and with beautiful colors. - The taste is something difficult to define. In the flavor I have not found the coconut, but the tropical fruits, mango and citrus. And i think i tasted something herbal. It's a nice taste even if I only cured it for three weeks. -The high is indicated, but starts as something cerebral and is extending through the body but without leaving k.o. It has convinced me, I have enjoyed cultivating it, I recommend it to anyone who is thinking of trying it00
Likes
Comments
Share
@Cmccart
Follow
Went and got a bigger light for flower I didn’t really expect to get them this big considering how bad I did my first grow but those were autos
Likes
9
Share
She has performed very good with the lst method, nice plant, fast growth, quality flowers, it's a very good choice for everyone who's looking for a good quality strain at affordable prices. Very nice genetic, this phenotype concretely has a very sweet and floral terps. You can check the other 2 phenos of ak420 here at my page
Processing
Likes
4
Share
@Ferenc
Follow
Lamp has changed. Veg stage is on, so 600W lamp is placed to be in the tent and the watering is 2 x 15 ml 2 x a day so 30 ml water per plant. Ventilation goes on at the same time like the lamp does. These girls grow so fast. They started smelling as well. Light schedule is 20 hours on and 4 hours off. Ventilation is the same hours when the lamp is on the ventilation is on as well. When lamp is off I leave the ventilation on 15 min more. Fertilization will start also on Monday, Wednesday, Friday the same amount of water with bat guano mix. I will be back after 2 weeks from my holiday.
Likes
14
Share
The plants completely stopped from going up, but the buds are getting bigger and the smell is stronger and stronger. I continued to play classic music for one hour everyday. Did anybody tried this before? Being the first experiment I am very happy with the results so far.
Likes
6
Share
@Weedzoks
Follow
Jour 21: Palissage et taille de deux bourgeons secondaires uniquement, arrosage 1l avec engrais Jour 25: Installation de la lampe Mars Hydro TSW2000. Arrosage 1,75l avec engrais. Jour 26: Apparition des premiers pistils Jour 27: Engrais foliaire, 3ml de vita race par litre.
Likes
7
Share
Dann braucht sie wohl doch 9 Wochen oder mehr... 😁 Der Nachwuchs drängelt schon aber die Dame lässt sich nicht hetzen. Sie ist mir leider noch nicht trüb genug, aber es wird so langsam. Sie saugt auch alles aus den Blättern in die Blüte Also so richtig Fast Flower finde ich meine Lady aber trotzdem nicht 🐌
Likes
48
Share
@Suemchen
Follow
Sanlight evo at 100% Day 64: flushed yesterday. One week now and then 72 hours of darkness. Looks and smells really good🤙 Day 67: Looks really good 👍 a couple of days now and then darkness 🤙 Day 69: well, that's IT🤗 The Journey Has come to an end.... 😢 Today I turned off the lights, sprayed purolyt. She will get 48 hours of darkness and then cut and hung.. Get 15% Off Fast Buds with Code: FBSUMO https://2fast4buds.com/
Likes
41
Share
This is my favorite plant of the 16oz dutch bucket grow. She has grow fast, healthy, and has a beautiful structure. She is putting on some nice tops. She is starting to show some drooping on the top leaves in the evening since being put under the quantum boards. But she perks back up in the morning so I think she will keep chugging along. I'm thinking I will easily exceed 2 oz on harvest if I can see her to the end. Got the nutrient pumping and the lights beaming. Not much else to do from here on out
Processing
Likes
14
Share
#beginning of flowering 09/04/19 #04/13/19 update of photos and videos are from the 5th day of flowering
Processing
Likes
15
Share
@MG2009
Follow
06/16/2020 Did some defoiliating, and fed Espoma Fruit and flower 9-4-3 (3 tbls top dressed) help to aid in the transition from veg to flowering, after 21st days get shorter but slowly. Might do light deprivation to induce an early harvest. I just posted a video of Red Sky #3, brother of Red Sky #1 One branch will get dusted on #1 Good news #1, clones very well with minimal effort stuck in potting mix which has 5-1-1 starter fertilizer plus myco, and tricoderma. After she settles in I will switch to top dressing with Espoma Fruit and flower 4-9-3 plus myco have 3 good clones to work with. Oh yeah apparently I put 4-9-3 in transplant pot so I guess it means nutes total is 9-10-4 maybe a mid to late top dress to finish but we see what happens!. The 5-1-1last about 6 weeks. And the 4-9-3 will last 3-4 weeks at best We see how she is doing in a month. Then I'll know better. From here on out this diary is all about my freaky princess!👍 Red Sky #1 she is getting to tall so I took clones to bring her down to size I will keep one mother plant, and monster crop the rest! Diary coming soon!
Likes
35
Share
Bonjour à tous les padawans et les maîtres jedis Pour cette semaine je prévoit de pratiquer comme technique spéciale le LST et juste un arrosage. Pour cela comme à mon habitude j'attend le cinquième noeud ou que je juge la plante robuste. Je profite que cette semaine qui va être relativement calme pour faire un LST appliqué et vous faire un rappel de ce qui est pour moi la meilleure technique pour arroser une autofloraison et la façon dont je pratique le LST. En suivant ces quelques simples conseils vous obtiendrez un résultat optimal tout au long de votre culture : Le cannabis est une plante qui n’aime pas recevoir un léger arrosage en continu. Il est impératif de l’arroser en grosse quantité, puis d’attendre que la terre soit bien sèche avant d’arroser à nouveau! Pour calculer la quantité d’eau nécessaire à chaque plante, suivez cette règle : Le volume d’eau à donner lors de chaque arrosage doit représenter au moins environ un quart du volume du pot !! Exemples : pour un pot d’1L, donnez 0,25L d’eau à chaque arrosage pour un pot de 4L, donnez 1L d’eau à chaque arrosage pour un pot de 12L, donnez 3L d’eau à chaque arrosage pour un pot de 30L, donnez 7,5L d’eau à chaque arrosage !etc… Pour donner un tel volume d’eau, il est souvent nécessaire d’arroser en deux (voir trois) fois, lentement et uniformément sur toute la surface. Disposez de bonnes coupelles sous les pots, celles ci se rempliront d’eau qui remontera dans le pot par capillarité en moins d’une journée. Il est également très important d’utiliser un bon terreau de qualité, avec une bonne capacité de rétention d’eau mais qui assure également un bon drainage (celui ci doit contenir de la perlite, et/ou de la coco, etc..) Il vous faut alors maintenant attendre quelques jours en sous-pesant régulièrement les pot avec vos bras. Quand ils seront redevenus très légers, vous pourrez arroser à nouveau !! En effet, comme l’eau pèse beaucoup plus lourd que la terre, un pot gorgé d’eau pèse plusieurs fois le poids d’un pot d’une plante prête à être arrosée. Avec un peu d’entraînement, vous apprendrez donc très rapidement à sous-peser vos pots pour savoir quand une plante a soif. C’est une technique à la fois très facile et très efficace, et qui peut être appliquée à toutes les plantes en pots ! En arrosant de cette façon, en général vous devrez arroser vos plantes tous les 3 à 6 jours. Pour cette semaine 3 au jour 17 ma plante fais 12 centimètres et son cinquième noeud apparaît je décide donc de pratiquer un LST sur ma plante. Pour ce j'utilise du fil de fer galvanisé que je plante directement dans le substrat en faisant attention de ne pas endommagé les racines car n'oublions pas que ce qui pousse dessus pousse aussi dessous. Jour 17 je pulvérise du une solution composé d'une cuillère à café de savon noir mou dilué dans un litre d'eau en prévention d'éventuels nuisibles. Je corrige mon LST suivant la pousse de ma plante ... Pour ma par c'est la manière dont je procède. Comme promis petit rapel de: Quand commencer à appliquer la technique LST De nombreux cultivateurs commencent la manipulation dés que les plantes possèdent entre 3 et 6 nœuds ou une paire de feuilles. Durant cette première étape de la croissance, le tronc encore flexible est pliable sans risque qu’il ne se casse, même si au fur et à mesure du développement de la plante il sera de plus en plus difficile de le plier. Nous pouvons continuer à guider la croissance des branches durant toute la culture, même durant la floraison, ce qui pour cette étape représente un grand avantage face à la taille, qui n’est pas du tout recommandé une fois que la formation des têtes commence, cela stressera en effet la plante, ce qui aura pour effet de retarder la récolte. Comment appliquer la technique de guidage LST Si nous sommes prudents, la flexibilité naturelle des fibres du cannabis permet de plier leur tronc et branches avec une relative facilitée, même durant la floraison des plantes. En utilisant une corde fine, nous pouvons accrocher la pointe de la plante à la base du pot par exemple ou à un tuteur que nous aurons planté dans le substrat. Nous plierons le tronc avec précaution et nous le fixerons avec la corde, à partir de là, nous pouvons augmenter progressivement la tension de la corde, chaque jour un peu plus, jusqu’à obtenir la position souhaitée. Soyez attentif à la réaction de la plante, essayez de ne pas appliquer trop de pression sur la corde et rappelez-vous que la flexibilité des branches peut varier d’une plante à l’autre. Pour obtenir de meilleurs résultats, il suffit de suivre quelques règles simples. Pour commencer, nous devons choisir une corde fine mais pas trop pour ne pas blesser les troncs au fur et à mesure qu’ils grandissent et qu’ils deviennent plus gros. Nous pouvons utiliser des crochets en plastique souple ou de n’importe quelle autre matière flexible pour éviter d’endommager les plantes. Spécialement en intérieur, utiliser des cordons en plastique de couleur (voir les diaries de @Silky) est très pratique pour voir facilement les accroches et faciliter le travail au milieu du réseau formés par les cordes, les tuteurs, les mailles ou les supports que nous aurons dans la culture. Bien entendu, en culture extérieure et surtout en guerilla nous ferons juste le contraire et nous utiliserons des matériaux de couleur qui n’attirent pas l’attention pour que notre jardin reste discret. Pour stresser les plantes au minimum, la mieux est de réaliser ces manipulations le soir ou juste après que les lampes en intérieur s’éteignent, ce qui leur permettra de se remettre durant la nuit. Normalement, le jour suivant nous pourrons observer comme les pointes des branches que nous avons pliées se dressent de nouveau vers le haut à la recherche d’une source de lumière. Que la force soit avec vous
Likes
11
Share
@WeedM8
Follow
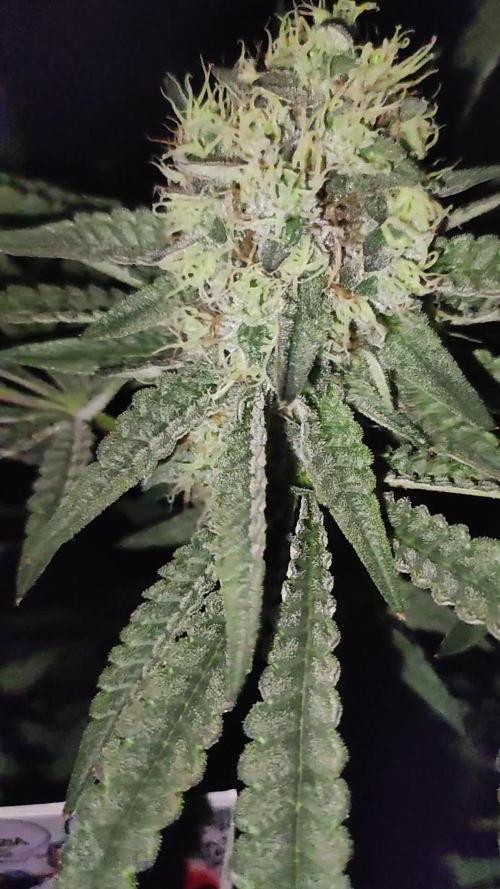
Looking pumpy very frosty closing weeks
Likes
41
Share
@Miketama
Follow
Harvest Day 83 Big thanks to Zamnesia for letting me run this strain in the Eternity Grow Cup 2026, and to Plagron for the Green Sensation doing its thing in the final weeks and really packing those colas. Joining the cup definitely brought some good vibes: 373g wet, my best pull ever from an 11L pot. Can’t complain. Good luck to all the growers still running 🥦 and massive respect to everyone who followed, liked and commented throughout the grow. That support kept the diary alive. 🥦