Likes
Comments
Share
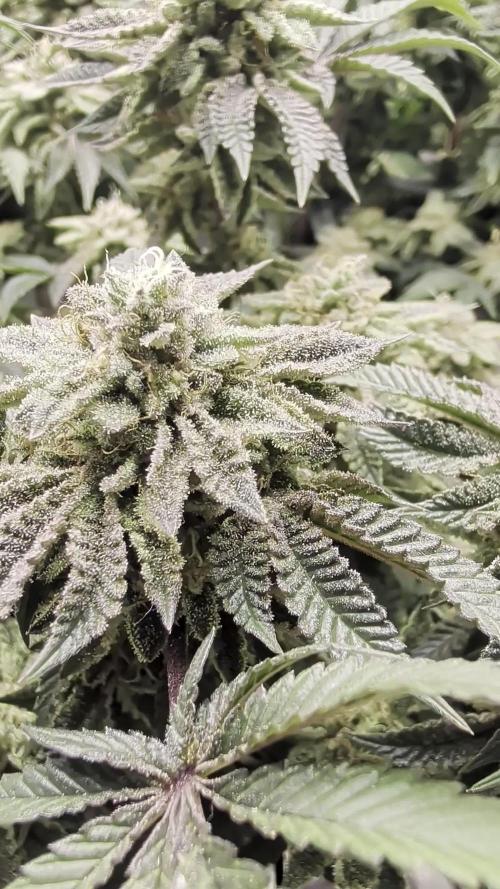
la plante n'etais pas trop grande, les tete sont collante comme jamais. plus d'info dans le smoke report!
Likes
31
Share
Happy 4:20 everyone! 🙌 I hope everyone's doing well and please remember to stay safe! The buds in my plant are getting bigger! Two of the side branches of Pistachio could not hold the weight of the buds (you can see when they fall on the timelapse!) so I had to "hang" them to the tent, yikes! 👽 I also increased the amount of Silver PK by 0.5 but I believe the PPM was a little too high, so next week I'll try lowering the dose of CalMax to see if that helps. Some of the trichomes on the leafs are starting to turn ambar (while the rest of the plant are transparent or very milky) so I suppose the girls are getting there! They need a liiiiittle more time since there are still some immature hairs, specially on Matcha. The leaves of Pistachio are also turning lighter in color and I've been removing them everytime one pops up. Anyway, see you all in my next update! 👍
Likes
8
Share
Chai Tea with Snoop Dogg and Hei-di 😆 So far just giving a little bit of water twice per week. She should have enough nutrients packed into that little can until flower starts!
Likes
6
Share
The week has passed really awesome, a big height growth, thats is bad in my case, but will see to what it gonna lead, last very hard defoliation has been done as well, cheers! ;)
Likes
2
Share
Gained 4-5 inches growth on every plant since moving outdoors. Been feeding compost tea I formulate myself brewed in concentrated and diluted 50-50 I’m ramping up my soil nutes for a week window I’m going out of town and having someone water for me. I getting exactly the results I’ve intended so far and couldn’t be happier. I’m rotating neem and bt. I’ve top dressed castings and guano as well as some other light dressing of other organics to promote micronutrients, I can’t recall everything as I tend to sort of wing it as I see fit. Soil coloration near black and teaming with life great aeration as green mulch becomes more prominent above ground, signifying penetration and good oxygen supply to established cannabis rootball. Teaming with the smell of signifying proper biome health. As spring establish new life the health of the yard has me feeling optimistic for the rest of the season. Most plants have near doubled in size and kicking off new stems from most recent topping. Survived a couple colder nights also which I hope to be the last that low for the rest of the year near 38-40 F*. Hardly fazed plants remain healthy as ever.
Likes
6
Share
Day 60 of 12/12 HARVEST TIME They are soooo fine I barely have words. Weak-neck gland trait is a fact. I was collecting FRESH, "WET" (non-dried) flowers for Fresh Frozen - the amount of trichome heads just breaking off during that process was astounding. Air was full of trichome heads every time I touched a branch or a bud. I repeat - it was non-dried flowers, straight from a branch, from alive, watered plant - and I collected a few grams of loose heads in my TrimBin. Crazy stuff. I also pressed it and I got top-shelf rosin - without dryiyng and sieving or bubble ice wash. Mind blown 🤯 8 plants 60 days (8.5 weeks) of flowering under 12/12 4x4 ft tent 466W Mars Hydro light = 2166g of Whole Plant Fresh Frozen material (just trimmed buds + some trichome-covered leaves) Now floweres are in deep freeze -36°C waiting to be washed for bubble hash and pressed into live rosin in the near future.
Likes
5
Share
@Kardo
Follow
Die Blueberry hat es nicht mehr lange sie sieht sehr schön aus und ist voll mit trichomen
Likes
4
Share
@khapuga34
Follow
On the 6th and 7th of March we transplanted plants from small pots to the big ones. As a base we used wet coconaut with perlit (70/30). Unfortunatelty, during the transplation we lost one 'Mexican Airline' plant— La Mujer (yes, we gave her a name). Now we have only two Lemon AK left in this diary. Their names are Josya (diminutive from Joseph) and Moishe as we «circumcised» them accidentally when transplantated to pots week earlier😵 Now they feel themselves great .
Likes
31
Share
Week 11 of flower and these lady’s packed on some weight the largest 2 of 4 will be going into 48 hours of darkness today for a chop Sunday the topped plant and one that had salt damage I’m going to let go for a couple more weeks If ya like leave a 👍
Likes
4
Share
@Ensign420
Follow
|»» LOG DISCLAIMER: Not intended as a grow guide. Grow log entries are usually posted 3 weeks later and are for my learning reference. ««| Introduction - Week 16 Summary - Ensign's log, stardate 17547.8, Wow what a great week in the garden! By the end of the week, the main tent has pretty much doubled in size! Upgraded the scrog frame and now have a second layer of netting about 14in above the original netting which is already filling in and looking incredible! The tent’s floor slightly flooded, but fixed it. Also trying Stash Blend for the first time! As for the veg tent. To preserve the genetics, started the mother plant cycling process and took more clone cuttings (which were rooting in Coco Coins by the end of the week). To make more room, also bonsaied all mother plants. The stretch is starting to slowing down and next week begins the first week of bloom! Ca-Caw! Let’s go! Onwards Ensign! [START OF WEEK 16] ========================================================== ---------- [ 4x4 MAIN TENT ] ---------- Heady OG BX1 #1 [Round4 ~Wk9] - WEEK 16 - Pre-Bloom [Stretch Wk2] TKO [Round2 ~Wk14] - WEEK 16 - Pre-Bloom [Stretch Wk2] ----------- [ 3x3 VEG TENT ] ------------ Garlic Budder OG#1 - WEEK 09 - Full Veg Garlic Budder OG#2 - WEEK 09 - Full Veg Gorilla Goat #1 - WEEK 09 - Full Veg Gorilla Goat #2 - WEEK 09 - Full Veg 08/04/25 → 08/10/25 This Week's Estimated Goals ---------------------------------------------------------------------------------------------- DLI: ~13 mol/m²/d PPFD: ~300 μmol/m²/s VPD: ~1.0 kPa This Week's Meter Readings & Averages ---------------------------------------------------------------------------------------------- Light On/Off: 19:00 - 07:00 | Wattage: ~326.5W [LV04] Distance From Canopy: ~31”, 27” DLI: ~15.60 mol/m²/d PPFD: ~361 μmol/m²/s VPD: ~0.69 kPa Soil %: [40.7, 47.0, 38.1, 56.6, 41.9, 42.7, 42.9, 43.9] ========================================================== Day 01 - Monday - 08/04/25 - Total Days: 113 ----------------------------------- Daily Averages ~[+01:00] - Temps: 83.6°F [28.7°C] - Humidity: 83.6% - VPD: 0.66 kPa - Soil %: [49, 37, 45, 60, 44, 43, 43, 45] ----------------------------------- - [+00:14]: Night check on the 4x4 tent. --- Holy Cannoli! Wow! These girls are in full stretch! --- Both cultivars have grown beyond the netting and have stretched beyond the (green) Vivosun’s CFM bars! Heady is a bit low on the left, but the canopy is pretty even and perky! --- Ca-Caw! Let’s go cuddies! --- Heady OG (BX1 #1) is starting off shorter than TKO, but am pretty confident that she’ll catch up. --- TKO is looking incredibly healthy! She’s the larger plant, but also in the smaller 20-gallon pot. Well she is 5 weeks older than Heady OG so makes sense. Regardless of the growth difference, absolutely stoked for this grow cycle!! - [+12:19]: Checked the Ecowitt soil moisture sensor data: ------------------ [ 4x4 MAIN TENT ] --------------- ------ 46% - [CH01 FT » G30 - Heady OG BX1 #1] ------ 37% - [CH02 FB » G30 - Heady OG BX1 #1] ------ 48% - [CH03 BT » G20 - TKO] ------ 62% - [CH04 BB » G20 - TKO] ------------------ [ 3x3 VEG TENT ] ---------------- ------ 41% - [CH05 BL » GR7 - Garlic Budder OG#1] ------ 44% - [CH06 BR » GR7 - Garlic Budder OG#2] ------ 40% - [CH07 FL » GR7 - Gorilla Goat #1] ------ 50% - [CH08 FR » GR7 - Gorilla Goat #2] --------- Veg: 38% - 45% | Flower: 45% - 55% --------- General: 30% [Dry] «| 45 - 60% [Moist] |» 70% [Wet] - [+00:14]: Checked the 3x3 veg tent. --- Ooo yea! The veg garden is looking incredible! --- All mamma plants are looking bushed out and beautiful! - [+00:37]: Super-cropped and bend the canopy down a bit. --- Lowered the canopy down a few inches. Really need to defoliate soon. The top growth is bushing out and getting really thick! --- Clones are also looking incredible and both are rotting along beautifully! Heady is going to make it and she is looking great! - [+00:38]: The cuttings are looking good for the most part. One is looking pretty droopy (damnit Ensign). --- Misted the cups with RO water. --- Think the RH may not be consistent enough and the cups might be drying out too quickly. - [+00:41]: Checked the humidifiers. --- Tanks are still full and no leaks found. --- Another day done! --- Okay! Since growth is raging upwards, decided to upgrade the scrog frame and plan to add a second layer tomorrow. --- Ahh yea! This grow is turning out to be an epic one! Day 02 - Tuesday - 08/05/25 - Total Days: 114 ----------------------------------- Daily Averages ~[+01:00] - Temps: 83.3°F [28.5°C] - Humidity: 83.3% - VPD: 0.67 kPa - Soil %: [49, 38, 47, 62, 41, 43, 43, 45] ----------------------------------- - [16:25]: Evening check on the 3x3 veg tent. --- Ooo yea! The clones are looking incredible! --- The cuttings still seem to be struggling. --- Hmm. - [16:27]: Misted the cups with RO water. --- Made a slight modification and wrapped the top of both cups with plastic wrap. --- Cut a slit from the middle to the edge. Misted the cup through the slit with RO water (2-3 sprays each). --- Then gently slipped the cups over each cutting. --- Also slightly misted each Coco Coin with RO water. --- Great! This should hopefully make a better seal and will keep the RH higher. I think. --- Anyways! --- The mother garden is vegging along beautifully! --- Growth is getting really bushy and need to do a heavy defoliation soon. - [16:56]: Checked the Ecowitt soil moisture sensor data: ------------------ [ 4x4 MAIN TENT ] --------------- ------ 48% - [CH01 FT » G30 - Heady OG BX1 #1] ------ 36% - [CH02 FB » G30 - Heady OG BX1 #1] ------ 47% - [CH03 BT » G20 - TKO] ------ 61% - [CH04 BB » G20 - TKO] ------------------ [ 3x3 VEG TENT ] ---------------- ------ 41% - [CH05 BL » GR7 - Garlic Budder OG#1] ------ 43% - [CH06 BR » GR7 - Garlic Budder OG#2] ------ 41% - [CH07 FL » GR7 - Gorilla Goat #1] ------ 49% - [CH08 FR » GR7 - Gorilla Goat #2] --------- Veg: 38% - 45% | Flower: 45% - 55% --------- General: 30% [Dry] «| 45 - 60% [Moist] |» 70% [Wet] - [19:03]: Night check on the 4x4 tent. --- Ooo yea! Wow these girls are stretching! --- Growth has clearly grown since the last checkup and getting taller! --- Ca-Caw! Let’s go ladies! - [19:14]: Wait. Uh-Oh! --- The tent seemed to have flooded slightly.. DAMNIT ENSIGN! ------ [» A FEW HOURS LATER.. «] --- Okay! Think I figured out why the tent flooded and how to fix it. --- The main reason was the new soil sensor which was probably not in proper contact with the soil. --- Fixed this by re-seating the unit. Also adjusted the drip ring a bit. --- Also poured about a cup of water straight onto new sensor. This should make the surrounding soil wetter and will hopefully fix the dry pocket. I think. --- For added redundancy, added additional trigger conditions to both Ecowitt WittFlows (TKO and Heady OG). - [23:45]: Adjusted the watering triggers for the auto-watering system for TKO. --- Changed the ON trigger from: --------- When CH3 soil moisture is under 45% ------------ Updated to: --------------- When CH3 soil moisture is UNDER 45% --------------- AND When CH4 soil moisture is UNDER 50% --- Changed the OFF trigger from: --------- When CH3 soil moisture is OVER 50% ------------ Updated to: --------------- When CH3 soil moisture is OVER 50% --------------- OR When CH3 soil moisture is OVER 50% --- Applied similar watering triggers for Heady OG. --- Changed the ON trigger from: --------- When CH1 soil moisture is under 45% ------------ Updated to: --------------- When CH1 soil moisture is UNDER 45% --------------- AND When CH2 soil moisture is UNDER 50% --- Changed the OFF trigger from: --------- When CH1 soil moisture is OVER 50% ------------ Updated to: --------------- When CH1 soil moisture is OVER 50% --------------- OR When CH2 soil moisture is OVER 50% --- Will check back daily to make sure the flooding has completely stopped. --- Well that pushed everything back a bit. --- Okay! Anyways, - [23:57]: Time to both build and install the second frame and netting. Let’s go! --- Got four 1in PVC corner fittings (local Lowes) along with four 1in PVC pipes (10ft long each). Also got more self-tapping screws. --- For the netting, using mason string. Usually use the braided nylon, but the twisted variant is a lot cheaper. --- To build the frame, I cut the 1in PVC pipes down to two different lengths: ------ [» x2 @ 42.5in «] – Front / Back ------ [» x2 @ 44in «] – Left / Right --- This makes the frame slightly thinner from left to right. --- Saving the extra piping for future projects. - [+04:04]: Okay! The new frame is built and looking sturdy! --- Did not use any glue and simply dry fitted each component. --- For easier fitting, smoothed the ends of each pipe with sand paper. --- Also marked each pipe to indicate the front, back, left, and right sides. --- For the fittings, used corner fittings and have open slot facing downwards. This way I can add the legs. --- After the frame was built, marked and drilled screws about 3in apart (self-tapping). Made sure to mirror the screw spacing on the opposite side. --- Time to weave the netting! - [+04:06]: Using some mason string, --- Started at one corner and strung all the horizontal lines. --- Double-wrapped each screw. --- After the horizontal lines were strung, continued and wrapped the vertical lines. - [+04:44]: Now that the frame is built and the netting fully weaved, time to install the frame! --- First the support poles. Cut and sanded more 1in PVC piping. ------ [» x4 @ 14in «] – Vertical Support - [17:56]: Installed the back support poles before the front ones. --- Temporarily removed the front CFM bar and had to raise the fan up a bit (was not easy, but got it done). --- Once the support poles were installed, gently set the new frame on top. - [+06:07]: Done and wow she’s a beauty! --- Well that took a bit longer than anticipated (also the flooding did not help), but glad the frame fit perfectly and the netting looks great! - [+06:12]: Checked the humidifiers. --- Tanks are still full and no leaks found. --- Ooo yea! What a day! Day 03 - Wednesday - 08/06/25 - Total Days: 115 ----------------------------------- Daily Averages ~[+01:00] - Temps: 83.9°F [28.8°C] - Humidity: 83.1% - VPD: 0.69 kPa - Soil %: [42, 54, 43, 60, 42, 43, 43, 45] ----------------------------------- - [+00:17]: Night check on the 4x4 tent. --- Ca-Caw!! Let’s go cuddies! Growth is looking beautiful and green! --- The second layer of scrog netting was not the easiest to install, but wow the garden is looking incredible! --- Both Heady OG and TKO are still stretching upwards with new nodes branching out everywhere! --- The canopy hasn’t reached the top net yet but hoping a few will make it. --- Regardless, absolutely hyped for this flower cycle! - [+00:23]: Checked the 3x3 veg tent. --- Looking beautiful in the veg garden! --- Wow the mothers have bushed out and have reached the grow light! - [+00:32]: Super-cropped and lowered the canopy --- The canopy is getting really thick! Plan to do a pretty heavy defoliation tomorrow. --- Clones look great and stoked that both Heady OG and TKO seem to be rooting along in the cups. Need to check the weights. Let’s go! - [+00:37]: Here are the starting initial watering ranges: ------ Heady OG BX1 » 261.4g → 301.2g ------ TKO » 240.9g → 301.4g --------- General Solo Range: [Dry] «| [Initial Cup Weight] + ~55-100g |» [Wet] --- All cups were last watered 5 days ago. - [+00:37]: Took the starting weight of both clones before watering, ------ Heady OG BX1 weighed 250.4g ------ TKO weighed 240.9g --- Oops! Probably should have watered earlier, sorry ladies! --- Stoked that Heady OG is clearly going to make it! Also good to know the soil dryback can be at least 10g from the initial pre-saturated weight. --- Anyways! --- While on a scale, --- Gently misted the straw mulch of both cups with RO water. --- Focused on the straw and sprayed as evenly as possible. --- Misted 10-20 sprays. Waited a moment, then misted again. --- Made sure to reference the watering weights. --- Repeated this process for both cups. --- There was no runoff. - [+01:08]: Took the saturated weight of both clones after watering, ------ Heady OG BX1 » 335.5g ------ TKO » 345.1g --- Marked the final wet weight on the back of each cup. Also marked the watering date on the front. --- Placed both phenos back into the tent. --- Cuttings are looking better! --- Glad that the slight modification to the cups helped to keep the moisture in (covered both with plastic wrap). --- Gently removed both cups and re-misted each with RO water (~2 mists). --- Carefully placed the cups back onto the cuttings. - [+01:21]: Checked the Ecowitt soil moisture sensor data: ------------------ [ 4x4 MAIN TENT ] --------------- ------ 34% - [CH01 FT » G30 - Heady OG BX1 #1] ------ 52% - [CH02 FB » G30 - Heady OG BX1 #1] ------ 39% - [CH03 BT » G20 - TKO] ------ 58% - [CH04 BB » G20 - TKO] ------------------ [ 3x3 VEG TENT ] ---------------- ------ 44% - [CH05 BL » GR7 - Garlic Budder OG#1] ------ 47% - [CH06 BR » GR7 - Garlic Budder OG#2] ------ 41% - [CH07 FL » GR7 - Gorilla Goat #1] ------ 46% - [CH08 FR » GR7 - Gorilla Goat #2] --------- Veg: 38% - 45% | Flower: 45% - 55% --------- General: 30% [Dry] «| 45 - 60% [Moist] |» 70% [Wet] - [+01:23]: Checked the humidifiers. --- Tanks are still full and no leaks found. Day 04 - Thursday - 08/07/25 - Total Days: 116 ----------------------------------- Daily Averages ~[+01:00] - Temps: 84.9°F [29.4°C] - Humidity: 82.0% - VPD: 0.75 kPa - Soil %: [32, 51, 37, 57, 42, 43, 43, 45] ----------------------------------- - [09:42]: Quickly checked on the propagation dome (in the 3x3 veg tent). --- Nice! Clones are both looking great! --- Heady OG is clearly recovering and looking better! --- Wow! TKO is looking incredibly healthy! Top growth has perky leaves with a few nodal growth sites starting to stretch. As far as cloning, she has been healthiest with no issues the entire way! --- Both Heady OG cuttings are looking beautiful and should be rooting. Plan to check for roots in a few days. --- Plan to do a pretty heave defoliation today. --- Also going to start the mother plant cloning process. - [17:12]: Evening check on the 3x3 veg tent. --- Mother garden is looking beautiful and the canopy is bushy with growth! --- Both Heady OG and TKO clones also look green and healthy! --- My main focus for today is the veg garden and the preservation of the genetics . --- Lots of work to do and time to also start the mother cycling process! --- This time, going to do a pretty heavy defoliation! --- Going to pretty much bonsai each mother while taking a few clones to preserve the genetics. --- Let’s go Ensign! - [17:58]: Filled a measuring cup with 1.5 cups of RO water. ------ Added 1/8tsp of Horticultural Aloe --- Mixed the solution and poured it straight into a clear solo cup. --- Repeated this process until 4 cups were filled. - [18:05]: Also marked each cup with the corresponding mother plant name. --- Time to defoliate and take the clone cuttings! - [18:07]: Using a pair of trimmers (AC Infinity), --- Bonsaied each mother plant. Removed over 75% of overall growth leaving several branches and nodes. - [19:44]: Done and wow what a difference! --- Pretty much removed all growth leaving a few nodal growth sites to heal. --- This is my first time going this heavy and am hoping that they recover. --- If this bonsai defoliation heals up with healthy growth, this can also be an alternative to a full plant cycling. --- Anyways! - [19:46]: To preserve the genetics, made sure to cut clone cuttings from each mother plant. --- To ensure successful rooting, took several cuttings. --- Made sure to clean each cutting by trimming most of the branches off leaving the top one or two nodes. --- Did not cut any leaf fingers and made sure to cut the tip of the stalk (about 45°) before placing into the cup of aloe solution. - [19:55]: Placed the fresh cuttings into the 3x3 veg tent. --- Have each cup resting on top of the corresponding mother plant. --- Okay! Let the two-day soak begin! - [20:00]: Mulched the trimmings in a paper bag. --- Since the bottom of the paper bags tend to decompose, have the bag in a used BuildASoil soil bag which should not decompose (these are meant for soil). --- Also added a bit of Kashi Blend and worm castings to the bottom of the bag. --- Back to the Heady OG cuttings! --- Gently removed the cups and misted the inside of each with RO water (~2 mists each). - [20:02]: Carefully placed the new cups onto the cuttings. --- Great! Plan to check for roots soon. - [20:08]: Checked the Ecowitt soil moisture sensor data: ------------------ [ 4x4 MAIN TENT ] --------------- ------ 31% - [CH01 FT » G30 - Heady OG BX1 #1] ------ 51% - [CH02 FB » G30 - Heady OG BX1 #1] ------ 35% - [CH03 BT » G20 - TKO] ------ 56% - [CH04 BB » G20 - TKO] ------------------ [ 3x3 VEG TENT ] ---------------- ------ 41% - [CH05 BL » GR7 - Garlic Budder OG#1] ------ 40% - [CH06 BR » GR7 - Garlic Budder OG#2] ------ 42% - [CH07 FL » GR7 - Gorilla Goat #1] ------ 44% - [CH08 FR » GR7 - Gorilla Goat #2] --------- Veg: 38% - 45% | Flower: 45% - 55% --------- General: 30% [Dry] «| 45 - 60% [Moist] |» 70% [Wet] - [20:12]: Checked the 4x4 tent. --- Ca-Caw! Ah yea! The garden is looking incredible and wow growth is raging! --- The tallest growth is just barely under the netting! --- Not much to do in the main tent now but to wait until the stretch slows down. --- Time to relax and let the grass grow! Let’s go! - [21:34]: Have an extra stainless steel rack and thought of a better way to hold the solo cups in the veg tent. --- The cups are balancing on the edge of the pots am concerned that they may tip over. --- Carefully too each cup out of the tent. - [21:36]: Placed the rack upside-down in the middle of the tent. --- Have the rack positioned on top of all 4 pots just above the center floor fan. - [21:39]: Gently placed each cutting cup onto the rack. --- The floor fan can easily still blow through the grid of the rack. Great! --- This should be way more stable while still allowing decent airflow. - [21:40]: Checked the humidifiers. --- Tanks are still full and no leaks found. Day 05 - Friday - 08/08/25 - Total Days: 117 ----------------------------------- Daily Averages ~[+01:00] - Temps: 84.5°F [29.2°C] - Humidity: 82.5% - VPD: 0.72 kPa - Soil %: [32, 50, 30, 53, 40, 42, 41, 42] ----------------------------------- - [23:02]: Night check on the 4x4 tent. --- Ahh yea! The garden is thriving! --- Both Heady OG and TKO are still stretching upwards and the canopy is getting dense! --- Wow! TKO has reached the top netting! Heady OG is just under the top netting. --- Ca-Caw! Let’s go ladies! - [23:11]: Checked the 3x3 veg tent. --- The veg garden is looking great! --- The bonsaied mother plants are still recovering from the heavy defoliation. But growth is looking a lot better than I would expect from such a large biomass reduction. Nice! --- Cuttings are looking great as well! - [23:13]: Time to swap the aloe water out! --- Replaced each solo cup with a clean one filled with fresh RO water (1.5cups). --- Plan to start using the propagation dome soon! --- Going to let these soak for another day before transplanting into Coco Coins for rooting. - [+02:05]: Quickly checked on the auto-watering system. --- System is still charged and no leaks or kinks found in the tubing. - [+02:08]: Checked the humidifiers. --- Tanks are still full and no leaks found. Day 06 - Saturday - 08/09/25 - Total Days: 118 ----------------------------------- Daily Averages ~[+01:00] - Temps: 83.4°F [28.6°C] - Humidity: 83.3% - VPD: 0.67 kPa - Soil %: [32, 50, 35, 52, 41, 40, 41, 41] ----------------------------------- - [07:55]: Quickly checked on the 3x3 veg tent. --- Looking great in the veg garden! --- Mothers are all recovering nicely from the bonsai defoliation. Great! --- Cuttings also look healthy and ready for transplanting! --- Both Heady OG and TKO clones are looking perky and getting bigger! --- Heady OG cuttings also looking green and rooting! I think. Will check for roots in a few days. - [20:58]: Night check on the 4x4 tent. --- Ca-Caw! This is why we grow! Wow! --- Also hyped that the canopy is getting dense with nodal growth! --- TKO has more tops stretching through the top scrog netting! Heady OG has not reached the net yet. --- Stoked the 14in space in between the netting is filling quite nicely and just going to let everything grow! - [21:01]: Checked the Ecowitt soil moisture sensor data: ------------------ [ 4x4 MAIN TENT ] --------------- ------ 29% - [CH01 FT » G30 - Heady OG BX1 #1] ------ 50% - [CH02 FB » G30 - Heady OG BX1 #1] ------ 34% - [CH03 BT » G20 - TKO] ------ 53% - [CH04 BB » G20 - TKO] ------------------ [ 3x3 VEG TENT ] ---------------- ------ 40% - [CH05 BL » GR7 - Garlic Budder OG#1] ------ 40% - [CH06 BR » GR7 - Garlic Budder OG#2] ------ 40% - [CH07 FL » GR7 - Gorilla Goat #1] ------ 40% - [CH08 FR » GR7 - Gorilla Goat #2] --------- Veg: 38% - 45% | Flower: 45% - 55% --------- General: 30% [Dry] «| 45 - 60% [Moist] |» 70% [Wet] - [21:05]: Checked the 3x3 veg tent. --- Growth is still recovering quite nicely! This may be my solution to maintain mother plants longer between cycles. --- Mother clone cuttings are also looking healthy and ready to be rooted! --- Was originally planning on rooting all of the cuttings, but since the mother plants are recovering better than anticipated, just going to plant one of each pheno. --- Let’s go! - [21:23]: Filled a measuring cup with 1.5 cups of RO water. ------ Added a pinch of Quillaja Saponaria Extract [60] ------ Added 1/64tsp of Horticultural Aloe ------ Added 1/32tsp of Mycrobe Complete --- Mixed the solution thoroughly. - [21:26]: Dropped 4 Coco Coins into the measuring cup. --- The coins immediately started to expand. ------ [» ~10 MINUTES LATER «] --- Placed each fully saturated Coco Coin into half-cut solo cups. - [21:41]: Using a squeeze bottle filled with Clonex, --- Gently filled each pre-made hole with Clonex rooting gel. - [21:43]: Time to plant the cuttings! --- Using a pair of clean trimmers, made a final 45° cut. --- Also stripped and scrapped some of the stem’s outer membrane. --- To help with planting, gave each Coco Coin a squeeze to loosen the coco. --- Made sure to insert each stem straight and snug with the tip about a 1/4 inch from the bottom of the Coco Coin. --- Also secured the stem by pinching and pressing in the top of the Coco Coin. --- Once each cutting was planted, - [22:11]: Placed each pheno into the propagation dome’s tray. --- Made sure to keep each clone properly tagged. --- Added 1/4 cup of RO water to the bottom of the tray. --- Placed the side extensions onto the tray. - [22:15]: Misted the top of the propagation dome before covering the cuttings. --- Vents are fully closed. --- Also lowered the intensity from 5 to 1. --- At the current light intensity (LV1), the PPFD is around 110 μmol/m²/s which gives a DLI of 7.13 mol/m²/d under an 18/6 light cycle --- Will check back daily to cycle the air under the dome. - [22:17]: Placed the extra mother cuttings back on the rack. Will try to keep these cuttings alive until the planted ones root. --- Will need to change the water every day or two. --- Also need to water the Heady OG and TKO clones. --- Ca-Caw! Let’s go! - [11:33]: Here are the starting initial watering ranges: ------ Heady OG BX1 » 261.4g → 301.2g ------ TKO » 240.9g → 301.4g --------- General Solo Range: [Dry] «| [Initial Cup Weight] + ~55-100g |» [Wet] --- All cups were last watered 3 days ago. --- Took the starting weight of both clones before watering, ------ Heady OG BX1 weighed 257.0g ------ TKO weighed 259.7g --- While on a scale, --- Gently misted the straw mulch of both cups with RO water. --- Focused on the straw and sprayed as evenly as possible. --- Misted 10-20 sprays. Waited a moment, then misted again. --- Made sure to reference the watering weights. --- Repeated this process for both cups. --- There was no runoff. --- Also defoliated and removed the lowest growth on both clones. - [23:03]: Took the saturated weight of both clones after watering, ------ Heady OG BX1 » 345.3g ------ TKO » 355.4g --- Marked the final wet weight on the back of each cup. Also marked the watering date on the front. --- Placed both phenos back into the tent. Have them now resting on the rack (on drip trays). - [23:14]: Checked the humidifiers. --- Tanks are still full and no leaks found. Day 07 - Sunday - 08/10/25 - Total Days: 119 ----------------------------------- Daily Averages ~[+01:00] - Temps: 83.9°F [28.8°C] - Humidity: 83.6% - VPD: 0.66 kPa - Soil %: [49, 49, 30, 52, 43, 45, 46, 44] ----------------------------------- - [08:02]: Quickly checked on the 3x3 veg tent. --- Ooo yea! Looking great in the veg garden! --- All mothers are still green and recovering. New growth is starting to develop and growth is looking healthy! --- Quickly checked on the propagation dome. --- All clone cuttings are looking green and healthy! - [19:04]: Night check on the 4x4 tent. --- Ca-Caw! Ah yea! Heady OG has reached the top scrog net! --- TKO has several tops above the netting and she is raging with healthy! --- Canopy is also showing more signs of pistil crowning and vertical growth seems to be slowing down. I think. - [19:07]: Checked the Ecowitt soil moisture sensor data: ------------------ [ 4x4 MAIN TENT ] --------------- ------ 48% - [CH01 FT » G30 - Heady OG BX1 #1] ------ 49% - [CH02 FB » G30 - Heady OG BX1 #1] ------ 36% - [CH03 BT » G20 - TKO] ------ 55% - [CH04 BB » G20 - TKO] ------------------ [ 3x3 VEG TENT ] ---------------- ------ 41% - [CH05 BL » GR7 - Garlic Budder OG#1] ------ 43% - [CH06 BR » GR7 - Garlic Budder OG#2] ------ 43% - [CH07 FL » GR7 - Gorilla Goat #1] ------ 43% - [CH08 FR » GR7 - Gorilla Goat #2] --------- Veg: 38% - 45% | Flower: 45% - 55% --------- General: 30% [Dry] «| 45 - 60% [Moist] |» 70% [Wet] - [19:10]: Checked the 3x3 veg tent. --- The veg garden is recovering beautifully! --- Since the stretch seems to be slowing down in the main tent, going to give these ladies a little extra. - [19:17]: Going to feed some Stash Blend for the first time. --- This blend of beneficial microbes and mycorrhizal fungi also includes a bit of silica which should help during the bloom phase. --- Also shout out to Mr. Grow It, Rob (from CLTV), and Pigeons420! Stay lifted! - [19:19]: Filled a pitcher with 16 cups (1gal) of RO water. ------ Added 1/8tsp of Quillaja Saponaria Extract [60] ------ Added 1tsp of Stash Blend --- Mixed the solution before pouring 6 cups straight into a pump sprayer. --- Gave the sprayer a good shake before spraying the entire solution onto Heady OG’s straw mulch. - [19:52]: Repeated this process again for TKO. --- Depending on how growth develops, may start feeding these ladies weekly. --- From personal experience, the veg phase can easily be grown with straight RO water. --- Flower is probably the most important time to feed because there are more roots and the plants are trying to produce more biomass. I think. --- Anyways! - [20:10]: In the veg tent, repeated the watering process for all mothers (1 cup + 1 cup RO each). --- Focused mainly on the straw (2 cups each). - [20:13]: Checked the humidifiers. --- Tanks are still full and no leaks found. --- Wow what a grow week! --- The difference in growth from Monday until now has been incredible! [END OF WEEK 16]
Likes
4
Share
Hello everyone I made mistake I put nutriment to early 😅 she still can chill 1 week only watering but I give her directly when she come out Thanks everyone ☺️
Likes
18
Share
Settimana 14 Mercoledi 21/12/2022 Per livello acqua bassa aggiungo 25 lt demineralizzata con 45 ml Flaschclean. Sabato 24/12/2022 raccogliamo.. buona vigilia di natale!
Likes
15
Share
@SamDo
Follow
Hello,,, semaine 8, floraison 4. Les plantes se portent bien pour le moment malgré le manque de place. Le stretch est fini, elles ont leur taille final je pense, à plus ou moins 90cm pour les plus grandes. Maintenant, ce sont les buds qui commencent à se développer en taille. Les trichromes continuent leurs apparitions. L’odeur commence aussi à être bien présente. Voilà pour cette semaine... Happy grow... 😎
Likes
4
Share
@Growtopus
Follow
So, wir haben auf Blüte umgestellt, auch wenn ich vielleicht noch etwas hätte warten sollen. Es hat aber einfach vom Zeitpunkt her gepasst – mit der Entlaubung und dem Abstand zur vorherigen Pflanzgeflüster-Behandlung. Die Triebe wurden etwas von Blättern und Seitentrieben befreit und mit Clips angepasst, damit wir schön in die Breite gehen. Mit Drähten möchte ich das dann im Verlauf der Blüte noch etwas nachjustieren. Wir haben diesmal trotz fertigem Living-Soil-Mix ordentlich Booster und etwas flüssigen Dünger gegeben, damit sich die Pflanzen und das Bodenleben von der Neemöl-Extrakt-Behandlung erholen. Morgen gibt es noch etwas Soil Starter, damit sich die ganzen Bodenpilze neu ansiedeln können. Beim nächsten Gießen kommt dann noch Honig dazu, damit die Mikroorganismen genug Energie haben, um sich schnell auszubreiten und die Pflanze zu unterstützen. --------- So, we’ve switched to flowering, even though I probably should have waited a bit longer. But the timing just worked out well – with the defoliation and the gap since the last “Pflanzgeflüster” treatment. The shoots were slightly thinned of leaves and side branches and adjusted with clips, so we can spread them out nicely. Later on during flowering, I’ll fine-tune things further with some wires. This time, despite the ready-made Living Soil mix, we added a good amount of boosters and some liquid fertilizer to help the plants and soil life recover from the neem oil extract treatment. Tomorrow they’ll also get some Soil Starter so that the soil fungi can reestablish themselves. With the next watering, I’ll add some honey to give the microorganisms enough energy to spread quickly and support the plant.
Likes
43
Share
~ GG4 SHERBET FAST FLOWER by FastBuds ~ Well fam, here we go again with another epic strain from FastBuds Fast Flowering stable. After having such tremendous success growing their Gorilla Cookies Fast Flower outdoors last year, I've decided to run another of their fast flowering strains outdoors this year... GG4 Sherbet Fast Flower! The best description of this awesome cultivar comes directly from my friends at FastBuds which is as follows: "Bred from extremely potent and flavorful Gorilla Glue and Orange Sherbet genetics, GG4 Sherbet FF (Fast-Flowering) takes all the best traits to the next level, offering a high-yielding strain that can produce up to 600 g/m2 in a 7-week flowering time. This super resilient Indica-leaning hybrid thrives indoors and outdoors, and in all types of climates while producing mouth-watering sweet, fruity, spicy and earthy terps that translate into a delicious sugary hazelnut aroma. Expect an extremely relaxing and overall happy effect that’ll leave you with a huge smile from ear to ear. It’s the perfect strain for growers of all levels of experience seeking low-maintenance yet highly productive photoperiod varieties that deliver quality and quantity without extra effort. GG4 Sherbet FF grows chunky buds with long dark orange hairs and spade-shaped calyxes that get encrusted with trichomes by harvest time, giving them a gorgeous silvery-white appearance. This medium-sized photoperiod can reach up to 200 cm in height and yields up to 650 g/m2 while developing that typical hybrid structure. GG4 Sherbet FF grows with a stocky, bushy appearance, developing one sturdy main cola and fat side branches that support huge yields without much effort. This super-fast variety produces distinctive light-green buds with a high bud-to-leaf ratio, making your trimming sessions a breeze. It’s a top-notch resin producer that doesn’t need much maintenance and will thrive in almost every climate, rewarding growers of all levels with extremely flavorful resin that makes for outstanding hash end extracts." ________________________________________________________________________________________________________________________________________________________________________________________________________________________________________________________________________________________________________________________ The Setup: This is going to be an outdoor grow, but I have started the GG4 Sherbet Fast Flower indoors as our weather is still too cold to put her outside (nighttime temp's dipping regularly into the 30's℉). The plan is simple... let her grow inside under a 19/5 light schedule until the nighttime temperatures stay above the mid 40's℉, at which point she'll be moved outside and transplanted into the soil which I have already setup and inoculated with beneficial microbes, and then let the fun begin!🤪💚 ________________________________________________________________________________________________________________________________________________________________________________________________________________________________________________________________________________________________________________________ Weekly Updates: 5/9- Week Six for the FastBuds GG4 Sherbet Fast Flower and she is doing great! Our weather, so far, has been rather cool and damp. We've had showers on and off every 2-3 days which has taken care of my watering chores which I won't complain about. 5/11- I'm continuing to monitor the leaf damage and am keeping up with the Neem Oil applications to mitigate as much further damage as possible. I still have yet to put eyes on the culprits responsible for the damage to the leaves. Tomorrow I'm going to top dress the GG4 Sherbet for the first time since transplanting outside into her pre-amended soil mix. 5/13- Yesterday, I top dressed the GG4 Sherbet FF with 2 cups of Gaia Green 4-4-4 All Purpose and 1/2g of worm castings. After top dressing and working the amendments into the soil, I watered them in via garden hose with well water. 5/15- There's six weeks of veg for the FastBuds GG4 Sherbet Fast Flower and, with our weather finally cooperating, she's beginning to really take off! I can't wait to see what she'll do over the course of the next few weeks... should be exciting! Thank you for checking out my diary.
Likes
20
Share
Es ist vorbei, jetzt wird geerntet. Zwei sehr unterschiedliche Phänotypen werden sehr bald im Vaporisator auf ihren Geschmack, Duft und Wirkung getestet werden. Auch wenn die kleinere der beiden Pflanzen vielleicht noch etwas länger hätte stehen können. Es war kein Platz mehr im Zelt und der oberste Bud der großen Runtz fing an zu verbrennen. Für ein SOG halte ich solch unterschiedliche Phänotypen nicht geeignet, anders sieht es allerdings mit Stecklingen von ihnen aus. Insgesamt unkomplizierte Pflanzen, nur die Thripsen bekam ich nie vollständig in den Griff. Dies war mein erster Indoor Grow und ich stelle fest, daß meine Grow Box nur Platz für eine Pflanze hat wenn es eine Schönheitskönigin werden soll. Immerhin habe ich es noch geschafft eine paar schöne Blattverfärbungen an der größeren Pflanze zu erreichen. Auf den Bildern kann man das wilde, ungestüme gut erkennen. Danke an Zamnesia, dass ich diesen Strain ausprobieren konnte! Ich habe ja noch ein paar Samen für weitere Grows. Vielen Dank auch an Plagron für den Blütendünger. Das solch dicke Blütenkolben möglich sind hätte ich vor diesem grow nicht geglaubt. Ich wünsche allen anderen Teilnehmern dieses Contests einen erfolgreichen Abschluss und eine gute Ernte! P.S. Wenn ich mir so in der Verößerung die Frostigkeit der Buds ansehe, wird mir etwas Bange... --- It's over, now it's time to harvest. Two very different phenotypes will soon be tested in the vaporizer for their taste, aroma and effect. Even if the smaller of the two plants could perhaps have stood a little longer. There was no more room in the tent and the top bud of the large Runtz started to burn. I don't think such different phenotypes are suitable for a SOG, but the situation is different with cuttings from them. All in all, uncomplicated plants, but I never got the thrips completely under control. This was my first indoor grow and I realize that my grow box only has room for one plant if it is to be a beauty queen. At least I managed to get some nice leaf coloration on the larger plant. You can see the wild, impetuous growth in the pictures. Thanks to Zamnesia for letting me try this strain! I still have a few seeds for further grows. Many thanks also to Plagron for the flower fertilizer. I would never have believed that such thick flower bulbs were possible before this grow. I wish all the other participants in this contest a successful conclusion and a good harvest! P.S. When I look at the frostiness of the buds as they grow, I get a bit scared...
Likes
62
Share
@Reyden
Follow
Siamo sempre più vicino per le Royal Gorilla 🦍, le Gorilla 🦍 Glue di Zamnesia sono ancora indietro mentre la Original Skunk di Seeds Mafia è maturata più veloce quindi verrà tolta più o meno insieme alle 2 di RQS 😎 Ho rispostato The Sin e White Runtz nella tenda piccola e messo una Gorilla Zamnesia e La auto Purple OG Punch di SSSC sotto la SF 2000 per questioni di altezza…le ragazze di Anesia Seeds erano troppo alte e ho deciso che era meglio toglierle…per me questa luce supera di gran lunga anche gli altri modelli più vecchi degli anni passati, avete fatto un ottimo lavoro con questo LED!!! Ora sono curioso di provare gli UV per vedere quanto effettivamente aiutano nella produzione di resina…chissà se riuscirò ad aggiungere nel mio setup 🙌